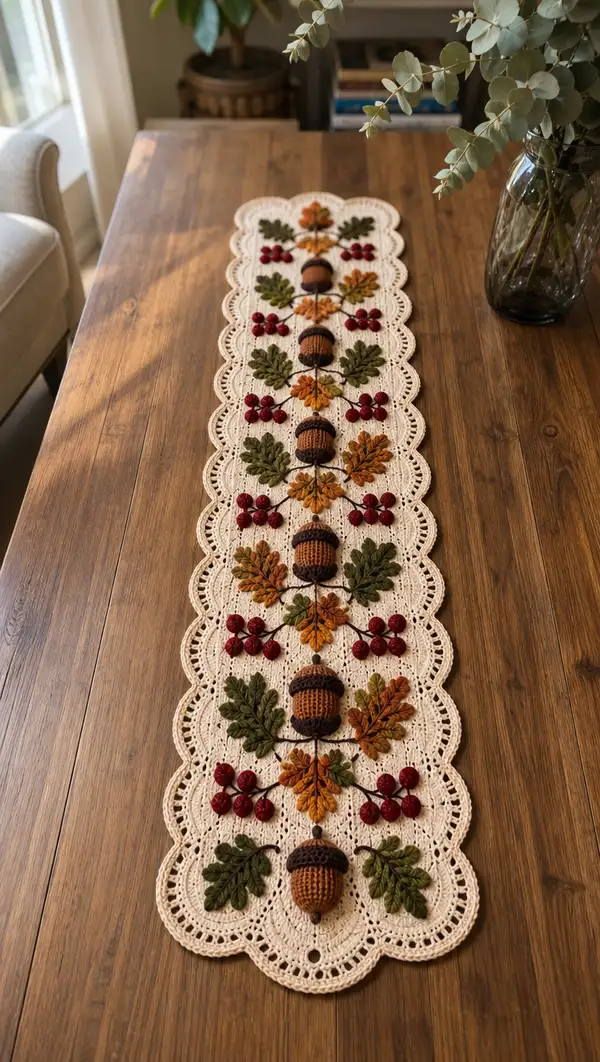
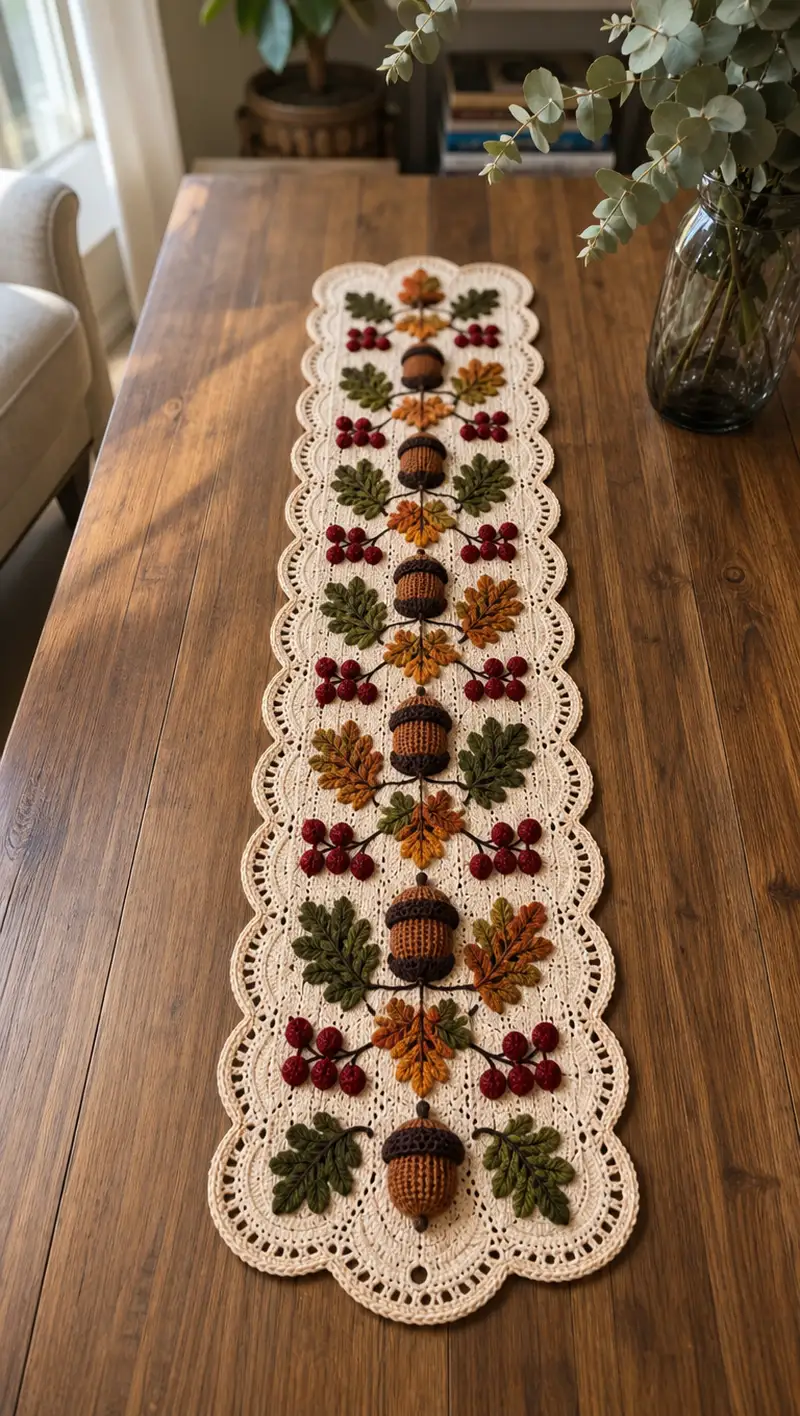
A long, elegant crochet table runner featuring a delicate cream lace base with 3D acorns, layered oak leaves in autumn tones and clustered red berries. The runner has a scalloped border, repeating vertical motifs, and rich textured applique details that bring a warm harvest aesthetic to your table.
Progress Tracker
0% Complete
— Overview :
Info :
This pattern is constructed as a lace base panel made from connected oval medallions and decorative mesh. Appliques (oak leaves, acorns, berry clusters) are crocheted separately then sewn to the base. The runner is worked in vertical repeats; make as many repeats as needed to reach desired length. Stitch counts below are calculated for one repeat panel (one vertical motif). Repeat assembly instructions across repeats to extend runner length.
— Base Lace Medallion (Make multiple and join into a long strip) :
Round 3 :
(1 sc, 1 inc) x 6 (18)
Round 4 :
(2 sc, 1 inc) x 6 (24)
Round 5 :
(3 sc, 1 inc) x 6 (30)
Round 6 :
(4 sc, 1 inc) x 6 (36)
Info :
These first rounds form the small central medallion from which the oval will elongate. Use this motif as the base for each vertical repeat. Make as many medallions as needed; in the sample runner there are 7 medallions joined along the center.
Round 7 :
1 sc in each st around (36)
Round 8 :
1 sc in each st around (36)
Round 9 :
1 sc in each st BLO (36)
Round 10 :
Change to airy lace technique: *ch 3, skip 2 sts, sc in next st* around to create open mesh. You will have 12 ch-3 spaces and 12 sc (36 total working points)
Info :
When making multiple medallions, leave a long tail for joining or join on the fly using sl sts into previous medallion ch-3 spaces. Block medallions flat before joining for smooth seams.
Round 11 :
*Into each ch-3 sp: (1 sc, ch 3, 3 dc, ch 3, 1 sc)* repeat around to form petal loops (12 petals; counts are structural, total stitches variable)
Round 12 :
Work around petal edges: In each petal (ch3 loop) work (sc, hdc, 3 dc, hdc, sc) to create fuller petals. Join with sl st to first sc.
Round 13 :
1 sc in each petal stitch around creating a smooth edge (approx 60 sts around, adjusted by petal work)
Info :
If you plan to join medallions into a strip, align them so petals of adjacent medallions match. For the runner sample, make 7 medallions per strip and join through petal sl st connections leaving small gaps for stems and mesh.
Round 14 :
Forming oval elongation: At two opposite petals only, work (sc, ch 6, sc) into the petal to create elongation loops. This opens two sides; these loops will be bridged with mesh when joining adjacent medallions (no stitch count change in main round).
Round 15 :
Around entire outer edge: *sc in next 3 sts, ch 3, skip 2 sts* repeat to create a consistent lace edging (approx 72 working points)
Round 16 :
Work a round of (sc, hdc, 3 dc, hdc, sc) in each ch-3 across the outer edge to stabilize border (counts variable; adjust to keep even tension)
Info :
Make enough medallions to create the central length you want. As you make medallions, join them using sl st between matching outer petal sts and ch loops to create a continuous center spine. When joining, keep join stitches loose to preserve lace openness.
Round 17 :
After joining medallions, work along the connected spine: chain 6 between medallions and sl st into the next medallion to create uniform connecting loops across the strip (no change to medallion counts)
Round 18 :
Turn the runner strip over and work into connecting ch-6 loops: in each ch-6, work (sc, ch 3, 5 dc, ch 3, sc) to fill connecting gaps and strengthen the central column. Each connecting unit becomes an anchor point for applique stems (counts variable by number of medallions)
Round 19 :
Work evenly around the entire created long strip adding sc into outer petal stitches to even out the perimeter (stitch count will scale with number of medallions)
Round 20 :
Work a decorative picot round: *sc in next 4 sts, picot (ch3, sl st into top of last sc)* repeat to create small scallops along both long edges
Info :
At this point your central lace base is stable and long. The sample used 7 medallions and measures approximately 70 inches. Trim ragged tails but do not fasten completely if you will do the full scalloped border in-place.
Round 21 :
Begin reinforcing the outer edge: *in next sc work 1 sc, ch 4, skip 2, sl st in next sc* around to create larger scalloping foundations (repeat count depends on length)
Round 22 :
Edge building: Into each ch4 space: (sc, hdc, 7 dc, hdc, sc). This creates deep scallops that will later be shaped with a finished trim. Approx counts scale with number of scallops.
Round 23 :
1 sc evenly around all remaining outer stitches to tidy joins and reinforce seam lines (stitch count maintained from previous round)
Info :
If your runner length will be shorter or longer, adjust the number of medallion repeats accordingly. For a balanced look ensure an odd number of medallions so there is a centered motif at each end, matching the photo layout.
Round 24 :
Blocking prep: Fasten off base but leave tails for final edging. Wet block entire base panel to accurate dimensions using pins to open scallops — let dry completely before adding appliques.
— Scalloped Finished Border :
Round 1 :
Join cream yarn to outer edge with sl st. Work 1 sc in each stitch around to create a firm edge (count will equal the total perimeter stitches)
Round 2 :
*sc in next 2 sts, (ch 3, sl st in next st) repeat along the edge to mark scallop bases (spacing depends on the number of petal units)
Round 3 :
Into each ch-3 base: (sc, hdc, 9 dc, hdc, sc) to create full scallops. Join with sl st. (each scallop approx 13 stitches)
Round 4 :
Work 1 sc around each scallop edge to tidy and create a firm lip for table use
Info :
For the very final finish, work a round of (ch3, sl st into 2nd ch from hook) picots between scallops for delicate eyelets. This creates the lacy frame seen in the photo.
Round 5 :
Fasten off and weave in ends on WS. The base for applique placement is now complete and blocked flat.
— Oak Leaf Applique (Make 2 shades x per motif — see assembly) :
Round 1 :
In MR with olive green: ch 2 (counts as hdc), work 6 hdc in MR, tighten (6)
Round 2 :
Inc around: (1 hdc, 1 inc) x 3 (9)
Round 3 :
(2 hdc, 1 inc) x 3 (12)
Round 4 :
(3 hdc, 1 inc) x 3 (15)
Info :
We will now begin shaping one half of the leaf. Work along the same side to form the central vein and serrated edges; counts are directional so total around count varies as we add shaping rows.
Round 5 :
Ch 2, turn and work along one side of the small wedge: (sc, hdc, 2 dc, hdc, sc) into next 5 sts to form the leaf point; do not join — we will work back along the opposite side now to form a mirror.
Round 6 :
Working back along base sts: sl st to begin opposite side, *sc in next 2 sts, ch 2, skip 1, sl st* to start serrations for oak shape. Create three small serrations using (sl st, ch2, sc) repeat to match photo silhouette.
Round 7 :
Edge definition: In each serration work (sc, ch2, sl st into tip) to create a lobed oak-edge. Fasten off leaving long tail for sewing. (leaf length approx 10-14 rows tall depending on tension)
Info :
Make leaf in two shades for a layered look: olive green and moss green or golden mustard for autumn variation. Steam or lightly block each leaf stretched along pins to bring out lobes.
Round 8 :
Optional: Using surface slip-stitch technique, embroider a central vein using contrasting yarn: insert yarn at leaf base and run sl st through center to tip, securing ends on WS.
Round 9 :
Repeat steps to create all leaves: for each vertical motif you will need 4 leaves (two opposite sides, top and bottom) — in total per motif: 2 olive, 2 rust/golden. Make as many motif sets as your runner length requires.
— Acorn Body (3D) :
Round 1 :
Using worsted warm brown, MR, 6 sc in MR (6)
Round 3 :
(1 sc, 1 inc) x 6 (18)
Round 4 :
(2 sc, 1 inc) x 6 (24)
Round 5 :
(3 sc, 1 inc) x 6 (30)
Info :
By round 5 the small acorn cup base is formed. We will now begin building height. Work rounds tightly; acorns are lightly stuffed near the end to keep shape.
Round 6 :
Rounds 6-10: 1 sc in each st around (30) for 5 rounds to build acorn body height
Round 11 :
(3 sc, 1 dec) x 6 (24)
Round 12 :
(2 sc, 1 dec) x 6 (18)
Info :
Begin light stuffing at round 12. Use small amounts of fiberfill pushed in with a chopstick to maintain a rounded acorn. Don't overstuff — acorns should be soft but hold shape.
Round 13 :
(1 sc, 1 dec) x 6 (12)
Round 14 :
6 dec (6) - close acorn body; fasten off leaving long tail to sew into acorn cap later
Info :
Make one acorn body for each motif (sample shows 7). Stuff only until slightly firm — acorn caps will be crocheted separately and sewn on to hide the finish.
— Acorn Cap :
Round 1 :
With dark chocolate brown MR, 6 sc in MR (6)
Round 3 :
(1 sc, 1 inc) x 6 (18)
Round 4 :
(2 sc, 1 inc) x 6 (24)
Round 5 :
1 sc in each st around (24)
Round 6 :
Switch to BLO: 1 sc in each st BLO around (24) — this creates a rim ridge for the cap
Round 7 :
*In next st work (sc, ch2, 3 dc, ch2, sc) repeat around to create textured cap nodes. End with sl st to join.* (creates a decorative shell edge)
Round 8 :
Work 1 sc around to tidy textured nodes; fasten off leaving long tail for sewing cap to body
Info :
Sew cap onto the acorn body centering the seam so the cap covers join of acorn closure. Use long tail to stitch invisibly through both pieces; reinforce with extra stitches if runner will be handled frequently.
— Berry Bud (Make clusters of 6 small berries per cluster) :
Round 1 :
Using cranberry red, MR, 6 sc in MR (6)
Round 3 :
Slip stitch in next st and close MR, fasten off leaving long tail. Make 6 berries per cluster and leave long tails for sewing. Do not stuff — these are tiny solid buds.
Info :
To make a tightly round berry, after closing MR pinch with needle and sew a tiny gather stitch to round the shape before knotting off. Small knots are acceptable as they will be sewn to the base.
— Stem & Branch Embroidery :
Info :
After all appliques are made and the base and border are blocked, use dark brown yarn to embroider a winding stem connecting acorns, leaves and berries. Use a tapestry needle and surface chain-stitch (draw up a loop and sl st) or simple back-stitch style sl st to make smooth curves.
Round 1 :
Cut an 18-24 inch length of dark brown yarn for each motif spine. Secure at the center connecting loop and run surface sl sts out to each applique anchor point.
Round 2 :
Where acorns and leaves meet, create short branch twigs by securing one or two short sl st stems and finishing with a small knot on the WS to hold securely.
Info :
Work stems slightly raised by pulling sl st loops only partially tight to create a dimensional raised branch. For uniform look keep stem thickness to single-strand yarn.
— Assembly & Placement (per vertical motif) :
Info :
Each vertical motif contains: 1 central acorn, 2 pairs of layered oak leaves (top & bottom) in two colors, and 2 berry clusters (one each side). Positioning is symmetrical along the center spine. Use pins to arrange before sewing.
Round 1 :
Position acorn centrally within the connecting unit of the medallion; use long tails from acorn body and cap to sew through base panel into a firm seam. Secure underside with extra stitches to prevent wobble.
Round 2 :
Pin the two larger layered leaves on either side of the acorn, slightly overlapping the acorn edges. Sew leaves with whip stitch around the base leaving tips free for 3D lift.
Round 3 :
Pin smaller leaves (opposite color) at angles beneath the larger leaves to create the layered arrangement. Sew with ladder stitch to the base to keep seams invisible on the right side.
Round 4 :
Pin berry cluster on sides of the leaf group (three berries per cluster forming small triangle). Sew each berry by threading long tail through center of berry into base panel and make multiple passes to anchor firmly.
Info :
Sew everything on the WS as much as possible for neater RS appearance. Use small, tight stitches for durability. Hide all tails inside the applique or weave into base stitches to avoid loose ends.
Round 5 :
Repeat placement and sewing for each motif along the runner. For end medallions, center motif so half a medallion forms border scallop for balanced finish.
— Finishing Touches :
Round 1 :
After all appliques sewn in place, run a final row of small sl sts in matching cream around the entire outer edge to tame any loose fibers and provide a uniform lip.
Round 2 :
Steam-block lightly from RS to maintain applique positioning and open scallops. Pin edges and leave until dry. Trim any visible threads and weave in ends on WS carefully.
Info :
Optional: add a small dab of fabric glue on WS under acorn caps to prevent shifting for a table item that will be moved often.
— Variation Notes & Scaling :
Info :
You can lengthen the runner by adding extra medallion repeats (each repeat adds approximately 9-11 inches in sample gauge). Reduce the number of repeats for a shorter runner or table centerpiece. To change scale: use DK yarn and smaller hook to make a smaller, tighter version; use bulky yarn and a larger hook for a chunkier accent (adjust applique sizes proportionally).
Round 1 :
Color change tips: when switching yarns, carry tails loosely along WS or fasten off and weave in later for neat color joins. For multi-shade leaves alternate colors every few loops to create a natural gradation.
Info :
For a slightly three-dimensional leaf, after sewing in place, add a few running stitches along the underside of the leaf vein and pull gently to bunch and create a cupped shape; secure on WS.
Completing this runner is a wonderfully satisfying journey — each medallion, leaf and acorn builds a layered, textured autumn vignette that looks like an heirloom. The scalloped lace base frames the appliques beautifully and the 3D acorns add delightful tactile charm. I hope you enjoy watching the motifs come together and that this piece becomes a seasonal favorite on your table. 🍂🧶