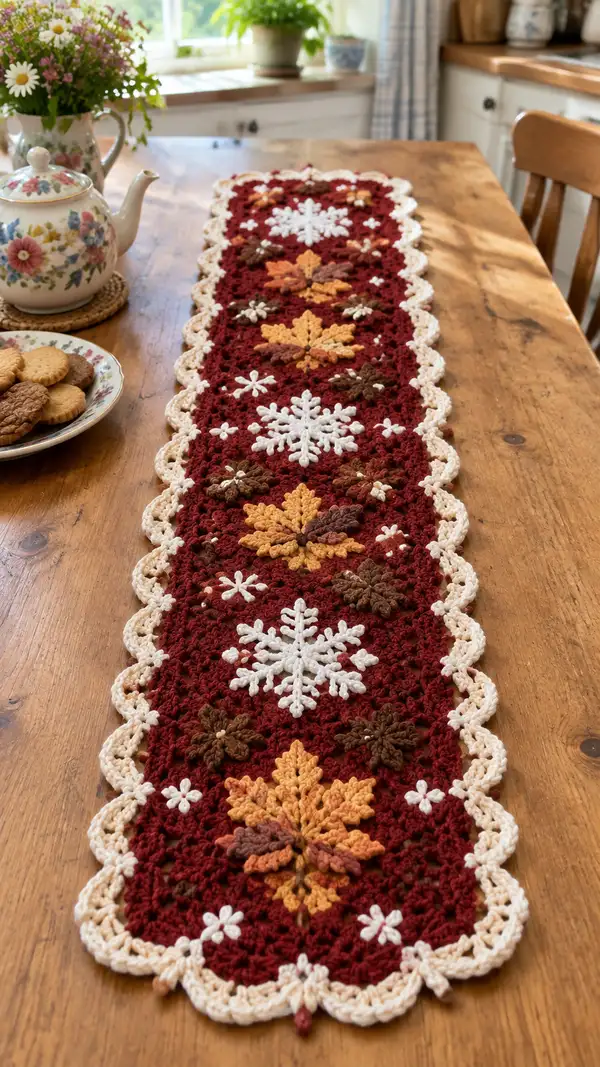
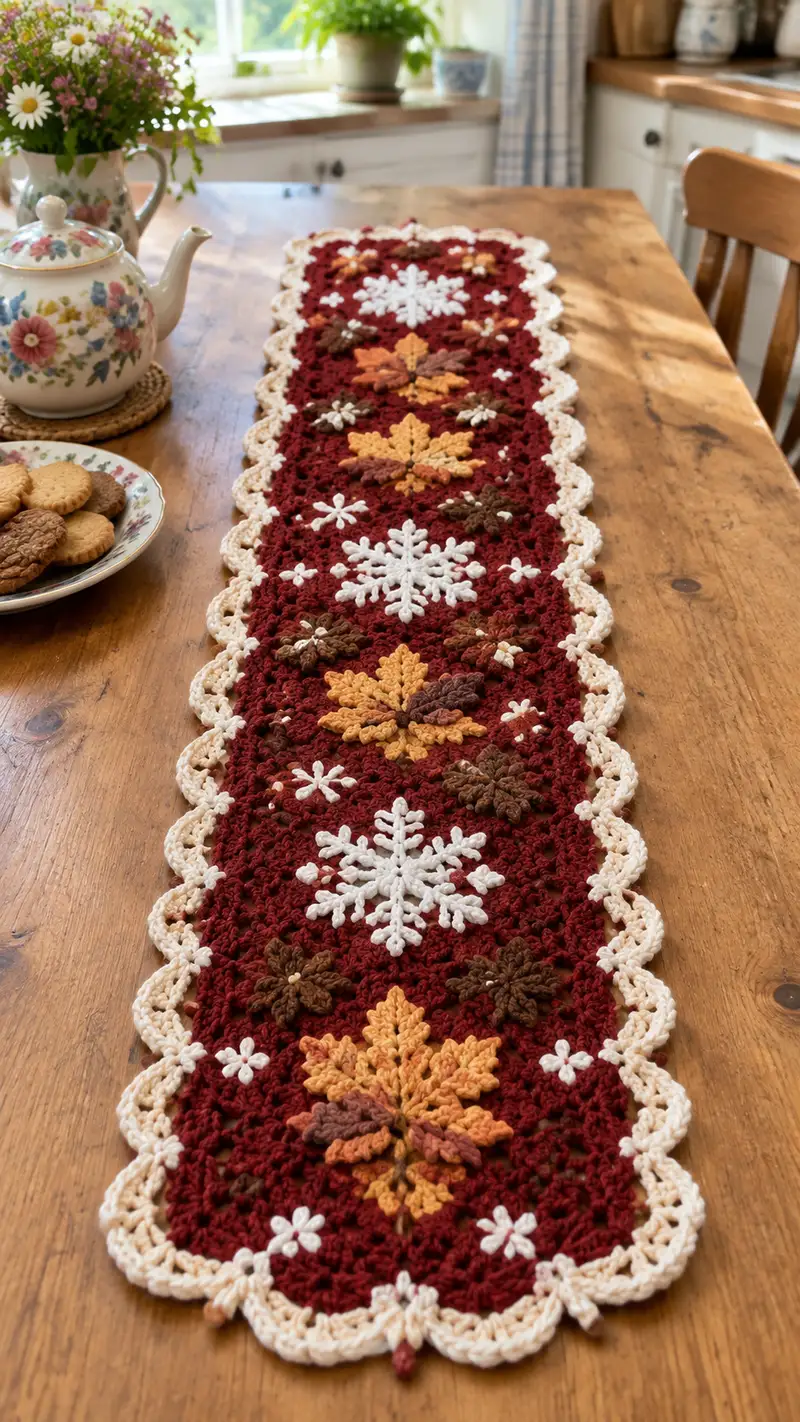
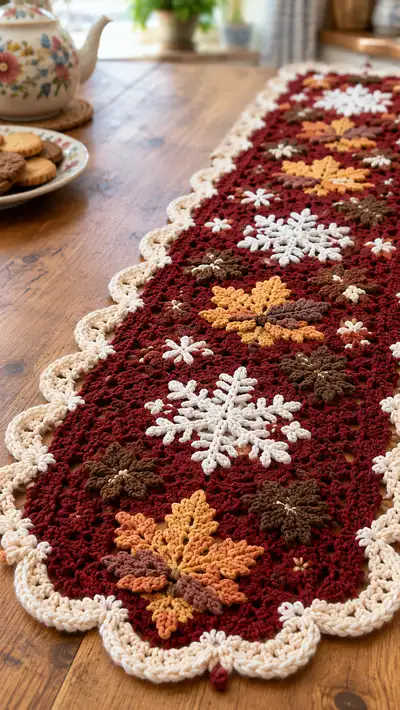
Make a cozy, seasonal table runner featuring layered crochet maple leaves, textured snowflakes and a scalloped cream border on a rich burgundy background. This runner is worked as motif panels with applique elements joined into a long rectangular runner. Finished look is layered, three-dimensional and perfect for fall and winter tabletops.
Progress Tracker
0% Complete
— Notes & Gauge :
Info :
Gauge is flexible for a table runner; sample tile should measure approximately 12cm/4.7in square after rounds 1-20 when using worsted weight yarn (4.0mm hook) and moderate tension. Adjust hook to match your tension. This pattern describes motif construction, panel rounds and a scalloped border. Work motifs slightly tighter than background so they sit raised on the surface.
Info :
All motifs begin with a magic ring unless otherwise stated. Use stitch markers for round starts and for aligning appliques when sewing. Color changes: cut yarn leaving 6-8cm tail to weave in later unless carrying is specified.
— Center Panel Tile (Make 7 panels, alternating motif types) :
Round 1 :
6 sc in magic ring (6)
Round 3 :
(1 sc, 1 inc) x 6 (18)
Round 4 :
(2 sc, 1 inc) x 6 (24)
Round 5 :
(3 sc, 1 inc) x 6 (30)
Info :
Change to main panel color (burgundy) now if you started motif centers in accent color. Carry color neatly or fasten off accent tail. From here, work rounds evenly in burgundy to create the working square-like panel.
Round 6 :
(4 sc, 1 inc) x 6 (36)
Round 7 :
(5 sc, 1 inc) x 6 (42)
Round 8 :
(6 sc, 1 inc) x 6 (48)
Info :
By round 8 you will have a circular panel. We will turn this into a shallow, square-ish motif by working cluster-based corners on specified rounds from 9-12 to give a gentle rectangular expansion. Keep your tension even to keep the panel flat.
Round 9 :
1 sc in each st (48)
Round 10 :
Work a corner increase every 12th stitch to square-up: (11 sc, 3 sc in next st) x 4 (52)
Info :
Mark the center of each side with a removable marker on round 10 to help place appliques later. These 4 corner increases create 4 gentle bulges approximating corners.
Round 11 :
1 sc in each st (52)
Round 12 :
(12 sc, 1 inc) x 4 (56)
Round 13 :
1 sc in each st (56)
Info :
If you are making a plain filler tile leave as burgundy. If you are adding a centered motif (leaf or snowflake), attach it to the tile now using mattress stitch around the ring of round 5-8 area so the motif sits centered. Pin before sewing.
Round 14 :
(13 sc, 1 inc) x 4 (60)
Round 15 :
1 sc in each st (60)
Round 16 :
(14 sc, 1 inc) x 4 (64)
Info :
These even rounds widen the panel gradually. Keep panels consistent by checking counts frequently. Fasten off after round 16 if you want smaller panels; continue to round 20 for larger panels used in this runner.
Round 17 :
1 sc in each st (64)
Round 18 :
(15 sc, 1 inc) x 4 (68)
Round 19 :
1 sc in each st (68)
Round 20 :
(16 sc, 1 inc) x 4 (72)
Info :
Fasten off leaving a long tail for seaming if you will sew panels together rather than join-as-you-go. Block each panel flat, shape to square-ish edges using pins and steam or spray blocking. Make 7 panels to create a long runner (or adjust count to desired length).
— Layered Maple Leaf Applique (Make 6 leaves — each leaf is worked in three contrasting colors for depth) :
Round 1 :
With color A (main leaf tone), 6 sc in magic ring (6)
Round 3 :
(1 sc, 1 inc) x 6 (18)
Round 4 :
Switch to color B for midtones. (2 sc, 1 inc) x 6 (24)
Info :
The leaf is built as 6 lobes/petals radiating from the center. We'll form each lobe using elongated stitches and slip-stitch joins around the center, then shape the lobes into a maple-leaf form by adding textured ridges.
Round 5 :
*(Ch 5, sl st into next st) x 6 around to create loop bases for lobes. Join with sl st to first loop (creates 6 loops)
Round 6 :
Work into each loop: (sc, hdc, 3 dc, tr, 3 dc, hdc, sc) in each loop to form a full lobe; repeat for all 6 loops. Fasten off color B (6 lobes formed)
Info :
Use a slightly smaller hook for these lobe stitches if you want sharper petal definition. After completing the lobes with color B, add contrast ridges using color C worked along the center of each lobe to create raised veins.
Round 7 :
With color C, attach at base of a lobe, ch 1, sc into center of lobe, work (sl st, fpdc, ps, fpdc, sl st) along center to create a raised ridge; repeat ridge for each of 6 lobes. Fasten off and weave tails.
Round 8 :
Optionally block lightly to flatten lobes and define ridge shapes. Use fine pins and steam lightly for a minute from a safe distance to avoid flattening stitches.
Info :
Leaf sizes: after completion each layered leaf will be approximately 9-10cm wide when using worsted yarn and 4.0mm hook. Place leaves on panels so the leaf center sits approximately 4-6 rounds in from the center depending on panel size. Sew leaves using long tail and whip stitch around the base of each lobe.
— Textured Snowflake Motif (Make 4 snowflakes) :
Round 1 :
With cream or white, ch 6, join to form a ring (6 ch)
Round 2 :
Ch 3 (counts as dc), (2 dc, ch 1, 3 dc) into ring x 3 to create 3 trebles clusters separated by ch-1 sps — for 3 large arms; join with sl st to top of ch-3 (18 dc approx)
Info :
We will build this snowflake as 6 arms. If round 2 created only 3 sections, work back into each section to create 6 smaller arms by splitting clusters with chains in next rounds. Keep motifs crisp by working with a slightly smaller hook (3.5mm) for the snowflake.
Round 3 :
Ch 1, *sc into cluster base, ch 5, sc into cluster base to form arm base* x 6 around. Join with sl st (6 ch-5 sps)
Round 4 :
In each ch-5 sp: (sc, hdc, 3 dc, picot, 3 dc, hdc, sc) — picot: ch 3, sl st to last dc — repeat for all 6 arms. Fasten off leaving tail for sewing.
Round 5 :
Use surface slip stitches to add small branchlets: reattach yarn in center, ch 1, sl st out to mid-arm, ch 4, sl st back, repeat small surface chains to mimic delicate snowflake branches. Fasten off and block star flat using pins; spray starch lightly if you want a crisp look.
Info :
Snowflakes will measure around 8-10cm depending on hook and yarn. Place snowflakes centered on selected panels such that their arms align along the panel axes. Sew with small invisible stitches around the inner ring and weave ends securely on the back.
— Small Daisy / Little Flower Embellishment (Make many) :
Round 1 :
With cream, 6 sc in magic ring (6)
Round 2 :
*(Ch 4, sl st in next st) x 6; join (creates 6 loops for petals)
Round 3 :
In each loop: (sl st, hdc, dc) then sl st to base; repeat x 6. Fasten off and sew daisy centers to panels by attaching to a chosen round 10-14 area of a panel.
Info :
These small daisies act as filler details between larger appliques and add sparkling contrast. Scatter them asymmetrically across panels for a natural look. Use a small stitch to anchor each daisy at three points so it stays flat against the background.
— Panel Finishing & Placement :
Round 1 :
Arrange motifs on each pre-blocked panel: place large leaf(s) centered on certain panels and snowflakes centered on alternate panels. Pin positions with at least four pins each motif to avoid shifting while sewing.
Round 2 :
Info : Sew each applique to the panel using long tail and small whip stitches, catching top loops only so stitches are invisible on the front. Start with snowflakes then leaves, then small daisies to fill gaps.
Round 3 :
Info : For layered leaves, sew the bottom leaf first (darker tone) then stagger the mid and top tones slightly offset to create depth. Secure each layer with 6-8 small stitches at the leaf base and several stitches through lobes to prevent flipping.
Round 4 :
Info : After sewing, weave all tails to the back of the panel and trim close. Lightly steam-block the panel again to relax sewing tensions and even out edges.
— Joining Panels (Join-As-You-Go Option or Sew Together) :
Round 1 :
Arrange panels in the desired order (for a runner: alternating leaf panel, snowflake panel, leaf panel, snowflake panel, filler leaf, etc.). Ensure edges align and pattern motifs face upward.
Round 2 :
Info : JOIN-AS-YOU-GO METHOD - With right side facing and main color, join panel 2 to panel 1 by working sc through both loops of panel 1 and back loop only of panel 2 every stitch along the joining edge; this hides the seam slightly and keeps the join flat. Use a stitch marker to keep corner alignment exact.
Round 3 :
Alternatively SEW METHOD: Blanket stitch or mattress stitch along the matching rounds counted from each panel center. Use panels' round numbers as guides: align round 16 of panel A to round 16 of panel B and sew along that seam for a straight join.
Round 4 :
Info : For a stable runner, add two passes of seaming: initial join stitches followed by a second pass of slip-stitches through the seam to lock and flatten the seam allowance. Make sure joins are not pulled tight; the runner should lie flat.
Round 5 :
Join all 7 panels in sequence using your chosen method. At the short ends, join panels flush and add a narrow connecting border to square the ends before the scalloped outer edge.
— Narrow Connector Row (Work around full assembled runner to create uniform edge before scallop) :
Round 1 :
With main burgundy color, join at any corner. Ch 1, work 1 sc in each st around entire assembled runner, placing (3 sc) in each corner to keep edges flat. Maintain even stitch distribution; total stitch count will vary by assembled width/length — aim to place corners evenly.
Round 2 :
1 sc in each st (even round) — this creates a neat framing row. Fasten off and change to cream for scallop border prep.
Info :
Blocking after joining is crucial. Pin the runner flat to correct any irregularities created during seaming. For best results block until dry so the scallop border will be easier to work onto a consistent edge.
— Scalloped Cream Border (This is a 6-round scallop sequence worked around entire runner edge) :
Round 1 :
Attach cream yarn in any st with sl st. Ch 1, sc in same st, *skip 2, (5 dc in next) skip 2, sc in next* repeat around to create shell base. At corners work shell into corner 3-sc cluster. Join with sl st to first sc.
Info :
Ensure shells are evenly spaced. If shells bunch, add an extra sc in the space before the next shell until spacing looks uniform. Keep shells slightly loose to create a soft scallop.
Round 2 :
Ch 3 (counts as dc), 2 dc in top of first dc of each shell, (ch 2, sl st in center of shell) across to next shell point, 3 dc in top of first dc of each shell; repeat to form raised shell arches. Join with sl st.
Round 3 :
Ch 1, sc in each dc across shell arches, into ch-2 sp make (sc, ch 3, sc) to create loop anchors for final scallops. Repeat around and join. Keep stitches loose here so scallops sit outward.
Round 4 :
*In each ch-3 loop: (sc, hdc, 3 dc, hdc, sc) to create a rounded scallop; repeat across each loop.* Join with sl st and fasten off cream end leaving long tail for corner decoration beads if desired.
Round 5 :
Info : For the classic picot points between scallops, reattach cream in the center of each scallop, ch 3, sl st to base to make a tiny picot. This gives old-fashioned crochet lace detail and matches the look in the photo. Weave ends and trim close on the back.
Round 6 :
Optional: Add tiny burgundy or brown bead drops between scallops by stitching a small bobble with contrast yarn through the center point before weaving in ends. This creates the small accent teardrops seen at scallop tips in the photo.
Info :
Final blocking after border rounds is recommended to ensure scallops are curved outward consistently. Pin each scallop outward and steam lightly or spray with starch and allow to dry fully.
— Final Touches & Finishing Rounds :
Round 1 :
Inspect entire runner for loose tails; weave in all ends neatly on the back using a yarn needle. Use a curved needle for bulkier tails if needed.
Round 2 :
Lightly steam or spray the finished runner and pin into final shape on a blocking mat; allow to dry fully. Remove all pins and recheck for symmetry. Trim any stray fibers.
Info :
Storage & care: Hand wash gently in cool water with mild detergent, reshape and dry flat. Avoid high heat or tumbling. Remove crumbs with a soft brush or handheld vacuum on low setting.
Round 3 :
Enjoy displaying your runner! Consider creating alternate colorways: a snowy white background with silver leaves, or a summer palette with coral and mint leaves for seasonal swaps.
This autumnal runner brings warmth and handmade charm to your table in one carefully layered piece. The contrast of rich burgundy, golden leaves and crisp white snowflakes creates a timeless seasonal look you'll enjoy year after year. Each stitch adds personality and texture — a perfect project to celebrate slowing down and making something beautiful by hand. 🧶🍁✨