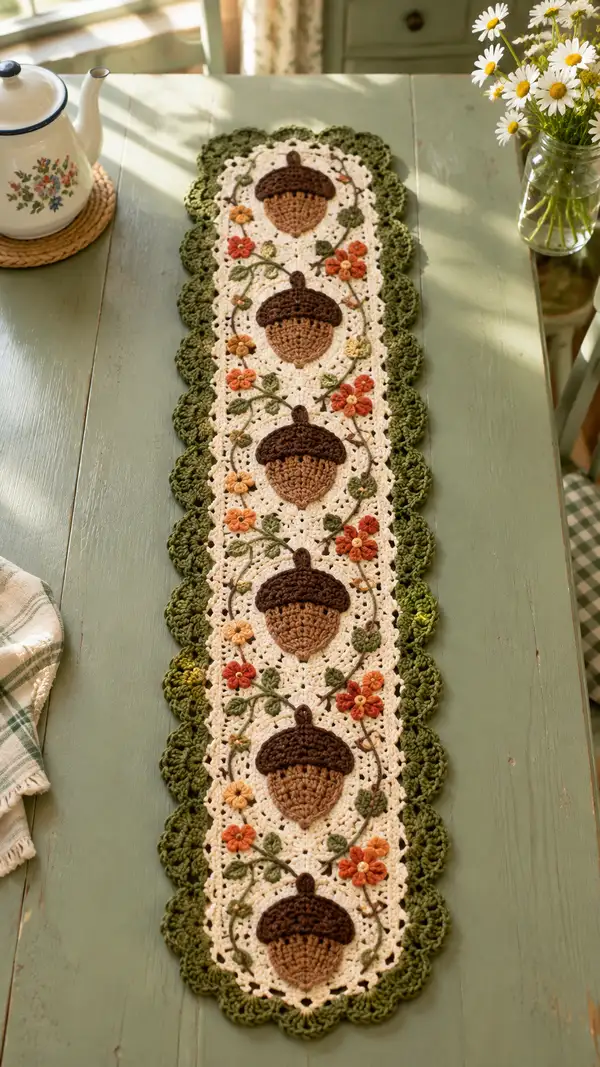
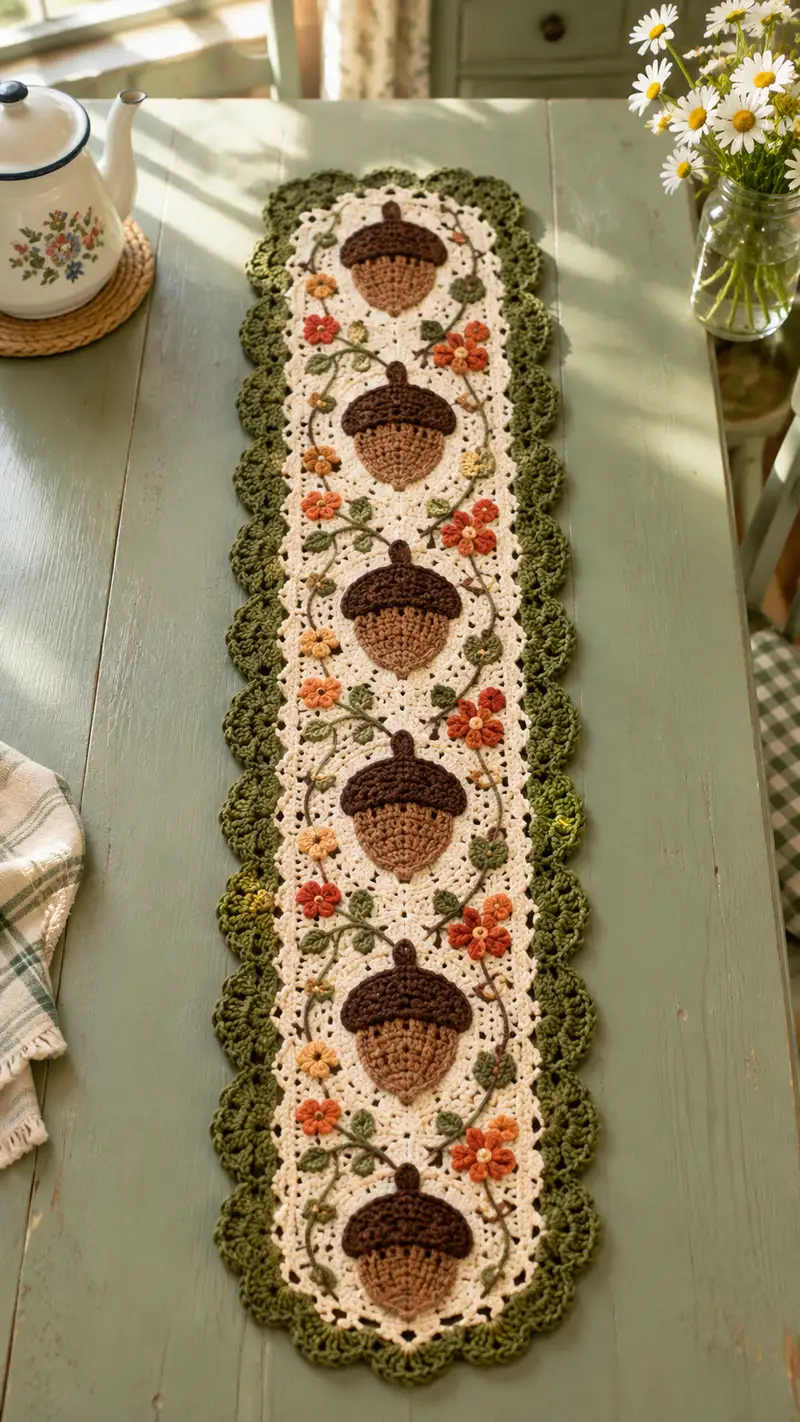
A vintage-inspired crochet table runner featuring a row of textured acorn appliques, delicate vines, and tiny autumn flowers on a lacy cream background. Finished with a leafy olive scalloped border, this runner brings warm, rustic charm to any dining table or sideboard. The design repeats acorn motifs down the center and uses surface embroidery and small 3D flowers to add seasonal detail. A perfect seasonal accent for farmhouse and cottage decor.
Progress Tracker
0% Complete
— Notes & Gauge :
Info :
Gauge is not critical for this decorative runner but for reference: 16 sc x 20 rows = 4 inches in single crochet using 3.5mm hook and worsted yarn. Use recommended hook to achieve a firm lace fabric that holds motifs well. The sample measures approximately 36-40 in (91-102 cm) long with five acorns and ~8 in (20 cm) wide including scalloped edge.
— Center Lace Panel :
Round 1 :
With cream yarn, ch 5, join with a sl st to form a ring. Ch 3 (counts as dc), 15 dc into ring (16 dc). Join with sl st to top of ch-3. (16)
Round 2 :
Ch 3, dc in same st, 2 dc in each st around. Join. (32)
Round 3 :
Ch 3, *dc in next st, 2 dc in next st* rep around. Join. (48)
Round 4 :
Ch 1, sc in same st, *(ch 2, skip 1, sc in next) repeat across to create small mesh foundation. Work 48 mesh spaces (approx) adjusting pattern to keep panel relatively rectangular as you continue.
Info :
From Round 4 onward we will work extended mesh rows to shape a long rectangular panel. Keep stitch multiples as noted in the next sequence and turn at the end of each row when working rows (not rounds) so the fabric lays flat. Use stitch markers at each end to keep counts consistent.
Row 5 :
Ch 3 (counts as dc), turn, *dc in next sp, ch 2, skip next dc, dc into next dc* rep across to last stitch, dc into top of turning ch. (maintain approx 48 dc positions)
Row 6-12 :
Repeat Row 5 for 7 rows to establish height and lace grid for appliques placement. Count should remain constant given turning chain. (approx 48 dc positions each row)
Info :
Mark the vertical center line of the panel now. This will be used to space the acorn appliques. For five acorns, mark five equally spaced horizontal placement zones along the length — roughly every 6 to 7 rows of mesh area center-to-center depending on your tension.
Row 13 :
Ch 1, turn, sc in first st, *ch 3, skip 2, sc in next ch-2 space* repeat across to end. This slightly enlarges the mesh for openwork around the applique edges. (approx 48 sc positions)
Row 14-20 :
Repeat Row 13 for 7 rows to reach a tall central band for embroidery and applique attachment. Adjust rows if adding fewer or more acorns — keep the center spacing even. (48 sc positions)
Info :
At this point you can lay out your acorn appliques on the panel to confirm spacing. The sample places acorn centers on the vertical center line with approximately 6-7 mesh rows between each acorn center. Pin lightly with rust-proof pins to check alignment before attaching.
Row 21 :
Ch 3, turn, work a decorative cluster row: *dc, ch 2, dc, skip 2* across to create small scallops that will be partly under the border. (maintain count)
Row 22-28 :
Repeat Row 21 for 7 rows to build a sturdy band for sewing the scalloped border. (consistent stitch count)
Info :
If you want a longer runner, continue repeating Row 13-21 sequences adding more mesh rows and marking additional acorn centers proportionally. For the sample, these rows give the correct vertical spacing for five acorns.
Row 29 :
Ch 1, turn, sc across evenly to create a firm edge. (approx 48 sc)
Row 30 :
Ch 1, turn, sc in BLO across to create a ridge that will anchor the scalloped border. (approx 48 sc)
Info :
Fasten off cream yarn if desired and weave in ends; leave long tails only where appliques or vines will be sewn. Keep panel flat and block lightly if necessary before attaching motifs.
— Acorn Applique (Make 5 identical) :
Info :
Each acorn is worked in two parts: the acorn base (light brown) and the cap (dark brown). Work both pieces flat and sew the cap partially over the base leaving a small top loop stalk for a realistic look. Use 3.25-3.5 mm hook for firmer shaping. Below instructions refer to a single acorn; repeat 5 times.
Round 1 (Base) :
With light brown, mr, ch 1, 6 sc in ring. (6)
Round 2 (Base) :
Inc in each st around. (12)
Round 3 (Base) :
(1 sc, inc) x 6. (18)
Round 4 (Base) :
(2 sc, inc) x 6. (24)
Round 5 (Base) :
(3 sc, inc) x 6. (30)
Info :
From this point we shape the acorn into a teardrop form by working partial rounds and controlling increases. Work flat in rows for base curvature to sit well under the cap.
Round 6 (Base) :
Ch 1, turn, sc in first 15 sts, dec over next 2 sts, sc in next 13 sts (total 28). (28)
Round 7 (Base) :
Ch 1, turn, sc in first 14, dec, sc in next 13 (27)
Round 8 (Base) :
Ch 1, turn, sc 1 in each st across 27. (27)
Round 9 (Base) :
Ch 1, turn, sc in first 13, dec, sc in next 12. (26)
Round 10 (Base) :
Ch 1, turn, sc across 26. (26)
Round 11 (Base) :
Ch 1, turn, sc in first 12, dec, sc in next 11. (25)
Round 12 (Base) :
Ch 1, turn, sc across 25. (25)
Info :
Fasten off base leaving a long tail for sewing to the panel. The base should be slightly domed; block if necessary. Do not stuff — acorn sits flat and is sewn onto the panel with surface stitches for a slight raised effect.
Round 1 (Cap) :
With dark brown, mr, ch 1, 6 sc in ring. (6)
Round 2 (Cap) :
Inc in each st around. (12)
Round 3 (Cap) :
(1 sc, inc) x 6. (18)
Round 4 (Cap) :
(2 sc, inc) x 6. (24)
Round 5 (Cap) :
Ch 1, sc in first 24 across (24) then fasten off, leaving long tail for sewing.
Round 6 (Cap Detail) :
Re-join dark brown at center top of cap, ch 6, sl st to form small stalk loop; sl st to next st and fasten off leaving tail. This creates the little top stem seen in the motif. (stalk loop)
Info :
Sew acorn base onto cream panel first, aligning center of base with your marked acorn center. Then place cap so it slightly overlaps top 8-10 stitches of base. Sew cap securely with ladder stitch or whip stitch, using the long tail, and make sure the cap's stalk loop points up. Repeat for all 5 motifs.
— Embroidered Vines & Leaves :
Info :
Vines are worked with surface slip-stitch or chain stitch embroidery using dark olive/forest green yarn. Leaves are small two-row leaf motifs crocheted separately and sewn on, or worked as surface leaves with simple chains and detached single crochet leaves. Below are both methods; choose whichever you prefer.
Vine Step 1 :
Thread embroidery needle with dark olive yarn. From a stitch near the base of the top acorn, bring yarn up and work a loose chain stitch along the marked curve down past the next acorn, ending near the next base; anchor at each end with a backstitch. Repeat for mirrored vine opposite if desired.
Leaf (Crocheted) - Make 12 :
With green, ch 6, sc in 2nd ch from hook, hdc in next, dc in next 2, hdc in next, sc in last, ch 1, sl st to first sc to close leaf. Fasten off leaving tail. Block slightly and arrange along vines. (Small leaf)
Info :
Sew leaves in pairs or singles on vine at alternating angles. Use small hidden stitches to attach through the central chain of each leaf, keeping the seam underside. Space leaves to complement acorn placement and flowers.
Leaf (Surface) :
Alternatively, make surface leaves by bringing yarn up at vine base, chain 4, sl st back to adjacent stitch to form a small loop leaf, secure and repeat. This is faster but slightly flatter.
— Tiny 3D Flowers (Make 15-20 total in rust/gold/peach) :
Round 1 :
With desired flower color, mr, ch 1, 6 sc in ring. (6)
Round 2 :
*Ch 3, sl st in next st* around to form six small petals. Fasten off leaving tail. (6 petals)
Round 3 (Center Option) :
For raised center, with gold yarn, embroider a small French knot or attach a tiny yarn-wrapped bead to each flower center. Fasten securely. Optional: add a tiny dab of craft glue to secure bead.
Info :
Sew flowers on clusters near acorns as in the photo: usually two or three per acorn spaced along the vine. Use a variety of colors for a natural look. Keep them small and light so the panel remains flat.
— Small Sprigs & Berry Clusters :
Sprig :
With tan yarn, ch 8, sl st back along chain to form a tiny branch. Attach three tiny French knots or 2 mm seed beads along the sprig. Sew near acorns as small seeds/berries. Fasten off.
Info :
These tiny sprigs add a vintage botanical feel; place them between flowers and leaves for visual interest. Keep scale small — each sprig should be no more than 1/2 to 3/4 inch long.
— Scalloped Leaf Border :
Info :
The scalloped border is worked in rounds all around the rectangular panel, using olive green yarn. First we create an even base round of single crochet to prepare for scallops, then work scallop clusters (shells) spaced evenly. Measure panel perimeter and divide scallops evenly; sample uses 22 scallops along each long side and 6 on each short end (total approx 56 scallops). Adjust for your own gauge and panel size.
Round 1 (Attach Border) :
With olive, join at a corner in any edge stitch, ch 1, sc evenly around the panel placing 3 sc in each corner space to keep corners flat. Work one full round of sc. (Count approx 48 sc per long row plus ends; total variable)
Round 2 :
*Ch 3, skip 2 sts, sl st in next* around to set scallop spacing; adjust to create equal spacing for scallops. Fasten off and rejoin where a scallop will be worked. (spacing set)
Round 3 (Scallop Row) :
Join olive at the start of first scallop, ch 3 (counts as dc), 2 dc in same st, 3 dc in next st, ch 1, 3 dc in next st, 2 dc in next st, sl st into next anchor point. This forms one full scallop cluster (approx 12 dc). Repeat across using anchor points from Round 2. Work 22 scallops on each long side and 6 scallops on each short end, adjusting counts to fit. Join and fasten off. (scallops formed)
Round 4 (Leaf Detail) :
Rejoin olive at base of each scallop and work *sl st, ch 4, (sc, hdc, dc, hdc, sc) in ch-4 loop, sl st back to base* to give an inner leaf texture to each scallop. Fasten off and weave ends. Repeat for each scallop around. (leaf texture added)
Info :
Block scallops gently to set shape. If your scallops cup up, steam block lightly or pin flat while damp to encourage a soft flat curve that sits nicely on the table.
— Finishing Touches & Assembly :
Info :
Lay the center panel flat and position acorns, leaves, flowers and sprigs. Start from top and work down to ensure even spacing. Pin every piece before sewing to check alignment. The following steps describe how to attach elements securely.
Step 1 :
Place acorn base onto panel center at marked positions; whip stitch through the outer rounds of the base and into the panel knots, using long tail to create hidden secure stitches. Make sure each base is centered on the vertical guide line. (Attach acorns)
Step 2 :
Place acorn cap overlapping the top edge of the base by 6-8 stitches; sew cap down at the lower seam line and secure the top stalk loop with a couple of small stitches to hold upright. Ensure all 5 caps are consistently positioned. (Attach caps)
Info :
Sew flowers and leaves to vine with small invisible stitches. For small 3D flowers, sew through the center and a couple of base petals to create a secure anchor. Avoid large knots that may show on the surface.
Step 3 :
Use thin yarn or embroidery thread to stitch vines between acorns: bring thread to surface at one vine start, chain-stitch along marked curve and secure at ends. Overlap a few vine stitches over acorn seams to make them appear integrated. (Surface vines)
Step 4 :
Sew leaves by bringing needle through leaf center and into panel; tack three evenly spaced stitches across leaf center for a secure, slightly raised placement. Trim tails and weave into adjacent stitches. (Attach leaves)
Info :
Weave in all loose ends on the panel underside; secure particularly long tails with a dab of craft glue on the underside if the runner will see heavy use. Steam-block entire piece flat to set stitches and smooth edges.
Step 5 :
Finally, if desired, lightly stiffen with craft starch for a more formal runner look. Pin edges to shape and allow to dry fully before use. The runner can be spot-cleaned with mild soap; hand washing is recommended.
— Optional Variation: Longer or Shorter Runner :
Info :
To lengthen the runner, continue the Center Lace Panel repeat sequence (Rows 13-21) and add additional acorn zones proportionally. To shorten, reduce the number of mesh repeats and acorn motifs. Keep vertical spacing between acorns consistent (approx 6 to 8 mesh rows center-to-center).
Optional Adjustment :
If you prefer a denser look, work additional mesh rows between acorns or add extra flowers and leaves. For a more minimal look, omit surface vines and use only acorn appliques with a plain scalloped border.
This autumn acorn table runner brings a touch of handmade farmhouse charm to any table and is a joy to make and display. The combination of textured acorns, tiny flowers, and scalloped leafy edges creates a cozy, layered look that guests will notice. Whether you make one as seasonal decor or a heartfelt gift, each stitch adds character and warmth. Enjoy the meditative rhythm of the mesh panel and the small, satisfying details of the appliques — and don’t forget to share your finished runner! 🧶🍂