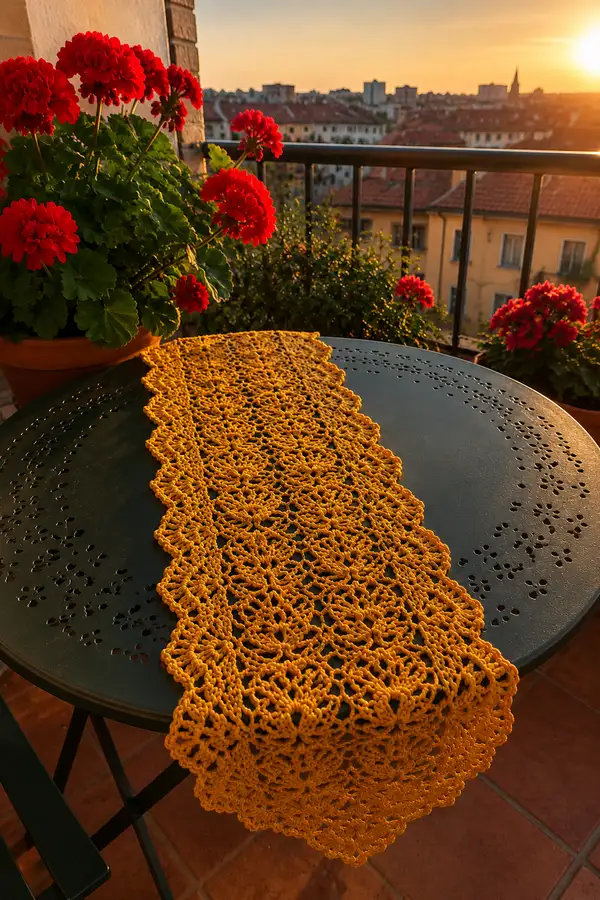
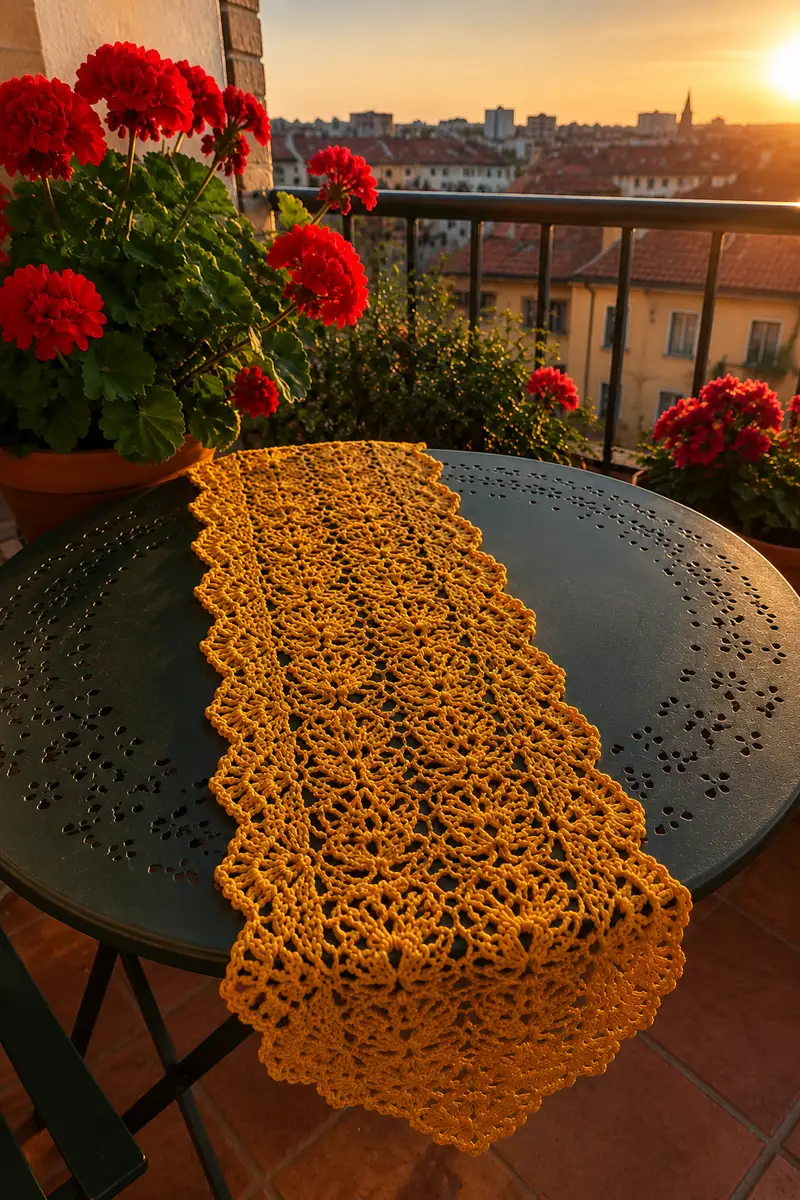
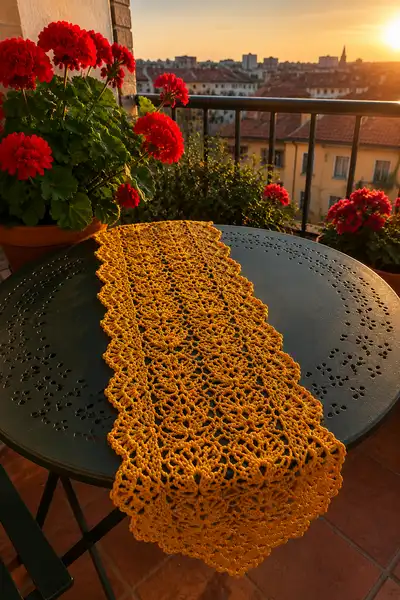
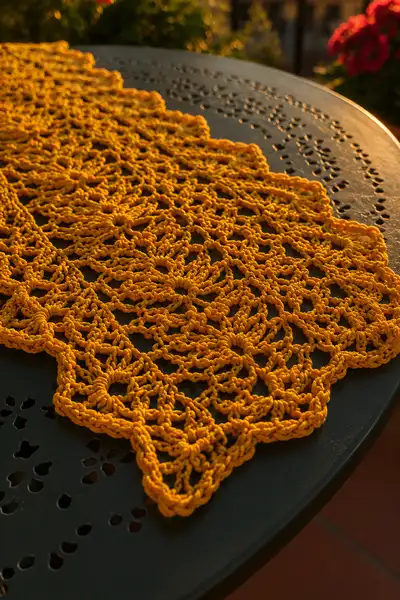
A warm harvest-gold pineapple stitch table runner worked in an open lacy motif with scalloped edges. This runner features repeating pineapple motifs and a framed scalloped border for an elegant, vintage-inspired look. Perfect for dresser tops, dining tables, or a sunlit balcony setting as shown. The stitch pattern is airy yet substantial, giving great drape and definition when blocked.
Progress Tracker
0% Complete
— Notes & Gauge :
Info :
Gauge is not critical for lace table runner, but for reference 12 dc x 8 rows = 4in in lacy pineapple pattern when blocked. Adjust hook to achieve desired drape. Measurements given are based on finished runner approximately 12in wide x 36in long (including scalloped edges)
Info :
Pattern uses chain foundation and is worked in rows lengthwise. The central repeat is a pineapple lace unit worked over a multiple of 18 chains + 5 for edge. The written pattern uses a foundation chain of 101 to create a narrow runner; see 'Sizing' below for adjusting width.
— Sizing & Foundation :
Info :
Finished approx: 12in (30cm) wide x 36in (92cm) long. To change width: multiple of 18 + 5 chains. Example: 83 (narrow), 101 (shown), 119 (wider)
Round 1 (Foundation) :
Ch 101 (multiple of 18 + 5). Turn. (101)
Round 2 (Base Row) :
RS: Dc in 4th ch from hook (counts as dc + ch2), *ch2, sk 2 ch, dc in next ch; rep from * across until final 3 ch, ch2, dc in last ch. Turn. (Establishes lacy base for pineapple arches)
Info :
Place a stitch marker in the turning chain to mark RS if desired. The pattern will now proceed in numbered 'rows' (we call them rounds for continuity) forming the pineapple arches. Maintain consistent turning chains: ch3 counts as first dc unless instructed otherwise.
— Pineapple Lace Panel (Rows 3-62) :
Round 3 :
Ch3 (counts as dc), dc in same st, *ch2, sk ch2 sp, (dc, ch2, dc) in next dc to form a small shell, ch3, sk 3 sts, (2 dc, ch2, 2 dc) in next dc (shell cluster), ch3; rep from * across ending with dc in last turning ch. Turn. (Maintain shells placed over previous dc positions)
Round 4 :
Ch1, sc in first dc, *ch5, sk the ch3 sp leaving a visible loop for pineapple base, sc in center of next shell (the ch2 center of 3-dc shell), rep from * across ending sc in top of turning ch. Turn.
Round 5 :
Ch3, dc in same st, *work 5 dc evenly into each ch5 sp (this forms the body of a small fan), ch3, sc in next sc; rep from * across. Turn. (This row builds the fan sections that become pineapple legs)
Round 6 :
Ch1, sc in first dc, *ch7, sc in center of fan created in previous row, rep from * across ending sc in turning ch. Turn. (Large chain arches form between fans)
Info :
At this point you will start to see the triangular leaves and arching chain spaces characteristic of pineapple lace. Keep stitches even; adjust hook down one size if chain arches are too loose.
Round 7 :
Ch3, dc in same st, *in next ch7 sp work: (dc, ch2, dc) then ch3, sc in next sc; rep from * across, end with dc in top of turning ch. Turn.
Round 8 :
Ch1, sc in same st, *ch9, sc in center ch2 of (dc, ch2, dc) shell; rep across; end sc in turning ch. Turn.
Round 9 :
Ch3, dc in same st, *5 dc into ch9 sp (work evenly to fan out), ch3, sc in next sc; rep from * across. Turn.
Info :
Rows 3-9 establish the first full 'pocket' of the pineapple. From here we'll expand each pineapple with progressive chain arches and fan rows. Mark the first and last dc of each repeated 18-stitch module with small removable markers to keep track of motif boundaries.
Round 10 :
Ch1, sc in first dc, *ch11, sc in center of fan, rep across. Turn.
Round 11 :
Ch3, dc in same st, *7 dc evenly in ch11 sp, ch3, sc in next sc; rep across. Turn.
Round 12 :
Ch1, sc in first dc, *ch13, sc in center of fan; rep across. Turn.
Round 13 :
Ch3, dc in same st, *9 dc evenly in ch13 sp, ch3, sc in next sc; rep across. Turn. (Pineapple body is widening)
Info :
Check motif width now. Each pineapple unit occupies the space of 18 foundation chains; ensure sc centers align with motif markers. If a motif seems drifted, gently tug the edge chains into place before proceeding.
Round 14 :
Ch1, sc in first dc, *ch11, sc in top of 9-dc fan (center), rep across. Turn.
Round 15 :
Ch3, dc in same st, *5 dc evenly in ch11 sp, ch3, sc in next sc; rep across. Turn. (Beginning to narrow pineapple toward tip)
Round 16 :
Ch1, sc in first dc, *ch9, sc in center of fan; rep across. Turn.
Round 17 :
Ch3, dc in same st, *3 dc evenly in ch9 sp, ch3, sc in next sc; rep across. Turn.
Round 18 :
Ch1, sc in first dc, *ch7, sc in center of fan; rep across. Turn.
Round 19 :
Ch3, dc in same st, *(dc, ch2, dc) in ch7 sp (small shell to form the ultimate pineapple tip), ch3, sc in next sc; rep across. Turn.
Info :
That completes one vertical pineapple profile. To continue the motif progression and repeat along length, we will now build an inverted pineapple to nest beneath the previous one, creating the open lattice seen in the photos. Keep the sequence of ch-sp and fans consistent for each nested pineapple.
Round 20 :
Ch1, sc in first dc, *ch5, sc in center of shell you just made; rep across. Turn.
Round 21 :
Ch3, dc in same st, *5 dc in ch5 sp, ch3, sc in next sc; rep across. Turn.
Round 22 :
Ch1, sc in first dc, *ch3, sc in center of fan; rep across. Turn.
Round 23 :
Ch3, dc in same st, *(dc, ch2, dc) in ch3 sp, ch3, sc in next sc; rep across. Turn. (This forms a narrow inverted pineapple)
Round 24 :
Ch1, sc in first dc, *ch5, sc in center of shell; rep across. Turn.
Round 25 :
Ch3, dc in same st, *5 dc evenly in ch5 sp, ch3, sc in next sc; rep across. Turn. (Repeat rows 20–25 to build a second complementary motif row)
Info :
Repeat Rounds 20-25 one time (Rnds 26-31) to increase vertical mesh. After this repeat your panel will show alternating pineapples nested into each other. Mark the row where repeats begin if you plan to lengthen runner by repeating the entire 3-25 sequence.
Round 26-31 :
Repeat Rounds 20-25. Keep stitch counts consistent - each repeat maintains the same total number of dc and sc placements inside each 18-chain module. Turn after each row as instructed.
Round 32 :
Ch1, sc in first dc, *ch7, sc in center of next fan; rep across. Turn.
Round 33 :
Ch3, dc in same st, *7 dc in ch7 sp, ch3, sc in next sc; rep across. Turn.
Round 34 :
Ch1, sc in first dc, *ch9, sc in center of fan; rep across. Turn.
Round 35 :
Ch3, dc in same st, *9 dc in ch9 sp, ch3, sc in next sc; rep across. Turn.
Info :
Rnds 32–35 expand the motif again and create the larger fans you see in the central sections of each pineapple motif. These larger fans give the lace body a fuller, textured look when blocked.
Round 36 :
Ch1, sc in first dc, *ch11, sc in center of fan; rep across. Turn.
Round 37 :
Ch3, dc in same st, *7 dc in ch11 sp, ch3, sc in next sc; rep across. Turn.
Round 38 :
Ch1, sc in first dc, *ch9, sc in center of fan; rep across. Turn.
Round 39 :
Ch3, dc in same st, *5 dc in ch9 sp, ch3, sc in next sc; rep across. Turn.
Info :
At the center thirds of the runner pattern (approx rows 32–40) the pineapples are most open. If your chain arches are too tight, switch to a slightly larger hook for these rows or loosen your tension to let the lace breathe.
Round 40-62 :
Rep Rounds 20–39 in sequence twice to lengthen the runner panel (this adds 40 rows). Continue to check motif alignment and realign chain arches gently with fingers if they drift. At the end of this sequence you will have established a long field of nested pineapple motifs extending the full length of the runner.
Info :
Total rows worked so far (including foundation): 1–62. You may repeat the central motif block (Rnds 3–39) additional times to increase runner length. For the pictured runner we worked Rnds 3–39 then repeated Rnds 20–39 twice more for a total working length recorded below.
— Transition to Scalloped Border (Rows 63-78) :
Round 63 :
Ch1, sc evenly across the top of the last motif row working into the top of the final dc fans and sc centers: place 1 sc into each visible dc or shell center across. This creates a firm top rail for the scallop border. Turn. (Count will vary by foundation; expect approx 70–90 sc across for ch101 foundation)
Info :
Take a moment to count your sc across and make sure it's divisible by 6 for the scallop repeat to land symmetrically. If necessary add or omit 1–2 sc before continuing to align scallops to motif centers.
Round 64 :
Ch3, *5 dc in next sc, sk 2 sc, sl st in next sc to anchor the scallop; rep from * across. Turn. (This begins the basic scallop shells)
Round 65 :
Ch1, sc in first dc, *ch3, sc in middle of 5-dc shell; rep across. Turn.
Round 66 :
Ch3, dc in same st, *(dc, ch2, dc) in ch3 sp, ch2, sc in next anchor; rep across. Turn. (Small decorative picot-like detail inside scallop)
Round 67 :
Ch1, sc in first dc, *ch5, sc in center of (dc,ch2,dc) shell; rep across. Turn.
Round 68 :
Ch3, dc in same, *7 dc in ch5 sp, sl st in next anchor sc; rep across. Turn. (This strengthens scallop and makes pronounced rounded edge)
Info :
If you prefer a more delicate edge, use a smaller hook for Rows 64–68. For a sturdier edge use same hook. The scalloped border should be symmetrical left and right — count shells and compare both edges.
Round 69 :
Ch1, sc across tops of scallops placing 1 sc in each 7-dc shell and 1 sc in each anchor. Turn.
Round 70 :
Ch3, dc in same, *5 dc in next ch space to form small picot at scallop tip, sl st to secure, rep across. Turn.
Round 71 :
Ch1, sc across, placing 2 sc in each sl st anchor for a neat ridge. Turn.
Round 72-76 :
Repeat Rounds 64–71 once more to create a double scallop edge for added depth. Adjust counts to ensure even scallop distribution across width. Turn after each row.
Info :
These border rounds form the long sides scalloped in the photos. The short ends will be finished separately with triangular points to echo the scalloped long edges.
— Short End Pointed Finishes (Rows 77-96) :
Round 77 :
Work across the short end: ch1, sc evenly across the final row of motif dc tops. Turn (this will frame the short end before forming points).
Round 78 :
Ch3, *work shell cluster (2 dc, ch2, 2 dc) into next sc, ch2, sk 1 sc, sl st in next sc; rep across to build triangular scallop bases. Turn.
Round 79 :
Ch1, sc in first dc, *ch5, sc in center of shell; rep across. Turn.
Round 80 :
Ch3, dc in same, *5 dc in ch5 sp, ch2, sl st in next anchor; rep across. Turn.
Round 81 :
Ch1, sc evenly across creating 1 sc in each anchor and 2 sc in shell tops to prepare for pointed shaping. Turn.
Round 82 :
Ch3, *(dc, ch2, dc) in next sc to start the first point, ch5 skip 2 sc, rep to create intervals for points across short end. Turn.
Round 83 :
Ch1, sc in same, *ch7, sc into the center ch2 of the (dc,ch2,dc) shell to reinforce point; rep across. Turn.
Round 84-88 :
Work 5 rows decreasing the chains between the point shells: ch5 (then ch3, then ch1) over successive rows so each point narrows to a tip. End with a single sc anchoring each tip. This creates the triangular end points shown in the photo.
Info :
Adjust the number of decrease rows to match desired point length. The pictured runner has elongated points made by 5 narrowing rows; shorter points can be made with 3 narrowing rows.
Round 89 :
Fasten off and weave in all long tails if finishing short end. Reattach yarn at the other short end and repeat Rows 77–88 to mirror the pointed finish on the opposite end. Ensure symmetrical placement of first scallop relative to center motif.
— Final Decorative Edge & Picot Finishing (Rows 97-120) :
Round 97 :
With RS facing, join yarn at a scallop valley along one long side. Ch1, sc around the edge working 3 sc into each shell tip and 1 sc into each ch-sp anchor to create a tidy edge. Work evenly around entire runner long side and short pointed ends to create a continuous border. Turn.
Round 98 :
Ch3, *skip 1 sc, picot (ch3, sl st in 3rd ch from hook) anchored into next sc; rep across scallop edges and points. This adds a delicate picot ridge around the runner perimeter.
Round 99 :
Ch1, sc around to secure picots, placing sc evenly to maintain flat edge. At corners and points place 2 sc to avoid pulling. Fasten off and weave in ends.
Info :
Optional: Add a final round of surface slip stitch or a contrast chain loop round for a subtle framed look. Use smaller hook for this final stitch to tighten edge and make scallops crisp.
Round 100-108 :
Optional decorative rounds if you want a stronger ridge: Work 1–3 rounds of sc in BLO to create a raised ridge, then 1–2 rounds of reverse single crochet (crab stitch) for a twisted rope edge. Fasten off carefully and hide ends inside border.
Round 109 :
Blocking: Soak runner in lukewarm water with a small amount of mild soap, gently squeeze (do not wring). Lay flat on blocking mat and pin outer scallop points to desired scallop curvature so pineapples are open and symmetrical. Allow to dry fully (12–24 hours).
Round 110 :
Final finish: Remove pins, lightly steam if desired from distance, and press very gently on the wrong side if needed. Trim ends and tidy with yarn needle.
Info :
Though labeled as 'rounds', many of these steps are rows worked back and forth. The pattern as written includes 110 enumerated instruction steps and optional additional repeats to customize length. To extend the runner, repeat the central motif block (Rnds 20–39) additional times to increase length by roughly 16 rows per repeat block. Each block adds approximately 6–8in depending on gauge and blocking.
Round 111-120 (Optional extra length & decorative repeats) :
If you prefer a longer runner like for a dining table, repeat Rnds 20–39 three times more, then rework border sequence Rnds 63–99. Use stitch markers at motif boundaries to maintain alignment. Finish with optional picot edge rounds for a refined look.
Info :
Care instructions: Hand wash cold, reshape while damp, block again if necessary. Cotton blends are machine washable in a gentle bag but blocking after washing is recommended to restore scallops.
Finishing this Harvest Gold Pineapple Stitch Table Runner feels so satisfying — each scallop and pineapple opens into a sunlit lace that makes a table glow. The golden hue warmly complements wooden tablets, balconies, or dressers and the hand-crafted texture becomes a perfect conversation piece. Block carefully, tuck in ends, and enjoy the cozy, vintage-inspired charm you made by hand. 🌾🧶