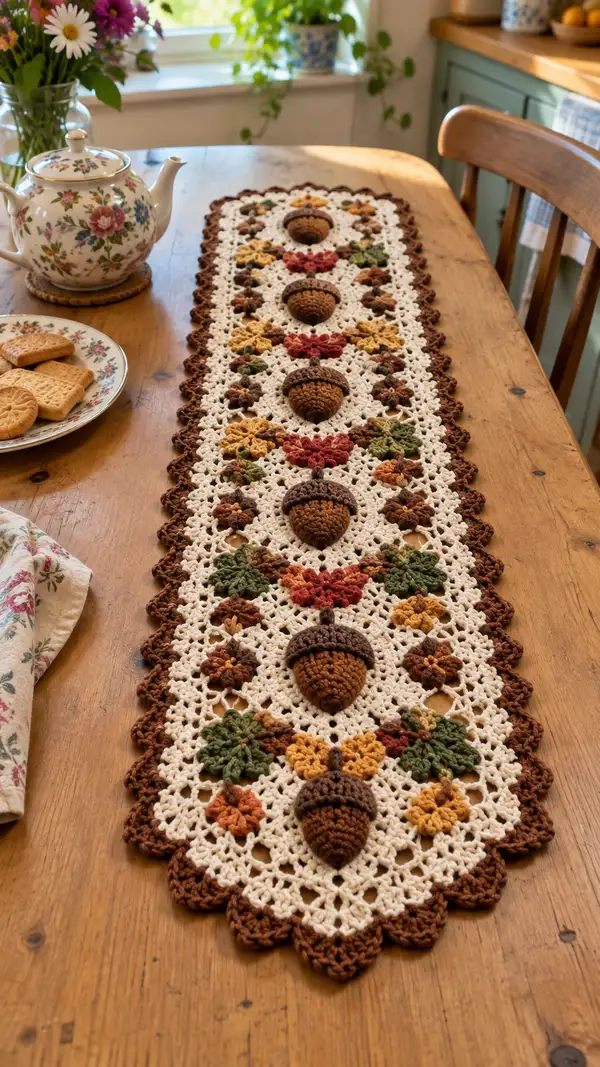
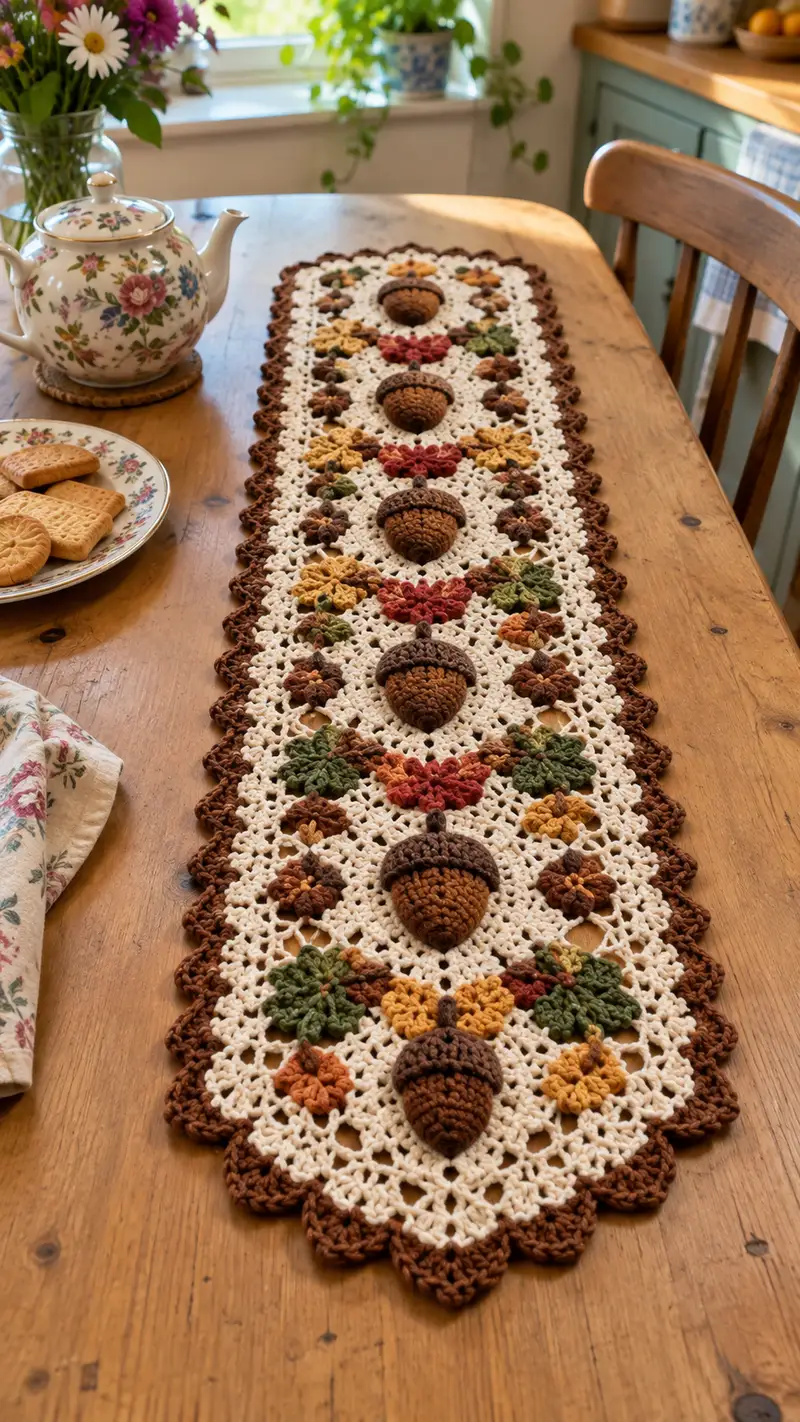
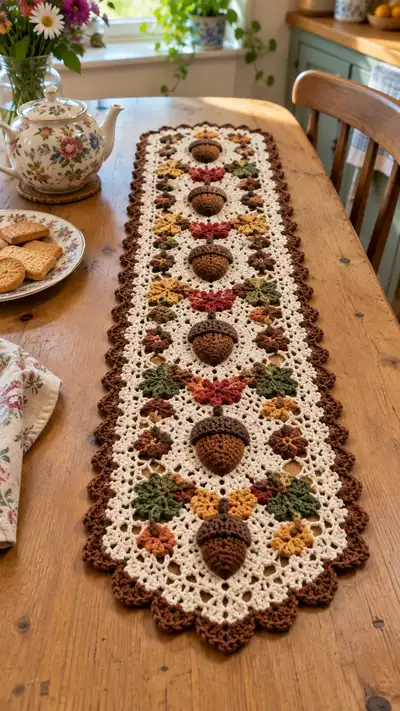
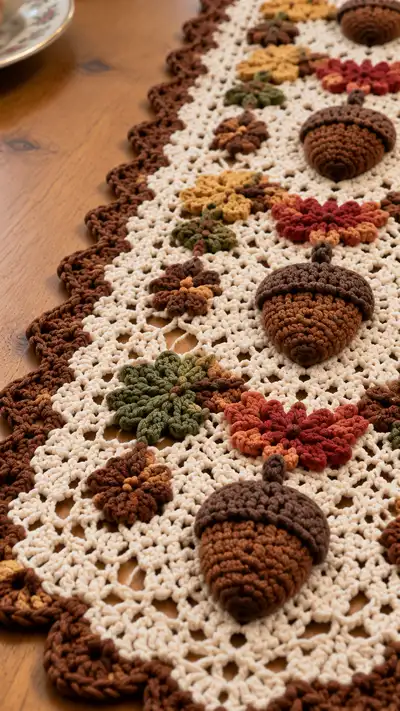
Create a warm, vintage-style table runner decorated with 3D acorns and layered floral motifs in autumn tones. This runner features a lacy cream lattice base, richly textured brown scalloped edges, and plush crocheted acorns and leaves in rust, mustard, olive and warm browns. The pattern combines motif assembly, simple amigurumi-style acorns and surface joining to produce a charming seasonal centerpiece.
Progress Tracker
0% Complete
— Materials & Gauge :
Info :
Gauge is flexible for this runner; using worsted cotton and a 4.0mm hook expect approximately 10 dc x 8 rows = 4 inches in dense fabric. For motif consistency, check that your lacy motif measures roughly 6.5 - 7 cm across center diamond after blocking. Adjust hook accordingly to meet motif size and to ensure consistent join geometry.
— Abbreviations & Notes :
Info :
Use stitch markers to mark beginning of each round or each motif join. Work right-handed instructions; left-handed crocheters may reverse joins. Carry unused accent yarn along back when working small color sections if you plan to avoid many ends; otherwise fasten off and weave ends neatly.
— Lacy Diamond Motif (make 12 for 4-acorn runner, or repeat to desired length) :
Round 1 :
Make a magic ring, ch 3 (counts as dc), 11 dc into ring; sl st to top of ch-3 to join (12 dc).
Round 2 :
Ch 3, dc in same st, *dc 2 in next st* around (24 dc); sl st to join. (24)
Round 3 :
Ch 1, sc in same st, ch 4, sk 1 st, *sc in next st, ch 4, sk 1* repeat around, sl st to join forming 12 ch-4 loops. (12 loops)
Round 4 :
Work in each ch-4 loop: (sc, ch 2, 3 dc, ch 2, sc) in each loop; sl st to join creating small quatrefoil shapes. (12 petals)
Info :
Keep tension airy but even; these rounds form the lattice openings that will define the runner’s openwork. Block each motif flat to even out petal shapes before adding next rounds.
Round 5 :
Ch 3, dc 2 in same base ch, *dc 3 in space between petals, ch 1* repeat around to widen lace; sl st to join. (approx 48 dc including ch sps)
Round 6 :
Ch 1, sc around working one sc in top of each dc and one sc in each ch-1 space; continue evenly to maintain shape (48 sc). Join.
Round 7 :
Ch 4 (counts as tr), tr in next 2 sts, ch 2, sl st in center of next petal; *ch 2, tr 3, ch 1, tr 3, ch 2, sl st in center of next petal* repeat making raised arches. (8 arches)
Round 8 :
Ch 1, sc in same st, ch 3, sk 2, sc in next center sl st, ch 3, repeat to form diamond connectors across motif; sl st to join. (12 ch-3 sps)
Round 9 :
In each ch-3 space: (sc, hdc, 3 dc, hdc, sc) to create mini-shells; sl st to join. This fills the diamonds with textured shells. (12 shells)
Info :
If making many motifs, keep consistent tension now; make a test join of two motifs to ensure connecting spaces match before producing full set.
Round 10 :
Ch 3, dc in each st and across shell peaks, placing 1 dc in each sc between shells; at points where motifs will be joined later, work ch-2 loops by ch 2, sk next st creating ch-2 join spaces. Continue around. (count variable, maintain same geometry)
Round 11 :
Turn motif into a more open lattice: ch 1, sc in each dc and in each ch-2 space work (ch 3, sc) to create small square holes. Join. (consistent number of sc to match previous round)
Round 12 :
Ch 3, dc in each sc and ch space around, placing additional dc pairs at corner points to maintain a gentle curve; sl st to join. (count consistent with previous round)
Info :
At this stage each motif has a central diamond of shells and an outer lace grid; when joined, the ch-3 and ch-2 spaces will line up to create continuous lattice lines across the runner.
Round 13 :
Ch 1, sc in each st; where two motif corners will meet later, mark those sc with a removable stitch marker to ease joining. (same st count)
Round 14 :
Ch 3, dc in each st around but work (dc, ch2, dc) in corner marked areas to create a small picot corner that helps when edging later. Sl st to join. (count maintained)
Round 15 :
Ch 1, sc around working evenly; remove temporary markers if used. Fasten off leaving working tail for joining. Block flat. (sc count consistent with round 13)
Info :
Make total number of motifs based on desired runner length; the shown example has 12 motifs in a long strip with staggered accents. Block and align motifs on layout board before joining; alternate orientation if desired to stagger acorn placement.
— 3D Acorn Body (make 6 or as many as motifs) :
Round 1 :
With Warm Brown, make magic ring, 6 sc in ring (6).
Round 2 :
Inc in each stitch around (12).
Round 3 :
(1 sc, inc) x 6 (18).
Round 4 :
(2 sc, inc) x 6 (24).
Round 5 :
(3 sc, inc) x 6 (30).
Info :
These increases build the acorn base. Keep stitches tight and even for a firm body. Use a 3.5mm hook for a denser fabric if your stitches are open.
Round 6 :
1 sc in each st around (30).
Round 7 :
1 sc in each st around (30).
Round 8 :
(4 sc, dec) x 5 then 4 sc, dec over last 6 sts to keep counts even (25). Note: Work pattern so that total becomes 25 by spacing decreases evenly.
Round 9 :
1 sc in each st around (25).
Info :
Begin stuffing lightly now—add a small ball of fiberfill and press in to start contour; the top will be stuffed more later to create roundness under the cap.
Round 10 :
(3 sc, dec) x 5 (20).
Round 11 :
1 sc in each st around (20).
Round 12 :
(2 sc, dec) x 5 (15).
Round 13 :
1 sc in each st around (15).
Info :
Stuff more firmly to achieve smooth, slightly elongated tear-drop shape typical of an acorn. Avoid over-stuffing which will distort the cap join later.
Round 14 :
(1 sc, dec) x 5 (10).
Round 15 :
Dec x 5 (5). Finish stuffing so the bottom is rounded but not bulging.
Round 16 :
Fasten off leaving long tail for sewing; close remaining hole by threading tail through remaining 5 sts and pull tight. Secure and weave tail into body. (Acorn body complete)
Info :
If you would like a bit of texture on the acorn body, work round 6-11 in BLO to create faint ridges; test on sample acorn to confirm look.
— Acorn Cap (make 6) :
Round 1 :
With Deep Chocolate, make magic ring, 6 sc into ring (6).
Round 2 :
Inc in each st around (12).
Round 3 :
(1 sc, inc) x 6 (18).
Round 4 :
(2 sc, inc) x 6 (24).
Info :
These rounds form a shallow dome that will cup the top of the acorn body. Keep this section slightly firmer than the body using tight stitches to create a defined cap edge.
Round 5 :
1 sc in each st around (24).
Round 6 :
Work 1 hdc in each st around (24).
Round 7 :
Ch 1, sc in each st around but in every 3rd stitch work (sc, ch 1, sc) to create a tiny picot ridge around outer edge (approx 30 points including picots). Join. (approx 30)
Round 8 :
Sl st around outer edge into ch-1 spaces to strengthen rim; fasten off leaving long tail for sewing. (Cap complete)
Info :
Optionally block the cap slightly over a rounded object to help it sit neatly on the acorn body. Make the cap slightly larger than body top so it overlaps; during assembly you will fold the cap edge under while sewing for a finished look.
— Acorn Stem Loop (make 6) :
Round 1 :
With Dark Brown, ch 8; sl st into first ch to form small ring, ch 1; work 6 sc into ring; sl st to join; fasten off leaving tail for sewing.
Info :
Sew stem loop to top center of cap before attaching cap to body. This small loop helps visually anchor the acorn and gives a little hanging point if desired.
— Small Layered Leaf/Flower Cluster (make multiple in rust, mustard, olive and browns) :
Round 1 :
With accent colour, make magic ring, ch 1, 8 sc in ring; sl st to join (8).
Round 2 :
Ch 2, (dc, ch 1, dc) in next st, *sk 1 st, (dc, ch 1, dc) in next* repeat around to make 4 petals; sl st to join. (4 petals)
Round 3 :
Change colour if layering multiple shades: ch 1, sc in each st around including petal points, creating small base (12 sc). Join and fasten off.
Info :
For fuller clusters make 2-3 stacked petals using different colours. Align slightly offset to create a layered leaf look. Use small puffs or popcorns for centre dots if desired.
Round 4 :
Optional centre bobble: join contrast colour in centre, ch 1, (yarn over twice, insert, pull up loop, yo, pull through 2 loops) repeat 4 times to make bobble; finish with sl st in same centre and fasten off. Weave tail to back.
Info :
Make a variety of these clusters; arrange in threes around each acorn as seen in the runner photo. Use a small dot of glue under heavy patches while sewing if yarn is slippery.
— Joining Motifs (rectangle assembly) :
Info :
Lay out motifs in intended order on blocking board. The pattern in the photo is a single-file column of motifs joined longways with slight stagger for acorn spacing—12 motifs to make a long runner. Align ch-2 and ch-3 connector spaces; you will join motif edges with slip-stitch join or whip stitch for invisible seams.
Round 1 :
Place two motifs right sides together, align corner picot points. Using Cream yarn, through corresponding ch-2 spaces, sl st join across the seam at each ch-2 on outer edges: *insert hook in ch-2 space of motif A and motif B, sl st* repeat along the entire meeting edge to join motifs securely. Repeat for all adjacent motifs until the runner length is achieved.
Round 2 :
After joining rows, work a single round of sc around the whole assembled rectangle to even join seams and prepare for surface appliques and border. Work 2 sc in corner picot ch-2 areas to keep corners smooth. (sc count variable: maintain even placement)
Info :
When joining make sure the lace holes align; if motifs are slightly different sizes, adjust by easing with blocking pins or by inserting small sc decreases in join rows for even tension.
— Securing Acorns to Motif : (placement & attachment) :
Info :
Position acorns centrally on specific diamonds of motifs: place one acorn approximately in center of each motif so that acorn points towards runner centre. Pin acorn lightly in place through cap edge into motif.
Round 1 :
Using long tail from acorn cap, whip-stitch cap to motif by passing yarn through underside of cap edge and through motif sc stitches, stitching evenly around rim until cap is secure and slightly tucked under. Keep stitches small and regular for invisible join.
Round 2 :
Sew acorn body to cap from inside the cap rim with several small stitches through the top rounds of the body to secure. If acorn tends to tilt, add a small felt disc inside cap before sewing to create a straighter join.
Info :
Attach clusters of leaves around the acorn using small whip stitches through the back of cluster bases. Use pins to arrange leaves symmetrically (two opposing leaves and a small flower cluster near the base).
— Surface Embellishments & Small Flowers (multiple colours) :
Round 1 :
Make small 5-petal flowers with accent colours: ch 2, (sc, ch 2) five times into ring, fasten off; join centre with tiny contrasting bobble if desired. Sew onto lattice intersections with matching yarn tail.
Round 2 :
Make tiny puff flowers by working 5 puff stitches into a small ring then securing with a sl st and sewing into position. Space these clusters evenly between acorns to emulate scattered leaves seen in the photo.
Info :
Alternate small flower types for visual variety and to break the repetition of motifs. Use 3 colours in small groups to mimic natural fall variation.
— Border Preparation (first round around entire runner) :
Round 1 :
Attach Deep Chocolate at an unobtrusive point on runner edge, ch 1, sc evenly around runner edge, working 2 sc in corner picots to keep edge flat. Maintain consistent stitch tension so scallop rounds later sit evenly. (sc count variable)
Round 2 :
Ch 3, dc in next st, *sk 1, (5 dc in next st) to form shell, sk 1, dc in next st* repeat around to begin scalloped pattern; join with sl st. (shell count based on motif perimeter)
Info :
Keep shell spacing equal; shells will form large scallops seen in the photos. If your runner pulls in anywhere, add an extra sc in that area during the sc round to compensate.
Round 3 :
Into each 5-dc shell: sl st, ch 1, (sc, hdc, 3 dc, hdc, sc) to build defined scallop; sl st between shells. Fasten off and weave ends. (scallop count as per shells)
Round 4 :
Optional final picot round: With Deep Chocolate, join into shell centre, *ch 3, sl st into top of shell center to create decorative picot* repeat around for crisp edge. Fasten off and weave ends.
Info :
For a fuller border, add one more deep chocolate round of shells or reverse-shells to enlarge scallops; test one corner first to judge proportion.
— Final Finishing Touches :
Round 1 :
Weave in all ends using a yarn needle, hiding tails through multiple stitches on wrong side to secure. Check all acorns and clusters for secure attachment and reinforce any loose stitches.
Round 2 :
Block entire runner gently: spray steam or wet block depending on yarn type and pin to exact shape on blocking board to set lace geometry. Allow to dry fully before removing pins.
Info :
For laundering: use gentle wash for cotton or handwash, reshape and lay flat to dry. Avoid high heat which can distort cotton stitches and 3D pieces.
— Pattern Variations & Sizing :
Info :
To make a longer runner increase motif count; to make a table mat use a 3-motif version. Change accent colours for seasonal looks (greens and red for Christmas, pastels for spring). Consider using a DK yarn and smaller hook for a daintier runner or a bulkier cotton for a sturdier farmhouse feel.
Round 1 :
Optional: For a more pronounced acorn, add an extra two rounds to acorn body increases (rounds 5-6) to get a larger body before beginning decreases. Adjust cap rounds to match new circumference.
Info :
Every accessory piece is optional: you can omit 3D acorns for a flat runner or replace them with flat appliques for easier transport and storage.
This autumn runner brings handmade charm to any table with layered textures, warm tones, and delightful 3D acorn accents. Each motif fits together like a little picture of fall, and assembling them is part of the fun—pin, sew, and watch your table come alive with cozy detail. Whether you keep it for yourself or give it as a thoughtful seasonal gift, this runner will brighten many gatherings. 🧶🍂