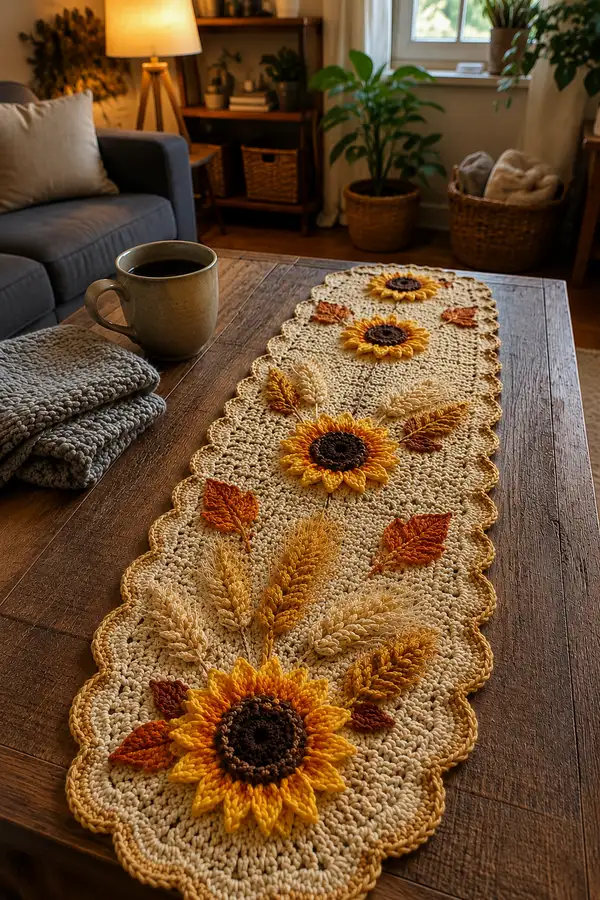
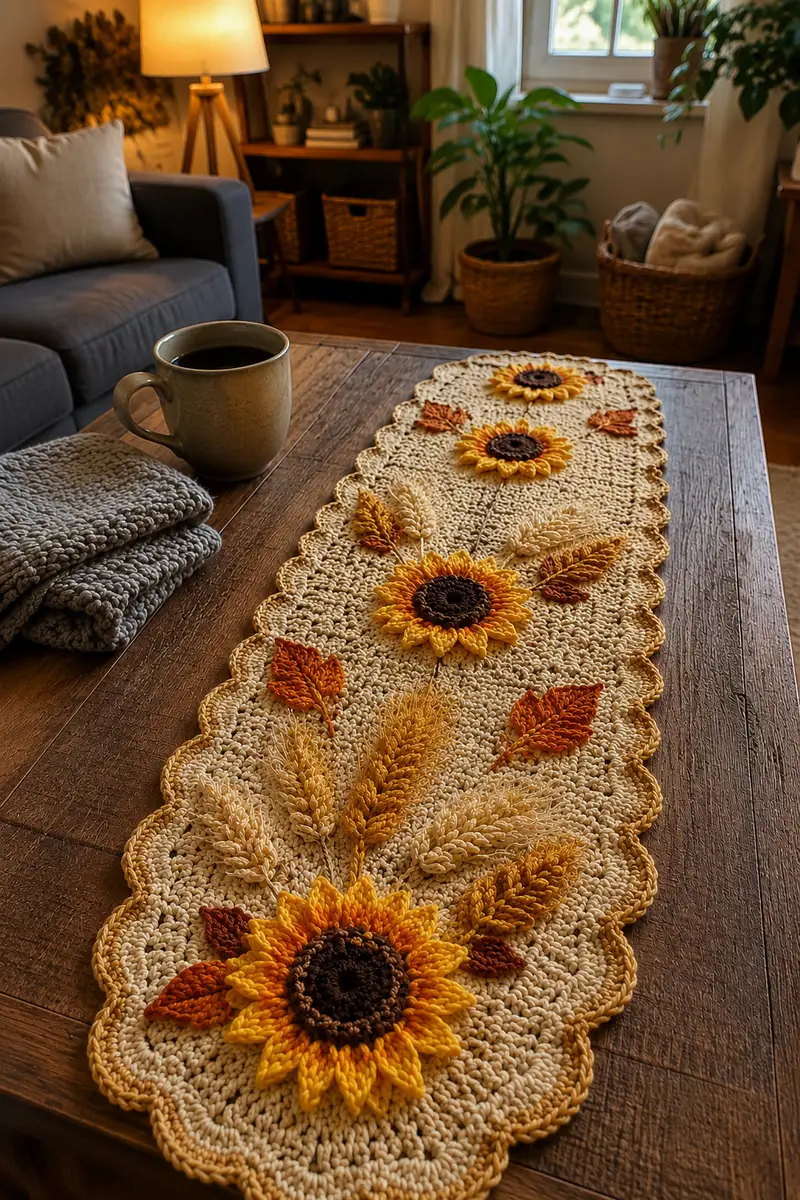
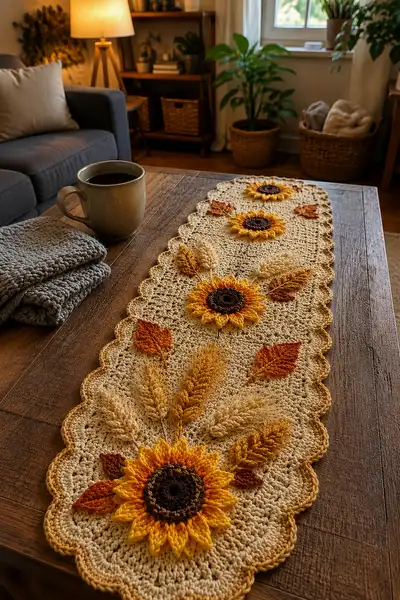
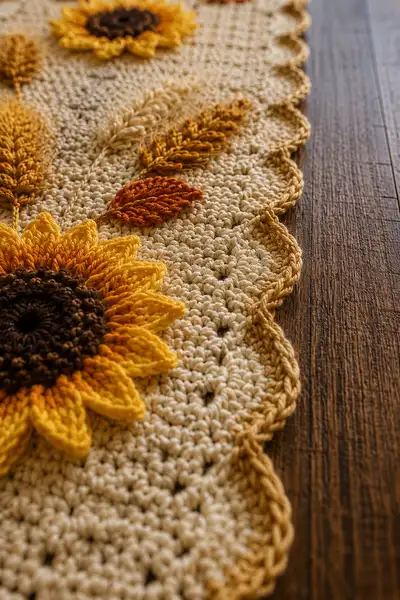
Warm, textured table runner featuring three layered sunflowers, sculpted wheat stalks and autumn leaves worked in cozy neutral and harvest tones. This elongated oval runner uses textured stitches and popcorn/petal techniques to create dimensional flowers and raised wheat elements that sit beautifully on a wooden table. A scalloped edge and tonal border finish give a polished, farmhouse-chic look perfect for fall and harvest displays.
Progress Tracker
0% Complete
— Base Panel (elongated oval) :
Notes :
This runner is worked in continuous rounds to form a long oval. Use a stitch marker at the beginning of each round. The plan is to establish a stable width early then add even rounds for length. Numbers shown are for the sample runner; adjust the number of even rounds to lengthen or shorten your runner.
Setup :
With main neutral/cream yarn and 4.0 mm hook, make a foundation chain of 36. Join with sl st to first ch to form a ring, taking care not to twist.
Round 1 :
Ch1, 1 sc in each ch around, join with sl st to first sc. (36)
Info :
Place marker in the first sc of the round to mark the start. This small ring is the narrow center of the oval; increases at four quarter points will create rounded ends as you grow.
Round 2 :
(inc in next st, 8 sc) x 4 evenly around to create gentle rounding at 4 points. (40)
Round 3 :
1 sc in each st around. (40)
Round 4 :
1 sc in each st around. (40)
Round 5 :
(inc in next st, 9 sc) x 4. (44)
Round 6-9 :
1 sc in each st around. (44)
Info :
Work rounds 6-9 evenly to create the height of the central strip. If you want a narrower runner, reduce these rounds; for a wider runner add two extra even rounds here then continue increases.
Round 10 :
(inc in next st, 10 sc) x 4. (48)
Round 11-18 :
1 sc in each st around. (48)
Info :
These rounds form the main flat panel. Work until your runner reaches approximately 9-10 inches across (sample reached 10" at round 18). The length of this central oval will determine how many overall rounds you complete before doing the scalloped edging.
Round 19 :
(inc in next st, 11 sc) x 4. (52)
Round 20-30 :
1 sc in each st around. (52)
Info :
At this stage your runner's circumference is widening slowly and most of the growth is causing the ends to round slightly. Continue even rounds to generate the length; in the sample, rounds 20-30 produced a long, even runner body for motif placement.
Round 31 :
(inc in next st, 12 sc) x 4. (56)
Round 32-42 :
1 sc in each st around. (56)
Info :
Keep the right side facing as you work rounds. At the end of round 42 you should have a long oval base approximately the length you want before motifs. Measure and adjust: if you need a longer runner, add sets of 6-8 even rounds (1 sc each) until length matches your table.
Round 43 :
Change to a slightly darker beige/tan for a subtle tonal ring: sl st into next st, ch1, 1 sc in each st around. (56)
Round 44 :
1 sc in each st around in tan. (56)
Info :
This tonal round frames the center area and provides a base for sewing motifs. We changed color here so the motifs will visually sit on a framed background.
Round 45-50 :
1 sc in each st around (56). Finish off and weave in ends, leaving long tails for seaming if you prefer to stitch motifs through the rounds rather than topstitching later.
Info :
If you plan to sew flowers on later, leave a 10-15" tail to use as a sewing thread. Otherwise fasten off and weave ends completely. Block the base flat now for best placement of motifs.
— Scalloped Edging :
Info :
We will work the scalloped edge in rounds along the last round of the base. If you finished the base, rejoin yarn in any stitch along the edge. Scallops are made with - sc clusters and shells. Use gold/antique yellow for the outer border.
Round 1 :
Join gold yarn with sl st to any st on edge. Ch1, *sk next 2 sts, (5 dc) in next st, sk next 2 sts, sc in next st; rep from * around to end. Join with sl st to first sc. This creates a small scallop every ~8 sts. (Number of scallops will depend on your base circumference)
Info :
If your base had more or fewer stitches, adjust skip counts to space shells evenly. Aim for evenly spaced scallops across the long sides and around rounded ends.
Round 2 :
Ch1, in each 5-dc shell: sl st into first dc, 1 sc into next dc, ch2, 1 sc into next dc; in sc between shells work sc. Fasten off, weave ends. This round softens the scallop edge and defines the scallops.
Info :
Optional: Work a narrow reverse single crochet (crab stitch) around the shell edges to create a slightly raised border and a finished look—use same gold yarn for contrast.
— Sunflower Motif (Make 3) :
Notes :
Each sunflower is built in three parts: dark brown center disk, first ring of textured petals (lower layer), then second layer of elongated petals (top layer). The petal texture uses puff or cluster stitches worked into the outer rounds to create dimensional petals. The sample uses: Center dark brown, inner petals mustard, outer petals golden yellow.
Center Round 1 :
With dark brown and 3.5-4.0 mm hook, make magic ring. Ch1, 6 sc in ring. (6)
Round 2 :
Inc in each st around. (12)
Round 3 :
(1 sc, inc) x 6. (18)
Round 4 :
(2 sc, inc) x 6. (24)
Round 5 :
1 sc in each st around. (24)
Info :
Optional: If you want a slightly raised center, add a round of puffs: (ch1, *yarn over, draw up loop 4 times, yo and pull through all loops, ch1, sl st into next st*) across one round to create tight popcorns—this uses extra yarn but gives a plush center.
Round 6 (petal foundation) :
Change to mustard. *Ch4, skip 1 st, sl st in next st* around to create 12 ch-4 loops evenly spaced. Join with sl st to beginning sl st. (12 loops)
Round 7 (inner petal layer) :
Working into each ch-4 loop: (sc, hdc, 3 dc, hdc, sc) in loop. Fasten off and weave tail to back. This forms the shorter, inner petals (12 petals).
Info :
Be careful to center each petal evenly around the disk. Use markers if needed to ensure even spacing. Wet-block petals lightly to open them if they feel twisted.
Round 8 (outer petal foundation) :
Join golden yellow behind the inner petals. Work through the base of the inner petals by inserting hook under the base and ch5, sl st to next base point to create 12 ch-5 loops. (12 loops)
Round 9 (outer petal shaping) :
In each ch-5 loop: (sc, hdc, 5 dc, hdc, sc). Fasten off. Gently pull petals forward. Optionally use a few stitches of the golden yarn behind each petal to tack it down, keeping petals vertical for dimension.
Round 10 :
Sew a few stitches along the outer edge of the center disk under the inner petal layer to keep everything secure. If you added the optional puff round, align petals to hide any gaps.
Info :
Trim petal bases neatly on back and weave ends; leave a long tail from the center round for sewing the sunflower onto the runner. Each sunflower finished this way measures approximately 6.5" – 7" diameter in the sample.
— Wheat Stalk (Make 6-8) :
Notes :
Wheat stalks are made as separate textured stems using elongated loop stitches (a 'loop cluster' technique) and a backbone of sc for the stem. You can use a larger hook or a dowel to create consistent long loops. The sample creates clusters of 6-8 loops per wheat grain across a short spine to mimic wheat heads.
Wheat Stalk Foundation :
With mustard yarn and 3.5 mm hook, ch 16. Turn to work back along chain: 1 sc in 2nd ch from hook and each ch to end (15 sc). This is the stem base for the first wheat head.
Round 1 (grain placement) :
Working along the right side of the chain base, join yarn at first st, *yarn over and pull up long loop to approximately 1.5" (use a 6.0 mm hook or a pencil as a loop former), repeat this 6 times into same stitch, yarn over and pull through all loops and ch1 to lock cluster, sl st in next base st; rep from * to end of stem to create 6 clusters. Fasten off and weave ends. This creates a dense wheat head made of loop clusters.
Info :
Make the long loops consistent in length by winding them over a small dowel or large hook and sliding them off as you work. Use a slightly looser tension for loops than the body stitches so they sit proudly above the surface.
Round 2 (stem finishing) :
Rejoin yarn at base of stem center and work sc in each base stitch across for the back row. Ch 1 and fasten off leaving a tail for sewing. Lightly tease out loops with a wide-tooth comb to give the wheat a soft feathery look. Optionally steam-block lightly to set shape.
Info :
Create wheat stalks in varying colours (light tan, golden ochre, and mustard) for depth. Position them in small clusters of 2-3 stalks when attaching to the runner.
— Leaves (Make 6-8) :
Leaf 1 :
With rust/orange and 3.5 mm hook, ch 8. Row 1: Sc in 2nd ch from hook, hdc in next, dc in next three, hdc in next, sc in last. Turn to work along opposite side of chain: sc in first, hdc in next, dc in next three, hdc in next, sl st to first st to close leaf. Fasten off leaving tail for sewing. (Leaf measures about 2.5-3")
Info :
Block leaves flat to get a neat pointed shape if necessary. You can add a center spine by embroidering a line of sc through the center with a slightly darker shade of rust.
Leaf 2 (textured)
For a more textured leaf, use mustard yarn and make ch10, then along chain: sc, hdc, (dc, tr) in middle, dc, hdc, sc; work opposite side mirroring; finish with sl st. Use BLO in one side to create a raised ridge for variety.
Info :
Make leaves in pairs and mix colors to create a natural palette. Use a few stitches of embroidery to create veins if you like.
— Small Accent Leaves/Berries (Make 6) :
Round 1 :
With rust, magic ring, ch1, 6 sc. (6)
Round 2 :
(1 sc, inc) x 3. (9)
Round 3 :
1 sc around, fasten off leaving tail for sewing. These tiny ovals are glued or stitched near sunflowers for color contrast.
Info :
If you'd prefer no small round accents, simply make two extra leaves instead and place them near wheat clusters for balance.
— Assembly & Placement :
Info :
Blocking: Before assembly, block the base and all motifs. Pin the runner exactly to desired shape with scalloped edge evened out. Steam or wet-block yarn according to fiber content. This makes positioning easier and tidier.
Sunflower Placement :
Place three sunflowers along the center line of the runner spaced evenly. In the sample the centers are positioned approximately at 6", 18", and 30" from one end. Pin them in place and check symmetry before sewing.
Info :
Use tails from sunflower centers to sew through the base using a yarn needle. Sew several passes through the center disk and the base, then wrap a couple of stitches through the stitches under the inner petals to secure. Tie a small secure knot on the back and weave end inside the runner.
Wheat & Leaves Placement :
Arrange wheat stalks in small bouquets around sunflowers—pointing outward along the runner for a natural branching effect. Add leaves (rust and mustard) in between stalks and around flowers to fill gaps and create flow. Pin each piece when happy with placement.
Sewing Motifs :
Using long tails left from motif construction, sew each motif down using whip stitch or small invisible stitches. Sew only through the base and under motif edges, leaving petals/fluffy loops free for dimension. For wheat clusters, slip stitch at the base and tack the top loop clusters with a few small stitches to the base so they sit upright.
Info :
To anchor motifs more securely on a table runner that will be handled, take a few stitches through the underside of the runner into the seam allowance and knot securely. Hide knots by weaving them into the nearest motif base.
— Additional Decorative Embroidery :
Info :
Use long running stitches or chain stitch with a tapestry needle to create stems radiating from each sunflower center to the wheat clusters and leaves. Use a slightly darker tone of tan or brown to make subtle stems; the embroidery should be delicate to avoid overpowering motifs.
Stem Embroidery :
Thread yarn needle with tan/olive. From the underside of the runner, bring needle up at sunflower center base, then make small chain-stitch lines that fan to each wheat cluster or leaf. Secure ends with small knots on underside and trim tails.
Finishing Touches :
Trim stray fibers from wheat loops if desired, lightly tease to achieve soft wisps. Steam lightly to set the shape only if your yarn fiber allows. Weave in all ends securely to the back of the runner. Give the entire piece a gentle blocking to ensure scallops lay flat and motifs look crisp.
Info :
For added durability, you can machine-stitch motifs with a sewing machine through the underside with a zig-zag stitch on low tension, catching only the base of the motifs and the runner backing. Test on a scrap first.
— Alternate sizing & customization :
Info :
To make a narrower runner, start with 28 chains and follow the same increase proportions. To make a runner twice as long, crochet additional even rounds at the central stage before working the scalloped border and attaching motifs. Sunflowers scale up easily by adding extra rounds to the center disk and lengthening outer petal loops.
Care Instructions :
Hand wash cold or gentle machine wash in a laundry bag on delicate. Reshape while damp and lay flat to dry. Avoid rough handling of looped wheat or layered petals to preserve shape.
Completing this harvest table runner is such a satisfying project — the textured sunflowers and wheat stalks really make a warm, seasonal statement! Each step brings the runner to life: blocking the base, stitching on the layered petals, and teasing the wheat loops into soft, feathery heads. The finished piece is perfect for fall gatherings or a cozy everyday centerpiece. 🧶🍁🌻 Add a cup of coffee and admire your handiwork — you made something beautiful by hand!