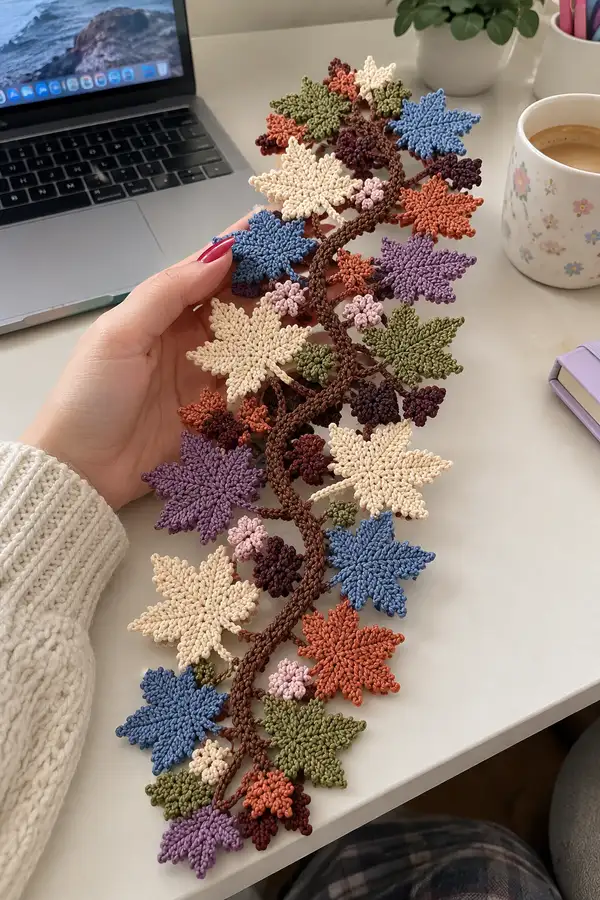
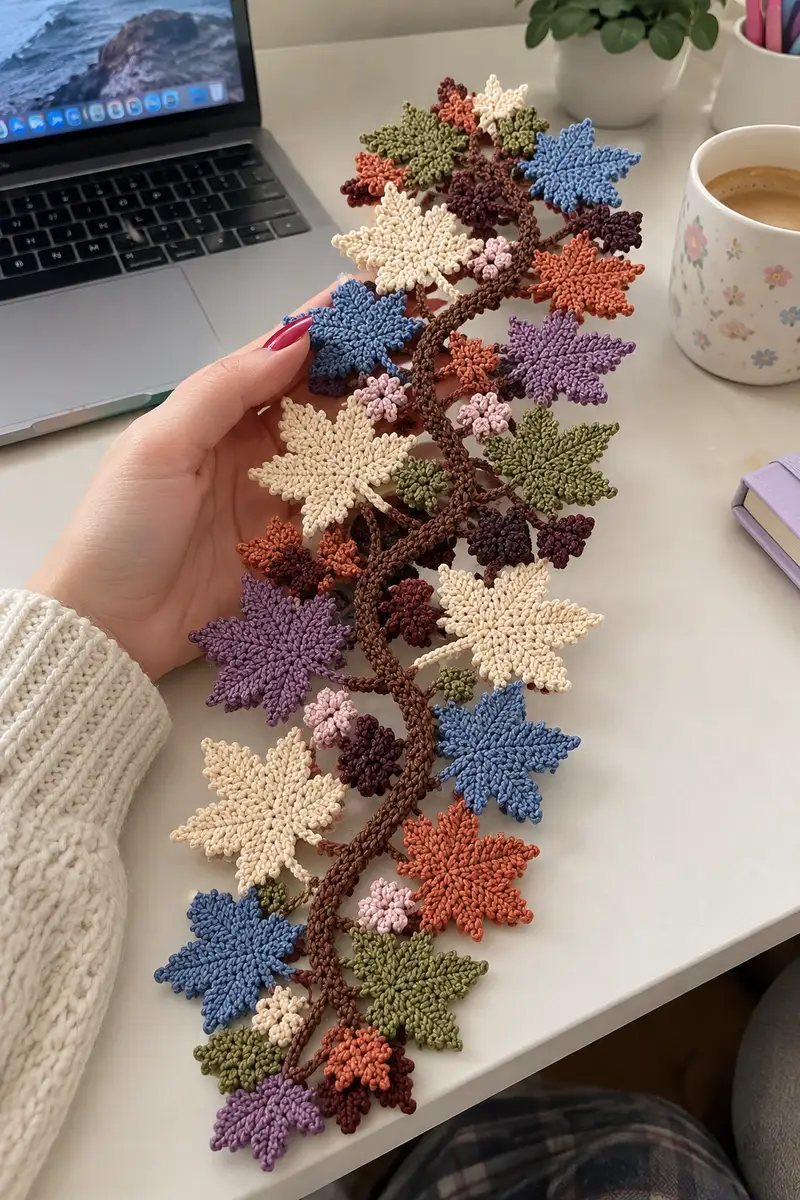
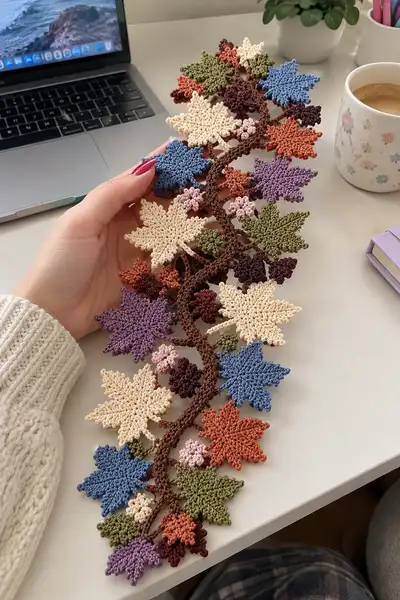
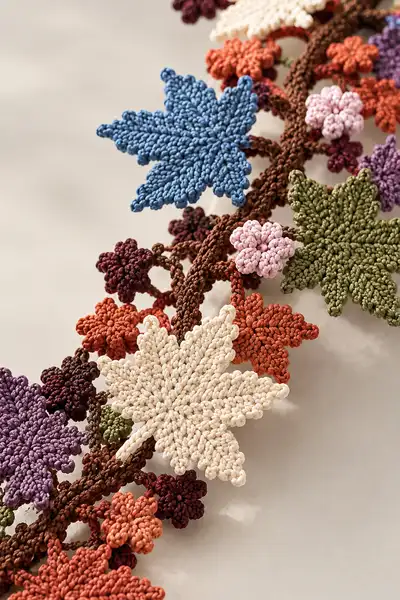
A delicate, nature-inspired garland made of crocheted maple-style leaves, tiny clustered berries and a hand-twisted vine. This decorative runner features layered leaves in autumn shades — cream, rust, olive, purple, blue — and textured berry clusters for depth. It’s perfect for tables, mantels, or as an accent for seasonal displays. The pattern uses fine cotton yarn and small hooks to produce crisp stitch definition and sculpted petal edges.
Progress Tracker
0% Complete
— Materials & Gauge :
Info :
Use cotton yarn for crisp stitch definition. Gauge is approximate and not critical: 18 sc = 4 cm in single crochet on 2.5mm hook when worked tightly. Work tightly so the edges of leaves hold shape
— Large Maple-Style Leaf (Make 6-8) :
Round 1 :
6 sc in magic ring (6)
Round 3 :
(1 sc, 1 inc) x 6 (18)
Round 4 :
(2 sc, 1 inc) x 6 (24)
Round 5 :
(3 sc, 1 inc) x 6 (30)
Info :
These early rounds create the leaf center. Keep tension steady; change color now if desired for variegated center
Round 6 :
(4 sc, 1 inc) x 6 (36)
Round 7 :
(5 sc, 1 inc) x 6 (42)
Round 8 :
(6 sc, 1 inc) x 6 (48)
Round 9 :
1 sc in each st (48)
Info :
We will now build the lobes. Visualize six main lobes separated by small notches. Place stitch markers at round-start and at each 8-st interval to mark lobe centers if helpful
Round 10 :
(5 sc, 1 dec) x 6 (42)
Round 11 :
(4 sc, 1 dec) x 6 (36)
Round 12 :
(3 sc, 1 dec) x 6 (30)
Info :
Start shaping each lobe by working short spike stitches and picots in the next rounds. Spike stitches (insert hook 2-3 rows below) give the raised vein effect
Round 13 :
(2 sc, 1 dec) x 6 (24)
Round 14 :
(1 sc, 1 dec) x 6 (18)
Info :
Fasten off leaving long tail for sewing. Press lightly or block flat; using a small amount of starch will open the lobes. This core creates the raised center base for lobe addition
Leaf Lobe Construction - Repeat for 6 Lobes :
Attach yarn at the marked point where you want the first lobe to sit (at the outer round near where you placed a marker). Each lobe is worked outward in rounds to create a pointed maple shape.
Round 1 :
Ch2, work 1 sc in joining st and 1 sc in next 2 sts, 1 hdc, 3 dc in next st (center point), 1 hdc, 1 sc in next 3 sts, sl st to base (9 sts worked across lobe)
Round 2 :
Turn the work outward, 1 sc in each st across lobe (9)
Round 3 :
(1 sc, inc) x 3 (12)
Round 4 :
(2 sc, inc) x 3 (15)
Round 5 :
1 sc in each st, at tip work picot (ch3, sl st into first ch) then continue back down opposite side: 1 sc in each st (15)
Info :
Work spike stitches down the center of each lobe for vein texture: insert hook two rounds below, pull up a long loop and sc normally. Place 2-4 spike stitches depending on lobe size
Round 6 :
Working into stitches around lobe edge, sc in each st BLO to create a crisp rim (15)
Leaf Edge Finish :
Along the outermost edge of each lobe work a tiny picot every 3 stitches: (3 sc, pic) repeat to tip to create the scalloped points. Fasten off and weave tails.
Info :
Attach each completed lobe evenly around the leaf core: space them so tips fan out. Use pins to hold lobes while sewing. Light blocking shapes lobes to match the photograph's slightly cup-shaped profile
— Medium Maple-Style Leaf (Make 8-10) :
Round 1 :
6 sc in magic ring (6)
Round 3 :
(1 sc, 1 inc) x 6 (18)
Round 4 :
(2 sc, 1 inc) x 6 (24)
Round 5 :
1 sc in each st (24)
Info :
These medium leaves are slightly flatter and use fewer lobe rounds. You can work them as single-piece leaves by shaping 5 lobes instead of 6 for a slightly different silhouette
Round 6 :
(3 sc, 1 dec) x 6 (18)
Round 7 :
(2 sc, 1 dec) x 6 (12)
Round 8 :
(1 sc, 1 dec) x 6 (6)
Info :
Turn outwards and work 5 lobes by joining yarn at 5 equidistant points around the last round. Each lobe: ch2, 3 sc, 1 hdc, 3 dc, 1 hdc, 3 sc, sl st to base
Round 9 :
1 sc around each lobe base to tidy joins (approx 35 total across entire leaf depending on shaping)
Round 10 :
Edge: sc in each st BLO to create neat ridge (35)
Info :
Fasten off and weave in ends. Pin and lightly shape lobes while damp for the best final look
— Small Leaf Variation (Make 10-12) :
Round 1 :
6 sc in magic ring (6)
Round 3 :
1 sc in each st (12)
Round 4 :
Divide into 5 small lobes by joining at 5 points: each lobe ch2, 2 sc, 1 dc, 2 sc, sl st to base
Round 5 :
Finish edge with tiny picots between lobes: (2 sc, pic) x 5 (approx 20)
Info :
Small leaves add scatter and fill negative spaces between larger leaves. Work quickly and avoid stuffing — they are flat appliques
— Tiny Filler Leaf (Make 12-20) :
Round 1 :
Ch4, join with sl st to make a small ring
Round 2 :
Ch1, 6 sc into ring (6)
Round 3 :
Form a tiny leaf: ch2, 2 sc, sl st to base on one side; repeat on opposite side to make twin-lobed tiny leaf
Info :
Tiny leaves are perfect to pack around the vine junctions; make extras as you need
— Berry Cluster (Make many small clusters) :
Round 1 :
6 sc in magic ring (6)
Round 3 :
(1 sc, 1 inc) x 6 (18)
Round 4 :
Work 6 popcorn stitches evenly around: *popcorn (5 dc cluster in same st, remove hook, insert into top of cluster, pull loop to close), sl st next st* repeat 6x (18)
Round 5 :
Ch1, 1 sc in each st around securing popcorn bases (18)
Info :
Alternatively work small bobble clusters by making 5-7 bobbles into a central ring for tight, round berries. Do not overstuff; these are decorative and leave slightly raised
Round 6 :
Fasten off leaving long tail for sewing. Make clusters in shades of plum, mauve and deep red to add depth
— Tubular Vine / Branch (Make 1 long vine, divide into branches) :
Round 1 :
6 sc in magic ring (6)
Round 3 :
1 sc in each st (12)
Round 4-40 :
1 sc in each st (12) — work continuously until vine reaches desired length (approx 40 rounds yields a vine approx 40-45cm depending on yarn)
Info :
Work the vine as a continuous spiral (do not join rounds). When you want a fork or branch, stop and chain out a short stem: ch10-16 then sl st back along chain to attach further along the tube to create realistic forks. For thicker sections optionally increase by (1 sc, inc) to 18 sts for a short stretch and then return to 12 sts
Round 41 :
If you increased earlier for bulge: decrease back to 12 by working (3 sc, 1 dec) x 3 if you had 15 (12)
Info :
To make a more natural twisted vine, after finishing the tube, gently twist and steam-block it while clamping in a slight spiral. Insert optional thin floral wire into the tube before final rounds if you want poseability
— Small Branches & Connectors :
Round 1 :
Ch12, sl st into 2nd ch from hook and along chain to form narrow cord (11)
Round 2 :
Attach cord to vine with sl st, then work 1 sc around cord connection to secure (5-7 sc around connection depending on bulk)
Info :
Use these small cords as short links between vine and leaves or berry clusters. Make many in varying lengths for natural placement
— Finishing Edges & Veins (Worked on finished leaves) :
Info :
Veins are added with surface slip stitch or long spike stitches. Choose a slightly darker or lighter shade for subtle contrast. Work surface slip stitches from leaf base to tip along each lobe, spacing evenly
Round 1 :
Insert hook at base of lobe, pull up loop and work surface sl st along center; at each lobe tip make 2 sl sts to anchor (no stitch count applies)
Round 2 :
For extra texture add tiny picots at outer edge: join yarn and (sl st, ch3, sl st into first ch) every 3-4 stitches along rim
Info :
Surface work does not change stitch count but adds beautiful raised veins; maintain even spacing between veins for visual harmony
— Assembly (Placement & Sewing) :
Info :
Layout the entire arrangement on a flat surface, branch centered. Start by positioning the largest leaves first, then medium and small leaves, and finally berry clusters. Photograph your layout for reference before sewing
Step 1 :
Fold the vine into a gentle S and pin in place on the blocking board. Pin each large leaf so its base sits snug to the vine at visually pleasing gaps (approx every 6-8 cm)
Step 2 :
Sew each leaf base to the vine using a mattress or whip stitch through the long tail left when fastening off; make 6-10 secure passes for large leaves
Step 3 :
Sew berry clusters to short branch cords or directly to vine junctions. Use the cluster long-tail to secure firmly then weave the tail through the vine to hide knots
Step 4 :
Add tiny filler leaves by sewing their bases behind larger leaves and at fork points to hide joins and make organic overlaps
Step 5 :
Weave and trim all remaining tails. If desired, mist the garland lightly with water and shape each lobe, then pin to dry or press with a cool iron using a pressing cloth
Info :
For a more permanent stiffened finish, apply a diluted fabric stiffener or light sugar-water starch and allow to dry pinned in position
— Alternate Leaf Decorative Edge (Optional) :
Round 1 :
On any leaf edge work 1 sc in each st BLO for one round to create a raised ridge
Round 2 :
Picot row: (2 sc, pic) x around each lobe tip to enhance points
Info :
This creates prominent scallops seen on the photographed leaves and accentuates light catch on each edge
— Decorative Tips & Variations :
Info :
Change yarn weight and hook to scale this design up for a larger garland or down for a delicate table runner. Use variegated yarn for marled leaves, or add metallic threads for a festive accent
Info :
Add a loop at each end of the vine (ch12, join) for easy hanging, or slip a length of twine through back for rustic mounting
This autumn leaf garland pattern is a joyful little project that brings nature indoors — each leaf and cluster adds depth and color to a seasonal vignette. Working with fine cotton and small hooks creates crisp, sculptural pieces that sit beautifully on mantels, tables, or window sills. Enjoy the slow, meditative process of making each lobe and berry, then watch them transform into an elegant, handcrafted garland. 🧶🍂✨