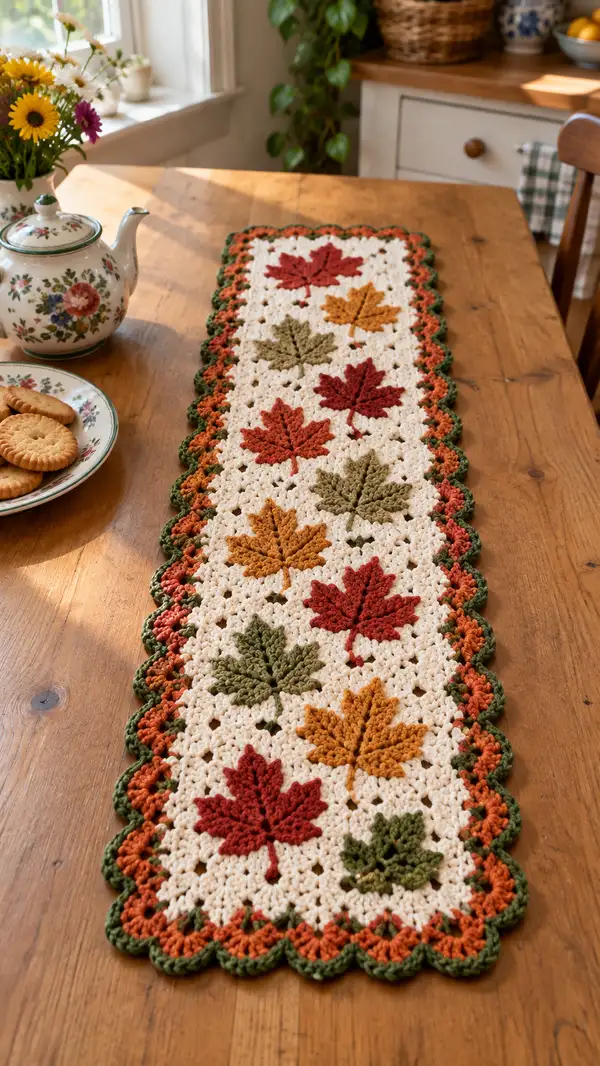
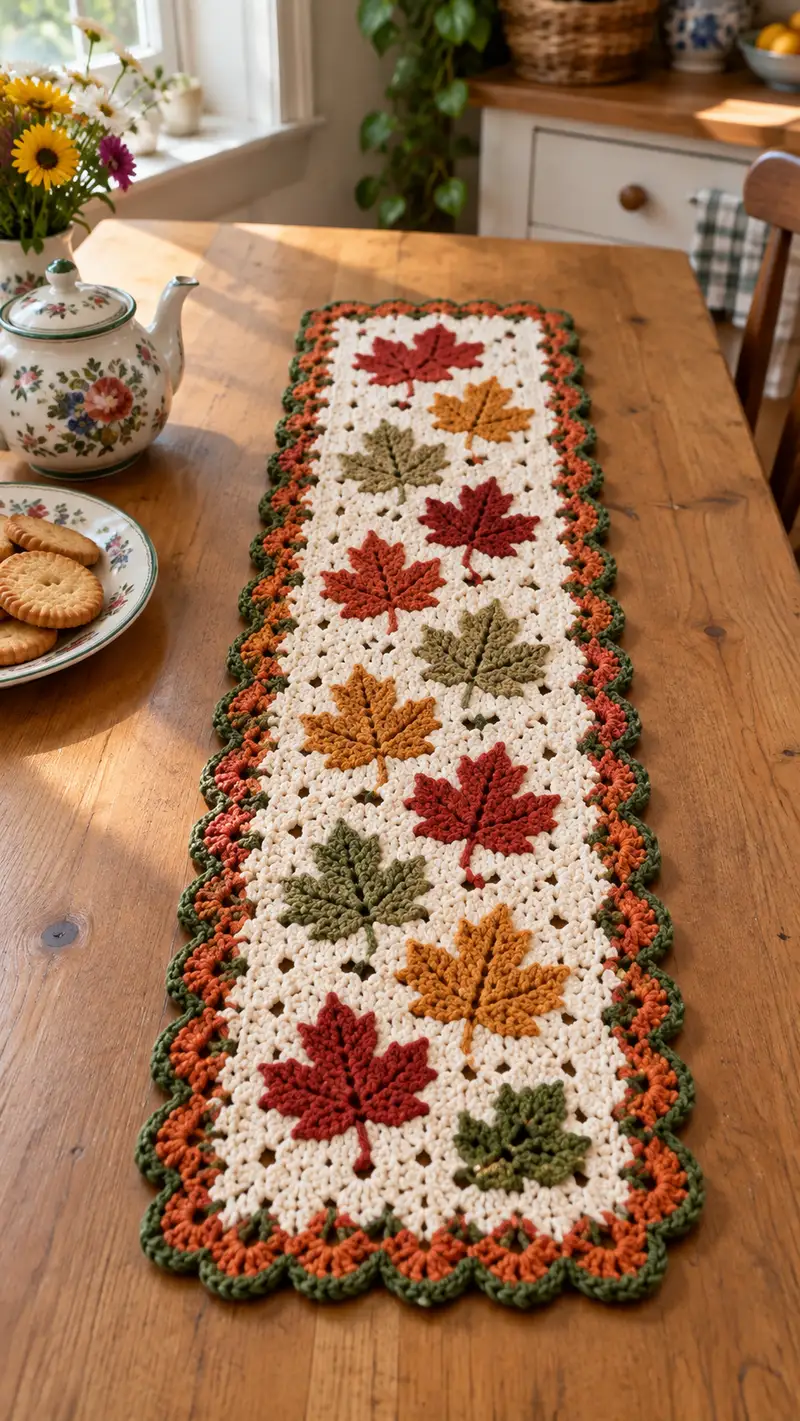
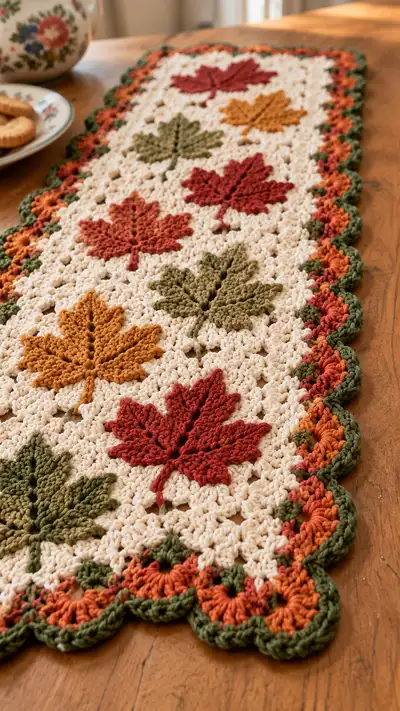
Create a warm, autumnal table runner featuring textured maple leaf appliques on a soft cream granny-style field with a scalloped green-and-orange border. This pattern produces a long, elegant runner perfect for a kitchen or sideboard. The design uses simple V-stitches for the background, a worked-flat maple leaf applique, and a layered scallop edging for a polished finish.
Progress Tracker
0% Complete
— Notes & Gauge :
Info :
This pattern is worked flat in rows for the main panel, then applique leaves are made separately and sewn in place. Gauge is not critical for look but important for final size: 12 dc x 6 rows = 4 inches in V-stitch fabric using 5.0 mm hook and worsted weight yarn. Finished runner as written measures approximately 12" wide x 36" long; adjust foundation chain to change width and length.
— Main Panel (foundation and V-stitch field) :
Round 1 :
Foundation chain: ch 99 (multiple of 6 + 3). This gives a working width that allows two offset columns of leaf placements and a balanced border.
Info :
Mark the 1st, middle, and last chain to help with placement later. If you want a narrower or wider runner, work multiples of 6 and add 3 chains for turning.
Round 2 :
Row 1: Dc into 4th ch from hook (counts as dc), *ch1, skip 1 ch, (dc, ch1, dc) in next ch (V-stitch), skip 1 ch; rep from * across to last ch, dc in last ch. Turn. (Approx 32 V-sts + edge dcs.)
Round 3 :
Row 2: Ch 3 (counts as dc), dc into base of ch3, *ch1, (dc, ch1, dc) into ch-1 sp of previous row, ch1; rep across to end, dc in top of turning ch. Turn. Maintain even V-stitch placement so corners remain straight.
Round 4-11 :
Rows 3-10: Repeat Row 2. Keep tension consistent. After 8 rows you will have a 4" tall band of V-stitch that reads open but stable. (Repeat until you have 8 rows total.)
Info :
Use stitch markers to note every 6 V-sts across to help quickly count placement for leaf appliques. This is helpful when mapping the grid for applique placement.
Round 12 :
Increase band height: Ch 3, 1 dc in next st, *ch1,(2 dc, ch1, 2 dc) into next ch-1 sp, ch1; rep across, ending with 1 dc in final turning ch. Turn. (This creates a slightly puffed row to anchor leaf stems later.)
Round 13-20 :
Rows 13-20: Return to standard V-stitch Row 2 pattern. Work 8 rows straight in V-stitch. This completes a set of 16 rows which we will use as the repeat unit for spacing leaves vertically.
Info :
Measure the runner now; you should have roughly 8-9" of fabric from the start. We will place the first row of leaves after establishing a base border-equivalent of V-stitch rows so leaves don't sit too close to the edge.
Round 21 :
Row 21 (leaf-placement prep): Ch 3, dc in next 2 sts, *ch1, (dc, ch1, dc) into each ch-1 sp across repeating; at the end work dc in remaining sts. Turn.
Round 22-29 :
Rows 22-29: Repeat Row 2 (V-stitch) for 8 more rows. This creates a box of background V-stitch rows where the first horizontal row of leaves will be placed on top. Continue to repeat blocks of 16 rows (Rounds 4-19 and 20-35) as needed to reach the desired runner length. For this pattern make 4 full leaf rows (total background rows approx 64) to accommodate 8 leaves arranged in two staggered columns.
Info :
If your runner length measure differs, you can add or subtract repeats of the 16-row block. Mark the rows where leaves will center — we recommend centering leaves at Row numbers 24, 40, 56 and 72 (approx) for even spacing down the runner.
Round 30-63 :
Continue repeating the V-stitch pattern (Row 2) to create the field: Work Rows 30-63 as even V-stitch rows. This brings the main panel to the correct length with four leaf-placement rows. At the end of Row 63 fasten off and weave in ends. The main panel is now ready for applique placement.
Info :
Block the panel lightly: pin edges straight and steam lightly to relax yarn and even the V-stitch. Allow to dry fully before attaching leaves or working border to prevent skewing.
— Leaf Appliques (Make 8) :
Info :
Leaves are worked flat in worsted weight yarn using a slightly smaller hook (4.0 mm) for crisp lobes. Each leaf is worked from the stem up and then the lobes are formed by short rows and decreases to sculpt the maple shape. Make 8 leaves total: 2 deep red, 2 rust, 2 gold, 2 olive (or mix colors to your preference).
Round 1 :
Ch 13. Sc in 2nd ch from hook and across (12 sc). Turn. This forms a narrow stem base for the leaf; some patterns start with a chain of 11 or 13 for size — ch13 gives a good leaf width.
Round 2 :
Ch1, sc across 12 sc. Turn. (12)
Round 3 :
Ch3 (counts as dc), dc in next 2 sts, tr in next 2 sts, dc in next 2 sts, ch2, sk 2 sts, dc in final 2 sts across; this begins to create an asymmetry for the center lobe. Turn.
Round 4 :
Work short shaping rows to begin forming lobes: Attach yarn at leftmost st, ch1, sc in first 3 sts, hdc in next 2, dc in next 2, ch2, turn. This creates a stepped edge for the first lobe. (Work back-and-forth shaping rather than full-row repeats.)
Info :
Because these leaves are worked in short rows and shaping, keep a close eye on stitch counts along each short row. Use a stitch marker at the first stitch of each new short row to ensure alignment when reversing direction.
Round 5 :
Working along left lobe: ch1, sc in next 4 sts, hdc in next 2, dc in next 3, sl st to center base. Repeat this shaping pattern mirrored on the right side by rejoining yarn at the right edge and working the same short rows in reverse, building symmetrical lobes.
Round 6 :
At center: ch3, 2 tr in same st, ch1, skip 1, 3 tr in next st across center to give a raised central ridge. Fasten off color if changing for the next leaf or continue to work edgings in same color. The center ridge gives the leaf a vein-like raised center.
Round 7-12 :
Refine lobes with slip-stitch picot edges and single crochet rounds: Round 7: sc evenly around the leaf edge placing 2 sc in corners to keep the fabric flat. Round 8: (Optional) Work 1 sc, ch2, sk 1, sc to add decorative spacing in the serrations. Round 9-12: Work 3 rounds of sc around, decreasing slightly near the tip to create pointed lobes. Fasten off leaving long tail for sewing (approx 10-12" tail).
Info :
If you prefer a flatter applique, omit rounds 6-8 and simply sc around. For more texture, use BLO on round 7 to create a raised ridge at the edge.
Round 13 :
Stem: Reattach yarn at base center, ch 10, sc back along chain to create a short stem. Fasten off and weave tail through the base of stem for security.
Info :
Make 8 leaves following the same instructions. Keep all leaves consistent in size by maintaining the same tension and hook size for each. Block leaves lightly by pinning flat and spritzing with water if edges curl.
— Leaf Alternative (Detailed 22-step maple shape) :
Round 1 :
Ch 11. Sc in 2nd ch from hook and across (10). Turn.
Round 2 :
Ch1, sc in first 3, hdc in next 2, dc in next 2, tr in next 1, tr2tog across top of the short row to create tip. Turn. (This is an alternate method for a slightly narrower, more pointed leaf.)
Round 3 :
Mirror the short rows to the other side to build symmetry: Reattach at opposite edge and repeat round 2 shaping. Fasten off and sc around as in main leaf to tidy edge.
Info :
Either leaf method (the 13-chain or 11-chain) yields nicely sized maple leaves; choose one and make all 8 identical for consistency.
— Placement Layout :
Info :
Mark positions for 8 leaves: two offset columns of four leaves each. Measure across the width and place the left column center at 1/3 width and the right column at 2/3 width. Vertically, place leaves centered on the rows previously noted (approx Rows 24, 40, 56 and 72 of the panel) ensuring even top and bottom margins. Use pins to pin leaves in position before sewing.
Round 1 :
Pin the first leaf in place aligning its stem with the V-stitch intersection in the background. Leave about 2-3 V-stitch spaces between leaves horizontally for balanced breathing room.
Info :
Sew each leaf using ladder stitch or whip stitch through the rounded border rounds only, avoiding sewing through the central decorative ridges; this keeps the texture visible and prevents flattening the leaf's raised veins.
— Joining Leaves to Panel :
Round 1 :
With matching yarn tail and yarn needle, sew the leaf by working long running stitches along the underside edge of the leaf to attach to the background V-stitch spaces. Use the long tail left when fastened off; weave the tail through the background V-stitch holes rather than through dc posts to hide the tail.
Round 2 :
Sew the stem last: insert the tail up into the base of the leaf and then into the underlying ch-1 sp where the stem should meet the background. Tie a secure knot on the wrong side and weave the tail 3-4" through the fabric before trimming to secure.
Info :
For a nearly invisible attachment, use a matching sewing thread in a complementary color to tack each leaf down, then use yarn to secure edges. Pin frequently and stitch with small, even stitches for a neat finish.
— Scalloped Border (3-row layered scallop) :
Round 1 :
Prepare to work border all the way around the panel. Reattach forest green at one corner: join with sl st into any ch-1 sp near the corner, ch1.
Round 2 :
Round A (green base): *sc evenly around the edge placing approx 1 sc per row-end and 3 sc in each corner to avoid pulling; work 2 sc in each V-stitch turning space. Join with sl st to first sc. This gives a neat solid base for the scallops. Total st count will vary; work evenly to avoid puckering.
Info :
When working around a rectangular piece, increase slightly at corners (3 sc) and reduce slightly along long edges if needed to keep the border flat. Count total stitches on one long edge and replicate on the opposite edge for symmetry.
Round 3 :
Round B (orange scallops): Join burnt orange in the first sc. *Ch3, 7 dc into next sc (or space of 3 sc), sl st in next sc; rep around to form scallops. Work 7 dc shells every 5-6 sc depending on your stitch count so that 7-dc shells sit evenly around. Join with sl st to first dc of first shell.
Round 4 :
Round C (green scallop trim): Join forest green into the top of any shell. Ch1, *[sk 3 dc of shell, sc in sl st between shells, ch3, sc in sl st], rep to create a scalloped picot ridge sitting between orange shells. This gives a layered two-color scallop effect.
Info :
If shells bunch at the corners, reduce dc in the corner shells to 5 dc instead of 7 to keep fabric flat. Adjust counts slightly but keep symmetry on all four corners.
Round 5 :
Optional Round D (final edge finish): Work a reverse single crochet (crab stitch) in green around the outer edge for a rope-like finished edge. This adds structure and a slightly twisted finish to the scallop tips. Join and fasten off; weave in ends neatly on the back.
Info :
Block the entire runner lightly after border is complete; pin scallops to the desired shape and steam gently, then allow to dry while pinned so scallops hold shape.
— Finishing Touches & Variations :
Round 1 :
Embroidered Veins: Using contrasting thread or yarn in darker shade, add a few embroidered veins to the leaves by using a simple surface slip stitch or back stitch along the central ridge and branching off slightly into the lobes. Keep stitches shallow so they read as veins not bulky cord.
Round 2 :
Optional Beads: For a tiny bit of sparkle, attach a few small seed beads near the leaf bases with invisible thread. This is purely decorative and should be secured tightly if runner will be used frequently.
Info :
Cleaning: Hand wash gently in lukewarm water with mild detergent and lay flat to dry. Do not wring or machine wash to preserve scallop shape and applique attachment.
Round 3 :
Storage: Store flat or gently rolled to prevent scallops from crushing; avoid heavy stacking on top of the runner to preserve shape.
This autumn maple leaf runner brings instant cozy charm to your table with its textured leaves and layered scalloped border. Working the V-stitch field is meditative, while applique and edging allow you to slow down and add thoughtful detail. The finished piece is both decorative and practical — a seasonal favorite you'll pull out every year. 🍁🧶 Make one for your own home or as a thoughtful, handmade gift.