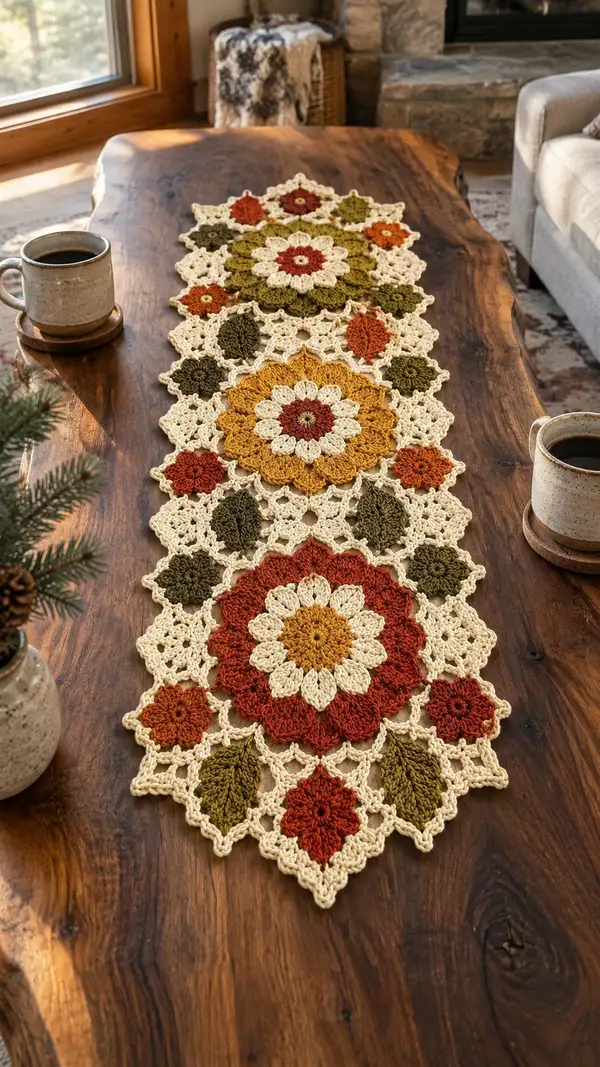
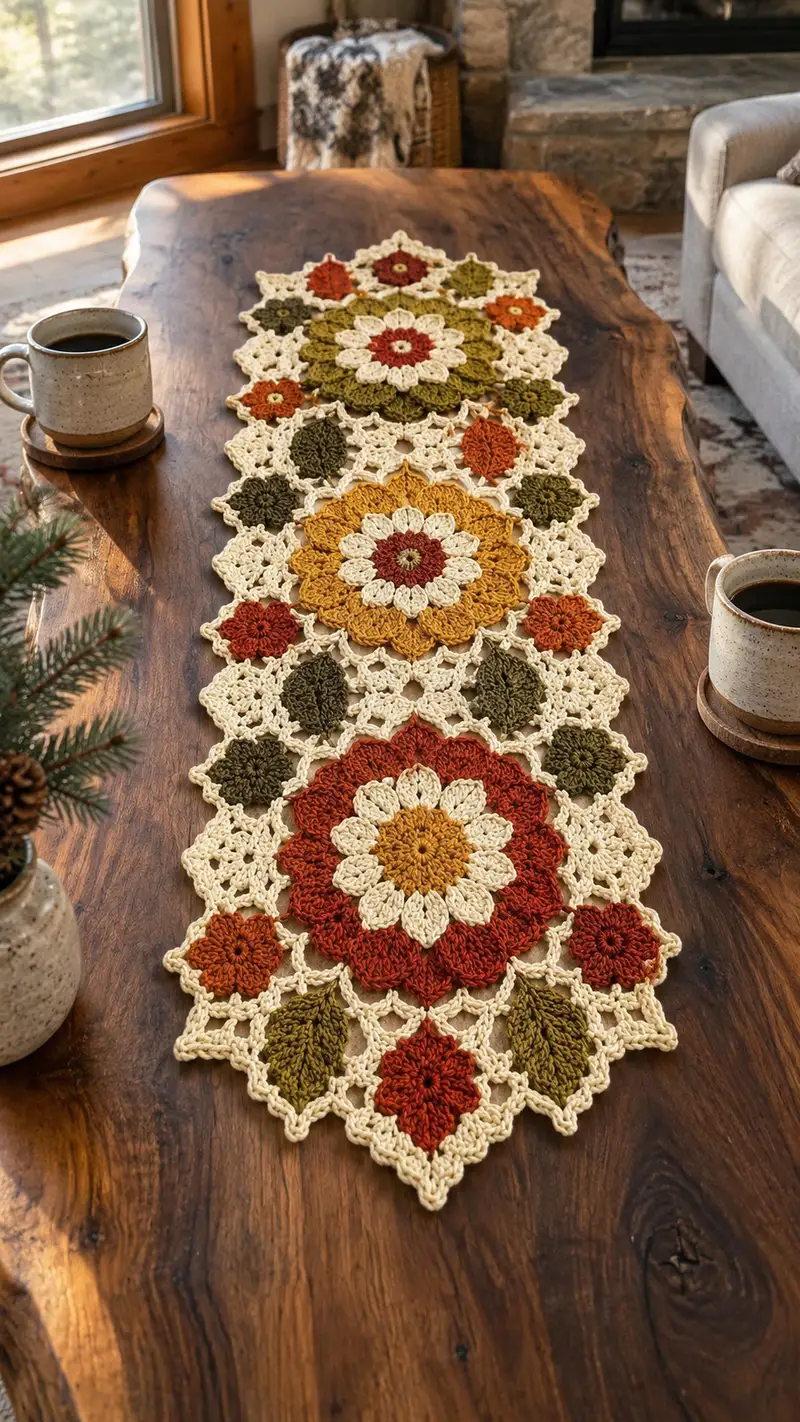
This elegant table runner features three large floral medallions linked by delicate lace connectors and leafy motifs in warm autumn tones. Made with cream, rust, mustard, olive and burnt orange yarns, the runner creates a cozy, vintage-inspired centerpiece. The layered petals and textured leaves add depth while the openwork lace gives it a light, airy feel. Perfect for fall decor, holiday tables, or as a year-round rustic accent.
Progress Tracker
0% Complete
— Notes & Gauge :
Info :
Gauge is not critical for motif patterns but maintain consistent tension so motifs match size. With worsted weight yarn and 4.0mm hook a finished large medallion measures approximately 12-13 inches across; adjust hook or yarn weight to change size. Block motifs flat before joining for best results.
Info :
Throughout the pattern the motifs are built in rounds. Use stitch markers for round starts and keep counts accurate. All rounds are worked in continuous rounds unless noted 'join and fasten off'. When changing color, finish the last stitch of the round with the new color, or carry the yarn where instructed.
— Large Floral Medallion (Make 3 - Colors: rust, mustard, olive) :
Round 1 :
6 sc in magic ring (6)
Round 3 :
(1 sc, 1 inc) x 6 (18)
Round 4 :
(2 sc, 1 inc) x 6 (24)
Round 5 :
(3 sc, 1 inc) x 6 (30)
Round 6 :
(4 sc, 1 inc) x 6 (36)
Round 7 :
(5 sc, 1 inc) x 6 (42)
Round 8 :
(6 sc, 1 inc) x 6 (48)
Info :
Change to the main petal color (rust/mustard/olive) at the end of Round 8. Fasten the new color onto the last stitch of Round 8 with a sl st or by finishing the stitch using the new color to have a cleaner join.
Round 9 :
1 sc in each st (48)
Round 10 :
1 sc in each st (48)
Info :
Rounds 9-10 build a stable base for the petal clusters. Place a removable marker at the first stitch of Round 11 to keep track of petal beginning points.
Round 11 :
(3 sc, ch 3, 3 dc cluster in next st, ch 3, sl st in next st) x 12 (48 base sts, 12 petal bases)
Info :
The format above groups the 48 base stitches into 12 petal locations. Work the 3 dc cluster into the next single stitch to create each petal pocket. After completing Round 11 you will have 12 defined petal arches.
Round 12 :
Join yarn in the first ch-3 arch, ch 1, (sc, hdc, 5 dc, hdc, sc) in each ch-3 arch around; sl st to first sc to join (12 petals, decorative clusters)
Info :
This round uses cluster petals worked into the ch-3 arch from Round 11. The big 5-dc petal creates a full layered petal look. Keep tension even; use stitch marker after every 3 petals for counting if needed.
Round 13 :
Ch 2 (counts as hdc), *skip to space between petals, 3 dc cluster in space, ch 2, sl st in top of petal center; rep from * around to make 12 shell connectors (do not change base count)
Round 14 :
Change to cream/neutral. In each shell connector from Round 13 work: ch 3, (1 dc, ch 2, 1 dc) into connector spaces to create lace bridges; sl st to join. (This creates an outer ring of 12 lace bridges)
Info :
Changing to cream gives a crisp outline to the medallion. Carrying the yarn is possible if making several medallions in the same color to save ends—carry along the back of stitches and crochet over when possible.
Round 15 :
Ch 3, *in the ch-2 space of each lace bridge work (2 dc, ch 2, 2 dc), ch 1, sl st into next space; rep from * around (12 shells) - creates larger scallops (no base stitch count change)
Round 16 :
1 sc in each st and in each ch-2 space around to tidy the shell edges (counts vary depending on how you count shells; approximate visual evenness—maintain the pattern symmetry)
Info :
If you prefer a more textured petal, substitute the 2 dc clusters in Round 15 with (hdc, 3 dc, hdc) for puffier scallops. Keep the stitch architecture consistent so later joining aligns.
Round 17 :
Ch 4 (counts as tr), *into central ch-2 of each large shell work (3 tr, ch 3, 3 tr), sl st into next sc; rep from * around to create 12 tall petals (visual layered petals)
Round 18 :
Switch to the accent color used for the medallion center (small round of burnt orange or rust as seen). Join with a sl st to the top of one tall petal, ch 1, sc evenly in top of each tall petal and in foundation stitches between petals to create a decorative ridge (count depends on how many top loops exist - evenly distribute).
Round 19 :
Ch 2, (1 hdc, ch 2, 1 hdc) in each top petal space to form small 12 decorative points, sl st to join.
Info :
At this stage you should have a large layered medallion with 12 major petals and an accent center. Block the medallion flat to open the petals fully before moving on to the joining rounds.
Round 20 :
Working in cream, chain into spaces between petals and work a lace join round: *(ch 4, sc in next space, ch 2, sc) into each interpetal space to create diamond connectors) around; sl st to join. This creates points used later for joining medallions to connectors.
Info :
Fasten off and weave in ends. Make three of these large medallions (one in rust, one in mustard, one in olive as shown in photo). Make all medallions identical in size by using the same tension and hook.
— Medium Flower Motif (Make 3 - center small flower connectors) :
Round 1 :
6 sc in magic ring (6)
Round 3 :
(1 sc, 1 inc) x 6 (18)
Round 4 :
Change to cream - 1 sc in each st (18)
Round 5 :
(2 sc, ch 3, sl st in 3rd sc) x 6 to form 6 small arches (18 base sts)
Round 6 :
Into each arch work (sc, hdc, 5 dc, hdc, sc) to create 6 mini petals (maintain evenness)
Info :
These medium flowers sit between large medallions to fill gaps and add color variety. Make three in accent colors that echo the medallion centers (use burnt orange, rust and mustard small centers).
Round 7 :
ch 2, sc in each top of petals around to tidy (count approximate 36-42 depending on petal distribution)
Round 8 :
ch 3, *in each space between petals work (2 dc, ch 2, 2 dc) for small shells; sl st to join (6 shells)
Info :
Fasten off leaving a long tail for crocheting the motif into the runner. These medium motifs are lighter and help maintain the runner length and rhythm.
— Small Flower Motif (Make 12 - tiny round accents) :
Round 1 :
6 sc in magic ring (6)
Round 2 :
ch 2, (2 dc, ch 2) in each st around to make 6 tiny petals; sl st to join
Info :
Small motifs are worked quickly and used as corner accents between lace diamonds and leaves. Make them in burnt orange and deep rust for contrast.
— Leaf Motif (Make 12 - olive leaves) :
Round 1 :
ch 8, sc in 2nd ch from hook, hdc, dc, hdc, sc, sl st to form leaf tip; turn and work along opposite side: sc, hdc, dc, hdc, sc in remaining chains; sl st to base. (Leaf counts variable - shape created by worked stitches)
Round 2 :
In the center of leaf work 3 sc, ch 1, 3 sc to create raised midrib; sl st to join. Fasten off leaving long tail for sewing.
Info :
The leaves are made flat; block them on a small mat if you want a more defined curved leaf. Use olive yarn and slightly tighten the last round to make a natural cupped shape.
— Diamond Lace Connector (Make 24 - cream connectors used between motifs) :
Round 1 :
6 sc in magic ring (6)
Round 2 :
(1 sc, 1 inc) x 3 to make 9 (9)
Round 3 :
(2 sc, 1 inc) x 3 (12)
Round 4 :
Ch 3, *skip 1 st, sc in next, ch 3; rep until you have 4 arches around; sl st to join forming a small diamond lattice (use 12 base sts as anchor points)
Round 5 :
Into each ch-3 arch work (sc, ch 2, sc) to form small picot-like connectors. Fasten off leaving a tail for joining.
Info :
These small diamond connectors make the open lace between medallions and leaf motifs. Make plenty as the runner requires many small connectors for the delicate lattice layout.
— Decorative Border Round for Medallions (Optional extra edging for each large medallion) :
Round 1 :
Attach cream color to the outermost chains of the medallion, ch 1, sc evenly around outer edge and in all ch-2 spaces (count will vary by motif - keep even tension)
Round 2 :
*In the outermost ch-2 spaces work (sc, ch 2, sc), in single scs work sc; rep to end to create a scalloped edge. Sl st to join and fasten off.
Info :
This border gives a consistent edge to each medallion and ensures a uniform look when joining medallions and connectors. Work this border on all large medallions before joining for easier alignment.
— Assembly & Joining Motifs into Runner :
Info :
Lay out all motifs in the runner order: from one end: small diamond rows shaping points, then a large medallion (rust), lace connectors with leaves and small flowers, mid medallion (mustard), repeat, last large medallion (olive). Use the photo layout for spacing inspiration. Pin motifs to a blocking mat in the exact positions before joining.
Joining Step 1 :
With cream yarn and 4.0mm hook, join motifs using crocheted slip-stitch joins: align the edges of two adjacent motifs and work sl st through both motif loops in the points indicated by the lace connector pattern to form an invisible seam. Work one connector at a time and pin prior to joining.
Info :
When joining medallions to diamonds and leaves, ensure each diamond point sits centered between medallion scallops. Use the outer scallop peaks from the medallion as anchor points; connect only where motifs meet visually to avoid pulling the medallion center out of shape.
Joining Step 2 :
For seams requiring extra strength (areas under plates or heavy use), use yarn needle and whip stitch to reinforce the crochet sl st join from the reverse side. This keeps the top surface tidy while giving a stronger hold.
Joining Step 3 :
Use small flower motifs to fill gaps by sewing them into the diamond lattice using a whip stitch through the center and two adjacent stitches to secure. Place leaves along the outer edge and stitch through the leaf base and a neighboring diamond stitch for a natural look.
Info :
Weave in ends after each join so they do not get in the way when completing subsequent joins. Block the runner once fully assembled to relax joins and give an even flat finish.
— Alternate Join: Crochet Seam Using Picot Points :
Round 1 :
Join two motifs at a point: with right sides up, attach with sl st through both motifs, ch 3, sl st into next anchor of both motifs, ch 3; repeat to make small picot-led join. Fasten off and weave tail.
Info :
This decorative join shows a visible tiny chain point between motifs and can be used to echo the lace pattern in the medallion edges. Choose this method for top-edge visibility or simple sl st for hidden seams.
— Finishing Border for Runner (Final edging around the entire assembled runner) :
Round 1 :
With cream yarn and 4.0mm hook, attach at any corner point, ch 1, evenly sc along the outer edge of the assembled runner, placing 1 sc in each outer loop and 1 sc in each outer ch-2 space; work extra sc in points to maintain flatness (total stitches will vary by finished runner size)
Round 2 :
*In every 4th sc work (sc, ch 2, sc) to form a small scallop; otherwise sc in sc. This creates a subtle scalloped border that ties together medallions and connectors.
Round 3 :
Work 1 more round of sc to even out edge, decreasing or increasing slightly at corners to keep runner flat. Fasten off and weave ends through the border on the reverse side.
Info :
Blocking the completed runner is important: pin the runner flat to desired measurements and spray-block or wet-block lightly, stretching each scallop and connector evenly. Let dry fully before removing pins.
— Tuning the Pattern: Make Runner Longer or Wider :
Info :
You can extend the runner by adding repeating sets of: (large medallion + 6 diamond connectors + 3 medium flowers + leaves + small flowers). To make it shorter remove one medallion set. Keep symmetry by removing or adding full medallion blocks rather than single connectors.
Info :
If you prefer a table mat instead of a long runner, make a single central medallion and surround with diamonds and leaves to create a round or oval doily-style centerpiece.
— Care Instructions :
Info :
Hand wash gently in cool water with mild detergent. Lay flat to dry, reshaping while damp. Avoid machine washing to keep yarn and joins from stretching. Iron on low with protective cloth if necessary.
Completing this Autumn Blossom Table Runner is so rewarding — each medallion and connector stitch builds into a warm, layered centerpiece you'll be proud to display. The combination of textured petals and airy lace creates depth and movement across your table. Enjoy the satisfaction of blocking and joining motifs into a long, elegant runner that celebrates seasonal color and handmade detail. 🧶🍂 Share your finished runner with friends or keep it as a lasting piece of cozy decor. Happy stitching! 🎨✨