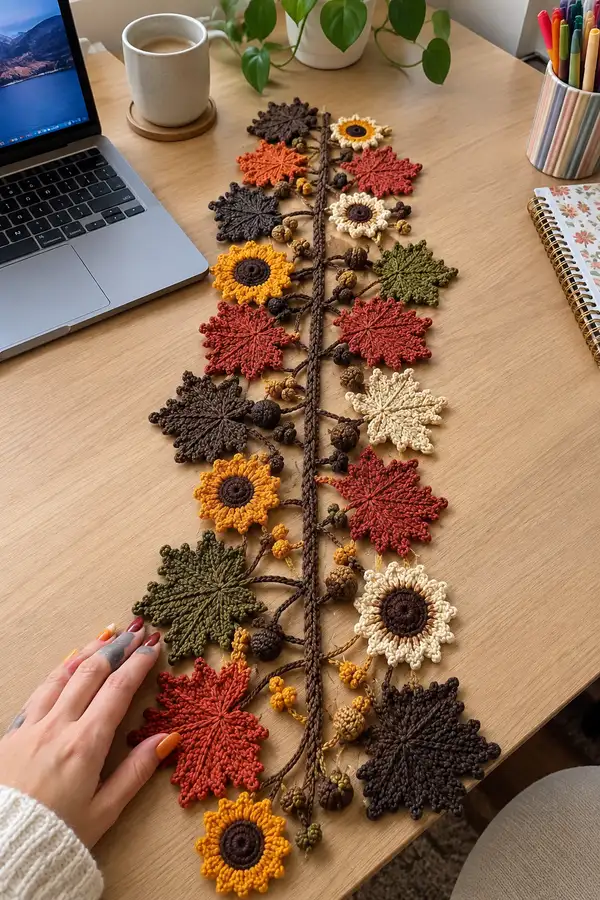
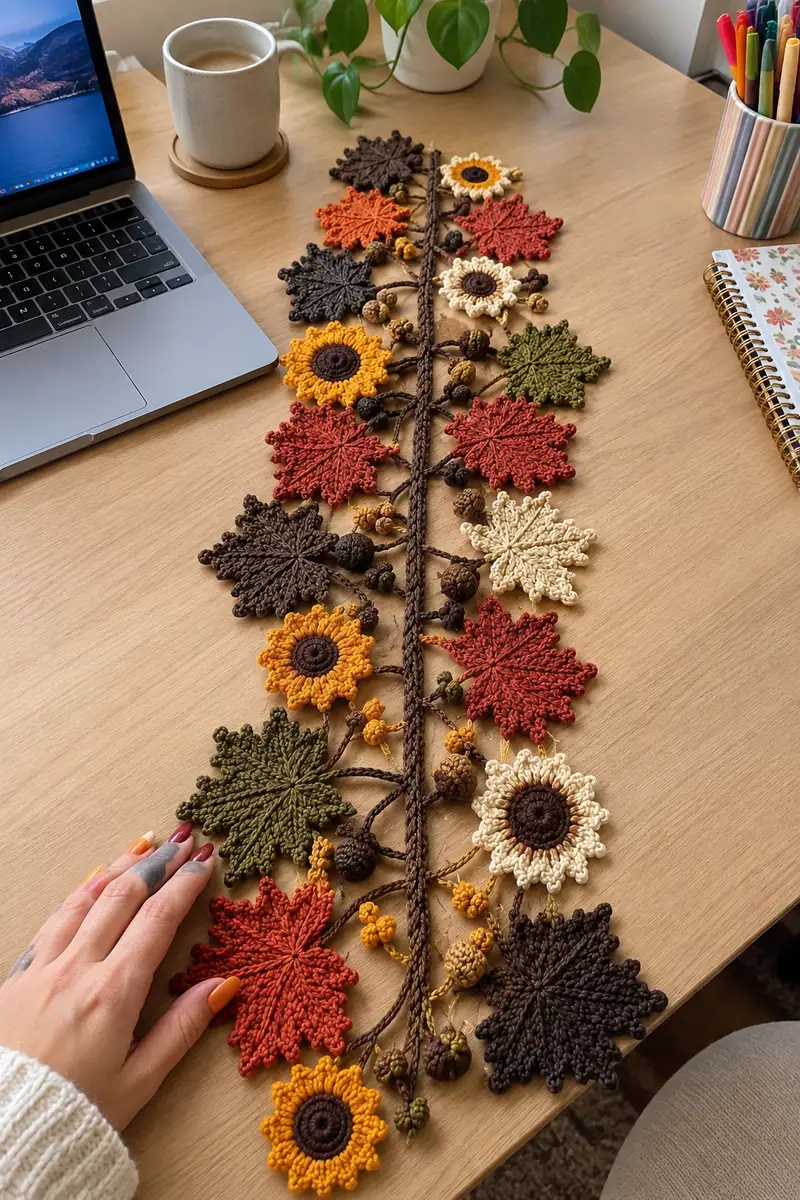
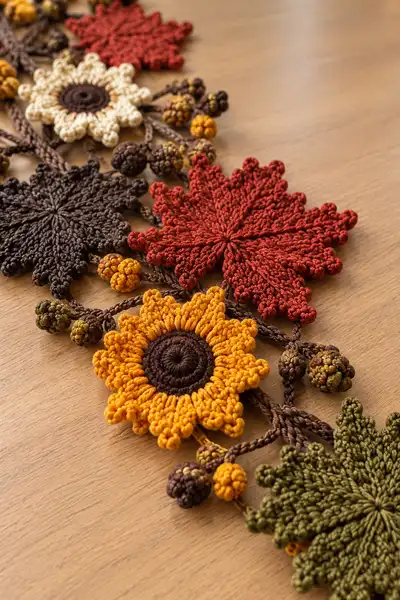
Bring warm fall charm to your home with this autumnal garland featuring intricately crocheted maple-style leaves, cheerful sunflowers, and clustered berries strung along a braided stem. The runner showcases rich seasonal hues—rust, mustard, olive, chocolate and cream—combined with textured bobbles and picot edges for a natural, handcrafted look. Perfect as a table runner, mantle garland, or doorway swag, this design layers motifs for depth and movement. Detailed shaping and clear assembly instructions make recreating this cozy decoration enjoyable and achievable.
Progress Tracker
0% Complete
— Overview :
Info :
This pattern is written in rounds for motifs and in rows/chains for stemwork. You will make a series of flat leaf motifs, sunflower motifs, and small berry/acorn bobbles, then join them along a long crocheted cord that is braided and twisted to resemble a twiggy stem. The pattern includes frequent Info notes explaining stitch techniques, tension tips, and assembly suggestions. Work tightly with worsted cotton so motifs hold a crisp shape; block motifs lightly if necessary.
— Maple-Style Leaf Motif (Make 8-10 total, assorted colors) :
Info :
These leaves are worked from the center out to create radiating ribs and pointed tips. Each leaf uses a magic ring center followed by rounds of increases to form a circular base, then worked-out radial points using chains and clusters. We use 12 points for the leaf (48 stitches circumference before points). Make 8–10 leaves in mixed colors: rust, olive, cream, dark brown and brick red.
Round 1 :
6 sc in magic ring (6)
Round 3 :
(1 sc, 1 inc) x 6 (18)
Round 4 :
(2 sc, 1 inc) x 6 (24)
Round 5 :
(3 sc, 1 inc) x 6 (30)
Round 6 :
(4 sc, 1 inc) x 6 (36)
Round 7 :
(5 sc, 1 inc) x 6 (42)
Round 8 :
(6 sc, 1 inc) x 6 (48)
Info :
At this point you have a stable circular base with 48 sts. We will create 12 leaf points by grouping every 4 stitches. Keep a stitch marker at the first stitch of Round 9 to avoid drift.
Round 9 :
1 sc in each st (48)
Round 10 :
(1 sc in next 2 st, ch 6, sl st into next st) x 12 around (48 anchors; counts remain 48)
Info :
Each ch6 forms a chain that will be worked back to form a long point/petal. Adjust chain length to change point length — ch6 gives moderate points matching the photo.
Round 11 :
*Work into the first chain of the ch-6: sc, hdc, 3 dc, hdc, sc, sl st into the base anchor (the stitch after the two sc worked previously); sl st into next 3 base sts to the next anchor* - repeat x12. (This creates 12 pointed petals anchored around the circle)
Round 12 :
Working around the outer edges of each petal: into each petal top work (sl st, ch1, picot, ch1, sl st) to form a small picot edging; maintain anchors on base so final stitch count on base remains 48
Info :
Use BLO on Round 13 to create raised veins. We will work surface slip-stitches later if desired. Fasten off leaving a 20–25cm tail for sewing. Lightly block each leaf flat by pinning to a blocking board, stretching points evenly, and misting with steam from a distance.
Round 13 :
Join in the center of a petal on the BLO of the base: ch1, *(BLO) 1 sc in next 4 base sts, sl st to next base anchor* x12; fasten off (48 anchors remain)
— Spiky/Pointed Leaf Variation (Make 4-6) :
Info :
This variation has narrower, serrated points for visual variety. Use same center rounds 1–8 as maple leaf above to make the circular base (48 sts). Use a shorter chain for points (ch4) and alternate small picot teeth for serration.
Round 1-8 :
Follow Rounds 1–8 of Maple-Style Leaf to make base circle (48)
Round 9 :
1 sc in each st (48)
Round 10 :
(1 sc in next 2 st, ch 4, sl st into next st) x 12 (48 anchors)
Round 11 :
*Work into chain: sc, 3 dc, sc; then at the tip work 3 picot teeth: (ch3, sl st into first ch) x3; sl st into base anchor; sl st into next 2 base sts* x12 (48)
Round 12 :
Working from the back side, sew a loose surface chain along each rib using sl st to emphasize veins; fasten off and weave tail through center for neatness
Info :
Alternate the two leaf styles along the stem to mimic natural variety. Use darker shades for leaves intended to sit behind lighter motifs to add depth when assembled.
— Sunflower Motif (Make 3-4 total) :
Info :
Sunflowers are worked flat from a central brown disc for the seed head, then a round of tall petals in mustard or cream. We use 12 petals around a 30-st base; petals are formed by clusters of trebles/puffs to create fullness similar to the photo.
Round 1 :
6 sc in magic ring with brown (6)
Round 3 :
(1 sc, 1 inc) x 6 (18)
Round 4 :
(2 sc, 1 inc) x 6 (24)
Round 5 :
(3 sc, 1 inc) x 6 (30)
Info :
We will create radial ridges of the center to mimic a seed head by using tight slip-stitch rounds and surface embroidery. Place a stitch marker at the start of Round 6 to keep the round consistent.
Round 6 :
1 sc in each st (30)
Round 7 :
Change to mustard (Info: join mustard yarn with a sl st in any st, carry brown inside or fasten off brown) ch1, *(ch3, 5 dc cluster into next st, ch3, sl st into next st) - this forms one petal per 2 base stitches; repeat around making 15 smaller petals (visual fullness comes from overlapping petals); fasten off mustard and weave ends*
Round 8 :
Optional: For larger petals, rejoin mustard at base of every second base stitch and work (ch2, tr, tr, tr, ch2, sl st) into the top of the cluster, repeat around to build a second layer of petals (30 petal tops but still anchored to 30 base sts)
Info :
After petals are worked, use brown yarn and a tapestry needle to sew small french-knot-like stitches across the brown center (surface embroidery) or work a round of tight sl st in contrasting brown to emphasize the seed head texture.
Round 9 :
With brown, working surface rope: insert hook from front to back at center and pull up a loop, repeat around making 12 surface loops to outline center; weave tail and fasten off
— Small Berry / Acorn Bobble (Make 20-28 small & 8 medium) :
Info :
These clustered elements are small tightly-crocheted bobbles built with puff/bobble stitches or small sphere techniques. They are worked in tight gauge and usually not stuffed. Use a smaller hook (3.0mm) for firmer texture and better roundness.
Round 1 :
6 sc in magic ring (6)
Round 3 :
(1 sc, 1 inc) x 6 (18)
Round 4 :
Working puff-style: *(yarn over, insert hook, pull up loop) repeat 3 more times into same st, yarn over and pull through all loops, ch1 to secure puff* in each of the next 6 sts - this forms 6 small puffs around the bobble; fasten off leaving long tail to sew to stem
Info :
Alternatively you can create a crocheted bead by working additional rounds of sc around the 18-st base to make a medium bobble: Round 4: 1 sc in each st (18), Round 5: (2 sc, inc) x 6 (24); fasten off and close opening with tail if you want a firmer, larger acorn-like bead.
— Acorn Cap Detail (Optional, Make 8) :
Round 1 :
With dark brown, ch4, join to form ring, 10 sc into ring (10)
Round 2 :
(1 sc, inc) x5 (15)
Round 3 :
1 sc in each st (15)
Round 4 :
Switch to lighter brown/olive and work 1 round of picot edging: *(sc, ch3, sl st into base of ch3) in each third stitch* - this forms a textured cap; fasten off leaving long tail to sew cap atop a medium bobble
Info :
Sew caps over larger bobbles to create acorn style elements that add realism. Secure with a few invisible stitches through the cap and base bead.
— Braided Twig Stem and Joining Cord :
Info :
The central stem in the photo is a triple-cord braid made from three crocheted cords (I-cord or long chains with slip-stitch reinforcement) twisted and braided for strength and texture. Make the full stem length first (approx 90–120cm depending on intended display) then pin motifs and sew in place. We'll make three cords and join them at each end with a tight knot and a few sl st to lock the braid.
Cord A - Chain Base :
Chain 220 (or desired length in chains). Turn, sl st into each chain back to start to form a firm cord; fasten off leaving long tail for joining.
Cord B - Chain Base :
Repeat chain 220 and sl st back. (Make Cord C identical.)
Info :
Make cords slightly longer than desired final stem length to allow for braiding shrinkage. Use the same color brown as stems. For extra thickness, use 3-ply twisted cords or two-strand chainwork per cord.
Braid Assembly :
Attach three cords at one end together by overlapping 5cm and securing with sl st and a few invisible sewing stitches. Braid the three cords loosely for the full length (over/under pattern) and secure the other end similarly. Lightly steam to neaten and set the braid shape.
Info :
When braiding, periodically flatten and align so motifs will sit evenly. Use pins on a long blocking board or table to hold the braid in place while you pin motifs.
— Joining Motifs to Stem (Detailed Placement and Steps) :
Info :
Refer to the photo for spacing: motifs are staggered on alternate sides of the braid. Start by pinning the braid flat on the table; pin placement marks where each leaf, sunflower and bobble cluster will attach. Leave 8–10cm between motif centers along the stem to achieve the airy composition shown.
Step 1 :
Pin the first leaf at the desired bottom-most position, with its center approximately 5–6cm from the braid edge so the leaf extends outward. Use straight pins through the leaf center into the stem to hold placement while sewing.
Step 2 :
Sew leaf to braid by hand using a yarn needle and the leaf tail. Run sewing stitches through the base anchors (Round 8 area) and through the braid strands, following the natural curve. Use a ladder-stitch style to make an invisible join and secure with a tight knot; weave the tail into the braid and trim.
Info :
Attach motifs alternately on left and right sides at staggered heights. Add smaller bobbles in groups of 2–3 next to leaves and sunflowers; these should be sewn along small crocheted stems coming off the braid (see below for chain bud stems).
Bud Stem :
From the braid, ch12, join with sl st to braid where the bud should sit, work 6 sc in a small loop to make a short connecting twig, attach bobble at the end with sewing tail; for a cluster repeat 2–3 times grouped close together
Info :
Make the connecting twig slightly flexible by using fewer reinforcement sl sts—this allows buds to dangle naturally. For a more structured twig, chain and sl st back to the braid creating a loop and sewing the loop closed beneath the bud.
— Decorative Joining and Edgework :
Round 1 :
Once all motifs are pinned and sewn, work a decorative edge along the outer edges of motifs where they meet the braid: using brown yarn, with the 3.5mm hook, sl st around exposed braid strands and join with small picots into leaf bases. This does not change motif counts but secures edges and hides raw tails.
Round 2 :
Along the very outer edge of each leaf, add a row of surface single crochets (make about 3–6 sc on each petal depending on width) then a picot every 2–3 sc to match the photo’s scalloped look; trim and weave ends.
Info :
Edgework is optional but gives a finished look and offers extra stability to attachments. Use matching or slightly darker shades for edging to emphasize shape.
— Finishing Touches :
Info :
After all sewing is complete, gently steam-block the entire garland laid flat to settle stitches and relax cord twists. Do not press the braid too heavily; we want the natural texture preserved. Trim all tails and tuck ends into the braid or under motifs for a clean finish.
Round 1 :
Optional: add hanging loops by making a small chain loop at each end: ch10, sl st into braid end, secure and hide tail.
Info :
For transport or storage, roll the garland loosely and place between layers of tissue paper to preserve shape. Re-block when ready to display.
— Tips, Techniques and Variations :
Info :
To achieve the carved-vein look on leaves, use surface slip-stitches or a loose chain embroidered along ribs. Work bobbles tightly and use a smaller hook. Swap colors seasonally—soft pastels for spring, deep reds for winter—or change scale by using thinner yarn and a smaller hook for a daintier runner.
Info :
If you prefer a continuous crocheted stem instead of a braid, chain the full length then work sl st back for one strong cord. You can also attach motifs with small rings or metal jump rings for a mixed-media look.
This autumn garland brings the cozy feeling of fall into any room—rich colors, tactile bobbles, and delicate picot edges come together in a handmade celebration of the season. Each leaf and sunflower is a small moment of craft that, when joined, makes a beautiful long runner perfect for mantels or tables. Enjoy the meditative process of making each motif, and take pride in every stitch that helps create your seasonal decor. 🧶🍁✨