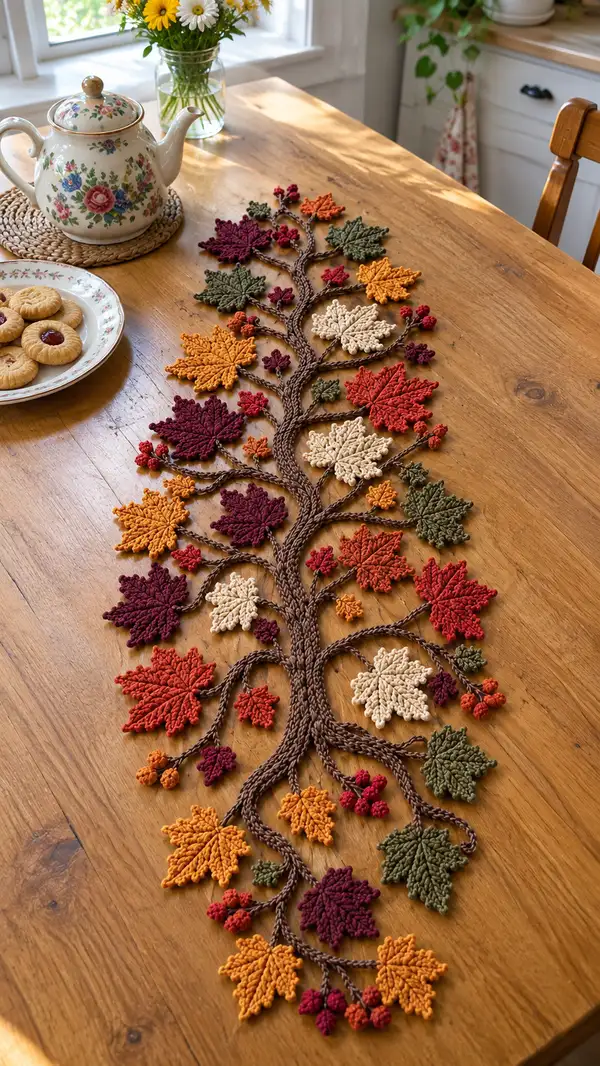
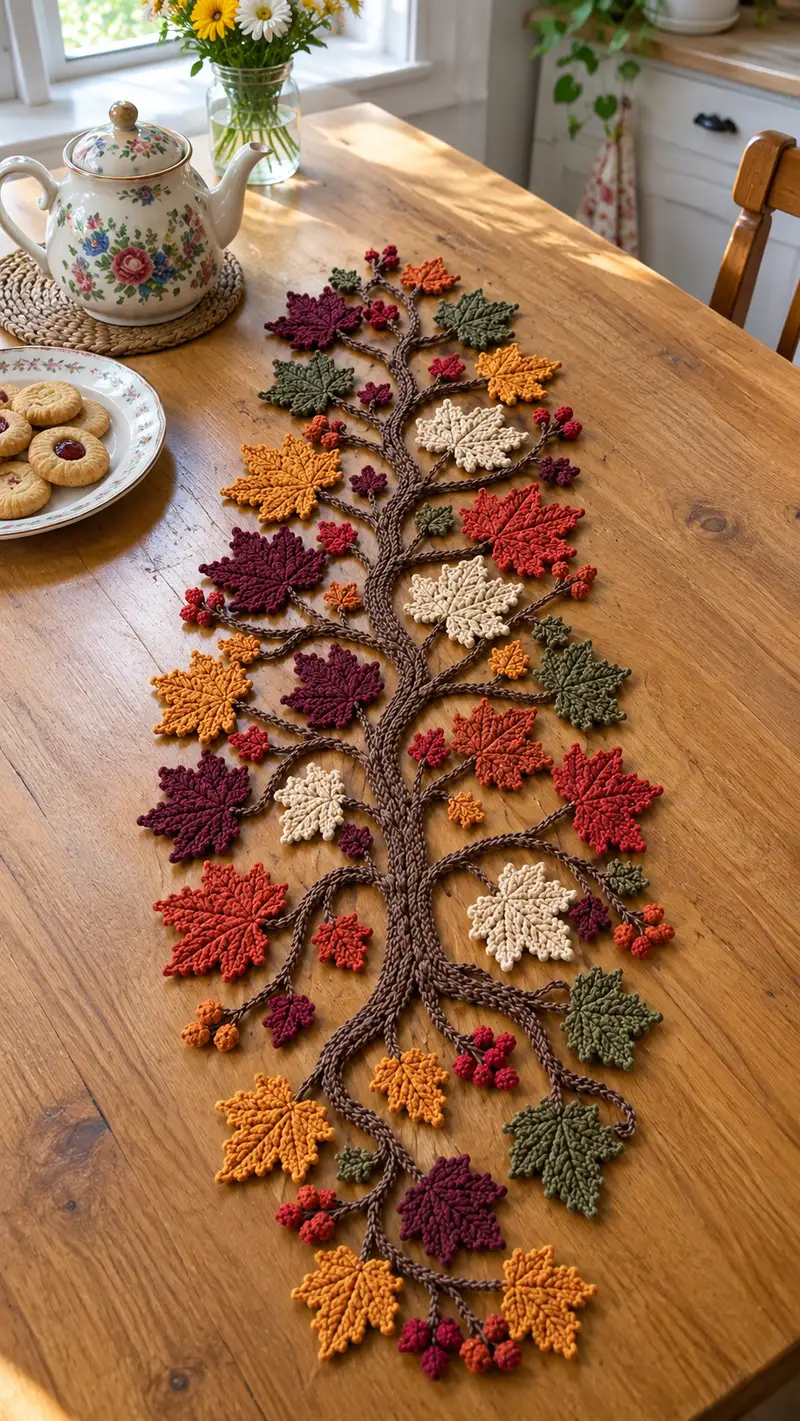
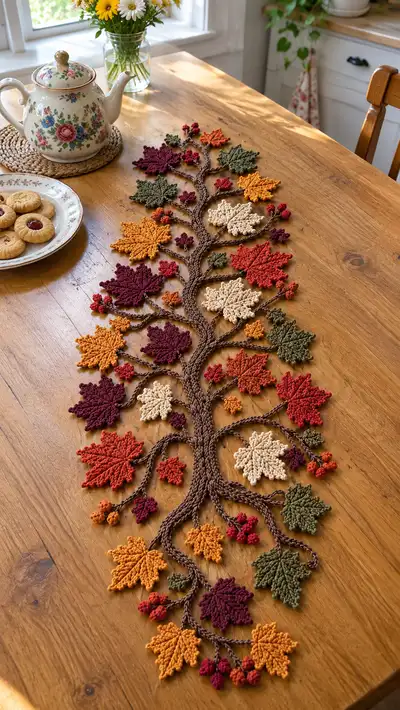
Create a long, graceful autumn branch table runner featuring sculpted maple leaves and tiny berry clusters in warm fall colors. This pattern builds braided trunk cords and individual raised maple leaves worked flat with textured veins, then assembles them into a flowing runner perfect for seasonal decor. Use worsted-weight cotton for crisp stitch definition and arrange leaves in your own layout for a custom centerpiece.
Progress Tracker
0% Complete
— Materials & Gauge :
Info :
Gauge is not critical for this decorative runner, but for consistent leaf size use worsted cotton and a 3.5mm hook. One large maple leaf (worked flat as written) measures approximately 9-10 cm across. Adjust hook to obtain crisp stitches; smaller hooks make crisper leaves and firmer berry spheres.
— General Notes :
Info :
Work leaves flat in rows unless otherwise specified. For tubes/cords work in continuous rounds (spiral) with a stitch marker to mark beginning of round. All counts in parentheses at the end of round. Use long tails for sewing when fastening off—at least 20 cm for leaf stems, 30-40 cm for trunk cords. Add Info sections liberally; follow them for shaping and finishing tips.
— Trunk & Branch Cords (Make 7 cords of various lengths) :
Overview :
The trunk is constructed from multiple narrow tubular cords crocheted in continuous rounds and assembled into a braided trunk form. Each cord is worked in the round with 6 sc in the magic ring then worked even to desired length. Cord counts and lengths below are guidelines; vary lengths to create the organic flowing branch look.
Cord A - Central trunk (longest) :
Round 1 : 6 sc in mr (6)
Round 2-80 :
1 sc in each st around (6) — work rounds continuously until cord measures approximately 60-70 cm. Keep a stitch marker at the start of each round to maintain spiral orientation.
Info :
Make Cord A the longest central piece; keep tension even so cord lies flat when gently stretched. If you prefer a thicker trunk, make additional long cords and braid them together later.
Cord B - Secondary trunk (long) :
Round 1 : 6 sc in mr (6)
Round 2-72 :
1 sc in each st around (6) — work to approximately 55-65 cm length.
Info :
Make Cord B slightly shorter than Cord A. Trim tail leaving 30-40 cm for sewing and attaching to central trunk. Keep cords straight as you work by allowing them to hang freely occasionally to relax the twist.
Cord C - Left branch cord (medium) :
Round 1 : 6 sc in mr (6)
Round 2-56 :
1 sc in each st around (6) — work to approx. 40-50 cm length.
Info :
Make cords in varying lengths for natural branch shapes. Leave a long tail to sew into the trunk; if you need a longer working length for braiding, add an extra 10 rounds.
Cord D - Right branch cord (medium) :
Round 1 : 6 sc in mr (6)
Round 2-52 :
1 sc in each st around (6) — work to approx. 38-48 cm length.
Cord E - Short side cord :
Round 1 : 6 sc in mr (6)
Round 2-40 :
1 sc in each st around (6) — work to approx. 30-35 cm length.
Cord F - Root curl (short) :
Round 1 : 6 sc in mr (6)
Round 2-36 :
1 sc in each st around (6) — make approx. 25-30 cm length.
Cord G - Accent cord (short) :
Round 1 : 6 sc in mr (6)
Round 2-44 :
1 sc in each st around (6) — make approx. 32-40 cm length.
Info :
When multiple cords are completed, braid Cord A, B and C lightly together to form the main trunk. Do not overstretch or flatten; braid loosely then sew down the braid center to secure. Additional cords (D-G) are attached as side branches and roots by sewing and twisting into place.
— Leaf Pattern: Large Maple Leaf (Make 9 or as desired) :
Overview :
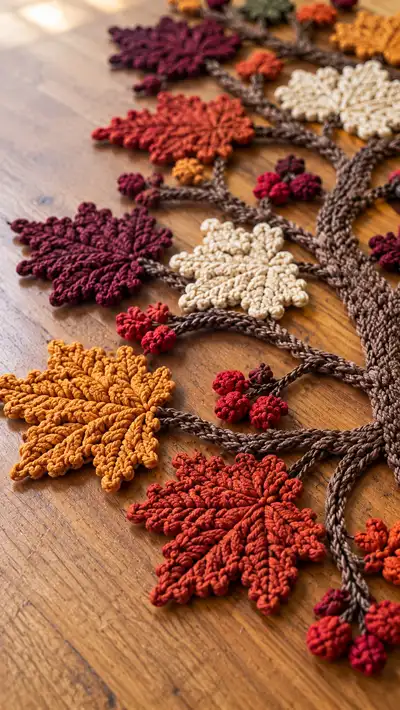
Large maple leaves are worked flat in rows with tall post stitches to create raised veins and picot edging for leaf points. Work in one piece from base to tip, then mirror for the opposite side if required. Counts are for the full single-layer leaf as pictured.
Round 1 :
Ch 13, sc in 2nd ch from hook, sc across (12)
Round 2 :
Ch 1, turn, sc in each st across (12)
Round 3 :
Ch 3 (counts as tr), tr in next 2 sts, hdc in next 3 sts, sc in next 2 sts, hdc in next 2 sts, tr in last 2 sts, ch1 turn (creates slight point) (12)
Info :
This row sets up the central core for working relief veins. Keep edge stitches consistent; small variations will be corrected with post stitches next.
Round 4 :
Ch 1, working on the right side of the leaf: sc into first st, *fpdc around next st (front post double crochet) to create raised vein, sc in next st* rep across to end (12)
Round 5 :
Ch 3, (tr in next st, ch 1, sl st into base to form a small point), continue: hdc in next 3, sc in next 2, hdc in next 2, tr in final 2, turn (12)
Info :
Use fpdc and bpdc (back post double crochet) alternately on rows to create pronounced ribs. The picot-like points are formed with ch1 sl st loops worked into the peaks; you can substitute picot if you prefer a sharper point.
Round 6 :
Ch 1, sc across edge working 2 sc into the picot/point spaces to widen points slightly. (14)
Round 7 :
Ch 1, turn, *bpdc around next st (to form central raised vein), sc next, fpdc next* rep across (14)
Round 8 :
Ch 3, tr into next 2 sts, ch1, sl st to base, hdc next 4 sts, sc next 2 sts, hdc next 3 sts, tr last 2 sts (14)
Info :
At this stage the leaf will start to take shape. Use a light steam or spray with water and shape with your fingers on a blocking mat for slightly cupped leaves. For a sharper maple outline add two small picots at each major lobe in round 9.
Round 9 :
Ch 1, sc across, making (sc, picot, sc) at the end of each lobe point to define corners. (18)
Round 10 :
Ch 1, *fpdc around stitches forming central vein to accent; sc in others* rep across (18)
Round 11 :
Ch 3, tr, tr2tog across the two top sts to form the tip, sl st into base to finish shaping. (18)
Round 12 :
Fasten off leaving 25-30 cm tail for sewing. Use tail to sew leaf stem into place later. If leaf needs more pronounced ridges, embroider along the central vein with duplicate stitch using the same yarn.
Info :
Large leaf worked as above yields a stylized maple approximately 9-10 cm wide. For deeper ridges you can substitute tr front post stitches on alternating rows to build up texture.
— Leaf Pattern: Medium Maple Leaf (Make 10-12) :
Round 1 :
Ch 11, sc in 2nd ch from hook across (10)
Round 2 :
Ch 1, turn, sc in each st (10)
Round 3 :
Ch 3, tr, hdc next 3, sc next 2, hdc next 2, tr last 2, turn (10)
Info :
Medium leaf follows same technique but with fewer stitches; use alternating fpdc and bpdc to create veins on rounds 4 and 5.
Round 4 :
Ch 1, *fpdc around next st, sc next* rep across (10)
Round 5 :
Ch 3, tr, ch1 slip to base to define lobes, continue with hdc and sc as shaped. (10)
Round 6 :
Work two tiny picots at the points where you want sharper tips: (sc, picot, sc) across three major points. Fasten off leaving long tail for sewing.
Info :
Medium leaves measure about 6-7 cm across. These are great to fill spaces between large leaves on the runner.
— Leaf Pattern: Small Leaf / Sapling Leaf (Make 18-22) :
Round 1 :
Ch 7, sc in 2nd ch from hook and across (6)
Round 2 :
Ch 1, turn, sc in each st (6)
Round 3 :
Ch 2, hdc in next 2 sts, sc next 2 sts, ch1 sl st to base to form a tiny point. Fasten off leaving long tail (6)
Info :
Small leaves are decorative and used in clusters near berry stems. You can work one or two tiny front post hdc stitches to add a subtle ridge down the center if desired.
— Berry Cluster (Make 20-30 clusters) :
Overview :
Berries are tiny 3-6 stitch spherical bobbles made by working into a magic ring and using bobble stitches or small sl st clusters. Each cluster typically contains 3-6 berries attached to a short stem.
Berry (single) :
Round 1 : mr, 6 sc in ring (6)
Round 2 :
(work 2 sc in next st) x 6 (12)
Round 3 :
Working continuous rounds, 1 sc in each st (12)
Round 4 :
Work 6 bobble stitches around evenly spaced: *yarn over, insert in st, draw up loop, yo draw through 2 loops* repeat 3 times, finish bobble by pulling through and sl st to secure, sc in next 2 sts; rep to make approximately 6 tiny bumps to shape sphere. (approx 12)
Round 5 :
Fasten off leaving 15-20 cm tail. Use tail to sew berries into tight clusters of 3-6 berries. Add a short sc stem by working 6 sc in mr for a very short cord or by chaining 6 and sl st to base for a stem.
Info :
Insert a tiny amount of fiberfill into the berry before closing for a rounded shape. Use smaller hook (3.0-3.25mm) for firmer berries if using cotton yarn.
— Twisted Stems (Make many) :
Overview :
Twisted stems are formed by making a short narrow cord and twisting it into a spiral for a natural look. Work a narrow tube or i-cord and twist along its length then steam lightly to set the twist.
Cord method :
Round 1 : 6 sc in mr (6)
Round 2-30 :
1 sc in each st around (6) — work to desired stem length (approx 6-15 cm depending on placement)
Info :
Before finishing, lay the cord flat and give it a gentle twist with your fingers to form a spiral. Pin into shape and lightly steam to set. Sew one end to the trunk and the other end to leaf bases or to berry clusters.
— Small Decorative Accents (Tiny leaves & filler berries) :
Mini Leaf :
Round 1 : ch 5, sc 4 across (4)
Round 2 :
Ch1, sc across, ch1 sl st to base to form tiny point, fasten off, leave tail for sewing.
Mini Berry Cluster :
Make three 6-sc berries as above and sew together with tails to form a cherry cluster. Fasten off leaving long tails for placement.
Info :
Use mini filler leaves to create density around large leaves; cluster berries near leaf junctions to imitate natural fruiting bodies.
— Assembly Prep :
Info :
Before sewing any pieces together, lay out trunk cords on a flat surface in the orientation you'd like for the final runner. Arrange leaves in an appealing balance of colors and sizes. Pin cords lightly with sewing pins so the overall silhouette looks natural and flowing. Take photographs of the layout to use as reference during sewing.
Info :
Trim extra long tails to about 30 cm for trunk cords and 20-25 cm for leaves and berries. This gives room to weave through the trunk without running out of yarn mid-join.
— Attaching Branches to Trunk :
Step :
Position smaller branch cords (D-G) where you want offshoots. Using the long tail from each cord, sew the cord to the underside of the main braid with mattress/whip stitch in several passing rows to secure. Leave tips free to curl as roots or branch ends.
Info :
Sew through the central braid and back into the branch cord so stitches are hidden. Make at least 6-10 secure passes for each branch to prevent shifting during use.
— Attaching Leaves & Berry Clusters :
Step :
Use the long tail left on each leaf to sew to a twisted stem or directly onto the trunk: insert tail through the trunk cord from back to front and then through the leaf base several times, pull snug and tie off inside the trunk braid if possible. Hide knots by weaving back into trunk cord.
Info :
Attach leaves in layers: larger leaves first, medium leaves next, then small leaves and berries. Rotate leaves slightly so edges are not all facing the same direction — this creates a more organic layout.
Step :
Sew berry clusters near leaf junctions using the berry tail as anchor. For cluster stems, insert the stem end into the trunk and secure with several whip stitches. Shape berry clusters with fingers and add a tiny dab of fabric glue if needed for extra security.
Info :
Step back occasionally and view the layout from across the table; move elements until shapes and colors have pleasing rhythm. Symmetry is optional — asymmetry often looks more interesting for a natural branch runner.
— Finishing Touches :
Info :
Weave all remaining tails into the trunk core so they are not visible. Trim excess. Lightly steam-block the assembled runner on a flat surface, shaping leaf lobes with fingers. If using cotton, steam will set the shapes and slightly flatten cords to help the runner lie evenly on the table.
Info :
If you plan to store the runner, roll loosely and store flat to avoid crushing picots. For laundering, spot clean only; cotton yarn colors may bleed so test a hidden yarn tail first.
— Variations & Scaling :
Info :
To make a wider runner, add additional parallel braided cords and mirror leaves on both sides. To make a longer runner, simply increase the number of trunk rounds (cords) or add extra cord segments sewn end-to-end before braiding. For a softer look, use a softer acrylic yarn but expect less pronounced veins.
Info :
Color tip: alternate warm and cool-toned leaves for contrast; place cream or light leaves near the center to brighten the middle of the runner, as pictured.
This autumn branch runner brings the warmth of the season to your table with hand-made leaves and berries in rich fall hues. Each piece is made individually and sewn into a flowing trunk, making every runner unique and full of hand-crafted charm. Arrange it as a centerpiece or drape across a sideboard — the textured veins and braided trunk add instant seasonal atmosphere. 🧶🍂🌾