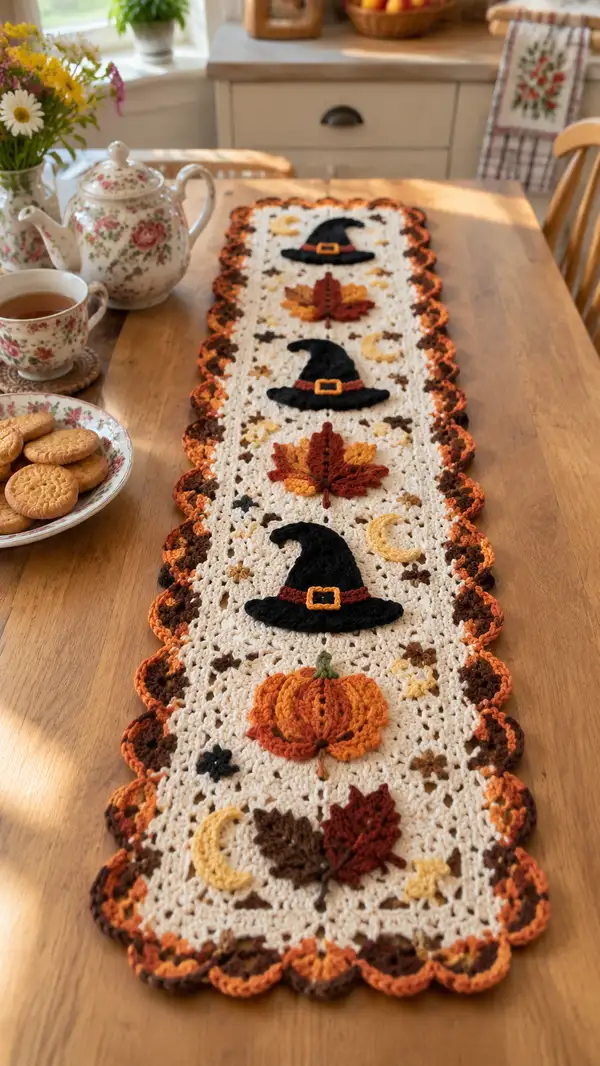
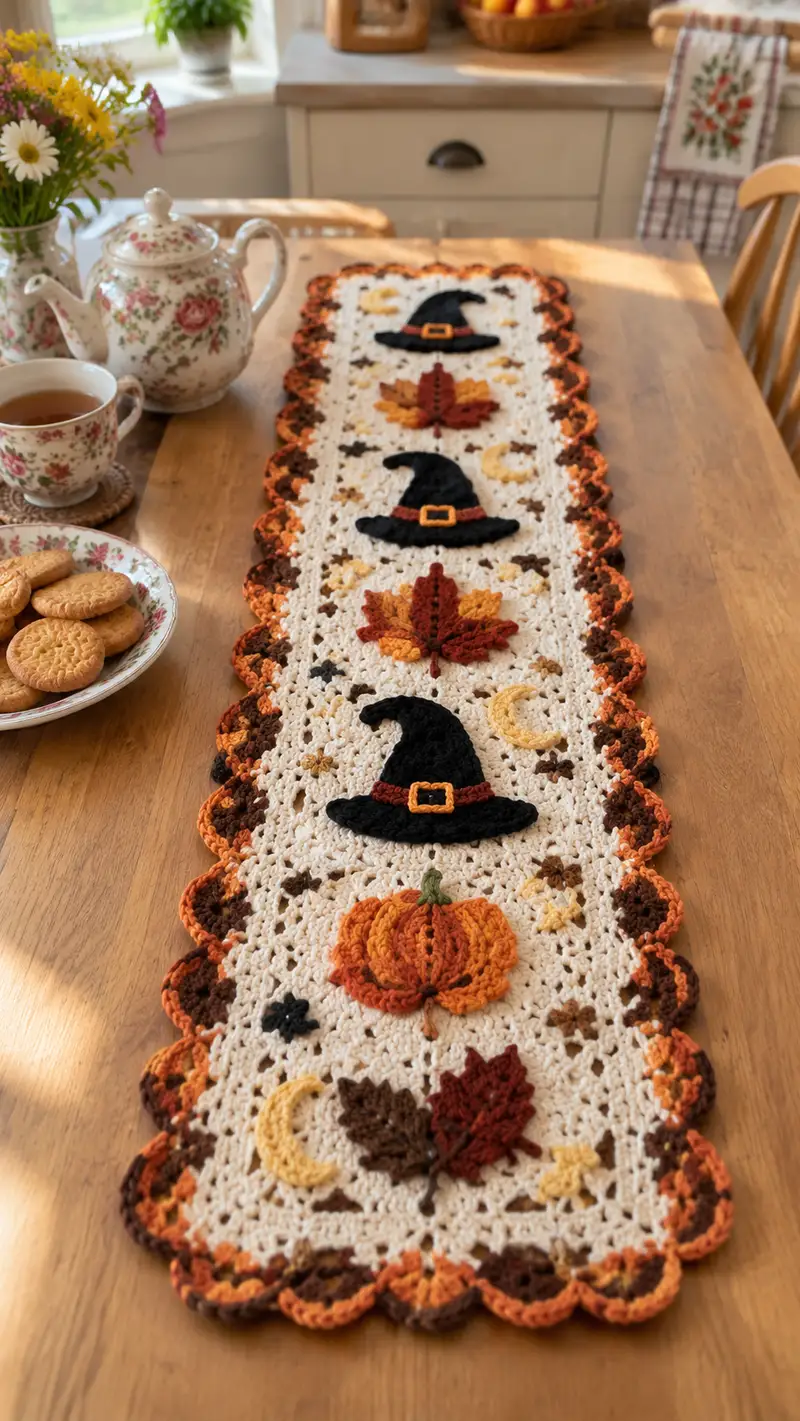
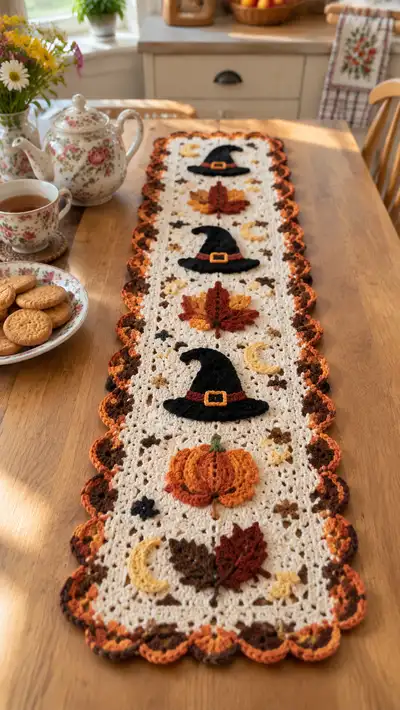
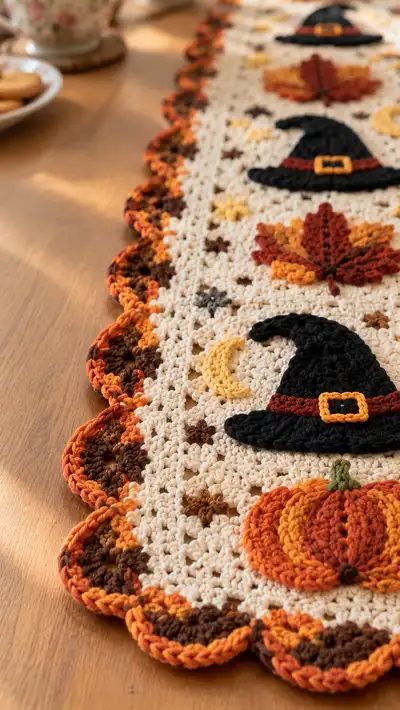
Create a warm, autumn-inspired table runner featuring layered appliqued pumpkins, witch hats, maple leaves, crescent moons and tiny star flowers on a soft cream lacy background. The runner is edged with a scalloped multicolor border in burnt orange, rust and chocolate brown for a cozy harvest look. This pattern gives step-by-step instructions to crochet the base panel, all appliques, and a decorative scalloped edging — perfect for seasonal décor or a festive centerpiece.
Progress Tracker
0% Complete
— Runner Base (lacy rectangular panel) :
Round 1 :
Foundation chain ch 123 (or any multiple of 10 + 3 for width adjustment). Ch 3 (counts as first dc), dc in 4th ch from hook and in each ch across—120 dc (120)
Round 2 :
Ch 3 (counts as dc), turn. *Sk 1 st, dc in next st, ch 1, dc in same st (V-st in next st), sk 1, dc in next st* across to last st, dc in top of turning ch (create 40 V-sts and additional dc filler). Maintain 120 main stitches equivalent (120)
Info :
The base is worked in straight rows (we call them rounds here to be consistent). The ch 3 at each row counts as the first dc. Use stitch markers to mark every 10th stitch in Row 1 to help count later for motif placement.
Round 3 :
Ch 3, turn. Dc in each dc and in ch-1 spaces across to maintain lacy V-st pattern (120)
Round 4 :
Ch 3, turn. *V-st (dc, ch1, dc) in ch-1 space, dc in next dc* repeat across (40 V-sts, filler dc) (120)
Round 5-8 :
Repeat Rounds 3-4 two more times to build height and stable lacy background (120)
Info :
At this stage you have created a stable lacy fabric. Measure width and adjust tension if needed. The runner top-to-bottom motif placement will be counted in blocks of 10 rows; make notes where each motif will sit (approx every 8-10 rows visually).
Round 9 :
Ch 3, turn. Dc across filling each V and dc from previous row (120)
Round 10 :
Ch 3, turn. *V-st in next ch-1 sp, dc in next dc* across (120)
Round 11-14 :
Repeat Rounds 9-10 twice (120)
Info :
Place first motif (pumpkin) centered across the width approximately between Rows 12-18. Use pins and stitch markers to mark the center point of the panel and mark rows where appliques will be sewn later.
Round 15 :
Ch 3, turn. Dc across (120)
Round 16 :
Ch 3, turn. *V-st in ch-1 sp, dc in next dc* across to continue pattern (120)
Round 17-20 :
Repeat Rounds 15-16 twice (120)
Info :
Mark the center of the runner lengthwise and horizontally using stitch markers so you can align the sequence of motifs (pumpkin, hat, leaf, hat) roughly evenly spaced down the runner. I recommend four main motif rows placed roughly 8-10 rows apart depending on your aesthetic.
Round 21 :
Ch 3, turn. Dc across (120)
Round 22 :
Ch 3, turn. *V-st in ch-1 sp, dc in next dc* across (120)
Round 23-26 :
Repeat Rounds 21-22 twice (120)
Info :
Begin placing small accent motifs (little stars and moons) in the open V-spaces between main motif rows. These are worked separately and sewn on; keep extra yarn tails to attach them securely later.
Round 27 :
Ch 3, turn. Dc across (120)
Round 28 :
Ch 3, turn. *V-st in ch-1 sp, dc in next dc* across (120)
Round 29-32 :
Repeat Rounds 27-28 twice to create space for the second main motif (witch hat) (120)
Info :
If you want the motifs closer together, reduce the number of repeat blocks here. This pattern suggests four large motif bands down the runner. Keep symmetry by mirroring spacing from top and bottom.
Round 33 :
Ch 3, turn. Dc across (120)
Round 34 :
Ch 3, turn. *V-st in ch-1 sp, dc in next dc* across (120)
Round 35-38 :
Repeat Rounds 33-34 twice (120)
Info :
Before continuing, block the panel lightly to square the edges: pin to measurements, steam or spritz and allow to dry. Blocking ensures the scalloped border will sit evenly.
Round 39 :
Ch 3, turn. Dc across working each dc and V-sp as established (120)
Round 40 :
Ch 3, turn. *V-st in ch-1 sp, dc in next dc* across (120)
Round 41-44 :
Repeat Rounds 39-40 twice (120)
Info :
Check the total row count and the visual spacing for the final motif at the far end — adjust by adding or removing two-row repeats to maintain visually even spacing from top to bottom.
Round 45 :
Ch 3, turn. Dc across (120)
Round 46 :
Ch 3, turn. *V-st in ch-1 sp, dc in next dc* across (120)
Round 47-50 :
Repeat Rounds 45-46 twice (120)
Info :
Finish the rectangular panel with two additional rows of even dc to create a stable foundation for the border. We will now prepare to add the scalloped edging in 3 colors.
Round 51 :
Ch 1, turn to WS. Work 1 sc evenly across the first row edge (work approx 120 sc evenly across the side row edge to prepare for border). Count should match previous row endpoints (120)
Round 52 :
Ch 1, turn. Work 1 sc in each row-end along the long edge (this creates a clean edge and counts should match row count; you will have approx 60-62 sc along long sides depending on finishing tension) (est. 62)
Info :
If your edge stitch count does not match both sides, adjust by adding an occasional sc inc or dec near the corners to keep symmetry. It is normal to have a few stitch differences; keep the scallop spacing visually even.
— Pumpkin Applique (Make 3: two mid-size and one slightly larger) :
Round 1 :
Using Burnt Orange. Ch 6, join with sl st to form loop. Ch 1, work 6 sc into loop (6)
Round 2 :
Inc in each st around (12)
Round 3 :
(1 sc, inc) x 6 (18)
Info :
This small circular base forms the center of the pumpkin; we will work elongated puff ribs on top to create a flattened pumpkin look rather than a fully stuffed ball.
Round 4 :
Ch 1, turn. *[Work 3 hdc in next st], sl st in next st* repeat around to create textured segments. End with sl st into first hdc (approx 9 groups where counts translate to 18 base sts)
Round 5 :
Switch to Rust/Terracotta for contrast. Ch 1. Work front post puff stitches for ribs: *yarn over, insert hook in front loop of indicated stitch, yo and pull up loop multiple times to create unworked puff (5 loops), yo and draw through all loops, ch1 to secure*; repeat 8 times evenly around to create 8 vertical ribs. Fasten off leaving tail (8)
Info :
Work the puff stitches slightly elongated (pull loops taller than usual) to create a visibly ribbed pumpkin shape. Keep tension firm so the rib stands away from the background when sewn on.
Round 6 :
Switch back to Burnt Orange. Ch 1, work 1 sc around each puff stitch to outline and tidy edges (8)
Round 7 :
Using Olive Green for the stem. At the top center, attach green yarn and ch 4, sl st back into base to form a short stem. Fasten off and leave tail for sewing.
Info :
Make 3 pumpkins following these rounds: 2 using Rounds 1-7 with Burnt Orange as primary (for mid-size pumpkins), and 1 slightly larger pumpkin made by adding an extra increase round after Round 3: (2 sc, inc) x 6 (24), then repeat Round 4-7 with 10 ribs instead of 8.
— Witch Hat Applique (Make 3) :
Round 1 :
Using Black. Ch 6, sl st to join. Ch 1, 6 sc in ring (6)
Round 3 :
(1 sc, inc) x 6 (18)
Round 4 :
Switch to 3.5 mm hook optionally. (2 sc, inc) x 6 (24)
Round 5 :
Ch 1. Work sc around (24)
Info :
This creates the top cone of the witch hat. We will elongate the cone by working short rows in dc/tr and finally create a broad brim worked separately and joined.
Round 6 :
Ch 2 (counts as hdc), turn. Hdc across 12 sts, do not join—work back-and-forth in rows to shape cone: hdc 12, turn (12)
Round 7 :
Ch 2, hdc across 12, turn (12)
Round 8 :
Ch 2, hdc2tog at the end of row to taper tip slightly, continue for 2 rows so tip becomes curved (decrease to 10 then 9) (10)
Info :
Fold the cone slightly to create a hooked top shape and secure with a few sl sts hidden on the WS. Do not stuff — hat is flat applique. Now make brim below.
Round 10 :
Attach Black at base of cone, ch 1, work 24 sc around base to form the brim foundation (24)
Round 11 :
Switch to dc for a broad brim. Ch 2, *2 dc in next st, dc in next 2 sts* repeat around to add flare (total will increase to approx 32-36 depending on increases) (approx 36)
Round 12 :
Switch to Rust/Terracotta for hatband. Sc around the base of the cone once in rust (approx 24) and fasten off leaving tails.
Round 13 :
Using Mustard Yellow make a small square buckle: Ch 6, sc in 2nd ch from hook, sc across (5), ch 1, turn, sc across 5 for 3 rows, fold and sl st edges; leave a long tail to sew as buckle centered on hatband (approx 5 x 3)
Info :
Make 3 hats identical in shape. Use blocking lightly to flatten the brim and ensure it sits flat when sewn onto the base panel. Sew the buckle onto the hatband using yarn tails for a secure finish.
— Maple Leaf Applique (Make 6 in 2 sizes) :
Round 1 :
Using Rust. Ch 7, sl st to form small loop or work as chain foundation. Ch 1, sc in 2nd ch from hook and across to form a small oval base of 6 sc (6)
Round 2 :
Ch 2, turn. In next stitch work (hdc, dc, tr) to form a point, sl st to next base stitch, repeat around to create 5 distinct points for a stylized maple leaf; work symmetrical points on either side of center to create lobes (approx final edge will be 10 points visually)
Round 3 :
Use Burnt Orange for inner lobes: surface crochet a central vein using sl st chain from base to tip: attach yarn at base, sl st up center to tip, then sl st back to create raised vein. Fasten off and leave tail for sewing (leaf footprint approx 6-8 cm wide depending on hook)
Info :
Make three larger leaves using these rounds (scale by using a longer foundation chain: ch 11 for larger leaves and add extra dc/tr on lobes). Make three smaller leaves by using the original counts. Leaves are flat appliques sewn with visible veins for contrast.
— Crescent Moon Applique (Make 6) :
Round 1 :
Using Mustard Yellow. Ch 8, in 2nd ch from hook sc, sc, hdc, dc, hdc, sc, sl st to form a curved crescent chain base (approx 7 sts)
Round 2 :
Working along the chain base, work 2 sc in base and sl st in back side to thicken curve. Turn and sc along opposite side close to shape to create crescent thickness (final approximate st count 12)
Info :
Make six crescent moons and place between motifs. These are small flat appliques and require only a short tail for sewing.
— Tiny Star / Flower Motif (Make 12) :
Round 1 :
Using Chocolate Brown. Ch 4, sl st to first ch to form ring. Ch 1, (sc, ch 2) x 5 into ring, sl st to join — creates 5 picot petals (10 elements) (5)
Round 2 :
Attach Mustard Yellow center: sl st in center and in each chain-2 picot do (sc, picot, sc) to make tiny daisylike star. Fasten off leaving tail for sewing. Repeat to make 12 small stars.
Info :
These tiny accents fill negative space and can be sewn into V-spaces of the lacy base to look like falling seeds or tiny flowers.
— Scalloped Border (Three-color layered scallops) :
Round 1 :
With Chocolate Brown, join at corner with sc, work 1 sc evenly along the long side edge stitch counts made in Base Round 51-52 (approx 62 sc each long side). Make sure to work 3 sc in corner to create round corner turn (est. 62)
Round 2 :
Work scallop foundation: *skip 2 sc, (5 dc) in next sc, skip 2 sc, sl st in next* repeat along long edge producing scallop bases (approx 20 scallops per long side depending on spacing) (approx 20)
Round 3 :
Switch to Burnt Orange. Work 1 sl st into center of each chocolate scallop, then work (ch 2, 3 dc, ch 2) into the same center to layer a second scallop slightly offset, sl st to base to secure (20)
Round 4 :
Switch to Rust. Work a final single dc edging down the center of each layered scallop to create a triple-tone scallop with a raised ridge: sc into each dc of the 2nd round cluster to define edge (20)
Info :
The scalloped border is layered in three colors for depth. Maintain consistent spacing so scallops line up with the V-st pattern in the base; pin as you go to keep alignment.
Round 5 :
Work the same layered scallops at either short end by forming semicircular scallops (use half clusters with same counts) so that the runner ends have symmetrical rounded corners (counts will mirror long sides)
Info :
For a boxed, framed look, work one extra round of sc around entire outside edge in Chocolate Brown to tidy up join points and hide any tail ends before finishing.
— Assembly & Surface Finishing :
Round 1 :
Lay the blocked base on a flat surface. Place appliques pinned to the marked rows and centers. Suggested order from one end to the other: leaf cluster, pumpkin, hat, leaf, hat, pumpkin (mirror at the other end) — adjust to your pinned spacing.
Info :
Pin each applique into position using rust-proof pins and check alignment from both ends. Sit back and view from a distance to ensure visual balance before sewing.
Round 2 :
Sew appliques using yarn tails and tapestry needle: start with long hidden ladder-stitches around raised edges, then tack through a few internal loops to secure. Use small gathers if you want a slight puckered edge for dimensionality.
Round 3 :
Attach pumpkins centered on their designated rows: sew around each rib and tack across center stem. Sew hat brims down with a few stitches near the base so the brim shows slightly lifted edges for shadow.
Round 4 :
Sew leaves and moons into open spaces using small stitches. Secure tiny star-flowers into V-spaces by threading tail through center and knotting on WS, then apply a tiny dab of fabric glue if needed on the knot for permanence.
Info :
Weave in all tails to the WS and trim. If using cotton yarn, give a very light steam press from the WS to help appliques meld into the base — do not press directly on raised puffs.
— Optional Decorative Surface Crochet :
Round 1 :
Using contrasting thread, surface slip-stitch a few curved lines across pumpkins to emphasize ribs and across leaves for extra veins. Use small, even spacing for a hand-embroidered look.
Round 2 :
Add a small yarn-stitched leaf stem using the Olive green by couching a chain of sl sts down into position and fastening at both ends.
Info :
Surface crochet creates a custom look and can be used to add shadowing or tiny highlights. Work slowly and test on a scrap to get tension right.
— Final Finishing :
Round 1 :
Once all appliques are sewn and excess tails are woven in, lightly block the runner one more time to settle the border and motif edges. Lay flat to dry completely.
Round 2 :
Inspect underside and trim away any visible knots. Optionally, add small slips of fusible interfacing under heavy join points for extra longevity on table with heavy items.
Info :
Your runner is now ready to style — pair with vintage china or use as a seasonal centerpiece. Store flat to maintain shape.
This autumn table runner blends classic crocheted lace with dimensional appliques to create a charming, seasonal centerpiece. Each applique is worked separately and sewn on for crisp detail and a handcrafted finish. The layered scalloped edge frames the runner in warm harvest tones, making it a cozy accent for any table. I hope this pattern brings a little handmade fall magic to your home — enjoy styling and gifting! 🧶🍁