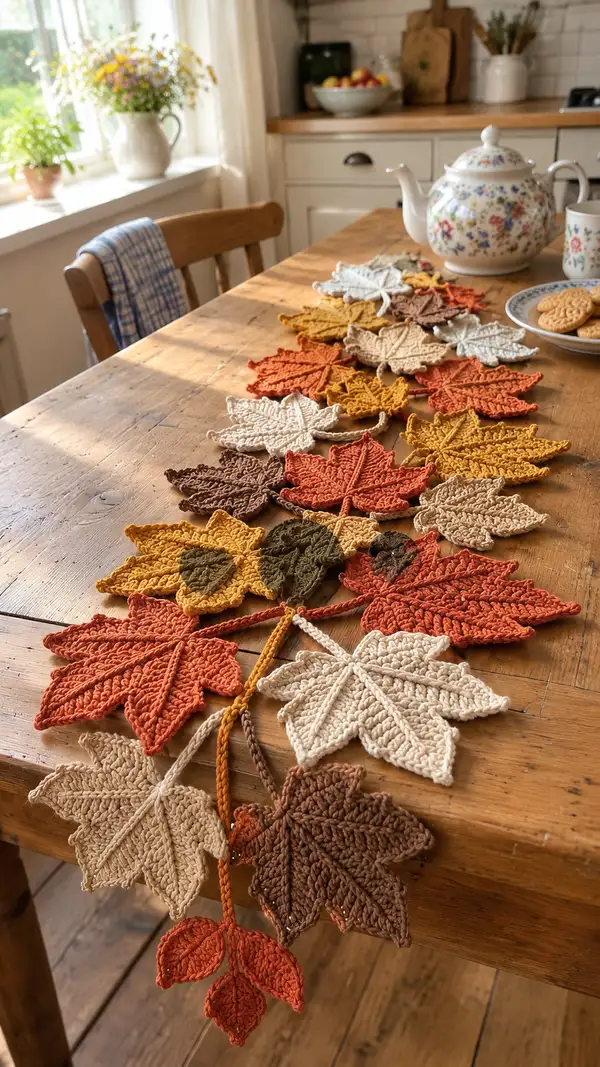
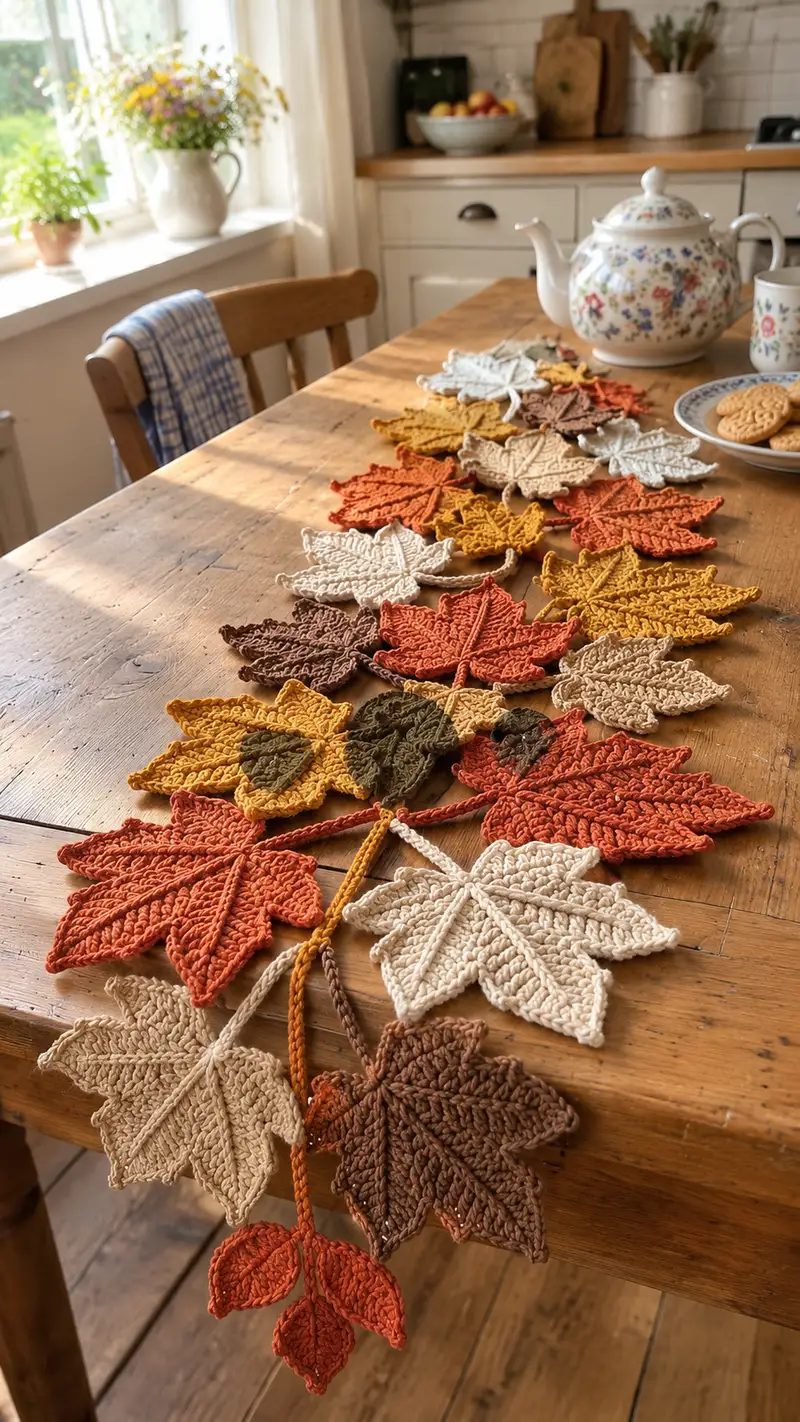
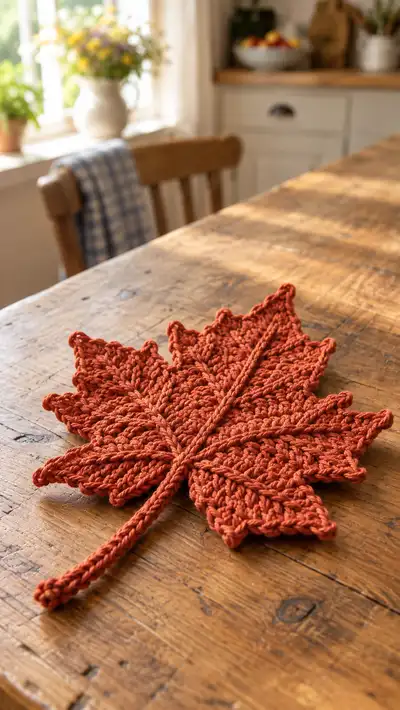
Create a gorgeous fall table runner or garland of textured crochet leaves in warm autumn hues. This pattern shows how to crochet large maple-style leaves, medium and small companion leaves, braided stems and cluster berries to assemble a long, layered garland. The finished pieces have raised veins, picot edges, and a soft cotton feel—perfect for tables, mantels, or gift-wrapping accents.
Progress Tracker
0% Complete
— Large Maple Leaf :
Round 1 :
6 sc in magic ring (6)
Round 3 :
(1 sc, 1 inc) x 6 (18)
Round 4 :
(2 sc, 1 inc) x 6 (24)
Round 5 :
(3 sc, 1 inc) x 6 (30)
Round 6 :
(4 sc, 1 inc) x 6 (36)
Round 7 :
(5 sc, 1 inc) x 6 (42)
Round 8 :
(6 sc, 1 inc) x 6 (48)
Info :
These first rounds form a dense central disk. Work tightly so the center will be firm — this helps the lobes anchor. Leave a stitch marker in the first stitch of each round to keep counting accurate.
Round 9 :
(7 sc, 1 inc) x 6 (54)
Round 10 :
1 sc in each st (54)
Round 11 :
(8 sc, 1 inc) x 6 (60)
Round 12 :
1 sc in each st BLO (60)
Info :
Work round 12 in BLO to create an initial ridge where the leaf's central veins will read better. This helps the leaf lie flatter once blocked.
Round 13 :
(9 sc, 1 inc) x 6 (66)
Round 14 :
1 sc in each st (66)
Round 15 :
(4 sc, inc, 5 sc, inc) x 6 (78)
Info :
Round 15 introduces extra increases to start defining the primary lobes of the maple leaf. Keep tension steady to avoid visible gaps in the increases.
Round 16 :
1 sc in each st (78)
Round 17 :
(2 sc, dec, 6 sc, inc) x 6 (78)
Round 18 :
1 sc in each st (78)
Round 19 :
(3 sc, dec, 5 sc, inc) x 6 (78)
Info :
At the end of round 19 you should still have the same stitch count. The pattern uses internal increases and decreases to push stitches outward into lobes — this is how we create pointed tips while maintaining stitch count.
Round 20 :
1 sc in each st (78)
Round 21 :
(6 sc, 1 dec) x 11 + (1 sc) (72)
Info :
Round 21 begins gentle decreases to form the distinct lobes' valleys. Count carefully — use a stitch marker after each group of repeats to ensure your fabric is balanced across the six lobes.
Round 22 :
1 sc in each st (72)
Round 23 :
(5 sc, 1 dec) x 12 (60)
Round 24 :
1 sc in each st BLO (60)
Info :
Use BLO on this round again to keep a subtle ridge that will read as a decorative midrib behind the central sewn veins later on. Blocking after finishing will open these textures nicely.
Round 25 :
(4 sc, 1 dec) x 12 (48)
Round 26 :
1 sc in each st (48)
Round 27 :
(3 sc, 1 dec) x 12 (36)
Round 28 :
1 sc in each st (36)
Round 29 :
(2 sc, 1 dec) x 12 (24)
Info :
Rounds 27-29 shape the outer edges of each point. At this stage the leaf will look scalloped; we will add picots and a pointed tip to each lobe in subsequent rounds.
Round 30 :
1 sc in each st (24)
Round 31 :
(1 sc, 1 dec) x 12 (12)
Info :
Rounds 31-32 close the very tips — fasten off here leaving a long tail if you will sew this leaf to a stem cord or another leaf. For a flat leaf, do NOT stuff; keep the piece unstuffed and block flat.
Round 33 :
Rejoin at base (if you fastened off) and sl st evenly around the outer edge (6 sl st placed evenly) to create a smoother edge (6)
Round 34 :
Switch to BLO and work 1 sc in each st around to create a neat rim (6)
Round 35 :
Work picot edging: *(ch 3, sl st in 3rd ch from hook) then sl st next st* around outermost points, spacing picots every 2-3 stitches to create small scallops (approximately 12-16 picots depending on your tension)
Info :
Picots add the delicate pointed teeth seen on the finished leaves. If you prefer a softer look, skip picots and work 1 sc in each stitch instead.
Round 36 :
Fasten off leaving a 40-50 cm tail for attaching to a stem; weave in the beginning tail toward the center to anchor.
Round 37 :
Using tapestry needle and same-color yarn, stitch a central raised vein: take the long tail and couch a chain-like cord along the center of the leaf from base to tip using small whip stitches every 4-5 mm. Secure at both ends.
Info :
The sewn central vein is essential for the maple look — pinch and secure the cord a little at the base to create the natural ridge. You can use a chain cord or a twisted cord produced separately to sew on.
Round 38 :
If desired, embroider secondary veins: use a contrasting or tonal yarn and stitch diagonal ribs from center vein to each lobe edge; place them symmetrically (4–6 ribs per lobe).
Round 39 :
Steam-block or wet-block the leaf on a towel, pinning each lobe to the desired shape and letting dry completely to set the lobes flat and crisp.
Round 40 :
Finishing: weave in all tails and trim flush. Repeat for additional large leaves as desired — this single leaf uses roughly 25–35 g of worsted cotton depending on size and tension.
— Medium Leaf :
Round 1 :
6 sc in magic ring (6)
Round 3 :
(1 sc, 1 inc) x 6 (18)
Round 4 :
(2 sc, 1 inc) x 6 (24)
Round 5 :
(3 sc, 1 inc) x 6 (30)
Info :
Medium leaves are scaled-down versions of the large leaf — they follow the same shaping principle but stop increasing earlier for a more compact lobe structure.
Round 6 :
1 sc in each st (30)
Round 7 :
(4 sc, 1 inc) x 6 (36)
Round 8 :
1 sc in each st BLO (36)
Round 9 :
(5 sc, 1 inc) x 6 (42)
Round 10 :
1 sc in each st (42)
Round 11 :
(3 sc, 1 dec) x 8 + (2 sc) (34)
Info :
Begin tapering the tips here — the medium leaf maintains a lobed look but with fewer increases and earlier decreases for a smaller silhouette.
Round 12 :
1 sc in each st (34)
Round 13 :
(2 sc, 1 dec) x 8 + (2 sc) (26)
Round 14 :
1 sc in each st (26)
Round 15 :
(1 sc, 1 dec) x 13 (13)
Round 16 :
Picot edge: ch 3, sl st in 3rd ch, sl st next st around to create a small scalloped rim (about 8–10 picots)
Info :
Fasten off leaving a 20–30 cm tail to attach to the garland stem. Add a small corded central vein by couching a short chain in place with tiny whip stitches.
Round 17 :
Blocking: pin flat and shape the lobe points gently. Allow to dry fully before assembly.
Round 18 :
Finishing: weave in ends and trim flush. Medium leaves use roughly 12–20 g yarn each depending on color and tension.
— Small Leaf :
Round 1 :
6 sc in magic ring (6)
Round 3 :
(1 sc, 1 inc) x 6 (18)
Round 4 :
(2 sc, 1 inc) x 6 (24)
Round 5 :
1 sc in each st (24)
Round 6 :
(3 sc, 1 dec) x 6 (18)
Info :
Small leaves are quick accents. Work tighter for a firm, flat finish. These make great filler pieces for a longer runner.
Round 7 :
1 sc in each st (18)
Round 8 :
(1 sc, 1 dec) x 6 (12)
Round 10 :
Fasten off leaving 15–20 cm tail for stem attachment; add a tiny central couching line for a vein if desired.
Round 11 :
Optional picot: ch 3, sl st in 3rd ch to add delicate teeth to the edge (5–7 picots)
Round 12 :
Weave in ends and block flat.
— Tiny Cluster Leaf (3-up cluster) :
Round 1 :
6 sc in magic ring (6)
Round 3 :
1 sc in each st (12)
Round 4 :
(1 sc, 1 dec) x 4 (8)
Info :
Make several of these tiny clusters for the trailing berries seen on the ends of the garland. Work in bright rust or deep brown for contrast.
Round 6 :
Fasten off leaving a 20 cm tail for sewing onto a stem.
— Stem Cord (make many) :
Round 1 :
Chain 60 (or desired stem length) (60 ch)
Round 2 :
1 sc in 2nd ch from hook and across to end (59 sc)
Round 3 :
Turn, ch 1, 1 sc in each st back (59 sc)
Round 4 :
Repeat Round 3 for 6 rows total to form a narrow ribbon-like cord (59)
Info :
Alternatively, create a braided cord by making three 60-ch chains and braiding them. A crocheted ribbon cord is flatter for table running; a braid is good for hanging garlands.
Round 5 :
Fold ribbon and whip stitch edges together with matching yarn for a rounded cord (work neat, small stitches)
Round 6 :
Fasten off leaving long tails for sewing leaves on at planned intervals. Consider making multiple cords and sewing them side-by-side for a fuller runner.
— Braided Stem Option :
Round 1 :
Make 3 chains of 90 ch each (90 ch x3)
Round 2 :
Braid the three chains together tightly and knot both ends to secure; weave in ends with tapestry needle.
Info :
Lightly mist the braid and press under a towel to help it sit flat on the table. You can also wrap the braid with a spiral of yarn in a contrasting color to mimic a natural stem.
— Joining Leaves to Stem :
Round 1 :
Plan layout: lay stem on table and arrange leaves in the order you like. Large leaves spaced 15–25 cm apart, medium leaves 8–12 cm from large leaves, small leaves and clusters filling gaps.
Round 2 :
Use long tail from each leaf to sew onto stem: align leaf base on stem cord, whip stitch through the base stitches and stem, making 6–10 small secure passes (no stuffing).
Round 3 :
Secure each leaf with an additional hidden knot and weave the tail end back through 4–6 stitches of the leaf to hide it. Trim tail close.
Round 4 :
For a more layered look, sew medium/small leaves on top of large leaves slightly offset, anchoring through both leaf bases and the stem cord.
Info :
Pin leaves and step back often to check balance and fullness. Sew with small, tight stitches to avoid visible thread across the stem.
Round 5 :
Add tiny clusters by sewing the tiny leaf clusters to the ends of short 6–10 ch stems (ch 6, sl st to form small cord) then attach to main stem where desired.
Round 6 :
If making a hanging garland, leave at least 30 cm of free cord at each end for tying; knot a loop for easy hanging.
— Edge Finishing and Texture Techniques :
Round 1 :
Raised Vein (optional): Crochet a small chain cord (ch 40–60), twist it lightly, then couch it onto the leaf center with small whip stitches every 4 mm; secure ends on reverse.
Round 2 :
Front Post Ridges: On a 1 sc round, replace a chosen sc with fpdc to make a visible ridge. Work 6 fpdc ribs spaced equally from base to tip following the leaf's geometry.
Round 3 :
Picot Edging: For crisp teeth, work *(ch 3, sl st in 3rd ch from hook), sl st next st* around prominent points; skip picots along shallow scallops.
Info :
Use a tapestry needle to neaten any visible floats; wet-blocking is recommended to open up the stitch definition so the ribs and picots look crisp and leaf-like.
— Variations and Size Adjustments :
Round 1 :
To make larger leaves, continue increasing rounds in the initial growth phase: after Round 15 of the large leaf, work two more increase rounds using (10 sc, inc) x 6 and (11 sc, inc) x 6 before shaping rounds.
Round 2 :
For a more delicate lace leaf, substitute some sc rounds with hdc or dc rows in the middle sections to open the fabric and reduce density.
Info :
Always test a single leaf to determine yarn usage, blocking results, and overall size before making multiples for a garland.
— Full Garland Assembly Sequence :
Round 1 :
Make stems/cords first: produce 2 ribbon cords of 120 cm each (or braid three chains) to create the backbone of a long table runner. Sew them side by side for extra width if desired.
Round 2 :
Arrange leaves on cords: pin down main leaves (large) every 18–22 cm, fill gaps with medium leaves and small clusters, and attach by sewing bases through both cord layers if double cord used.
Round 3 :
Secure ends: knot cords and wrap with a small piece of yarn to create a neat end cap; tuck ends under the nearest leaf and secure with a few hidden stitches.
Round 4 :
Final blocking: once entire garland is assembled, block the full piece gently on a large towel or blocking mat so all leaves sit in the same plane and the garland lies flat.
Round 5 :
Optional embellishments: add wooden beads between leaves by threading onto the stem before sewing each leaf, or sew on small faux berries for seasonal sparkle.
Info :
Take photographs of placement and spacing before sewing — it helps to re-create the same balanced look across multiple garlands or when gifting the piece.
This autumn leaf garland pattern brings cozy seasonal charm to any table or mantle with textured, handcrafted leaves and thoughtful finishing techniques. Each leaf is designed to look crisp and natural, with raised veins and picot teeth that catch the light beautifully. The layered, mixed-color approach lets you create a warm, organic runner perfect for gifting or holiday decorating. 🍁🧶 Enjoy the soothing rhythm of these repetitive stitches and share your finished garland with friends! 🍂