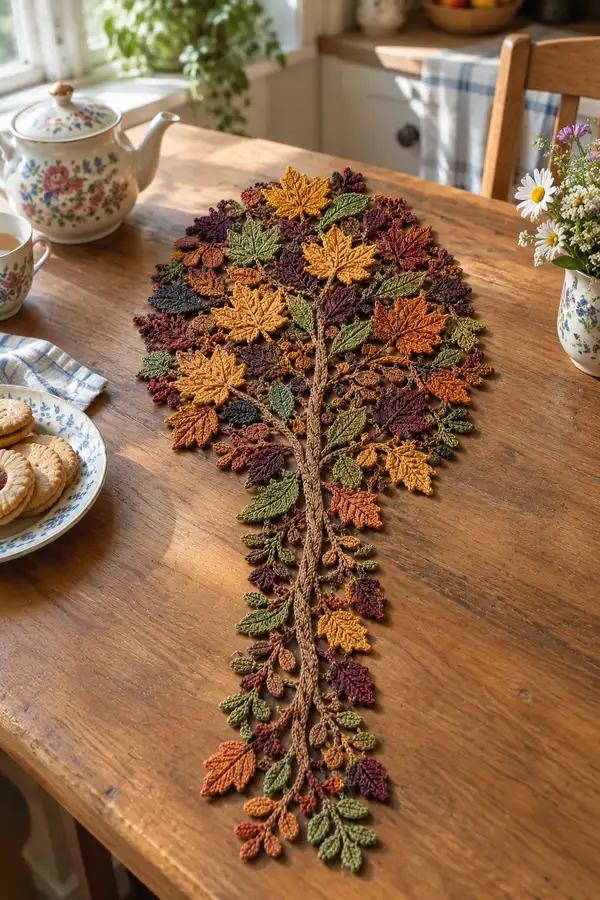
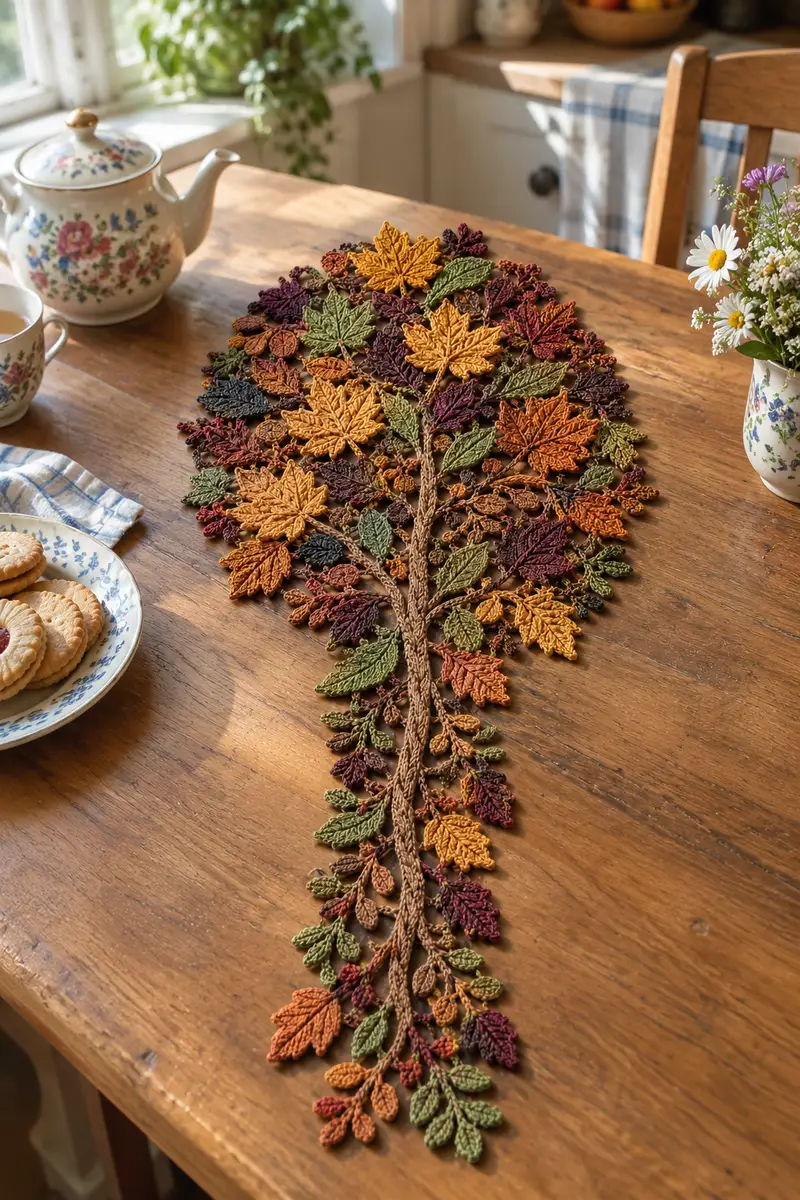
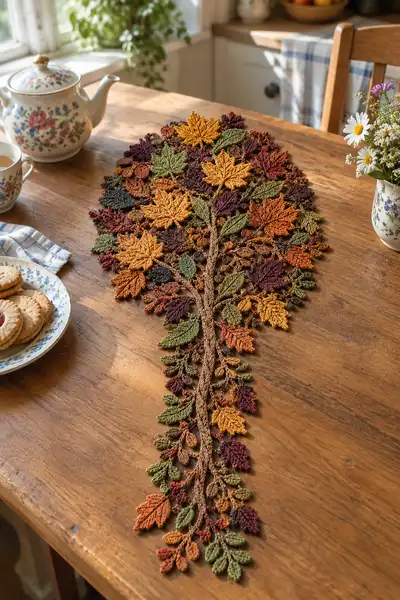
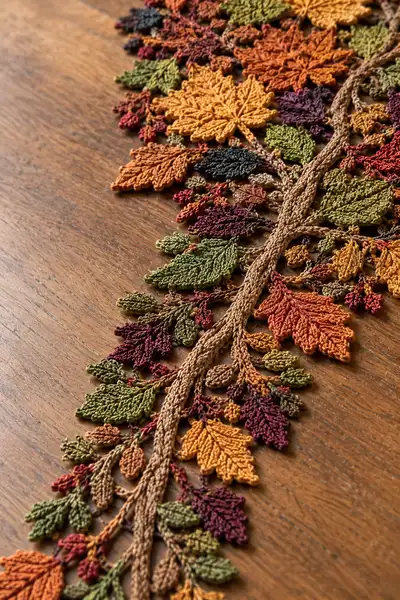
Create a striking autumn table runner inspired by a single maple-tree silhouette made from joined crochet leaf motifs. This pattern uses small delicate leaves, layered maple motifs and a braided trunk to create a long narrow runner in warm fall shades. Colors include golden yellow, burnt orange, deep plum, olive and brown, and the finished piece lies flat for a natural, organic table accent.
Progress Tracker
0% Complete
— Materials & Gauge :
Info :
Gauge is not critical for this runner, but for scale: using 3.0mm hook and DK cotton you should get approximately 12 stitches and 16 rows = 4 inches in single crochet. Lightweight yarn keeps motifs delicate and will yield the pictured size.
— Notes Before You Start :
Info :
Work motifs flat unless otherwise specified. Leaves are worked from center spine outward in numbered rounds. Many leaves are mirrored—make left and right versions for branching symmetry. Block all motifs before assembly to ensure neat joins. Keep long tails (15-25 cm) for sewing and joining; never fasten off too short.
— Trunk Foundation (make 1 braided trunk piece) :
Round 1 :
Ch 6, join with sl st to form ring (6)
Round 2 :
Ch 1, 2 sc in each ch around (12)
Round 3 :
1 sc in next st, (inc) x 5, 1 sc in last st (17)
Round 4 :
1 sc in each st around (17)
Info :
Switch to working in continuous spiral for an organic braided look. Use dark brown mercerized cotton for trunk color. Keep tension slightly firm to make trunk slightly raised above leaves.
Round 5 :
(2 sc, inc) x 4, 1 sc in remaining st (21)
Round 6 :
1 sc in each st (21)
Round 7 :
(3 sc, inc) x 5, 1 sc (26)
Round 8 :
1 sc in each st (26)
Round 9 :
(4 sc, inc) x 5, 2 sc (31)
Round 10 :
1 sc in each st (31)
Info :
At this point the trunk is round and sturdy. To form the long narrow trunk shown in the photograph we will transition to a long chain-and-row braid that will be joined back to the trunk cylinder. Leave a 40cm tail for joining later.
Round 11 :
Ch 1, sc in next 15 sts, ch 40 (foundation braid chain), sc in remaining sts (47 incl chain) (47)
Round 12 :
Turn to work along chain: 1 sc in each ch across the 40-ch chain, then 1 sc in each of the 31 trunk sts (71)
Round 13 :
1 sc in each st (71)
Round 14 :
(5 sc, inc) x 11, 6 sc (82)
Info :
We will flatten the braid slightly by switching to BLO for a few rounds for definition and to mimic a bark ridge.
Round 15 :
1 sc in each st BLO (82)
Round 16 :
1 sc in each st (82)
Round 17 :
Work 6 sc, ch 10, skip 10 sts (creates the first lateral branch anchor), *6 sc, ch 10, skip 10 sts* repeat across (anchors count varies by length) (approx 82)
Round 18 :
1 sc in each st (82)
Info :
The trunk is now a flat, slightly wide column with chained branch anchors along both sides. These chain anchors will be used to attach branch stems built separately. Fasten off leaving long tail to weave into underside.
— Large Maple Leaf Motif (Make 7 - size A, mirrored pairs and one crown) :
Info :
Large maple leaf is worked from center spike spine outward. Use golden yellow, burnt orange and rust shades for these. Each leaf is worked in 36 rounds to build layered lobes. Make left and right mirrored versions by working rounds in reverse order on the mirrored half where directed.
Round 1 :
Ch 8, sc in 2nd ch from hook, hdc in next, dc in next, tr in next, dtr in next, sl st in last ch (work along chain to form one side of spine) - turn and work back along opposite side: dtr, tr, dc, hdc, sc (13)
Round 2 :
Ch 1, 1 sc in first 2 sts, inc in next, 1 hdc in next, (dc, ch1, dc) in top spine st, continue: 1 hdc, inc, 2 sc (increase to form first lobe) (17)
Round 3 :
Ch 1, (sc, inc) x 3, 1 hdc in next, (dc, ch1, dc) in center, 1 hdc, (sc, inc) x 3 (25)
Round 4 :
Ch 1, (2 sc, inc) x 4, 2 hdc, (dc, ch1, dc) center, 2 hdc, (2 sc, inc) x 4 (33)
Round 5 :
Ch 1, 1 sc in each of next 33 sts; at lobes work picot edges: where you see a ch1 space do (dc, picot, dc) to create serrated edge (33)
Info :
Use picots and short spike stitches on the peripheral rows to create realistic leaf tooth edges. Keep tension firm on outer rounds to maintain flatness.
Round 6 :
Ch 1, (3 sc, inc) x 8, 1 sc (41)
Round 7 :
1 sc in each st (41)
Round 8 :
Ch 1, (4 sc, inc) x 8, 1 sc (50)
Round 9 :
1 sc in each st; at each lobe tip work a cluster: (hdc, dc, hdc) to raise tip slightly (50)
Round 10 :
Ch 1, (5 sc, inc) x 8 (58)
Round 11 :
1 sc in each st (58)
Round 12 :
Switch to burnt orange or alternate color now for variegation. Ch 1, 1 sc in each st (58)
Info :
Color change: carry unused yarn across the interior stitches at the center spine and conceal under the next round. Alternating colors gives the layered autumn effect in photos.
Round 13 :
Ch 1, (6 sc, inc) x 8, 2 sc (66)
Round 14 :
1 sc in each st (66)
Round 15 :
Work 1 sc in next 10 sts, (sc, picot, sc) at lobe indentations 6 times to sculpt indentations, 1 sc in remaining sts (66)
Round 16 :
Ch 1, (7 sc, inc) x 8, 2 sc (74)
Round 17 :
1 sc in each st (74)
Round 18 :
Work a round of spike sts: *ch 3, work a spike dc into the 3rd row down to accent veins*, repeat across to create long vein texture (74)
Info :
Spike stitches are worked by inserting hook into a lower row then completing a dc. This adds raised vein lines on the leaf; place them symmetrically from center spine to tips.
Round 19 :
Ch 1, 1 sc in each st (74)
Round 20 :
(8 sc, inc) x 8, 2 sc (82)
Round 21 :
1 sc in each st (82)
Round 22 :
Work decorative edge: *dc, picot, dc, ch1, sl st in next st* around to add a crisp serrated edge (82)
Round 23 :
Ch 1, 1 sc in each st (82)
Round 24 :
Work short surface slip-stitch veins: working from center outward, sl st in next 4 sts, ch 1, skip 1, sl st across to mimic small veins (82)
Info :
At this scale, surface slip stitches create pronounced veins without adding bulk. Apply them sparsely on top rounds for realism.
Round 25 :
Ch 1, 1 sc in each st (82)
Round 26 :
Edge shaping: *(3 sc, dec) x 12, 2 sc* (70)
Round 27 :
1 sc in each st (70)
Round 28 :
*(2 sc, dec) x 14, 2 sc* (56)
Round 29 :
1 sc in each st (56)
Round 30 :
*(1 sc, dec) x 14, 2 sc* (42)
Round 31 :
1 sc in each st (42)
Round 32 :
*(dec) x 12, 6 sc* (30)
Round 33 :
1 sc in each st (30)
Round 34 :
Work decorative stem: ch 12 from center bottom, sl st back to center to create a short stem. Fasten off leaving long tail for sewing (30)
Round 35 :
Weave an embroidery vein with contrasting thread along the center from tip to stem using long tail, then fasten off
Info :
Make 7 large leaves: 3 mirrored left/right pairs (6 leaves) and 1 larger crown leaf. Block each leaf flat and pin center spine straight before steam or wet blocking.
— Medium Leaf Motif (Make 18 - size B) :
Info :
Medium leaf: simpler elongated leaf used to fill branches. Work 20 rounds per leaf; make a mixture of olive, rust and plum colors. Mirror half of these for natural balance.
Round 1 :
Ch 10, sc in 2nd ch from hook, hdc, dc, tr, dc, hdc, sc across to form base spine, work back along opposite side mirroring stitches (17)
Round 2 :
Ch 1, 1 sc in next 3 sts, inc, 1 hdc, (dc, ch1, dc) in tip, 1 hdc, inc, 3 sc (21)
Round 3 :
Ch 1, (sc, inc) x 4, 1 hdc, (dc, ch1, dc), 1 hdc, (sc, inc) x 4 (29)
Round 4 :
1 sc in each st (29)
Round 5 :
(2 sc, inc) x 6, 1 sc (35)
Round 6 :
1 sc in each st (35)
Round 7 :
Work small picots along edge at every 5th stitch: *sc 4, (dc, picot, dc)* repeat (35)
Info :
Medium leaves are lightweight fillers; keep edges crisp and slightly curved by tightening outer rounds with picots.
Round 8 :
1 sc in each st (35)
Round 9 :
(3 sc, inc) x 8, 3 sc (43)
Round 10 :
1 sc in each st (43)
Round 11 :
Work 4 short veins: sl st lines from center to tip spaced evenly; ch 1 at end of each vein (43)
Round 12 :
1 sc in each st (43)
Round 13 :
*(2 sc, dec) x 10, 3 sc* (33)
Round 14 :
1 sc in each st (33)
Round 15 :
*(1 sc, dec) x 10, 3 sc* (23)
Round 16 :
1 sc in each st (23)
Round 17 :
Dec around until 12 sts remain, then fasten off leaving long tail; add short ch stem of 8 ch from bottom and sl st back (12)
Info :
Make 18 medium leaves in a balance of colors. Block and press them to match size. Leave long tails for sewing and for decorative surface stitch veins if desired.
— Small Leaf & Sprig Motifs (Make 40-60 assorted) :
Info :
Small leaves and droplet sprigs are built quickly. Use 2.5mm hook for most delicate pieces. These create the dense cluster texture along branches.
Round 1 :
Ch 6, sc in 2nd ch, hdc, dc, hdc, sc across (5)
Round 2 :
Ch 1, sc in next 2 sts, inc, sc, ch 4, sl st into same base to form a tiny droplet bud, sc 2 (7)
Round 3 :
1 sc in each st, add a picot at lip: ch 3 sl st in 3rd ch (7)
Round 4 :
Fasten off leaving long tail for attaching to branch stems
Info :
Make 40-60 of these tiny leaves and buds in mixed colors. They are the smallest elements and will be clustered together to form full branches.
— Berry Cluster (Make 24) :
Round 1 :
With rust color, ch 4, join to form ring, ch 1, 6 sc in ring (6)
Round 2 :
(sc, inc) x 3 (9)
Round 3 :
Work 3 bobbles across next 3 sts: *[yrh, insert, yrh pull] x3 finish off bobble* repeat (3 bobbles), fasten off leaving long tail (9)
Info :
Sew these clusters in groups of three or more to form berries along branches. Use small thread or thinner yarn for smaller berries if desired.
— Branch & Stem Motifs (Make 12 main branch stems) :
Info :
Branch stems are worked as a chain-and-scallop sequence that interlocks with trunk anchors. Work in brown or taupe for trunk-to-branch transition.
Round 1 :
Ch 40 (length of branch), sc in 2nd ch from hook and in each ch across (39)
Round 2 :
Turn, ch 2 (counts as hdc), 1 hdc in next 3 sts, (dc, ch 3, dc) in next st (form small leaf socket), repeat repeats across to create sockets every 6 sts (approx 39)
Round 3 :
1 sc in each st, create small connecting picot at intervals: *sc 5, (ch 3 picot, sl st)* repeat (39)
Round 4 :
Attach tiny leaves and sprigs: using long tails, sew 3-6 small leaves and 1 berry cluster into consecutive sockets along branch for a natural cluster (39)
Info :
Make 12 main branches of varying lengths—some 40ch, some 28ch, some 18ch—to create tapering branches. Mirror halves for left and right sides of trunk.
— Joining Runner Layout & Assembly Steps (Comprehensive Join Rounds) :
Info :
Lay out trunk and branches on a large blocking mat in the desired tree shape. Arrange large maple leaves near top crown, medium leaves along mid branches, and small sprigs filling gaps. Mark attachment points with pins. Joining uses slip-stitch joins, short connecting chains and whip-stitch sewing with long tails.
Round 1 :
Position trunk on work surface; with long tail from trunk bottom, whip-stitch trunk tail through trunk underside to secure trunk braid flat (no stitch count)
Round 2 :
Sew the first two main branches to trunk anchors at trunk round 17 chain anchors: using mattress stitch and long tail sew 12 secure stitches along anchor (no stitch count)
Round 3 :
Using slip-stitch join: with branch tail attached, sl st through branch base and trunk anchor across 6 times to lock branch in place (6)
Round 4 :
Attach large maple leaf crown: place the larger crown leaf centered on trunk top; using long tail, whip stitch from leaf stem to trunk top 10 secure stitches, then add 2 hidden slip-stitches behind to anchor (no stitch count)
Info :
Attach pieces loosely at first; you will tighten and invisibly stitch after all placements are confirmed. Keep joins small and hidden under overlapping leaves for a natural look.
Round 5 :
Begin filling left branch: attach medium leaf pairs along the branch every 6-8 sts using yarn tail and ladder stitch through underside (approx 6 leaves on branch)
Round 6 :
Attach clusters of small leaves and berry clusters around each medium leaf base: sew three small leaves and one berry cluster into the sockets created in branch Round 2 (per socket) (approx 12 attachments)
Round 7 :
Repeat branch attachment for mirrored right side branches. Check symmetry by folding runner in half to confirm placement before permanent stitching
Round 8 :
Cross-connect adjacent branches: where tips nearly meet, work a 6 ch bridging chain and sl st into both motif bases to create an airy lace connection (6)
Info :
These bridging chains add stability and keep motifs from shifting. Vary bridge lengths (4–8 ch) to maintain organic spacing and let leaves overlap naturally.
Round 9 :
Reinforce trunk-to-branch joins by sewing an additional 8 stitches from trunk interior to branch underside, creating a hidden seam for strength
Round 10 :
Attach remaining large maple leaves around crown area in layered fashion: overlap edges by 6–8 stitches and ladder stitch through both leaves and a small portion of branch for secure layered join (per leaf)
Round 11 :
Work decorative connecting tendrils in exposed gaps: ch 14, sl st back along chain to create a dense tendril, fasten off and tack into place at both ends (no stitch count)
Round 12 :
Add final small leaf clusters to runner edges to soften silhouette: sew 2–4 small leaves, sometimes with a berry cluster, spaced 4–6 cm apart along outside edge (varies)
Info :
Arrange color balance across runner—distribute mustard yellows and bright oranges among darker plums so no single area is overly bright. Step back often to visualize composition.
Round 13 :
Secure loose motif tails by weaving them through 15-20 nearby stitches and trimming close to fabric for a tidy underside (no count)
Round 14 :
Create small loop points for optional hanging/display: sc across 6 sts at runner wide end, ch 10, sl st into same space to create hanging loop (6)
Round 15 :
Edge stabilization round: with 3.0mm hook and matching brown, work a round of crab stitch (reverse sc) around entire outer silhouette to crisp the edge; maintain even tension (approx circumference stitches)
Round 16 :
Blocking: pin runner to shape on blocking board, stretching gently to flatten overlapping leaves and open picot edges. Steam-block or wet-block according to yarn manufacturer instructions (no count)
Info :
Blocking is essential for this design—without it, leaves curl and the silhouette looks uneven. Pin every leaf tip and seam heavy areas to hold composition while drying.
Round 17 :
Optional stiffening: apply a diluted fabric stiffener or light spray starch across the underside only if you want a semi-rigid runner. Let dry completely between layers (no count)
Round 18 :
Final trim and inspection: check for loose threads, secure them, and trim any visible tails. Ensure runner lays flat and even.
Info :
Wear protective gloves if you use spray starch. Test on a scrap motif first so color doesn't shift. Light stiffening preserves drape but keep it flexible enough for storage.
— Finishing Details & Alternate Edgings :
Round 1 :
Decorative beading option: sew small wooden or glass seed beads into berry cluster centers with fine thread (per bead)
Round 2 :
Lace trim option: for a looser silhouette add a 1-row open chain lace (ch 5, sl st in next st) around outermost leaves to give a lacy fringe (parentheses show no fixed count)
Info :
Experiment with a narrow runner version by omitting outermost branch and reducing large leaves to 3-4 instead of 7, or make a wider centerpiece by adding symmetrical side branches.
Round 3 :
Storage tip: store runner flat or gently rolled in acid-free tissue to maintain shape; avoid hanging long-term which may stretch joins (no count)
Info :
If you wish to machine-wash later, secure beads and test a colorfast sample; hand-wash cold recommended to preserve blocking and shape.
Completing this table runner is a satisfying journey from little motifs to a dramatic, leafy composition. Each small leaf and berry contributes to the whole, and the layered colors evoke a cozy autumn table setting. The blocking and careful joining turn a collection of motifs into a sculptural textile accent you'll be proud to display. 🧶🍁 Enjoy the calm rhythm of stitching and then step back to admire your leafy masterpiece! 🍂