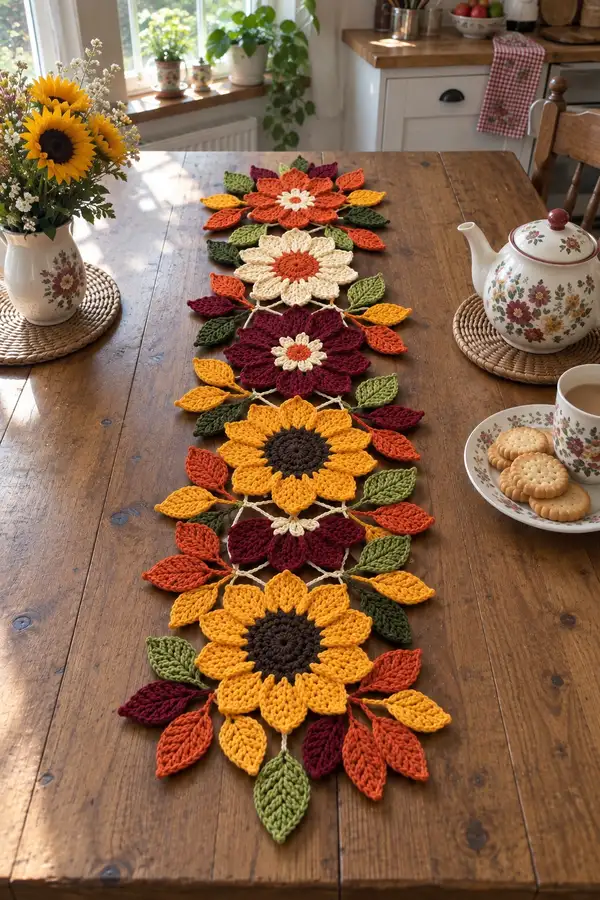
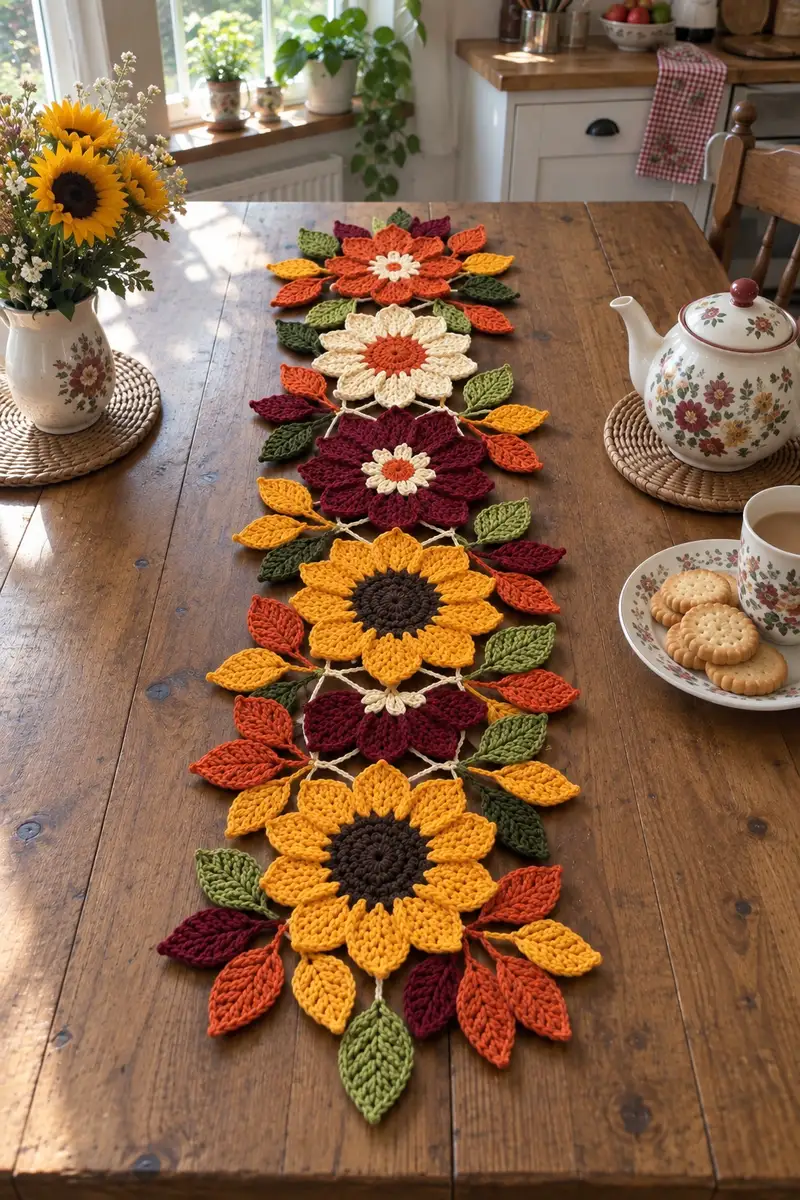
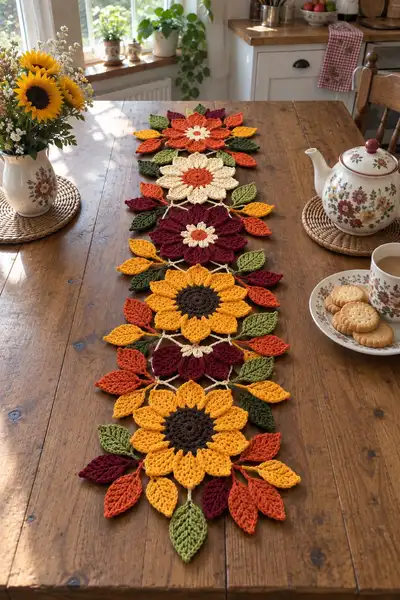
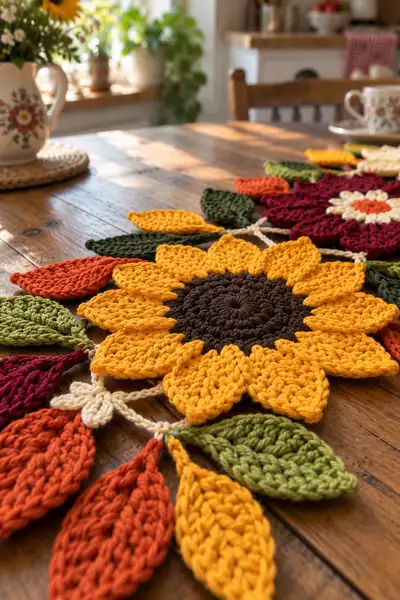
Create a cozy, seasonal table runner made from linked crocheted flowers and leaves in warm autumn tones. This pattern shows how to make sunflower, daisy and dahlia-style floral motifs, textured leaves, and elegant connecting chains to form a runner that lays beautifully across any wooden table. The finished runner features rich mustard, burgundy, pumpkin, olive and cream shades with layered petals and raised stitch texture for a handcrafted heirloom look.
Progress Tracker
0% Complete
— Materials and Gauge :
Info :
Gauge is not critical for this decorative runner, but to match pictured scale, gauge is approximately 12 rounds of sunflower center = 4.5" across using 5.0 mm hook and worsted weight yarn. Make a small test motif to check your proportions. Use a slightly smaller hook for tighter petals if your stitches are loose.
— Notes :
Info :
This pattern describes four main motif types (Sunflower, Golden Daisy, Cream Layered Flower, Burgundy Dahlia) plus a leaf pattern and chain-join construction. Each motif is crocheted mostly in rounds, then petals or layers are built on top and are attached to anchor points around the center. Multiple Info sections are included to advise blocking, color changes and assembly. Where petals are worked into chain-spaces, count anchors carefully so all motifs have the intended petal count.
— Sunflower Motif (Make 2 pictured) :
Round 1 :
mr, 6 sc in ring (6)
Round 3 :
(1 sc, inc) x 6 (18)
Round 4 :
(2 sc, inc) x 6 (24)
Round 5 :
(3 sc, inc) x 6 (30)
Round 6 :
(4 sc, inc) x 6 (36)
Round 7 :
1 sc in each st around (36)
Round 8 :
1 sc in each st around (36)
Round 9 :
1 sc in each st around (36)
Info :
Center is worked in chocolate brown. After Round 9 you may change to petal color. For a textured center, you can substitute Round 8-9 with a round of back-loop-only sc to create a subtle ridge. Place stitch markers every 6 stitches to help counting for petal anchors.
Round 10 :
Change to mustard yellow. *Sc in next 2 sts, ch 3, skip next st* repeat 12 times around, sl st to first sc (36 sts, 12 ch-3 spaces)
Round 11 :
Work petals into each ch-3 space: Join yarn with sl st into first ch-3 sp, (ch2, 2 dc, tr, 2 dc, ch2) sl st into same ch-3 sp to finish petal. Repeat in each ch-3 sp for a total of 12 petals. Sl st to base to finish.
Info :
Each petal is a tall, pointed cluster. Use a slightly smaller hook for petal stitches if your petals are too loose. Keep tension steady to create uniform petal shape. After working all petals, fasten off and weave in ends or leave long tails for blocking and sewing.
Round 12 :
Working behind the petals: Join yarn at base of any petal, ch1, *(sc in space between petals, ch2) repeat around to create a decorative scalloped base that spaces leaves later; work 12 sc and 12 ch-2 loops* sl st to first sc.
Round 13 :
(Optional) Add a row of hdc in BLO around the center behind the petals to raise the petal bases and add dimension. 1 hdc in each stitch (count will vary ~36).
Round 14 :
Work a round of surface slip stitches along the center edge (sl st in FLO around the center circumference) to give a corded look where petals join (36).
Round 15 :
Petal second layer: In front of the first petal row, rejoin yarn at base of any petal and work a shorter petal into the space between two first-row petals: sl st, ch2, 3 dc, ch2, sl st. Repeat for 12 small filler petals to create a double-layered sunflower. Fasten off.
Info :
Blocking tip: pin the flower flat, pulling petals slightly outward and steam lightly or spritz with water, shaping each petal evenly so the motif sits flat. Allow to dry before joining.
— Golden Daisy Motif (Make 1 pictured) :
Round 1 :
mr, 6 sc in ring (6)
Round 3 :
(1 sc, inc) x 6 (18)
Round 4 :
(2 sc, inc) x 6 (24)
Round 5 :
1 sc in each st (24)
Round 6 :
Change to cream for inner ring: *sc in next 2 sts, ch 2, skip 1* around to create 8 ch-2 spaces (24 sts, 8 loops)
Round 7 :
Work petals in cream into each ch-2 space: join with sl st, (ch2, 3 dc, ch2) sl st. Repeat for 8 petals.
Round 8 :
Change to orange for second petal layer: Join in any sc between petals, ch1, *(sc in next sc, ch3, sc in next sc) repeat 8 times around, sl st to first sc to create 8 ch-3 spaces (still 24 base sts)
Round 9 :
In each ch-3 space work a larger elongated petal: (sl st, ch2, 2 dc, 2 tr, 2 dc, ch2, sl st). Fasten off and weave ends.
Info :
Daisy uses alternating short and long petal layers to create depth. Keep petal rows centered over the base for a balanced look. The center color swap helps the cream ring read as a delicate middle.
— Cream Layered Flower (Make 1 pictured) :
Round 1 :
mr, 6 sc in ring (6)
Round 3 :
(1 sc, inc) x 6 (18)
Round 4 :
1 sc in each st (18)
Round 5 :
Change to soft cream: *(sc in next st, ch 3, skip 1) x 6 creating 6 ch-3 loops around center to form petal anchors (18 sts, 6 loops)
Round 6 :
Work 6 large rounded petals: in each ch-3 sp join yarn and work (ch2, dc, dc, hdc, dc, dc, ch2) sl st to complete petal. Repeat 6 times.
Round 7 :
Behind petals, work one round of sc in BLO around the center to add a ridge (18); this helps petals stand away from center.
Round 8 :
Add a second row of decorative small petals in cream: join in any sc between large petals and make small picot-like petals: sl st, ch3, sc back into same space, sl st. Repeat 6 times to fill gaps.
Info :
For the layered cream flower, the center is small and refined; take care to place second row petals midway between first row petals to create a rosette effect. Blocking will flatten the rosette into a neat layered flower.
— Burgundy Dahlia Motif (Make 2 pictured) :
Round 1 :
mr, 6 sc in ring (6)
Round 3 :
(1 sc, inc) x 6 (18)
Round 4 :
(2 sc, inc) x 6 (24)
Round 5 :
(3 sc, inc) x 6 (30)
Round 6 :
1 sc in each st (30)
Info :
Dahlia-style motif uses many small petals arranged densely to read as a full layered bloom. The center is worked larger and is used to anchor 15-16 small petals. Count and mark anchor points carefully.
Round 7 :
Mark 15 anchor points: *sc in next 1 st, ch2, skip next 1 st* repeat around until you have 15 ch-2 spaces. If you have 30 base sts, this pattern (sc, ch2) x15 will fit perfectly (30 sts, 15 ch-2 spaces)
Round 8 :
Petal round 1: In each ch-2 sp join and make small petal: (sl st, ch2, 3 dc, ch2, sl st) Repeat 15 times to create first small petal layer.
Round 9 :
Between the petals create small loops for next layer: join in a sc between petals, *ch3, sl st in next sc* around creating 15 ch-3 loops.
Round 10 :
Petal round 2: In each ch-3 loop work a taller petal: join, (ch2, 2 dc, tr, 2 dc, ch2) sl st. Repeat 15 times. Fasten off and weave ends.
Info :
Use two slightly different burgundy shades if you want subtle dimension in petals; alternate or mix shades per layer. Dahlia motifs look especially good with their petals slightly curved forward — lightly steam and shape while blocking.
— Leaf (Make many) :
Round 1 :
ch 6, sc in 2nd ch from hook, hdc in next, dc in next, tr in last (leaves are worked flat, beginning from tip)
Round 2 :
Turn, working down the opposite side of foundation chain: dc in next, hdc in next, sc in next, sl st in last to shape base. Fasten off; weave ends. (Leaf will measure approx 2.2-2.8" depending on tension)
Info :
This simple 2-row leaf creates a crisp pointed leaf. For the pictured runner, leaves are worked slightly larger by increasing foundation chain to ch7 or ch8 and adding an extra hdc or dc in the sequence. Use olive green, rust and orange for color variety.
Round 3 :
Alternate leaf (long tapered): ch 8, sc in 2nd ch, sc in next 2, hdc in next 2, dc in last 2; turn and mirror back with dc, hdc, sc, sc, sl st; fasten off. This yields a longer leaf for staggered layout.
Info :
Vary leaf sizes by starting with ch6-ch10. For heavier texture, work final round in BLO to create a raised central vein. You can also embroider a central vein in contrasting yarn using a yarn needle after blocking.
— Joining Chain Mesh and Connectors :
Info :
The runner in the photos uses cream/off-white chain connectors worked in small bridged chains between motif edges. The chain mesh is crocheted separately as short segments which are overlapped and sewn to motif bases using sl st or whip stitch.
Round 1 :
Join cream yarn at a base sc or at a petal base between motifs, ch 12 (adjust length based on spacing), sl st to the base of the next motif to connect. Repeat to connect across the runner length.
Round 2 :
For decorative X-shaped joins: after chaining 12, join with a sc at each mid point of two adjacent motifs to create crossed chains. Secure ends with small sl st and weave in securely.
Info :
Tip: Before permanently connecting, lay out all motifs on a table in the desired order. Pin chain lengths in place to ensure balanced spacing. Measure between motif centers and adjust ch lengths for symmetrical edges.
Round 3 :
Optional: Reinforce joins by sewing chain tails to the back of motifs with matching cream yarn using small whip stitches. This reduces visible tension on the front and keeps the mesh flat.
— Decorative Edge and Finishing Touches :
Round 1 :
With cream yarn, join at one outer petal tip of the end motif, ch 3, sl st into each petal tip around that motif creating small loops that frame the outer edge - repeat for every outer motif in runner.
Round 2 :
Optional picot scallop: In each loop work (sc, ch3, sc) to create a delicate picot between petals and leaves along the outer runner edge. Fasten off and weave ends.
Info :
The edge trim is decorative and optional. If you prefer a clean silhouette, simply weave in ends and press lightly. For a lace border, follow the picot scallop rounds as written to create the pictured airy finish.
— Alternate Petal Texture (Surface Post Stitches) :
Round 1 :
To add ribbed texture to petals, work a round of dc around petal bases using FPdc and BPdc (front and back post double crochet) spaced evenly. Example: *FPdc around next stitch, BPdc around next* repeat across petal base. This creates vertical ribs that catch light and give depth.
Info :
Use FP and BP post stitches sparingly on larger petals; on small petals, the post stitches may be too bulky. This technique is excellent for sunflowers and adds realistic petal ridges.
— Assembly Instructions (Pre-Join Prep) :
Info :
Block all motifs flat before joining. Steam or wet-block to gently open petals and set shape. Allow to dry completely on a flat surface. Arrange motifs in desired order and photograph layout to use as a reference during joining.
Round 1 :
Place two motifs to join face-up so petal tips interleave slightly. Using cream yarn and a yarn needle, whip stitch through the back loops of both motifs at the points where you want the chain anchors to be (usually base between petals). Use even stitches and tension so join is invisible from front.
Round 2 :
Once all motif pairs are connected in a single strip, add leaf clusters by sewing leaves to join points and petal tips with small stitches. Pin them first to achieve a natural staggered arrangement.
Info :
For stability, sew through two rounds of stitches on each motif instead of just one; this keeps joins secure and reduces sagging over time. Use matching yarn colors for hidden joins and cream for prominent chain joins.
— Optional Extra: Padded Leaves (Alternate) :
Round 1 :
Make two identical flat leaves as per Leaf section but leave long tails. Place them wrong sides together and whip stitch around leaving one end open. Stuff lightly with a small pinch of fiberfill to create slight puff and finish closing. This creates gently domed leaves that add dimension.
Info :
Only lightly stuff leaves. Overstuffing creates bulky joins and makes the runner lumpy. Use padded leaves sparingly to keep the runner relatively flat for table use.
— Final Blocking and Pressing :
Info :
After assembly, pin the entire runner onto a large blocking board, gently stretching to achieve linear edges. Spray lightly with water or use a steam iron at a safe distance for your yarn fiber. Let dry overnight. This final step ensures the runner lays flat and looks professionally finished.
— Stitch Count and Repeat Reference :
Info :
Sunflower: Center base 36 sts, 12 petal anchors. Daisy: Base 24 sts, 8 large petals. Burgundy Dahlia: Base 30 sts, 15-16 small petals. These counts correspond to anchor spacing described in each motif section and help you ensure correct petal numbers. Adjust ch anchors if you want more or fewer petals (maintain spacing evenly).
— Color Variation & Scale Tips :
Info :
To scale the runner larger, substitute bulky yarn and increase hook size by 2 mm; motifs will enlarge proportionally but may require additional petals for balance. To make smaller runners, use a DK weight yarn and 4.0 mm hook, decreasing the number of repeats if required. Keep all motifs consistent in size for a uniform finished runner.
Completing this autumn floral runner is such a rewarding experience — each flower and leaf layered together becomes a centerpiece that brightens the whole room. The warm colors and textured petals feel like autumn captured in yarn, and the modular design makes it easy to customize length and palette. I hope you enjoy every stitch of making this runner and that it lives on your table for many cosy seasons! 🍂🧶