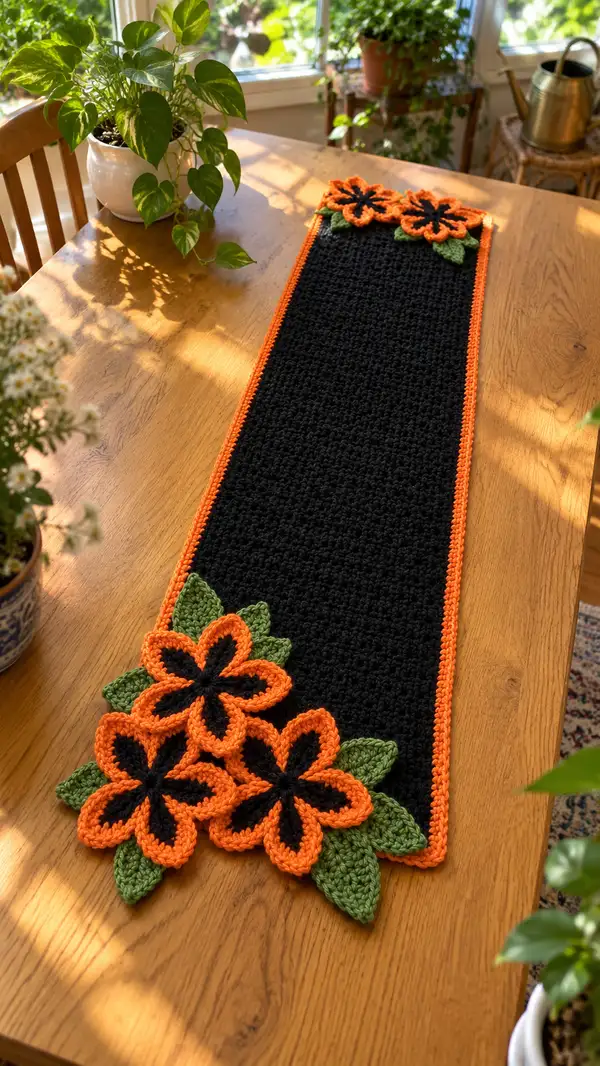
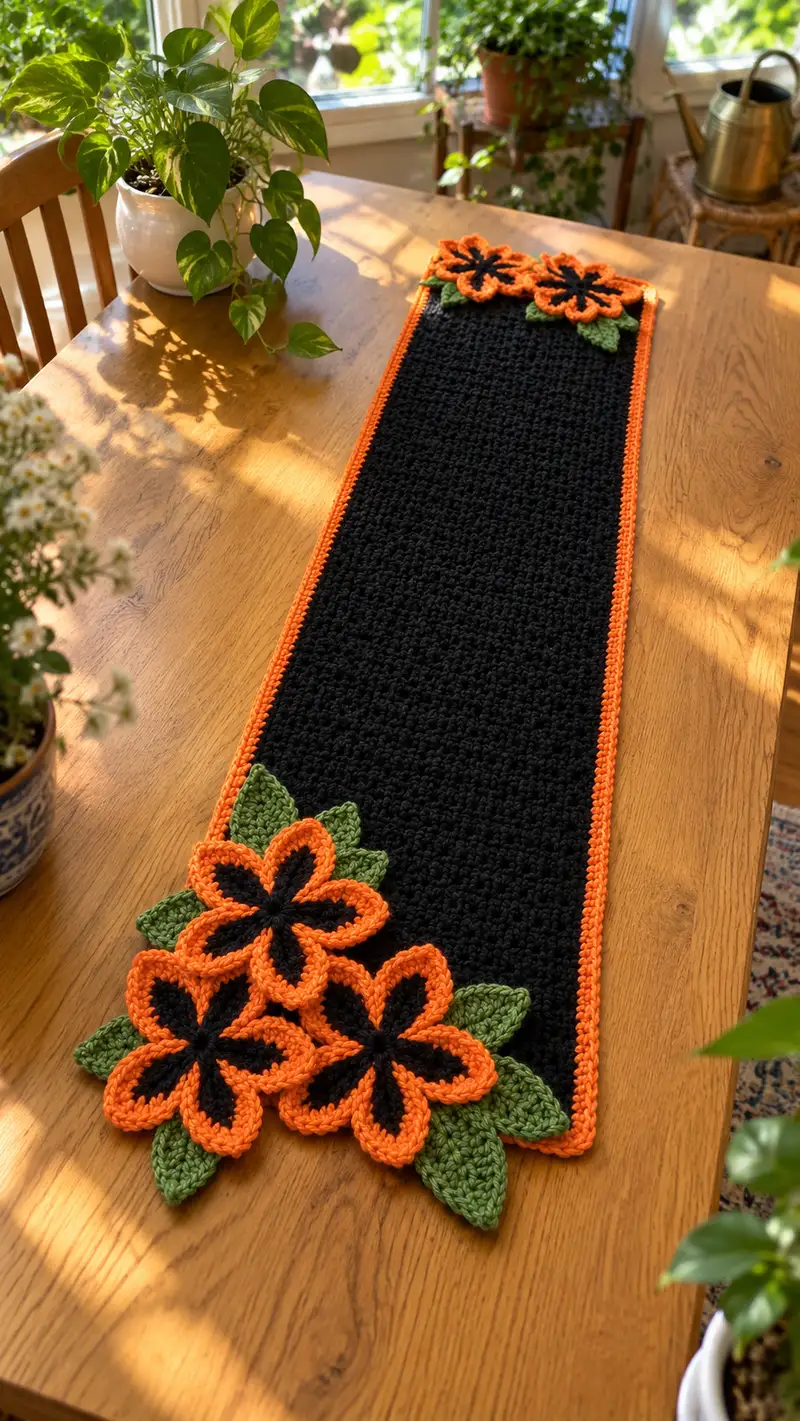
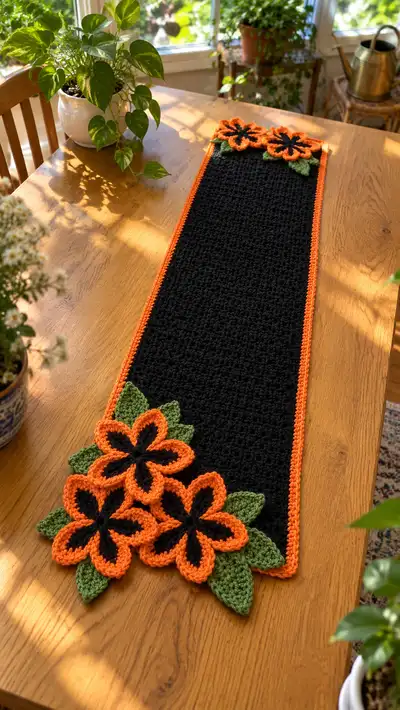
Create a striking black table runner edged in bright pumpkin-orange with layered orange-and-black flowers and green leaves at each end. This long, textured runner uses a simple, repeatable stitch for the body and modular floral motifs that are crocheted separately and sewn on. The bold color contrast and three-dimensional flowers make a perfect seasonal centerpiece for fall tables or Halloween décor.
Progress Tracker
0% Complete
— Materials and Gauge :
Info :
Gauge: 18 sc x 10 rows = 10 cm in single crochet (tension may vary). The runner pictured measures approximately 13" wide by 48" long. Use a 4.0 mm hook for a dense fabric; if your tension is loose, try a 3.5 mm hook.
— Overview :
Info :
This pattern is worked in three main components: the textured central panel (worked flat), a neat single-crochet border worked around the panel, and modular floral motifs (flowers and leaves) crocheted separately then sewn onto each end. The central panel uses a two-stitch texture repeat that is easy to memorize and creates a subtle, dense fabric that shows the bright motifs beautifully.
— Abbreviations and Notes :
Info :
Work in continuous rows turning at the end of each row. Count stitches regularly and mark the first stitch of each row with a stitch marker for consistency. Work motifs in the round; fasten off and weave ends before attaching. Use matching yarn for joining stitches when possible to make seams invisible.
— Main Panel (Textured Body) :
Row 1 :
With black yarn, ch 80. (80)
Row 2 :
Ch 1 (does not count as st), sc in 2nd ch from hook and in each chain across. Turn. (80)
Row 3 :
Ch 1, *sc in next st, hdc in next st; rep from * to end. Turn. (80: 40 sc + 40 hdc)
Row 4 :
Ch 1, *hdc in the stitch where you worked hdc last row, sc in the next stitch; rep from * across to end. Turn. (80)
Row 5-8 :
Repeat Rows 3-4 twice more (establishing the alternating textured linen/moss-like pattern). Keep stitch count 80.
Info :
Keep tension even. Place a marker in the first stitch of Row 3 and move it each row to track edge stitches. The alternating sc/hdc creates a tight, dense texture that resists curling.
Row 9-20 :
Continue repeating Rows 3 and 4 (pattern established) maintaining 80 sts. After Row 20 your panel should be developing length; check width and adjust if necessary (a gauge change may require adding or subtracting multiples of 2 chains at the foundation).
Info :
If you prefer a wider runner, increase foundation chain by multiples of 2 to preserve the pattern repeat. For every additional 2 chains, the row will remain even for the sc/hdc alternation.
Row 21-40 :
Continue repeating Rows 3 and 4. Turn after each row and keep the first stitch of every row marked. (80)
Info :
Check the panel periodically on a flat surface. If the edges begin to flare, tighten the first few stitches of each row slightly. If it cups, loosen them slightly.
Row 41-80 :
Continue the established two-row repeat. At the end of Row 80 measure the length; the pictured runner used 160 rows total for its finished length. If you want a shorter runner, stop earlier; for longer, continue in pattern until desired length is reached. (80)
Info :
The pictured runner finished at 160 rows. This provides a long, table-suited length (about 48" – your row height may vary based on gauge). I recommend planning for an even number of rows so the textured pattern balances evenly at both ends.
Row 81-160 :
Continue alternating Row 3 and Row 4 until you reach Row 160 (or your desired length). Maintain stitch count 80. Fasten off at end of final row and weave in a short tail to help join border later. (80)
Info :
Before adding border, block the panel lightly: dampen and pin to dimensions on a flat surface to help it lay flat and true. Allow to dry fully to set the stitches.
— Border (worked in pumpkin orange) :
Info :
We will work 3 rounds of single crochet around the entire panel to create a clean framed edge. Corners: when turning corners, work 3 sc in the same corner stitch to create a neat 90-degree turn.
Round 1 :
Join pumpkin orange with a sl st to any corner stitch. Ch 1, work 1 sc evenly up the side edge along the row ends (placing roughly 1 sc for every row end; this will create an even edge), 3 sc in top corner turning chain, sc across the foundation chain stitches (80 sc along the long edge), 3 sc in next corner, sc down the opposite side spacing to match the first side; sl st to join. (Approximately 2 x sides + 80 sc across; count will vary slightly by side row count)
Info :
When working sc up the short sides, place one sc into the end of each row of the main panel. This keeps the border even and tidy. If there is small discrepancy, adjust by adding or skipping a stitch or two on the short edge only.
Round 2 :
Ch 1, sc in each st around, working 3 sc in each corner stitches. Sl st to join. Fasten off and change yarn for Round 3 as needed. (st count ~ depends on exact row counts; sc in each stitch around)
Round 3 :
With the same orange yarn, join and work one more round of sc to make a clean raised border: ch 1, sc in each st around, placing 3 sc in each corner. Sl st and fasten off. Weave ends. This creates a defined orange frame around the black textured center.
Info :
If you prefer a thinner border, work only 2 rounds. For a more substantial framing, add a final round in crab stitch (reverse single crochet) worked from left to right for a twisted rope effect.
— Flower Motif (Make 5 for one end, 2 for the opposite end) :
Info :
Each flower is made in two parts: a small black central disc worked in the round, then a petal round worked in orange that attaches to the disc to create five rounded petals. The petals are made with chain arches and cluster stitches for a three-dimensional look. Finish petals by edging in orange sc for definition.
Flower - Round 1 :
With black yarn, mr, 6 sc into magic ring. (6)
Flower - Round 2 :
Inc in each st around (12). (12)
Flower - Round 3 :
(1 sc, inc) x 6 (18). (18)
Flower - Round 4 :
1 sc in each st around (18). Sl st to join and finish off black. Weave tail through center to tighten if needed. Fasten off black and attach orange into any st on Round 3 to begin petals. (18)
Flower - Info :
Place 5 marker points around the disc every 3-4 stitches where petals will attach—space them evenly. Each petal will be anchored into a base stitch of the black disc.
Flower - Round 5 (Petal base) :
With orange, join in the first anchor stitch, ch 1, sc in same st, *ch 9, skip 3 sts on disc, sc in next st (anchor), ch 1, sc in same anchor st; rep from * to make 5 chain loops (5 loops/anchor spaces total). Sl st to first sc. (This creates five loop foundations for petals)
Flower - Round 6 (Petal shaping) :
*Into first chain-9 loop: sc in loop, hdc 2, dc 5, hdc 2, sc 1. Break loop, sl st at base to secure. Rep into each chain-9 loop to form 5 petals. (Work identical clusters into each loop to keep consistent petal size)
Flower - Round 7 (Edge) :
Work sc evenly around entire flower edge (working 2-3 sc into curved petal tips to maintain flat shape). Sl st to join. Fasten off and weave ends. (st count variable depending on petals)
Flower - Info :
To make petals slightly raised, insert a tiny bit of polyfill into the petal base before closing the sl st. Use a few small fibers only; too much will distort the petal.
Flower - Optional Accent :
For the darker petal center seen in the photo, work short center spokes in black: using black yarn and a yarn needle, stitch five straight stitches from the disc center outward into each petal base (approx 4-6 mm) to suggest a star-like center. Knot and weave on back.
— Petal Detailing Variation (Alternate method for richer petal outline) :
Info :
If you prefer a fuller petal outline as pictured, after Round 7, rejoin orange at base of each petal and work sc in FLO only along the petal edge to create a raised ridge: sc in each st FLO around petal rim then sl st and fasten off. This creates the plump edge that visually separates petals from the black background.
— Leaf Motif (Make 8-9 as desired) :
Leaf - Round 1 :
With green yarn, ch 8. Sc in 2nd ch from hook, hdc in next, dc in next 2, hdc in next, sc in next, sl st in last ch to form small pointed chain base. (7)
Leaf - Round 2 :
Ch 1, working on opposite side of foundation chain: sc in first st along chain, hdc in next, dc 2, hdc next, sc last. Sl st to join at base. (symmetrical leaf)
Leaf - Round 3 :
Ch 1, sc around entire leaf, working 2 sc in tip stitch to create a rounded point and ensuring even tension. Sl st and leave a long tail for sewing. Fasten off. (st count variable)
Leaf - Info :
For a larger, sculpted leaf like in the photo, use ch 10 foundation and increase number of middle dc to 3-4 per side and use BLO or FLO for the final round to create a ridge down the center if desired.
— Flower Placement Plan :
Info :
The runner pictured uses a cluster of three overlapping flowers on one short end (arranged in a triangular group) and two overlapping flowers on the opposite end. Leaves are tucked under and around flowers to appear natural. Use pins to test arrangement before sewing. Typical layout spacing: three flowers at one end with centers arranged approximately 2-3 cm apart (center to center), two flowers at the opposite end spaced 2-3 cm apart and centered on the width.
— Assembly and Sewing Motifs On :
Info :
Block flowers and leaves lightly on a towel if they are a little irregular. Pin each motif to the runner in the arrangement you like. Use the long tails left for sewing and a yarn needle to whip stitch motifs to the border and main panel, sewing through the border where possible for extra stability.
Assembly Step 1 :
Position the cluster of 3 flowers on one end: place one flower centered on the corner with two slightly overlapping beside it forming a triangular cluster. Pin in place. Tuck 3-4 leaves behind and around the petals so the leaf tips point outward from the cluster. Sew each motif by stitching through the orange border and into the black panel edge when possible for a secure hold.
Assembly Step 2 :
Attach the opposite end cluster of two flowers centered on the other short end. Add 2-3 leaves behind them and sew in the same manner. Make sure to mirror the angle of the larger end so both ends look balanced when the runner is placed on a table.
Assembly Step 3 :
Secure any overlapping petals by stitching them together at the points they meet (use invisible whip stitch) so the cluster sits as one piece and does not gap. For extra security, sew through the petal base to the textured panel beneath to anchor the motif flatly.
Assembly Step 4 :
Weave in all ends and trim tails close to the surface. If you used a center black stitching accent, ensure those threads are secured on the underside with a few small knots and woven in to prevent unraveling.
Info :
If you want the petals to lift slightly from the body of the runner, add a small amount of fiberfill to the petal base before sewing to the panel. Use tiny bits only to avoid bulky lumps under the petal tips.
— Optional: Adding a Backing :
Info :
For a more finished look and to protect tabletops, cut a piece of craft felt slightly smaller than the runner, and sew with a running stitch around the back perimeter to attach. Use a matching orange thread or a slip stitch along the edge to secure felt invisibly.
— Finishing Touches :
Info :
Block the entire runner again if needed after assembly (steam lightly) and pin motifs to correct final position. Press gently with a cloth between iron and yarn if needed — avoid direct high heat. Add optional tiny seed beads or French knot embroidery in the flower center for sparkle if desired.
Final Care :
Hand wash gently in cool water with mild detergent. Reshape while damp and lay flat to dry. Avoid wringing or twisting to preserve the petals and texture.
This runner brings together simple stitches and show-stopping motifs to create a centerpiece that's both bold and homey. The textured black panel provides a refined backdrop for the bright orange flowers and sculpted green leaves — a beautiful fusion of minimalist design and playful detail. It's a satisfying project that makes a charming seasonal gift or a warm addition to your own dining space. 🧶🍂✨