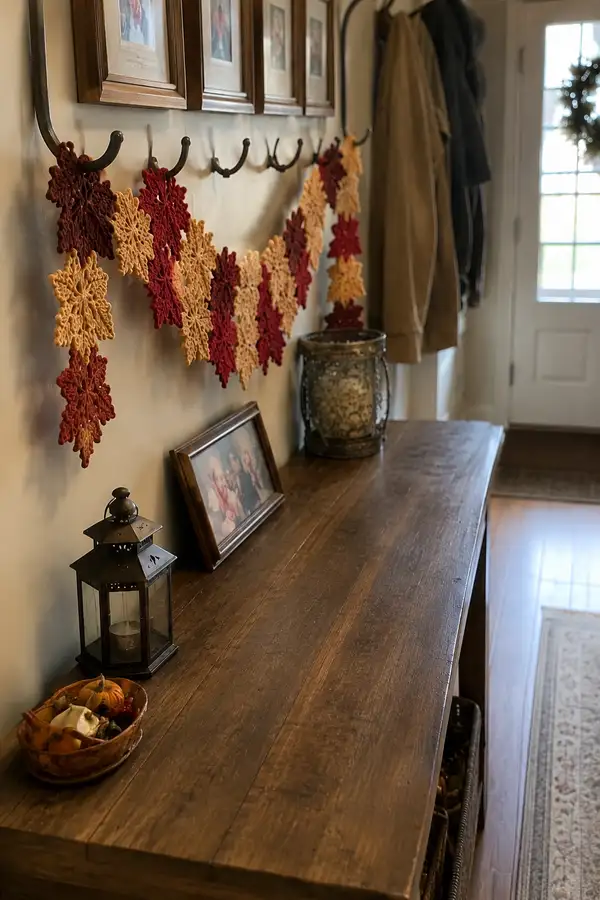
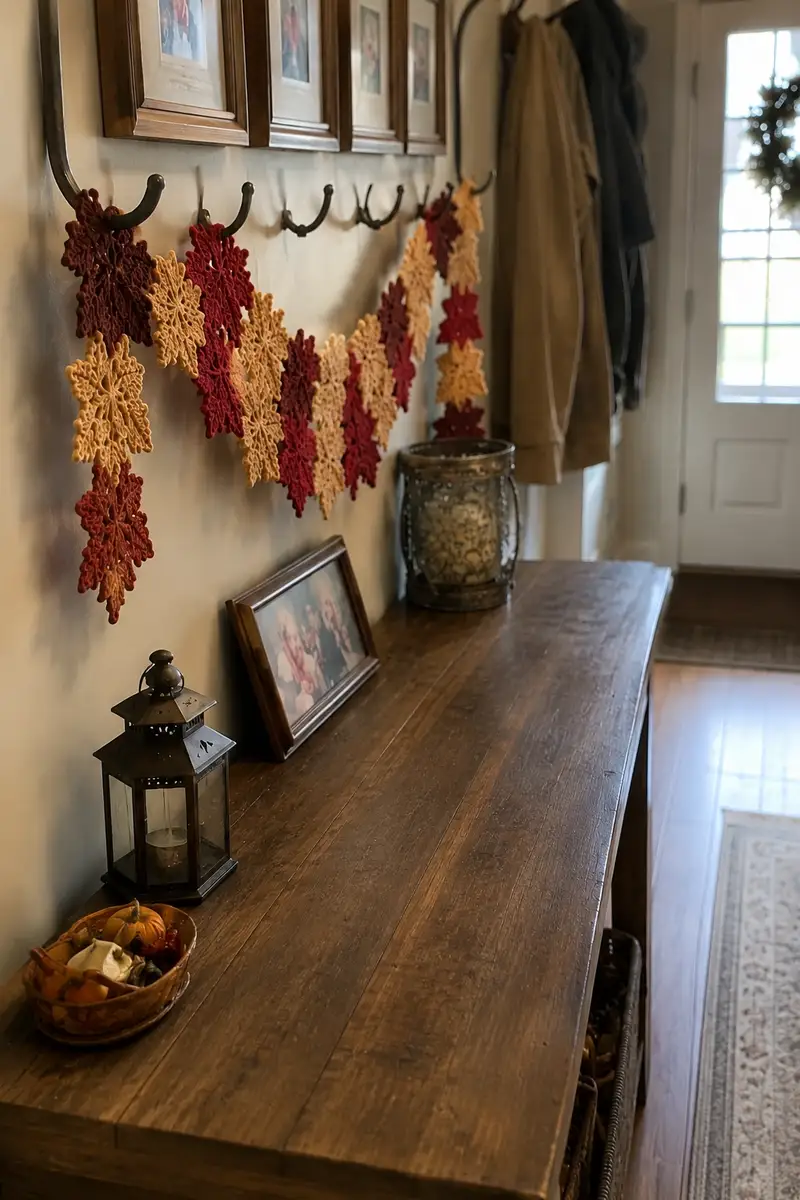
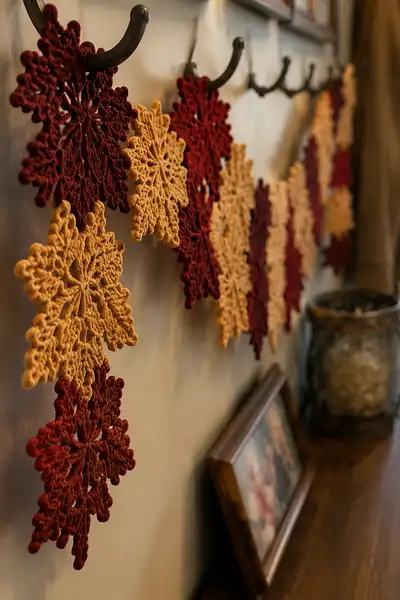
Create a warm autumn centerpiece with this Cascading Maple Leaves Table Runner. The design features richly textured maple-leaf motifs worked in cranberry and honey tones, joined into a flowing garland that hangs beautifully along a console or table. Each leaf is made with layered lace stitches and raised bobbles for a dimensional, handcrafted look. This pattern includes detailed motif instructions, joining and edging techniques for a polished finish.
Progress Tracker
0% Complete
— Overview & Techniques :
Info :
This pattern is built around a 30-round Maple Leaf motif and a 20-round Mini Leaf motif. Make 10-14 full leaves and 8-10 mini leaves to achieve the cascading look in the photo; adjust counts to fit your desired runner length. Work with worsted weight yarn and a 4.0mm hook unless you prefer a drapier or firmer fabric. Puff stitches are used to create raised ribs; each 'puff' is made by yarning over multiple times and pulling through to gather. When working picot points, maintain a tight tension to keep points crisp. Block each motif lightly before joining for even shapes.
Info :
Puff stitch instructions: Yarn over, insert hook, pull up loop (yarn over, insert, pull up) 3 times total to make 4 loops on hook, yarn over and pull through all loops, ch1 to close puff. Alternative: 2-yarn-over puffs for a smaller profile. Adjust amounts as desired but keep consistent across motif.
— Large Maple Leaf Motif (Make 10-14) :
Round 1 :
6 sc in magic ring (6)
Round 3 :
(1 sc, inc) x 6 (18)
Round 4 :
(2 sc, inc) x 6 (24)
Info :
These first rounds form a small solid center. Keep gauge tight to prevent gaping when later rounds open up into lace.
Round 5 :
(3 sc, inc) x 6 (30)
Round 6 :
1 sc in each st (30)
Round 7 :
(4 sc, inc) x 6 (36)
Round 8 :
1 sc in each st (36)
Info :
From round 9 we begin to introduce puff clusters and chain spaces that will form the leaf lobes. Place a stitch marker at the start of each round.
Round 9 :
(sc in next 2 sts, ch3, skip 2 sts, puff in next st, ch1) x 12 (36 main points/ch-spaces)
Round 10 :
Sl st into first ch3 space, ch3 (counts as first tr), tr, ch1, tr into same ch3 space; *sc into next puff base, ch3, tr, ch1, tr into next ch3 space; repeat from * around. End sl st into starting ch3 (36 shells)
Info :
Shells of 2 tr separated by a ch1 will give a lacy fan that begins the lobed structure. Keep the puff stitches consistent; if puff height varies, the lobes will look uneven.
Round 11 :
Ch1, sc into each tr and sc across each shell and puff base (36)
Round 12 :
(sc in next 3 sts, puff in next st, ch2, skip 1, sc in next 2) x 12 (36)
Round 13 :
Join by sl st into first puff base, ch3, (puff, ch1) x3 into same space to make a raised point; *sc into next sc-group, (puff, ch1) x3 into next puff base; repeat from * around. End sl st into starting ch3 (12 raised points)
Info :
This round begins the distinct maple points. Each group of (puff,ch1)x3 forms a raised triangular tip. Keep counts consistent: 12 main points around the motif.
Round 14 :
Ch1, sc in same st, *ch3, skip 2, (2 tr, ch1, 2 tr) in next st (small fan), ch3, sc in next sc; repeat from * around to create elongated lobes (12 fans and spaces)
Round 15 :
1 sc in each st and into ch3 spaces across (36)
Round 16 :
(sc in next 2 sts, 3-dc cluster in next st, ch2, skip 1, sc in next 2) x 12 (36)
Info :
3-dc cluster gives a raised ridge; maintain consistent cluster technique: yarn over, insert, pull up loop, yarn over and pull through two, repeat 3 times then yarn over and pull through all loops to close cluster.
Round 17 :
Ch1, sc around working into every dc and cluster and sc (36)
Round 18 :
(sc in next 1 st, puff in next st, ch4, skip 2, sc in next 2) x 12 (36)
Round 19 :
Sl st into first ch4 space, ch3, tr into same ch4 space, ch2, tr into same space; *sc into next puff base, ch4, (tr,ch2,tr) into ch4 space; repeat around. End sl st into starting ch3 (12 leaf lobes)
Info :
These chain-4 loop fans will be elongated later into the external points; count carefully to retain 12 evenly placed lobes.
Round 20 :
Ch1, sc across each tr, in each ch4 space work (sc, ch3, sc) to establish central ch-points (36)
Round 21 :
(sc in next 2 sts, (puff,ch1)x4 into next sc grouping to create point base, sc in next 2) x 6 (42)
Info :
Round 21 expands the motif into six larger secondary points interleaved with the 12 lobes. Count math: original 36 plus (each group adds 1 extra st across 6 groups) = 42.
Round 22 :
1 sc in each st (42)
Round 23 :
(sc in next 3 sts, picot: ch3, sl st into top of last sc, sc in next 3, skip 1) x 6 then sc around remaining sts to complete round (42)
Round 24 :
Working into picot bases, make (sc, hdc, tr, picot (ch3 sl st to tr), tr, hdc, sc) across each of the 6 large points to form pointed tips. Work remaining stitches between points in sc (approx 42, depending on tension)
Info :
Picot placement ensures crisp points. If your picots are too small, use ch4 instead of ch3. Maintain symmetry by counting stitches between each shaped point.
Round 25 :
1 sc across entire round in BLO to give a raised ridge around the motif and help the leaf cup slightly (42)
Round 26 :
(ch5, sl st into next picot point, sl st into next sc) x 6 to form small decorative hanging loops around main points, then sc in each remaining st across (42 loops + sc)
Round 27 :
Edging round: *sc in next 2 sts, picot (ch3 sl st to first sc), sc in next 2 sts; repeat across entire motif to give scalloped edge (42)
Round 28 :
Fasten off, weave ends. Block gently to open points and flatten motif. If using a color change, finish in that color and secure tail at back.
Info :
After round 28 the motif should be roughly 5-6 inches at widest point depending on yarn and tension. Light blocking will help match sizes across motifs for neat joining.
— Mini Maple Leaf Motif (Make 8-10) :
Round 1 :
6 sc in magic ring (6)
Round 3 :
(1 sc, inc) x 6 (18)
Round 4 :
1 sc in each st (18)
Info :
Mini leaf follows similar shaping but with compressed rounds to create a smaller element for alternating spacing in the runner.
Round 5 :
(sc in next 2 sts, ch3, puff in next st) x 6 (18)
Round 6 :
Sl st into ch3 space, ch3, (tr, ch1, tr) in same space; *sc into next puff base, ch3, (tr,ch1,tr) into next ch3 space; repeat around (6 shells)
Round 7 :
Sc in each st across (18)
Round 8 :
(sc, puff,ch1,puff, sc) into every third st to form small lobes (approx 18)
Round 9 :
Ch1, sc around; then in selected lobes work picots at tip (ch3 sl st) to provide texture and small points (18)
Round 10 :
Work edging: sc in each st, picot on alternating lobes for a crisp silhouette. Fasten off and weave ends.
Info :
Mini leaves should measure roughly 3-4 inches across; these act as fills and visual rhythm between larger leaves. Block to match sizes.
— Joining Chain & Layout :
Info :
Decide on your layout first. The sample runner alternates colors: Cranberry large leaf, Honey mini leaf, Cranberry large, Honey large, Cranberry mini, etc. The runner in photos has 10 large leaves and 8 mini leaves joined with short chains so motifs drape. Lay motifs flat and pin in place before joining.
Round 1 (Join Preparation) :
With contrast or same yarn, create a foundation chain tailored to motif spacing: ch6 for each gap between large motifs and ch4 between large and mini. Example chain sequence for 10 large + 8 mini: ch6, attach leaf A, ch4, attach mini, ch6, attach large, etc. Adjust chain lengths to taste.
Round 2 (Joining Method A - Slip-Stitch Join) :
Attach yarn to picot at top of leaf A with sl st, ch spacing required (ch6 or ch4), sl st into corresponding picot or loop of next motif to join. Repeat along the runner so motifs are linked. Ensure equal tension in the join chains so the runner hangs evenly.
Info :
Slip-stitch join is nearly invisible and keeps motifs connected but flexible. For a more decorative join, use chain loops and small connecting picots and then rope-twist them by working sc into both chain and motif picots.
Round 3 (Joining Method B - Crochet Join with Sc) :
For stronger join, use sc: with yarn attached to motif picot, ch3 then sc through the chain and into next motif's picot. Work 3 sc across chain before attaching to next motif; this creates a firmer, visible chain between motifs.
Info :
When joining, always pin and count chain stitches before committing. Maintain symmetry by joining equivalent points on each motif (ex: join picot at round 26 loop on both motifs).
Round 4 (Anchoring Joins) :
Every 3-4 joins, add a 5-6 ch hanging loop worked into the join chain for optional hooks or for decorative weight. Make these consistent every set to prevent slouching.
— Border & Edge Treatment (Optional Full Runner Edge) :
Round 1 :
With yarn attached at one end of runner, ch1 and sc evenly around the entire outer edge of the connected motifs, working 1 sc in each visible stitch/picot base. Use extra sc (2 sc) in corners or between motifs to maintain flatness.
Round 2 :
*(sc in next 2 sts, picot ch3 sl st), sc in next 2 sts; repeat along entire border to create continuous scalloped edge
Info :
If you prefer a crisp edge, work a final round in BLO (if possible) or use a smaller 3.5mm hook to tighten the border. For a textured trim, alternate sc and hdc around the shape.
Round 3 :
Optional decorative round: Work crab stitch (reverse single crochet) around to give a rope-like finish. Fasten off and weave ends neatly to the back of the runner.
Round 4 :
Blocking/Finishing: Pin runner flat to standard shape and lightly steam or spray with water. Allow to dry; if you like crisp points, apply a small amount of fabric stiffener to picot points following manufacturer's instructions.
— Full Step-by-Step Assembly Sequence :
Info :
Suggested assembly order: Block motifs → arrange layout → join motifs left-to-right working consistent chains → add hanging loops at strategic intervals → complete border rounds → final block and finish. Always work joins on a flat surface and pin motifs before sewing.
Round 1 (Pin Layout) :
Arrange motifs on blocking mat using pins to mark centers and outer tips. Leave approx 1-1.5 inches between large motifs along the chain before finalizing chains for drape.
Round 2 (Begin Joins) :
Attach yarn to designated picot on Leaf 1, ch6, attach to Leaf 2 picot with sl st. Adjust chain tension so motifs sit naturally without pucker. Continue for the length.
Round 3 (Mid-Runner Stabilizer) :
At midpoint of runner, add two parallel ch3 joins between adjacent motif pairs to provide extra stability in the middle of the runner. This prevents sagging after washing.
Info :
If using heavier yarn or longer runners, consider adding a crocheted cord sewn to the back for extra support. Sew cord discreetly along the back with a yarn needle.
Round 4 (Final Edge) :
Work border rounds described earlier around entire runner to tidy joins and present a continuous silhouette. Fasten off and weave all ends to the back.
Round 5 (Optional Hangers) :
Create small ch10 loops spaced every 3-4 motifs and secure to join chains for hanging; reinforce with two more sc through both loop and join to prevent stretch.
— Alternate Color & Variation Notes :
Info :
Alternate colors every motif for vibrant contrast or use gradient colors for subtle shift. For vintage look, use a light tan for joins. To make a placemat instead of runner, join 4-6 motifs in a square and work the same border instructions.
Info :
To increase motif size: use bulkier yarn and larger hook; your counts will remain but gauge changes motif diameter. To decrease size: use fingering or DK yarn and smaller hook; adjust joining chain lengths proportionally.
— Troubleshooting & Tips :
Info :
If motifs differ in size, steam-block all motifs together and re-pin to identical dimensions, or adjust border sc counts to even out differences. For loose picots, reduce ch length by one or use a smaller hook for edging rounds. If seams pucker, reduce tension on join chains and add small stabilizing stitches at the back.
Info :
Keep a row counter or marks on your layout to track which picot on each motif is used for joins; consistent referencing prevents mismatched joins and rotation errors.
— Yield & Sizing Guidance :
Info :
Using worsted weight and 4.0mm hook, one Large Leaf measures ~5-6 inches across; one Mini Leaf ~3-4 inches. The photographed runner uses ten Large and eight Mini for a total length approx 60-70 inches including drape. Adjust motif counts to reach your desired length.
Info :
Yarn usage estimates: each large leaf uses ~12g-15g of worsted yarn; each mini leaf uses ~6g-8g. Multiply accordingly to estimate yardage.
This Cascading Maple Leaves runner brings the golden warmth of fall into your home with handcrafted charm. Each leaf carries texture and character, combining lacework, raised puffs and crisp picots to capture autumn’s spirit. Whether draped along a console or displayed as seasonal wall garland, this runner becomes an inviting accent and a conversation piece. Enjoy the meditative stitching and the cozy satisfaction of creating a seasonal heirloom. 🍁🧶