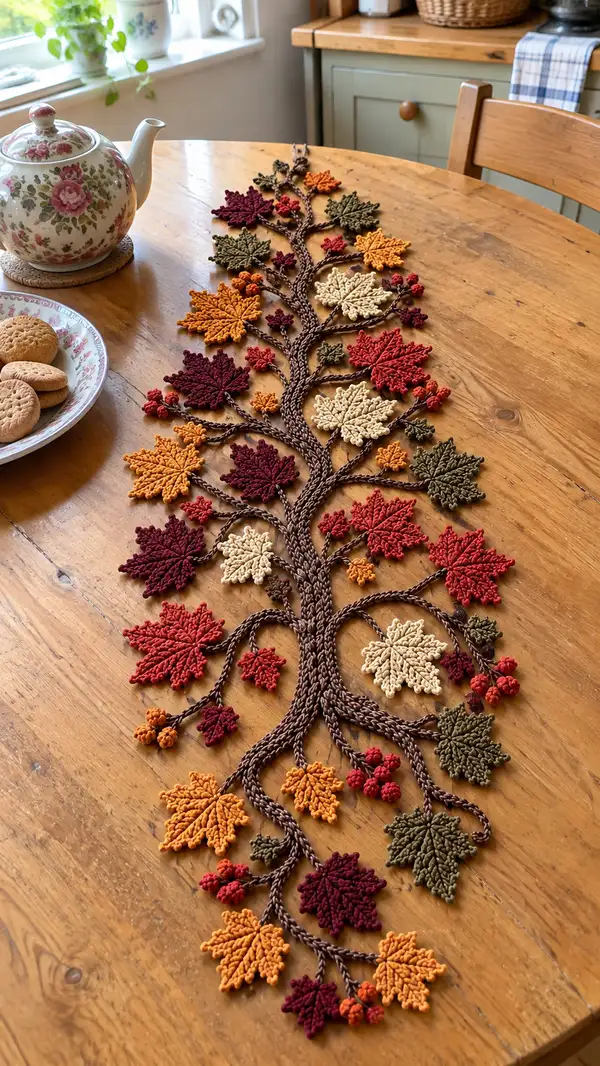
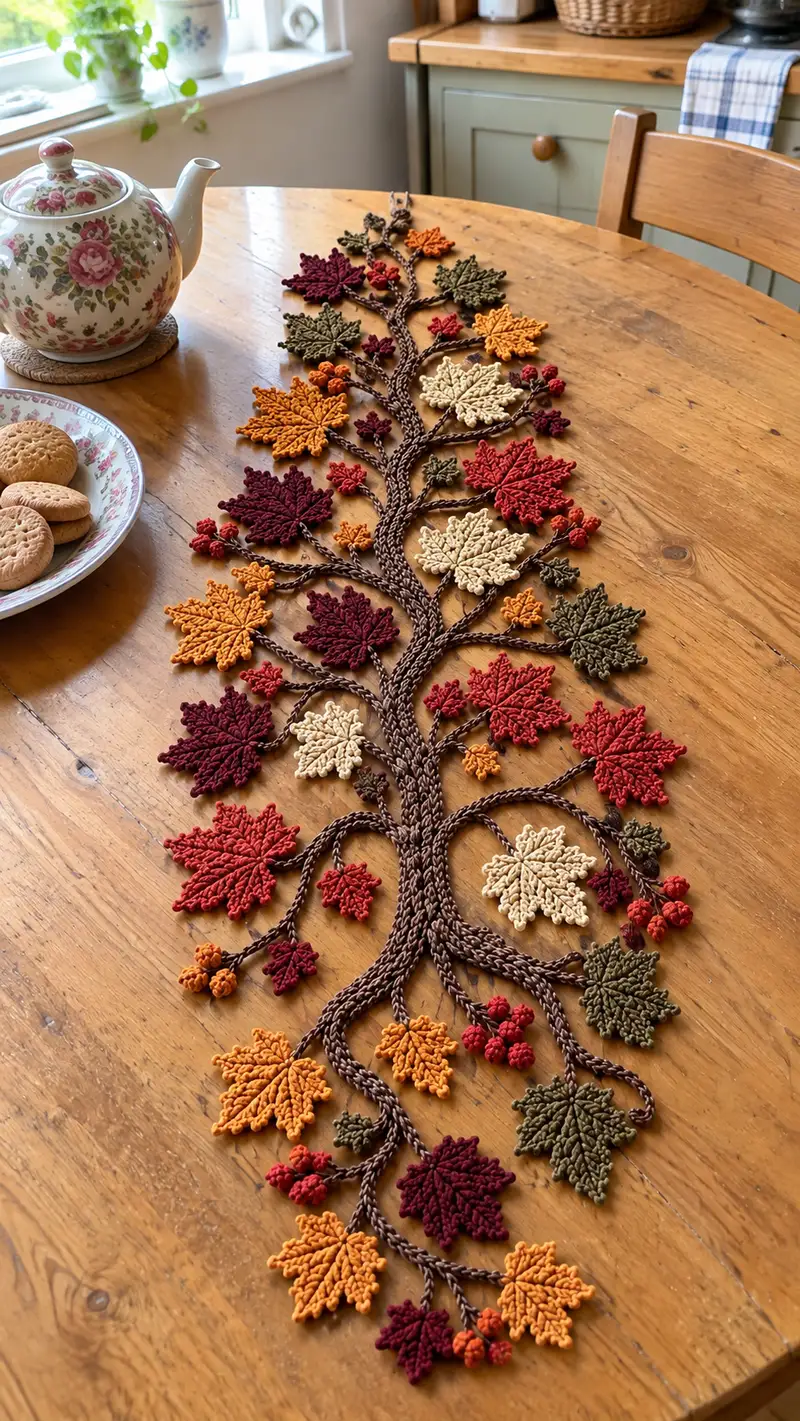
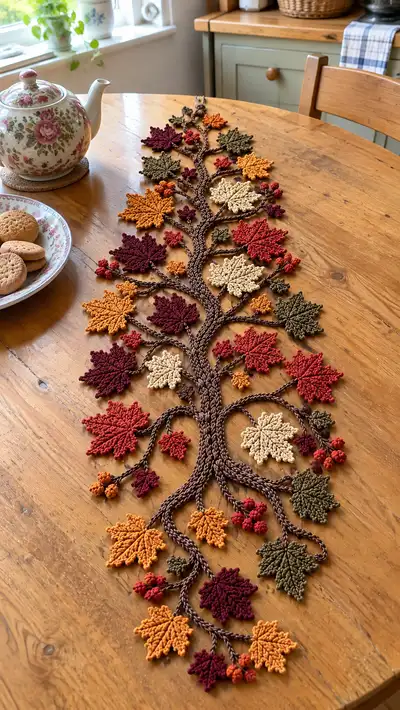
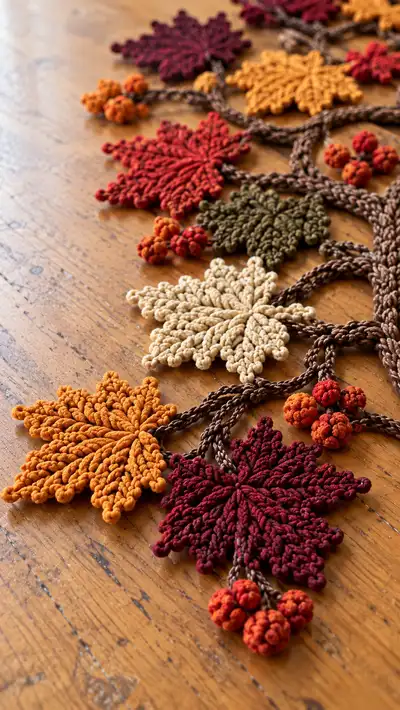
A richly textured fall table runner made from crochet braided trunk, delicate maple-style leaves and clustered berries in warm autumn hues. This pattern recreates the layered arrangement in the photo with detailed instructions for cords, multiple leaf sizes, and berry clusters. Perfect for a centerpiece or seasonal decor, the finished runner lays flat and can be customized in length and color.
Progress Tracker
0% Complete
— Overview :
Info :
This pattern builds a flat, decorative autumn branch runner composed of crocheted cords (the trunk and branches), maple-inspired leaves in three sizes and clustered berries. Work each component separately and assemble at the end. I recommend making the trunk and the main branch cords first to determine placement, then create leaves and berries to attach. Use smooth worsted cotton for crisp stitch definition. All counts and lengths are approximate; adjust cord lengths to fit your table.
— Materials & Gauge :
Info :
Gauge is not critical since pieces are worked separately, but aim for about 4 sc = 1 inch in single crochet with 3.5mm and worsted cotton. Make a test leaf to get used to tension and blocking.
— Trunk & Main Cords :
Info :
The trunk is built from multiple crocheted cords joined and braided. Each cord is created as a narrow tube using a 3-4 stitch I-cord method (work into back loops of a chain tube) to create a firm, round rope. Make 6 cords of different lengths and braid or tuck into a flat root/branch assembly.
Cord: Preparation :
Make a test cord to establish your chain length. Typical cord thickness uses a foundation chain of 6-12 chains and working sc around the chain to form a tube. The cords are then worked in continuous rounds (spiral) until the desired length is achieved.
Round 1 :
Ch 10 using trunk color. (10)
Round 2 :
Working into back bumps only, 1 sc in 2nd ch from hook and across to end (9). Do not turn; rotate to work along the opposite side of chain.
Round 3 :
Now work 9 sc along the opposite side of the foundation chain into corresponding bumps (9). Slip stitch into first sc to close the round into a narrow tube. (9)
Info :
From this point work in spiral rounds without joining: place a stitch marker at the first stitch of the round and move it up each round. The cord will form a tube. If you prefer a flatter cord, work 1 sc in each st FLO for a cord with a flat back for sewing.
Round 4-48 :
1 sc in each st around (9) — work until cord reaches approximately 10-16 inches in length depending on placement. Make 6 cords of varying lengths: two long cords (14-16 in), two medium (10-12 in), two short (6-8 in). For a longer runner make cords longer as needed.
Info :
When finishing each cord, fasten off leaving a long tail for sewing. Optional: create a loop at one end by chaining 6 and slip stitching into the end of the tube to provide an anchor point when assembling trunk roots.
Round 49 :
After making all cords, braid or twist cords as shown in photo: group cords in pairs and loosely braid to create a trunk feel. Secure ends by whip stitching cords together with matching yarn, overlapping about 1-2 inches for a stable join.
Info :
Use pins to arrange the trunk shape on a flat surface before sewing — this pattern's trunk has a natural serpentine curve with two major root forks and multiple branches. Arrange cords to form those curves and tack them together with ladder stitch.
— Leaf: Large Maple-Style (Make 8) :
Info :
Large leaves are worked flat from a central starting point and use raised rib stitches (post stitches and BLO stitches) to create the visible veins. Each leaf is worked in joined rounds that build 8 leaf lobes for a star-like maple shape. The following pattern describes one large leaf approximately 3.5-4 inches across before blocking.
Round 1 :
Make a magic loop; 6 sc into magic loop. Pull tight. (6)
Round 2 :
(1 sc, inc) x 3 on one side to start a lobe, then rotate and repeat for 8 mini-lobes: work (inc) x 6 total around to make base round. For consistency use (1 sc, 1 inc) x 3 then (2 sc, inc) x 3 etc. Result after full increase: 12 sc. (12)
Info :
We will shape a leaf by building out 8 lobes separated by small picot-style points. Keep stitches on the low side to maintain a defined edge; blocking will open up the lobe shape.
Round 3 :
(2 sc, inc) x 4 then (1 sc, inc) x 4 for the alternate lobes to encourage a slightly star-shaped outline. Result: 20 sc. (20)
Round 4 :
1 sc in each st around (20). Work loosely to allow the next round to form ribs. (20)
Round 5 :
(3 sc, inc) x 5 (25)
Round 6 :
1 sc in each st BLO (25). This creates a small ridge for defined veins. (25)
Info :
Now we will define 8 distinct veins. You'll make raised front post stitches along radial lines. Use a stitch map: mark stitches for each vein placement with 8 stitch markers evenly spaced around the top of the leaf.
Round 7 :
*At each vein marker: fpdc around next st (front post double crochet) to create a raised rib; ch2 between ribs* around. Work entire round so you have 8 raised ribs separated by small chain spaces. (Approx 25)
Round 8 :
1 sc in each st and ch space around, working into back of fpdc where possible to anchor ribs (25). (This flattens and anchors the ribs.)
Info :
To shape pointed lobes, we will work clusters and picots at the outer edge. If you prefer a softer leaf edge omit the picots and work simple sc edging instead.
Round 9 :
(4 sc, picot) x 5 then (3 sc, picot) x 3 to form alternating deep and shallow lobes. Picot = ch3, sl st into 3rd ch from hook. Count carefully. Expected stitch count remains approximately 25 after picots incorporated as they sit on edge points.
Round 10 :
1 sc in each st and around picots working sl st into picot apex so that each point is reinforced. (25)
Round 11 :
Working in FLO, 1 sc in each st to create a neat textured border. (25)
Info :
Fasten off leaving a long tail for sewing. Block leaf flat: pin into maple shape with ribs radially fanning out. Steam or wet block and allow to dry to set shape. Repeat to make 8 large leaves. Leave tails for attachment at leaf base.
— Leaf: Medium Maple-Style (Make 10) :
Info :
Medium leaves follow a similar method with fewer rounds and slightly fewer lobes. They will measure about 2.5-3 inches across after blocking.
Round 1 :
Magic loop, 6 sc in loop. (6)
Round 2 :
(1 sc, inc) x 6 (18)
Round 3 :
1 sc in each st around (18)
Round 4 :
(2 sc, inc) x 6 (24)
Round 5 :
1 sc BLO around (24). This makes a folding line for ribs. (24)
Round 6 :
Set 6 evenly spaced markers for veins. At each: fp sc (front post sc) around the next stitch; ch1 between ribs. Work entire round. (24)
Round 7 :
1 sc in each st around to anchor ribs (24)
Round 8 :
(3 sc, picot) x 6 to create defined lobes; picot = ch3, sl st back into 3rd ch. (24)
Info :
Finish with 1 sc round and fasten off leaving a tail for sewing. Block gently. Repeat to make 10 medium leaves.
— Leaf: Small Maple-Style (Make 12) :
Round 1 :
Magic loop, 6 sc (6)
Round 2 :
(inc, sc) x 3 (9)
Round 4 :
(2 sc, inc) x 3 (12)
Round 5 :
1 sc BLO around (12)
Round 6 :
Make 3 raised fp sc ribs spaced evenly: *fp sc around next st, ch1* rep 3 times. (12)
Round 7 :
Edge round: (2 sc, picot) x 4. Fasten off leaving a long tail. Block lightly. (12)
Info :
Small leaves are great for filling gaps and for the base of berry clusters. Make at least 12-14 small leaves to match the photo arrangement.
— Berry Cluster (Make ~18 clusters) :
Info :
Berries are small bobble pods grouped in clusters of 3-6 berries. Each berry is a tight bobble ball created by working single crochets into a magic ring, then forming a 3-row bobble cap and closing. Use slightly fuzzy or textured yarn for berry effect or the same cotton for neat clusters.
Round 1 :
Magic loop, 6 sc into loop, pull tight. (6)
Round 3 :
1 sc in each st BLO (12) — creates small ridge. (12)
Round 4 :
Work bobble round: *yo, insert hook into next st, pull up loop, yo, pull through 2 loops, leave; rep 3 times in same st to form triple partial bobble, then yo and pull through all loops to close bobble; sl st in next st to anchor* Rep around to create clustered surface. Expect 4-6 bobble points. Fasten off leaving tail. (approx 12)
Info :
Make clusters by sewing 3-5 berries together with matching yarn to form the larger berry clusters seen in the photo. Vary cluster sizes for a natural look. Leave a long tail to attach cluster to branches.
— Branch Sub-Cords & Small Twigs :
Info :
Branches are created from the same cord technique as the trunk but are single or double cords, shorter and sometimes twisted. Many small twiglets are made from short chains with slip stitch reinforcement to remain flexible for sewing under leaves and clusters.
Round 1 :
Ch 18 for a short twig. Join with sl st to first ch to form loop if you want a ring base or work as a long chain left unjoined. (18)
Round 2 :
Work 1 sc in each ch back along chain, then 1 sc around the opposite side if joined to make a tube (18). Fasten off. (18)
Round 3 :
For a braided twig: make 3 short cords of 12 ch each and 1 sc around to form tubes, then braid and sew ends together. Fasten off. (12 per cord)
Info :
Create many twig pieces of different lengths (6-12 cords) to tuck and stitch under leaves and berry clusters for a natural branching effect. Use shorter twigs near the leaf tips and longer ones nearer the trunk.
— Decorative Veining (Optional) :
Round 1 :
Use contrast color or same as leaf: ch 30, sl st back into chain to make a twisted cord of variable length to stitch over leaf center as a prominent vein. Fasten off leaving tail. (30)
Info :
These thin chains can be sewn along the underside of each leaf to create accent veins or layered across the trunk for visual interest.
— Edging Ropes & Finishing Curls :
Round 1 :
Make an I-cord of 6 ch foundation and 6 sc around then spiral to 30-40 in length for each decorative curl at the ends of the runner. (6)
Round 2-40 :
1 sc around in spiral to desired length. Fasten off leaving long tail to sew and curl naturally. (6)
Info :
These ropes are used to create the lower root curl and top curl in the photo. Bend into shape and press lightly with steam to hold a little if desired.
— Assembly Preparation :
Info :
Lay out the trunk cords in the desired serpentine shape on a flat table. Pin lightly. Decide locations for large, medium and small leaves and mark them with pins. Group berries and small leaves into clusters. Keep a photo reference of the finished layout nearby for guidance.
Round 1 :
Sew trunk cords together where they overlap using mattress/ladder stitch, securing with at least 6-8 passes per overlap so the trunk feels integral. Use the long tails left at cord ends to weave inside the trunk and hide ends. (No stitch count)
Info :
Use small, even stitches and keep sewing on the underside where the table will touch the piece. If you want a reversible runner, sew more neatly on both sides and avoid visible knots.
Round 2 :
Sew main branches by tacking short cords to the trunk at desired points using whip stitch around both trunk and cord for stable attachment. Use at least 8-10 secure stitches per branch. (No stitch count)
Info :
Attach leaves and berries last — pin each leaf, berry cluster and twig into place, then sew through the base tail of the leaf into the trunk/branch cord with a few secure passes. Reinforce heavy elements with extra stitches.
— Detailed Leaf Attachment (Examples using round refs) :
Round 1 :
Attach a large leaf: position leaf base where a branch forks (for example near trunk cord round 24 if you counted cord rounds earlier). Push the tail through the trunk cord using tapestry needle, stitch through both trunk and base of leaf 6-8 times, then weave tail through trunk cords to hide. Repeat both sides of the leaf for stability. (No stitch count)
Info :
When attaching leaves, angle them slightly upward so they cast soft shadows and show the ribbing. Use a few invisible stitches on the top side to secure if necessary but keep most sewing on underside.
Round 2 :
Sew berry clusters by threading the cluster tail through the trunk or branch and securing with several passes. Arrange clusters in small groups of 2-4 berries each, sometimes sewing a small leaf under each cluster to camouflage the join. (No stitch count)
Info :
Place smaller leaves and twiglets around cluster bases to integrate them visually. Use contrasting thread or yarn for subtle anchoring stitches if trunk color hides stitches too well.
— Final Shaping and Blocking :
Round 1 :
Once everything is sewn in place, lightly steam the whole runner while pinned into final shape to relax yarn and flatten leaves. For cotton yarn a damp towel and iron on low or gentle steam works. Allow to dry fully. (No stitch count)
Info :
Check all sewn joins once more after blocking and add extra stitches where needed. Trim any stray fibers and weave in all remaining ends. If you want extra stiffness, brush a little diluted fabric stiffener under each leaf then dry flat.
— Alternative Construction Notes :
Info :
If you prefer a crocheted flat trunk rather than braided cords, create a wide flat strip using 6-8 sc in foundation row and work even rows until desired width; then cut slits for branch attachment points and sew branches into slits. This will change visual texture but simplifies the structure.
Info :
To make a longer runner, simply add more cords and more leaves: create additional medium/small leaves as needed and continue trunk braid in the same style. Keep leaf spacing regular to maintain balance.
— Care Instructions :
Info :
Spot clean with a damp cloth. If machine washing is necessary use a gentle cold cycle inside a pillowcase bag and reshape immediately; however, hand-washing is recommended. Re-block leaves after washing to restore shape.
This autumn branch table runner pattern brings the beauty of falling leaves to your table with tactile ribs, braided trunk textures and clustered berries. Each component is simple to make and satisfying to arrange, allowing you to customize every color and length. From yarn to final blocking, you'll enjoy assembling a seasonal centerpiece that sparks warmth and compliments your home. 🧶🍁 Place it proudly on your table and enjoy the cozy fall vibe! 🍂