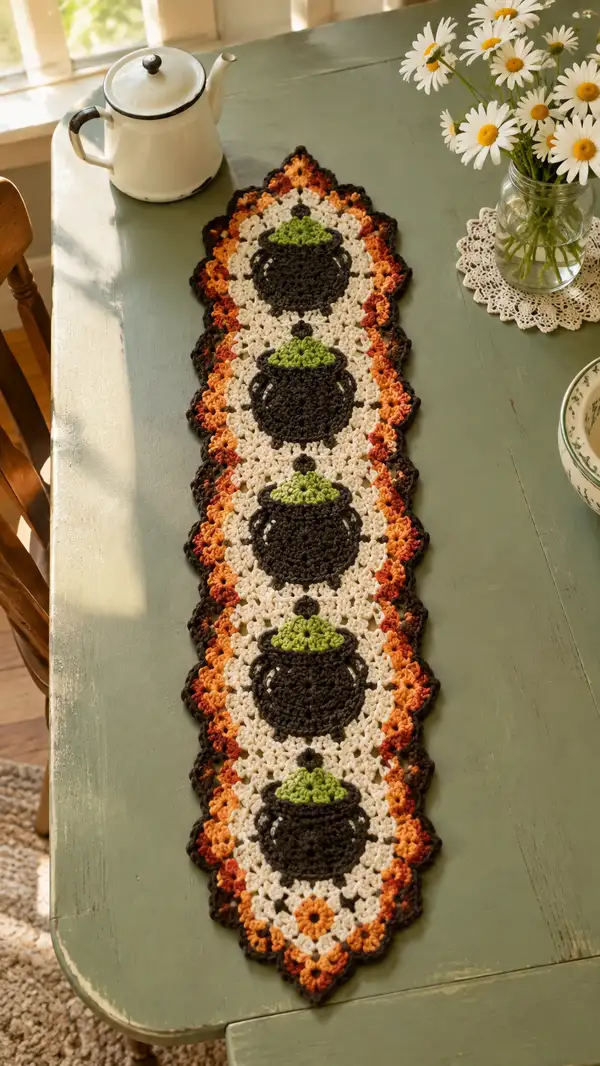
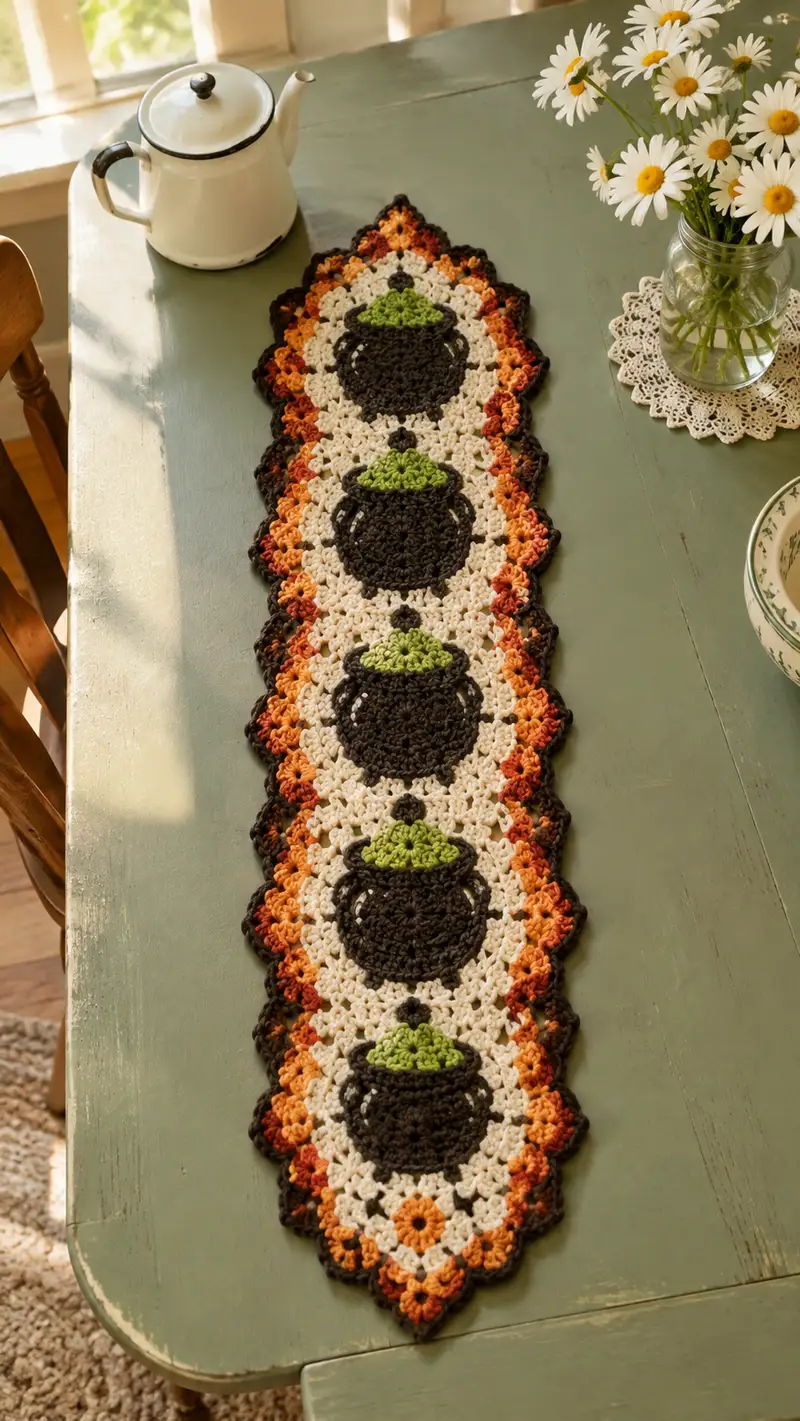
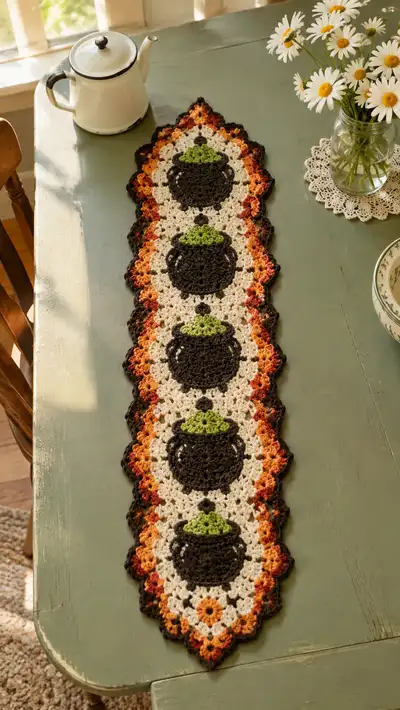
This autumn-inspired table runner features a row of five decorative cauldron motifs framed by a lacy cream background and a warm scalloped border in orange, rust and deep brown. The long, narrow runner is perfect for a farmhouse table, entry table or mantel. The pattern uses layered motifs joined as you go and a scalloped edging to create a finished, vintage-inspired look.
Progress Tracker
0% Complete
— Overview :
Info :
This runner is made of five identical cauldron motifs worked in rounds and joined to each other with connecting openwork rounds. Work each cauldron motif and its immediate surrounding rounds, join the next motif along one side, then continue with the connecting rounds so motifs are joined as you go. The pattern below is written for each element: Center Cauldron, Lid, Handles, Surrounding Lace Rounds (join-as-you-go), and Final Scalloped Border.
Info :
Gauge is flexible for table runners. Aim for a cauldron motif approximately 5.5-6in (14-15cm) across when worked with the recommended yarn and 4.0mm hook. Adjust hook if needed.
— Center Cauldron Motif (Make 5) :
Round 1 :
With deep chocolate brown, 6 sc in mr (6)
Round 3 :
(1 sc, 1 inc) x 6 (18)
Round 4 :
(2 sc, 1 inc) x 6 (24)
Round 5 :
(3 sc, 1 inc) x 6 (30)
Info :
Keep tension slightly firm for the cauldron body rounds so the circle holds a shallow bowl shape. Place a stitch marker at the start of each round.
Round 6 :
1 sc in each st around (30)
Round 7 :
1 sc in each st around (30)
Round 8 :
(4 sc, 1 inc) x 6 (36)
Info :
Round 8 expands the cauldron to a fuller base; check that your counts reached 36. Use 3.5mm hook here if you want a denser circle.
Round 9 :
1 sc in each st around (36)
Round 10 :
1 sc in each st around (36)
Round 11 :
(5 sc, 1 inc) x 6 (42)
Round 12 :
1 sc in each st around (42)
Round 13 :
1 sc in each st around (42)
Info :
Rounds 9-13 build height and depth for the cauldron center; keep work flat. If cupping, relax tension; if ruffling, skip an increase evenly across that round.
Round 14 :
(6 sc, 1 inc) x 6 (48)
Round 15 :
1 sc in each st around (48)
Round 16 :
1 sc in each st around (48)
Round 17 :
1 sc in next 6 sts, dec, 1 sc in next 6 sts, dec, 1 sc in next 6 sts, dec, 1 sc in next 6 sts, dec, 1 sc in next 6 sts, dec, 1 sc in next 6 sts, dec (42)
Info :
Begin slight shaping to define the cauldron rim; dec sequence above maintains even spacing for a gentle inward curve.
Round 18 :
(5 sc, 1 dec) x 6 (36)
Round 19 :
(4 sc, 1 dec) x 6 (30)
Round 20 :
(3 sc, 1 dec) x 6 (24)
Info :
Round 20 completes the cauldron bowl and provides a stable platform for the lid. Fasten off brown leaving long tail for joining if desired. Tuck small tufts of stuffing under the center only if you want dimension (not necessary for flat runner).
— Cauldron Lid (Make 5, attach to top of each cauldron) :
Info :
The lid is a small half-round worked in bright green, attached to the top center of the cauldron to simulate bubbling contents. Work each lid and sew to the cauldron rim or join with sl sts through both pieces.
Round 1 :
With bright green, ch 2, 6 sc in 2nd ch from hook (6)
Round 3 :
(1 sc, 1 inc) x 6 (18)
Round 4 :
(2 sc, 1 inc) x 6 (24)
Info :
To create a half-dome shape, fasten off leaving long tail then fold lid in half and sew the bottom edge to the top of the cauldron. Alternatively, work Round 5 across half of the round and leave the other half unworked to create a natural semicircle for a flush join.
Round 5 :
Work 12 sc (half of round 4) to create a semicircle (12). Fasten off leaving long tail for sewing.
Info :
Stitch lid to cauldron aligning center of semicircle with the topmost stitch of cauldron Round 20. Use matching green tail and mattress stitch for invisible join.
— Cauldron Handles (Make 10 total - 2 per cauldron, small arches) :
Info :
Handles are worked as small chains and arches in dark brown then sewn onto each side of the cauldron rim. Work them small and secure; they are decorative only.
Round 1 :
With deep brown, ch 6, sl st in 2nd ch from hook and across to first ch to create a small loop, join at attachment point with sl st. Fasten off leaving tails for sewing.
Round 2 :
Optional: Work 1 sc around the chain loop to thicken handle (6). Fasten off and sew handle to cauldron body midway down Round 16-18 of the cauldron.
Info :
Attach each handle symmetrically on either side of the lid center: count roughly 6-8 stitches from the lid join on each side to place handles evenly. Sew with small stitches to secure handles flat against the motif.
— Small Accent Dot (Make 4 per motif) :
Round 1 :
With dark brown (contrast), 6 sc in mr, sl st to finish (6). Fasten off leaving tail for sewing.
Info :
Sew a small accent dot above and below the cauldron within the cream field as shown in the photo: place one dot at the center-top and one at the center-bottom of each motif as an anchor for openwork rounds.
— Surrounding Cream Lace Rounds (Frame each cauldron and join motifs) :
Info :
Switch to cream/ivory yarn. These rounds form the openwork field around each cauldron and are worked so adjacent motifs are joined on alternating rounds. Work the first motif fully; when you reach the joining round for the second motif, you will join as you go by slip stitching into the adjacent motif's matching space. This method removes heavy seaming.
Round 1 :
Join cream with a sl st to any stitch on outer round of the cauldron (we recommend Round 15-16 area) and ch3 (counts as dc), dc in same stitch, ch2, *skip 2 sts, 2 dc in next st, ch2; rep around to form 12 dc-clusters with ch-2 spaces; join with sl st to top of beginning ch3 (24 dc, 12 ch-2 sps)
Round 2 :
Ch3, dc in same sp, ch1, *(2 dc in next ch-2 sp, ch1) x around; join (24 clusters, 12 ch-1 sps)
Info :
These first lace rounds add height and create anchor points for joining motifs. Keep loops even and do not pull tight; lace should sit flat around the cauldron.
Round 3 :
Ch4 (counts as tr), tr in same sp, ch2, *(3 tr in next ch-1 sp, ch2) x around; join (36 tr groups)
Round 4 :
Switch to deep brown to create small contrast dots at compass points. Ch1, sc into center of each ch-2 space from previous round creating 12 small sc dots; join and fasten off brown, change back to cream.
Info :
When joining motifs: on the motif you are adding afterwards, work Round 2 and pause before Round 3. On Round 3 for joining, when you reach a ch-2 space that aligns with the adjacent completed motif's ch-2 space, sl st into that ch-2 of the neighbor motif then ch2 and continue tr group — this joins motifs on alternate rounds. See joining notes below for exact sequence.
Round 5 :
Ch3, dc in same st, ch1, *(2 dc in next ch-1 sp, ch1) x around; join (continue to increase openwork width) (48 dc clusters)
Round 6 :
Ch1, sc into each dc and ch-1 sp around to create a firm but open band (count depends on previous round stitch totals but should correspond evenly around circumference)
Info :
After you've completed the full surrounding rounds for the first motif, work the second motif center and when you reach its Round 3, perform the join-as-you-go sequence in the spots that align to link the two motifs. Use a stitch marker to find corresponding ch-2 spaces on the neighbor motif.
Round 7 :
Ch3, dc in same st, ch2, *dc cluster in next cluster, ch2; repeat around to form larger open spaces for the runner field (work will now create an oval field linking two motifs when joined) (approx 12 larger spaces)
Round 8 :
Ch1, sc around filling each dc and ch space to create a stable join edge (work will tighten counts; maintain evenity)
Info :
For motifs placed in a straight line, decide whether to join along two points or three per side depending on how firm you want the seam. The photo shows a single-row join with the motifs touching at top and bottom anchor dots and shared openwork between them.
Round 9 :
Ch3, dc cluster (2 dc, ch1, 2 dc) into each ch-2 space around to add a decorative petal; join with sl st to ch3 (number of petals will match previous ch-2 spaces)
Round 10 :
Ch1, sc around into each stitch to create a clean base for border (stitch count will be even around; aim for consistent count across motifs)
Info :
If you are joining two already-made motifs: line them up so that their Round 9 petals interlock; use sl st to join each petal to its neighbor petal across the join. Work one motif perimeter and when a join point is reached, sl st into adjacent motif's petal instead of ch-1 space, then continue in current motif. This creates a nearly invisible join.
— Linear Joining Band (After all motifs are worked and partially joined) :
Info :
Once motifs are joined side-to-side along their long edges, work a long connecting band across the top and bottom of the runner to harmonize motifs into a continuous strip. This will be the foundation for the scalloped edging.
Round 1 :
With cream, join at the very topmost stitch of one end motif, ch3, dc in next 6 sts across the tops of the motifs creating a straight ridge connecting motif tops. Count stitches to maintain alignment; you should have a band spanning the entire runner length (st count depends on number of motifs but keep it even).
Round 2 :
Ch1, sc across all dc and chain spaces to tidy the band. Maintain even tension to avoid pulling edges in (this band sets the straight line for border attachment).
Info :
At this stage, lay the runner flat and check for lumps or ripples. If needed, lightly block the runner by pinning it flat to a blocking board and misting with water. Allow to dry fully before working final edging.
— Scalloped Border and Outer Accents :
Info :
The scalloped outer border alternates between variegated autumn yarn shells and deep brown picot anchors to mimic the photo's layered warm edge. Work in rounds around the entire runner, working evenly spaced shells and joining at the runner's points carefully so the scallops look symmetrical.
Round 1 :
With variegated orange, join at the outermost stitch, ch1, sc in same stitch, *skip 2 sts, (5 dc in next st) shell, skip 2 sts, sc in next st; rep around to create evenly spaced shells. At points (ends of runner), work (7 dc) shells to make pointier ends. Join with sl st to first sc.
Round 2 :
Ch1, sc around, placing 1 sc in each dc of shells and 1 sc in sc spaces to create an even foundation (count should match number of stitches from previous round).
Info :
Switch to deep brown for a subtle outline: work a small contrasting round over the shell edges by working sc around the outermost loops of each shell, adding a picot at the shell peak for a delicate vintage look.
Round 3 :
With deep brown, *work sc in 2 sts, ch3, sl st in top dc of shell to create little looped picot accent, sc in next 2 sts; rep around. At running points, work additional sc to maintain symmetry.
Round 4 :
With variegated yarn, join and work 1 sc in each st around then shell again over previous shells: (3 dc, ch2, 3 dc) in top of each previous shell; join
Round 5 :
Ch1, sc around to neaten edge and tighten any loose arches. Fasten off and weave in ends. If desired, add a final small picot at each shell valley using deep brown for contrast.
Info :
For exceptionally crisp scallops, block the runner once more after edging. Stretch shell peaks slightly and pin until dry. This helps scallops sit uniformly and highlights the color changes in variegated yarn.
— Optional Reinforcement & Finishing Rounds :
Round 1 :
With cream, work a final sc round across the inner perimeter where motifs meet the border to ensure joins are secure: sc in each stitch across seam joins, make sure to catch both motif edges with each stitch.
Round 2 :
With deep brown, add exaggerated picot points at runner tips: ch3, sl st into same stitch, sc into next 4 sts; repeat to highlight runner corners. Fasten off and weave ends long for a clean back finish (weave through several stitches).
Info :
Weave all ends to the back side and trim close. Use a tapestry needle to smooth tails under several stitches so they won't show on the front. Press lightly (not iron) with a damp cloth if needed to set shape.
— Color-changing & Joining Tips (Important) :
Info :
Change colors by completing the last stitch of the previous color to the final yarn over, then yarn over with the new color and pull through to finish the stitch. This gives a clean color join. Carry unused yarn inside the motif in dense rounds only; for openwork rounds weave in tails frequently to avoid long floats.
Info :
Join-as-you-go specifics: when joining two motif rounds, align motifs so that ch-2 or petal spaces meet. On the working motif, when you reach the space to be joined, insert hook into corresponding space of neighbor motif and sl st, then continue the stitch in your current motif. Use stitch markers to map matching spaces before joining.
Info :
Blocking suggestions: pin runner to flat surface in final desired dimensions, steam lightly or spray with water, allow to dry completely. For crisp scallops, apply gentle tension to peaks when pinning.
Info :
Stitch count verification: many rounds above use cluster-based counts rather than exact stitch totals for the full runner because counts will scale depending on joining choices. Always count clusters and spaces to ensure symmetry. For single motif rounds we provided explicit stitch counts for clarity.
Info :
Trim and tidy: after completing the runner, weave in all ends and make a tidy back; if pieces show loose tails on the front, secure from the back with extra small whip stitches using matching yarn to hide where necessary.
This Autumn Cauldron Table Runner brings warmth and vintage charm to any table. With layered cauldron motifs and a lacy cream body, every stitch blends color and texture for a cozy seasonal accent. The join-as-you-go construction makes assembly satisfying, and the scalloped border gives a finished, heirloom look. I hope this project inspires cozy evenings and seasonal gatherings — enjoy making it and sharing with those you love! 🍂🧶