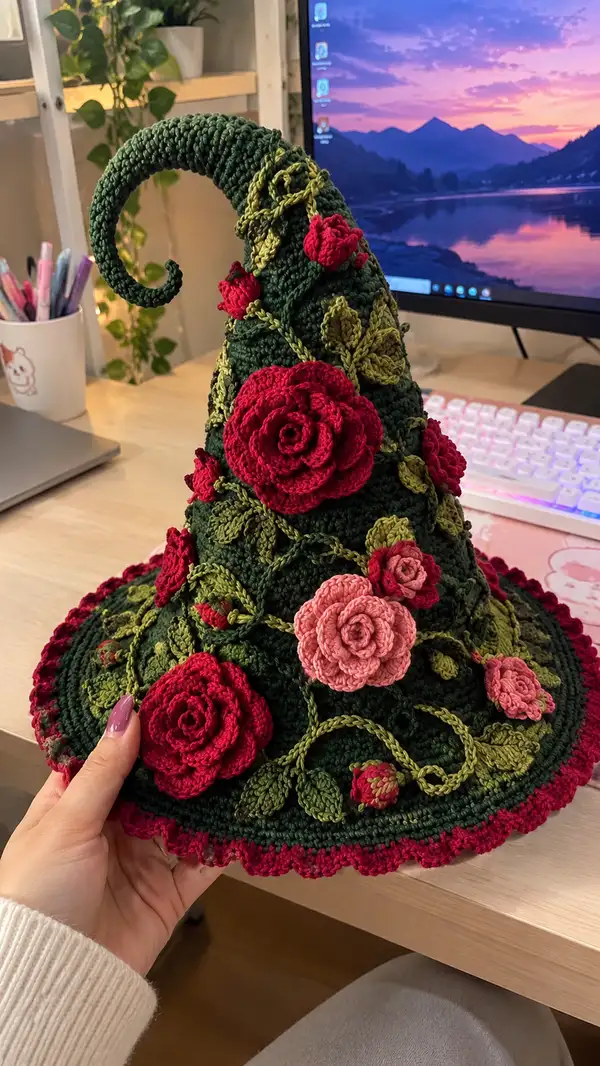
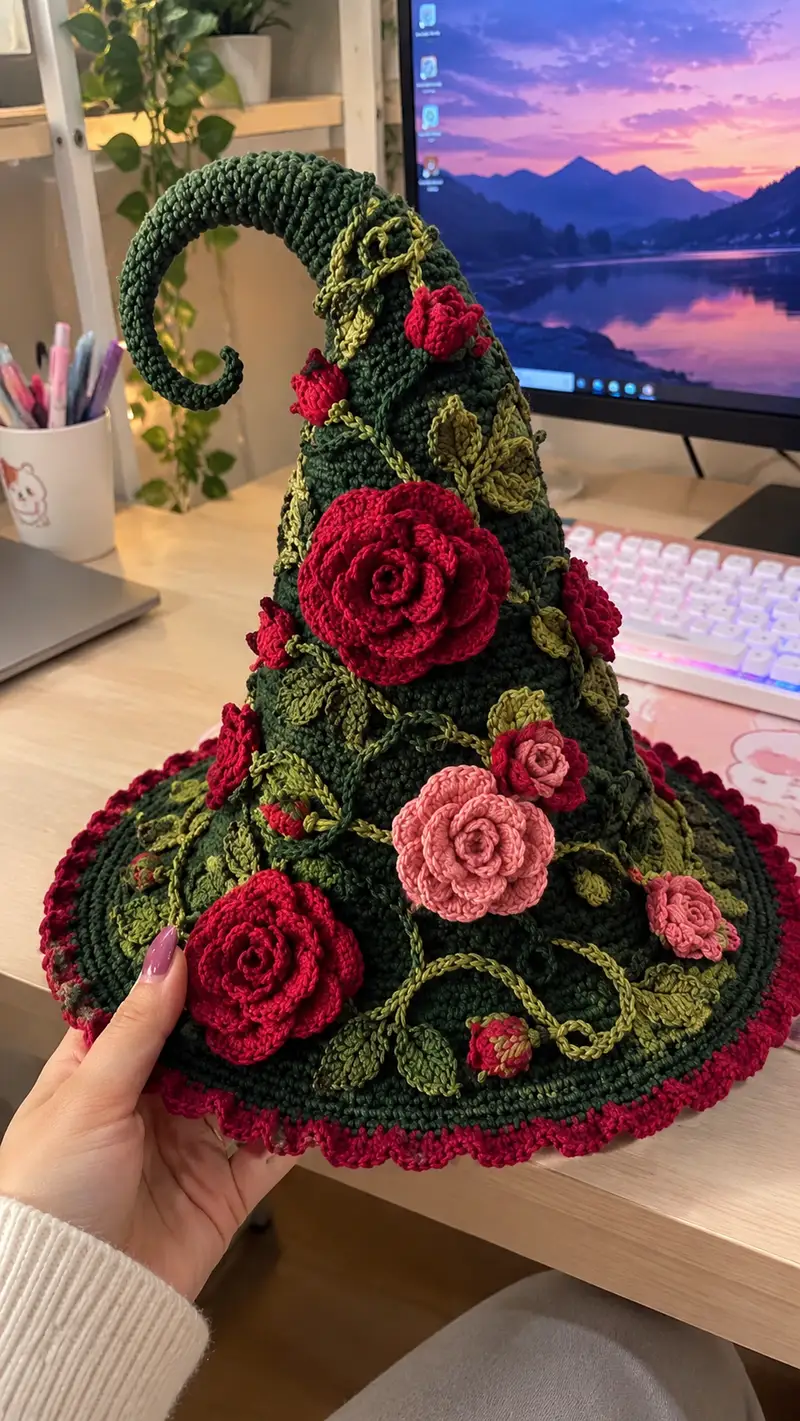
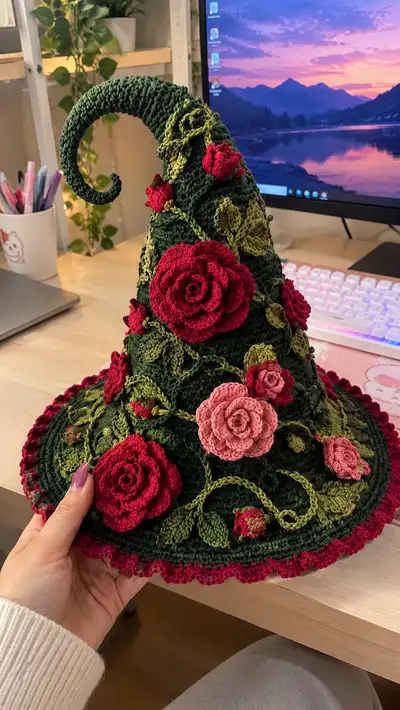
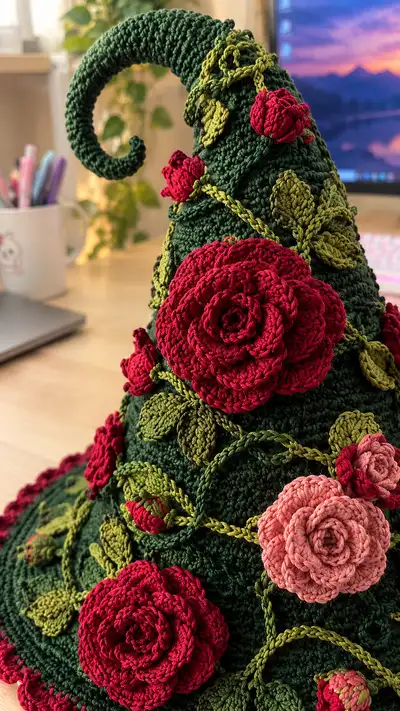
A whimsical, structured witch hat decorated with lush crochet roses, bud clusters and twisting leafy vines. Worked in a tight stitch for a firm shape with a curled top and wide brim, it features layered 3D roses in deep red and soft pink with olive-green leaves and tendrils. The finished hat is sturdy enough to display as decor or wearable as a costume accent. Detailed step-by-step rounds, shaping tips, and assembly instructions guide you through every stitch.
Progress Tracker
0% Complete
— Brim :
Round 1 :
6 sc in magic ring (6)
Round 3 :
(1 sc, 1 inc) x 6 (18)
Round 4 :
(2 sc, 1 inc) x 6 (24)
Round 5 :
(3 sc, 1 inc) x 6 (30)
Round 6 :
(4 sc, 1 inc) x 6 (36)
Round 7 :
(5 sc, 1 inc) x 6 (42)
Round 8 :
(6 sc, 1 inc) x 6 (48)
Info :
These rounds form the inner circle of the brim. The cone will be attached to this opening later; keep this circumference flat and even. Place a marker at the start of each round.
Round 9-14 :
1 sc in each st (48)
Info :
Work several even rounds to build up brim thickness at the crown junction. If your fabric is too loose, change to a smaller hook for these rounds to ensure a stable base.
Round 15 :
(3 sc, 1 inc) x 12 (60)
Round 16 :
1 sc in each st (60)
Round 17 :
(4 sc, 1 inc) x 12 (72)
Round 18 :
1 sc in each st (72)
Round 19 :
(5 sc, 1 inc) x 12 (84)
Round 20 :
1 sc in each st (84)
Round 21 :
(6 sc, 1 inc) x 12 (96)
Round 22 :
1 sc in each st (96)
Round 23 :
(7 sc, 1 inc) x 12 (108)
Round 24 :
1 sc in each st (108)
Round 25 :
(8 sc, 1 inc) x 12 (120)
Round 26-28 :
1 sc in each st (120)
Info :
These rounds create the flared outer brim. Work tightly and keep the brim flat by blocking lightly on a round surface if needed. This outermost band will receive the scalloped edge.
Round 29 :
(BLO) 1 sc in each st (120)
Round 30 :
Scallop edge: *sk 1, 5 dc in next st, sk 1, sl st in next st* rep around (creates ruffled rim). Join and fasten off. (approx 20 scallops)
Info :
Fasten off leaving long tail for sewing if you prefer to attach the cone by sewing instead of crocheting in place. Block and set the brim aside on a flat surface while you work the cone and decorations.
— Cone (Main Body) :
Round 1 :
6 sc in magic ring (6)
Round 3 :
(1 sc, 1 inc) x 6 (18)
Round 4 :
(2 sc, 1 inc) x 6 (24)
Round 5 :
(3 sc, 1 inc) x 6 (30)
Round 6 :
(4 sc, 1 inc) x 6 (36)
Round 7 :
(5 sc, 1 inc) x 6 (42)
Round 8 :
(6 sc, 1 inc) x 6 (48)
Info :
The cone base is worked to match the inner brim circumference (48 sts). If your brim inner circle has a different count, adjust increases so rounds 1-8 match that number. Keep stitches tight to maintain a firm cone.
Round 9-20 :
1 sc in each st (48)
Info :
Work even to build the height of the cone. For a taller hat, add extra even rounds here in multiples of 2-4 rounds. Place a marker at the top center to help align appliques later.
Round 21 :
1 sc in each st BLO (48)
Round 22-28 :
1 sc in each st (48)
Info :
Consider adding a round of HDC or a contrasting row to mark the area where vines will spiral — work in FLO or BLO to create a subtle ridge for vine placement.
Round 29 :
Optional decorative ridge: 1 hdc in each st (48)
Round 30-34 :
1 sc in each st (48)
Info :
Decide where the curled tip will begin (usually around rounds 30-34). Leave top opening unclosed — you will insert the spiral tip tube into this opening and secure it from the inside later.
Round 35 :
Decrease shaping to slightly narrow toward the top: (6 sc, 1 dec) x 6 (42)
Round 36 :
1 sc in each st (42)
Round 37 :
(5 sc, 1 dec) x 6 (36)
Round 38 :
1 sc in each st (36)
Round 39 :
(4 sc, 1 dec) x 6 (30)
Round 40 :
1 sc in each st (30)
Info :
Stop decreases here and leave opening large enough to insert base of tip tube. If you prefer a continuous cone with internal wire only, omit the separate tip tube and shape with wire inserted through the closed top.
Round 41-44 :
1 sc in each st (30)
Round 45 :
Fasten off leaving a long tail for sewing the cone base to brim. Stuff only the very top lightly if desired; the cone should remain mostly hollow to keep it light. (30)
Info :
If you plan to attach the cone by sewing, place the cone inside the brim opening, align stitches and pin every 6-8 sts. Use the long tail and mattress or whip stitch to sew evenly to the brim. If you prefer a crocheted join, use the brim inner opening to SC through both layers around.
— Spiral Tip Tube (Make 1) :
Round 1 :
6 sc in magic ring (6)
Round 3-18 :
1 sc in each st (12) — work even to lengthen tube to approximately 12-18 rounds depending on desired curl length
Info :
Before closing the tube, insert floral wire down the center, leaving extra wire at the base to anchor into the cone. Wrap wire ends with a small bit of tape or bend to avoid sharp points. Stuff lightly around the wire for shape and stability.
Round 19 :
(1 sc, 1 dec) x 4 (8)
Round 20 :
1 sc in each st (8)
Round 21 :
(1 sc, 1 dec) x 2 (6)
Round 22 :
Fasten off leaving long tail for sewing. Shape the tube around the wire to form the spiral curl, sewing the base securely to the cone inside the top opening with several passes for stability.
Info :
To create a smoother curl, wrap the finished tube around a cylindrical object (wide marker) and pin, then steam-block lightly if using cotton yarn. Do not overheat — use gentle steam and allow to cool before handling.
— Large Rose (Make 2) :
Round 1 :
Ch 41, sl st to form ring (or magic ring of 12 ch if preferred) — this foundation chain forms the spiral
Round 2 :
Working into the ring/chain, *ch 3, 3 dc in next ch, ch 3, sl st in next ch* across to form the first spiral set of petals. Turn spiral as you work so petals face up (foundation spiral will remain open)
Round 3 :
Continue spiral: *ch 4, 4 dc in next sp, ch 4, sl st in next sp* repeat across spiral — keep petals slightly overlapped by sewing baseline toward center as you go
Round 4 :
Ch 4, 1 tr in next sp, 1 dc in next, 2 hdc in next 2, 1 dc in next, 1 tr in next — this creates larger outer petals. Continue along spiral until end
Round 5 :
For outermost edge, *ch 5, 5 dc cluster in next sp, ch 5, sl st* until the spiral reaches desired fullness. Fasten off leaving long tail for sewing. Roll the spiral tightly from one end to the other to form the rose, adjusting petal placement as you stitch the base down through each coil to secure.
Info :
Make petals tighter or looser by increasing/decreasing the number of chains and dc per petal. Use a slightly smaller hook for rose pieces to keep petals crisp. Pin rolled rose before sewing to test placement and fullness.
— Medium Rose (Make 3) :
Round 1 :
Ch 31, sl st to form ring (foundation chain for spiral)
Round 2 :
*ch 3, 3 dc in next ch, ch 3, sl st* across chain
Round 3 :
*ch 4, 4 dc cluster in next sp, ch 4, sl st* across until end. Fasten off leaving long tail and roll up into rose, sewing coil base as you go (rose will be slightly smaller than large rose).
Info :
Use medium red for these roses. Make 2 identical medium roses and 1 slightly tighter for an accent. For a blush rose, use the same pattern with a smaller foundation chain (ch 27).
— Small Rosebud (Make 6-8) :
Round 1 :
Ch 12, sl st to form ring
Round 2 :
*ch 2, 2 dc in next ch, ch 2, sl st* rep across to form tiny petal spiral
Round 3 :
Roll tightly and stitch base with tail. Insert a small amount of stuffing for a rounded bud if desired. Fasten off.
Info :
Place buds in clusters along the vines for natural variety. Use half double crochet in petal rounds for a plumper bud if preferred.
— Leaves (Make 12-16) :
Round 1 :
Ch 12 (foundation chain)
Round 2 :
In 2nd ch from hook: sc, hdc, dc, tr, tr, dc, hdc, sc — working down the chain across second side mirror the stitches: sc, hdc, dc, tr, tr, dc, hdc, sc. Sl st to join at base. (approx 16 sts shaped)
Round 3 :
Work a round of slip stitches along the leaf edge to tidy shape or add a BLO round of sc to create a raised central vein: 1 sc in each st BLO (16)
Info :
Use two shades of green to alternate leaves for depth. Block leaves lightly on a curved surface to give a lifelike shape and allow to dry before sewing.
Round 4 :
Fasten off leaving long tail for sewing. Apply a few anchoring stitches to the underside when attaching to vines for a lifted look.
— Twisting Vine Chains (Make several lengths) :
Info :
Vines are worked as long chains with a chain-looped texture and occasionally worked back with slip stitches for thickness. Make multiple lengths varying from 30-80 ch depending on where you place them on the cone and brim.
Round 1 :
Ch 60 (or desired length). Optional: sl st back along chain into every 2nd ch for a twisted appearance.
Round 2 :
To add thickness: with the working yarn, sc into each ch along the chain to make a corded vine. Fasten off leaving tail for sewing.
Info :
Vines may be crocheted in one color and then embroidered around with finer yarn for ridges. Secure vine ends to the hat body with small stitches and then weave the vine in an S shape spiraling up the cone.
— Assembly Prep and Placement :
Info :
Arrange vines first: lay a long vine starting at the brim, spiraling up the cone toward the tip. Pin in place and experiment with rose group placement. Typical clusters: one large rose with two medium and two buds nearby, and smaller groupings spaced around the brim.
Round 1 :
Sew cone to brim: Align cone base to brim inner circle (48 sts). Using long tail from cone, whip stitch or mattress stitch through both layers every 2-3 sts for a smooth join. Work evenly around, adjusting to avoid puckers.
Info :
Use pins to hold cone and brim while sewing. When stitches are complete, weave in ends through several rounds of the cone interior for security. If you inserted the tip tube wire, anchor its base with strong stitches and a dab of glue if required.
Round 2 :
Position vines: Using strong yarn tails, tack vines to the hat at 6-10 strategic anchor points. Sew around each vine base through hat fabric several times and hide tails inside the hat body.
Round 3 :
Attach leaves: Sew leaves along vines at natural intervals, using the leaf tail and a few small stitches to create a lifted look. Add a couple of stitches through the vine and leaf base to prevent rotation.
Round 4 :
Sew roses: Place large rose first — position where it balances the composition. Use the long tail and an invisible whip stitch to sew through the rose base and into the hat. Sew through multiple coils of the rose base to prevent unraveling. Repeat for medium roses, bud placement, and any accent flowers.
Info :
When assembling, hide all tails by weaving through several rounds or into leaves and vines for a tidy finish. Add small securing stitches behind large appliques to distribute weight and prevent drooping.
— Finishing Touches :
Round 1 :
Embroider small tendrils or vein highlights using a contrasting green and a yarn needle. Use simple chain stitch or surface slip-stitch for subtle texture.
Round 2 :
If desired, add a tiny bead or French knot at rose centers using embroidery thread for sparkle — secure thoroughly from the inside.
Info :
Trim any visible tails and run a final round of blocking to set shapes. Use gentle steam or pin shapes then allow to cool completely. Check wire ends inside tip to ensure they are safely tucked and capped.
Round 3 :
Edge cleanup: from brim underside, weave in remaining ends and optionally add a narrow slip stitch border to tidy scallops.
Info :
Allow glue to dry completely if used. Check overall balance of applique weight: add a few hidden stitches if a rose causes sagging at any point.
This enchanted rose witch hat is a joyful blend of structure and floral romance — every petal, leaf and vine adds personality. As you stitch and assemble, you'll see the piece transform into a dramatic wearable or display item full of handcrafted charm. The process encourages creative placement and personalization, so you can vary colors, rose sizes and vine paths to make yours one-of-a-kind. 🧶🌹 Let it sit proudly on a shelf or wear it for a whimsical costume moment. Happy stitching! ✨