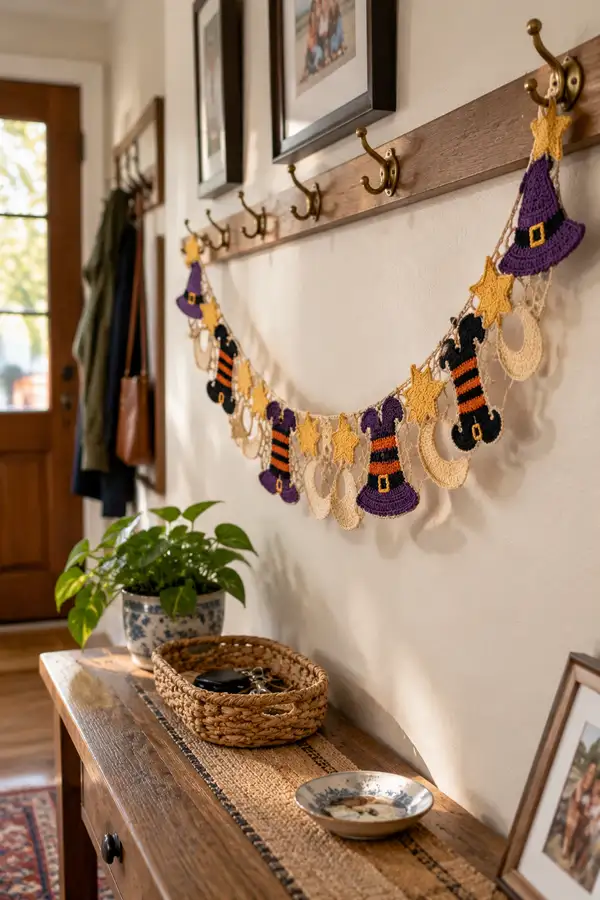
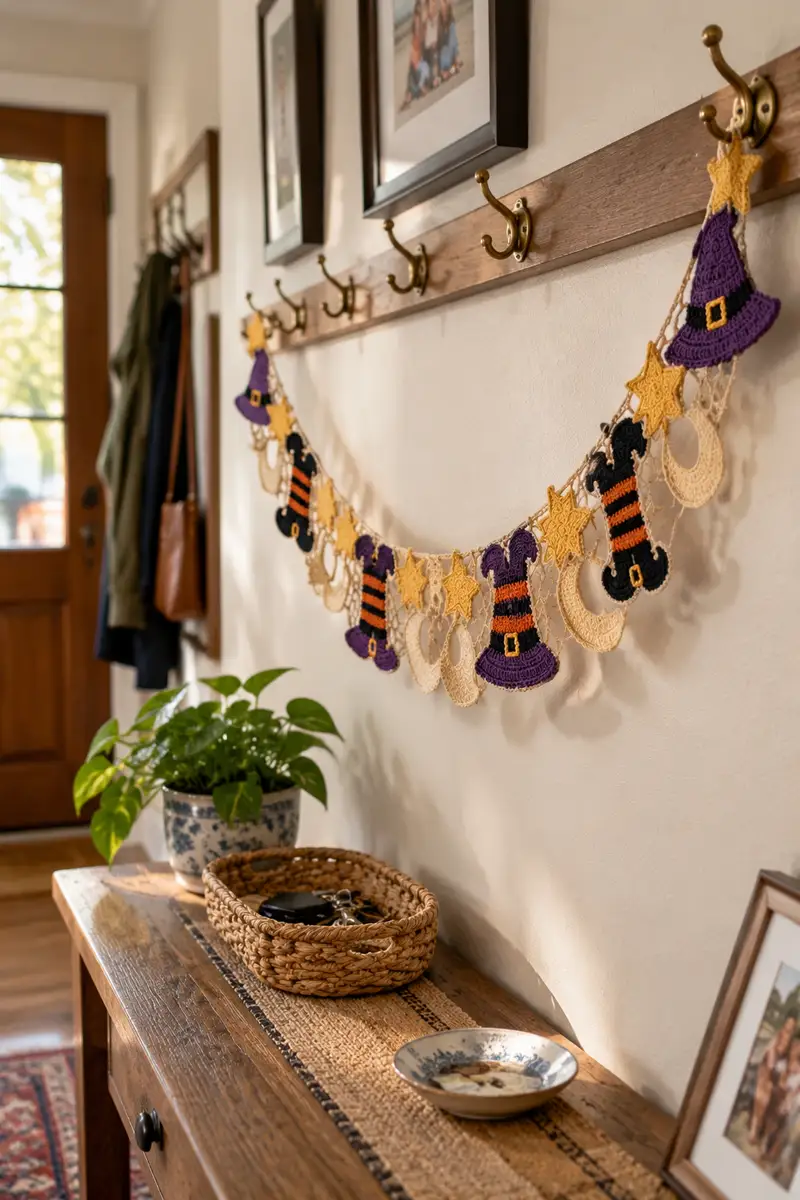
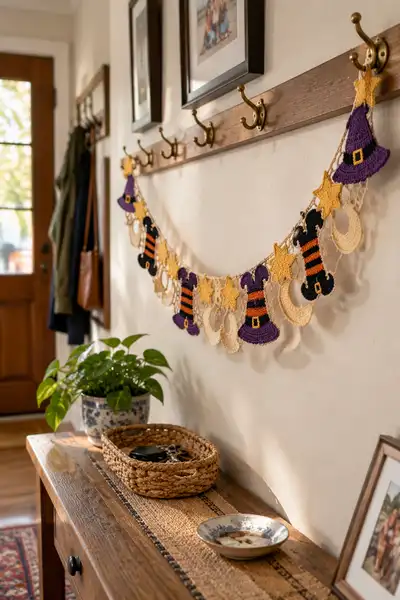
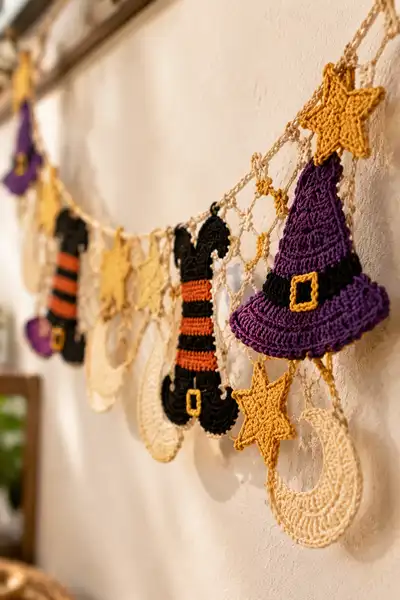
Create a whimsical Halloween garland featuring purple witch hats, striped witch legs, golden stars and delicate crescent moons linked by an open lace mesh. This pattern uses small motifs crocheted in worsted or DK cotton and assembled into a dreamy seasonal table runner or wall garland. Finished motifs are light and flat—perfect for hanging along a mantel, entryway, or across a doorway. Includes full round-by-round instructions, color-change notes, and mesh connector directions for a professional finish.
Progress Tracker
0% Complete
— Materials and Gauge :
Info :
Use DK to light-worsted mercerized cotton for crisp motifs. Gauge is not critical, but motifs were worked with 3.5mm hook producing hat width ~9.5cm/3.75in. For balanced look, keep tension consistent across colors.
— Notes and Techniques :
Info :
Work in continuous rounds where possible for hats and boots to avoid visible seams, but you may join rounds with sl st if preferred to create a row edge. Use Info sections to change color and carry yarn tails to back where stitches are dense. Block each motif flat before assembly; starched block helps them hang straight.
— Witch Hat (Make 4) :
Round 1 :
6 sc in magic ring (6)
Round 3 :
(1 sc, inc) x 6 (18)
Round 4 :
(2 sc, inc) x 6 (24)
Round 5 :
(3 sc, inc) x 6 (30)
Info :
These first rounds create the top cone of the hat. Keep rounds tight so crown sits flat. Join with 1 sl st to first sc if you prefer a seam; otherwise place stitch marker and work continuous rounds.
Round 6 :
1 sc in each st (30)
Round 7 :
1 sc in each st (30)
Round 8 :
(4 sc, inc) x 6 (36)
Round 9 :
1 sc in each st (36)
Round 10 :
(5 sc, inc) x 6 (42)
Round 11 :
1 sc in each st (42)
Info :
At rounds 8-11 the cone begins to flare slightly. If you want a taller hat, add additional even rounds here before shaping the brim. Maintain consistent stitch height for smooth fabric.
Round 12 :
(6 sc, inc) x 6 (48)
Round 13 :
1 sc in each st (48)
Round 14 :
Change to BLO and work 1 sc in each st BLO (48)
Info :
Working the first brim round in BLO creates a subtle ridge that defines where the brim begins. Change to purple yarn for the hat body earlier if using a different crown color—our hats are entirely purple except for the band.
Round 15 :
(7 sc, inc) x 6 (54)
Round 16 :
1 sc in each st (54)
Round 17 :
(8 sc, inc) x 6 (60)
Round 18 :
1 sc in each st (60)
Info :
Now we're creating a flared brim. The increase pattern widens the brim gradually to a flattering curve. If you prefer a smaller brim, stop increasing earlier and start edging at lower round counts.
Round 19 :
(9 sc, inc) x 6 (66)
Round 20 :
1 sc in each st (66)
Round 21 :
(10 sc, inc) x 6 (72)
Round 22 :
1 sc in each st (72)
Round 23 :
Switch to 3.25mm hook. *1 sc, ch2, skip 1, 1 sc* repeat around to form a decorative picot-like scallop (72)
Round 24 :
Edge: *(sc, picot, sc) in each ch2 space* repeat around. Fasten off and weave in ends (72)
Info :
Create hat band: With black yarn, join at an inner brim stitch and work 3 rounds of sc around inside brim (work tightly). Fasten off, then embroider or crochet a small square buckle in golden yarn by chaining 6, joining to a small 4-round rectangle, and sewing to band center.
— Witch Boot / Striped Leg (Make 4) :
Round 1 :
10 sc in magic ring (10)
Round 3 :
(1 sc, inc) x 10 (30)
Round 4 :
1 sc in each st (30)
Round 5 :
Change to black yarn. (2 sc, inc) x 10 (40)
Round 6 :
1 sc in each st (40)
Info :
These rounds create the rounded top of the boot sole and base for the curled boot toe. Working broader base helps the stylized curled toe sit flat when hung.
Round 7 :
Switch to FLO: *(4 sc, inc) x 8 then leave remaining 8 sts unworked for shaping curl* (48 in worked portion)
Round 8 :
Work in rounds along the extended portion to form toe curl: starting at edge, 1 sc in next 12 sts, (dec) to pull curl, then 6 sc to finish curl shape (maintain count at ~48)
Round 9 :
Begin leg: change to orange yarn. 1 sc in each st for 6 rounds to form first orange stripe (48)
Round 10 :
Change to black yarn. 1 sc in each st for 6 rounds to form first black stripe (48)
Round 11 :
Change to orange yarn. 1 sc in each st for 6 rounds stripe (48)
Info :
To produce crisp stripes, fasten off previous color at end of round and join new color with a sl st. Alternatively, carry colors up inside work if you do not mind tiny floats on back; secure floats every 3-4 sts to avoid long floats.
Round 12 :
Change to black yarn and work 1 sc in each st for 4 rounds (48)
Round 13 :
Decrease slightly for ankle: (8 sc, dec) x 4 (44)
Round 14 :
1 sc in each st (44)
Round 15 :
(7 sc, dec) x 4 (40)
Round 16 :
1 sc in each st (40)
Round 17 :
Form top ruffle: switch to purple and work *(1 sc, ch2, skip 1, 1 sc)* around top edge (40)
Round 18 :
Edging: in ch2 spaces work (sc, picot, sc). Fasten off and weave in ends (40)
Info :
Create small square buckle: with golden yarn chain 6, join in loop, sl st around to form small square, stuff lightly with fiberfill if desired, then sew to boot center near toe or ankle depending on pictured design. For contrast add a thin black ran band using surface slip stitch.
— Crescent Moon (Make 6) :
Round 1 :
6 sc in magic ring (6)
Round 3 :
(1 sc, inc) x 6 (18)
Round 4 :
(2 sc, inc) x 6 (24)
Round 5 :
(3 sc, inc) x 6 (30)
Info :
We will work a shallow circle then remove a wedge to create a crescent shape. Keep rounds flat and tight so the crescent edge is crisp.
Round 6 :
1 sc in each st (30)
Round 7 :
1 sc in each st (30)
Round 8 :
Start shaping crescent: work 1 sc in next 8 sts, dec across next 4 sts, skip 6 sts to create inner curve, sl st into next st to anchor (Total worked ~24)
Round 9 :
Continue shaping: from anchor, 1 sc in next 10 sts, dec 2 times across next 4 sts, 1 sc in last 8 sts (approx 22)
Round 10 :
Edge round: 1 sc in each st around worked portion, then in the inner curve do *(ch2, sl st in same st)* to create small loops (22)
Round 11 :
Switch to 3.25mm hook. Work 1 sc in each st to firm edge, then work decorative surface dc in outer edge to create a lace-like texture (22)
Round 12 :
Edging: *(sc, ch3, picot, ch3, sc) in each larger space around outer curve* repeat to form scalloped rim. Fasten off and weave ends (22)
Info :
Blocking crescent moons flat is key. Use pins and light spray starch to hold open inner curve so the crescent reads well from a distance. If using a heavier yarn, reduce hook size to maintain crisp edges.
— Five-Point Star (Make 8) :
Round 1 :
5 dc in magic ring (5)
Round 2 :
Sl st to first dc, ch3, 2 dc in same, ch3 sl st in next dc to pull point; repeat for 5 points forming star shape (5 points)
Round 3 :
Edge each point with *(sc, picot, sc) across each ch3 arc* repeat for all 5 points. Fasten off and weave ends (small)
Info :
Stars are small and decorative. Work tightly and block slightly to keep points crisp. If you prefer a fuller star, work an extra round of sc across each point before edging.
— Small Connecting Star (Make 12) :
Round 1 :
6 sc in magic ring (6)
Round 2 :
Ch2, sl st into alternate stitches to create miniature loops forming a star-like ring (6)
Info :
These tiny stars act as decorative spacers on the mesh. Fasten off and weave ends short.
— Lace Mesh Connector / Garland Netting :
Info :
The mesh is worked in ecru/cream color to connect motifs into the runner. It is an open diamond net worked in chain-arch rows with picot join points. This section provides a row-by-row approach; adjust length to fit your space and number of motifs.
Row 1 :
With ecru yarn, foundation chain to desired length for full garland (example: ch 240 for pictured 2m/78in runner). Turn (use a multiple of 6 + 4)
Row 2 :
Starting in 5th ch from hook, *dc, ch4, skip 3 ch, dc* across to create base arches. End with dc in last ch. Turn.
Row 3 :
Ch3 (counts as dc), *dc in top of dc from previous row, ch4, dc in next dc* repeat across to create mesh; maintain even tension to keep diamonds uniform.
Info :
Place a small stitch marker or removable marker where each motif should hang — refer to layout photo for spacing: hat, star, moon, star, leg, star repeating. Use a layout chain number per motif spacing (roughly 20-26 ch segments between hanging points in the pictured spacing).
Row 4-10 :
Repeat Row 3 to build a mesh of about 7-9 rows high (adjust to desired coverage). Each row aligns diamonds to form open net. On final mesh row, work small picot loops where motif hangers will attach: sc, ch5, picot (ch3 sl st), sc in next dc of mesh to create a hanging loop.
Info :
Alternate: Work mesh in two halves and join motifs across center if you plan a symmetrical runner. Smaller diamonds can be made by reducing ch4 to ch3 in mesh rows for a denser look.
Row 11 :
Finish with a decorative scallop along top edge: *skip dc, 5 dc in next ch4 space, skip dc, sl st into next dc* repeat across. Fasten off and block mesh flat.
— Attaching Motifs to Mesh (Connector Rounds) :
Info :
Pin motifs to mesh before attaching. Each motif is joined using its small loop or by sewing closely around an inner edge. Use matching ecru yarn for nearly invisible joins or coordinate color for contrast. This section assumes motifs are pinned at predetermined picot loops formed on mesh Row 3 and Row 10.
Step 1 :
Arrange motifs in this repeating order across mesh: large star, hat, small star, moon, small star, boot, small star, hat, etc. Adjust spacing to taste by changing chain counts between picot hanging loops.
Step 2 :
For each motif, thread darning needle with ecru yarn, fold one end of motif over the picot loop and tack in three evenly spaced stitches through top chain loop and mesh loop. Secure with backstitch and weave in ends. For hats and boots use two attachment points: top center and top-side for stability.
Info :
To create dangling moons and stars (two-tiered look) attach a small connecting chain of ch6 between mesh picot and motif loop so items hang at slightly different heights. Add a small knot or bead to keep chain in place if desired.
— Decorative Details and Buckles :
Info :
Buckles are crocheted as tiny rectangles or embroidered with golden yarn. For a small buckle: ch6, join to form loop, work 3 rounds of sc around loop, finishing with an inside bar created by sewing a 3-stitch black bar across centers. Sew buckle to hat band or boot strap using small vertical stitches behind buckle to hide tail ends.
Round 1 :
Chain 6 in gold, sl st to join into ring (6)
Round 2 :
Work 6 sc around ring (6)
Round 3 :
Work *inc* across to firm shape if needed then fasten off leaving tail for sewing. Use black yarn to sew across center creating buckle opening.
Info :
Sew buckles aligned so that the belt appears centered. If you want sparkly details, use metallic thread in place of gold or add a small bead in buckle center.
— Finishing and Blocking :
Info :
Block every motif flat. Pin to shape on foam board and lightly mist with water or fabric starch for stiffness. Leave to dry fully. This preserves shape and makes joining easier. Trim any long loose ends after weaving them in.
Step :
Trim and inspect garland for symmetry. Add small stitches to pull any sagging motifs taut to mesh if needed. Re-block assembled garland if attachments caused distortion.
Info :
Optional: Add backing felt circles to motifs if you want more weight or to hide seams. Use small amounts of craft glue or sew felt in place carefully.
— Sizing & Adjustments :
Info :
To scale pattern up or down: use heavier yarn and larger hooks for large statement garland; switch to lighter thread for delicate miniature banners. Adjust foundation chain for mesh length and change motif counts to fit space.
This Halloween garland brings a playful yet elegant touch to seasonal decor with whimsical witch hats, striped boots, golden stars and crescent moons strung on delicate lace mesh. Each flat motif works up quickly and blocks beautifully, making assembly satisfying and fun. Hang it across an entryway or mantel for an instant festive statement—it's perfect for gifting or seasonal home refreshes. 🧶✨🎃