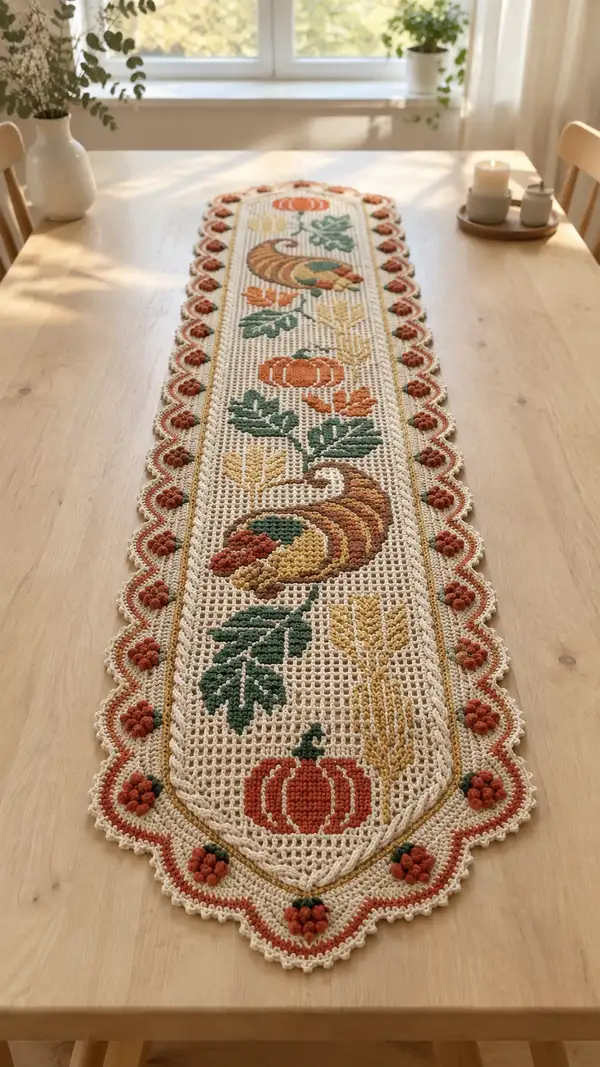
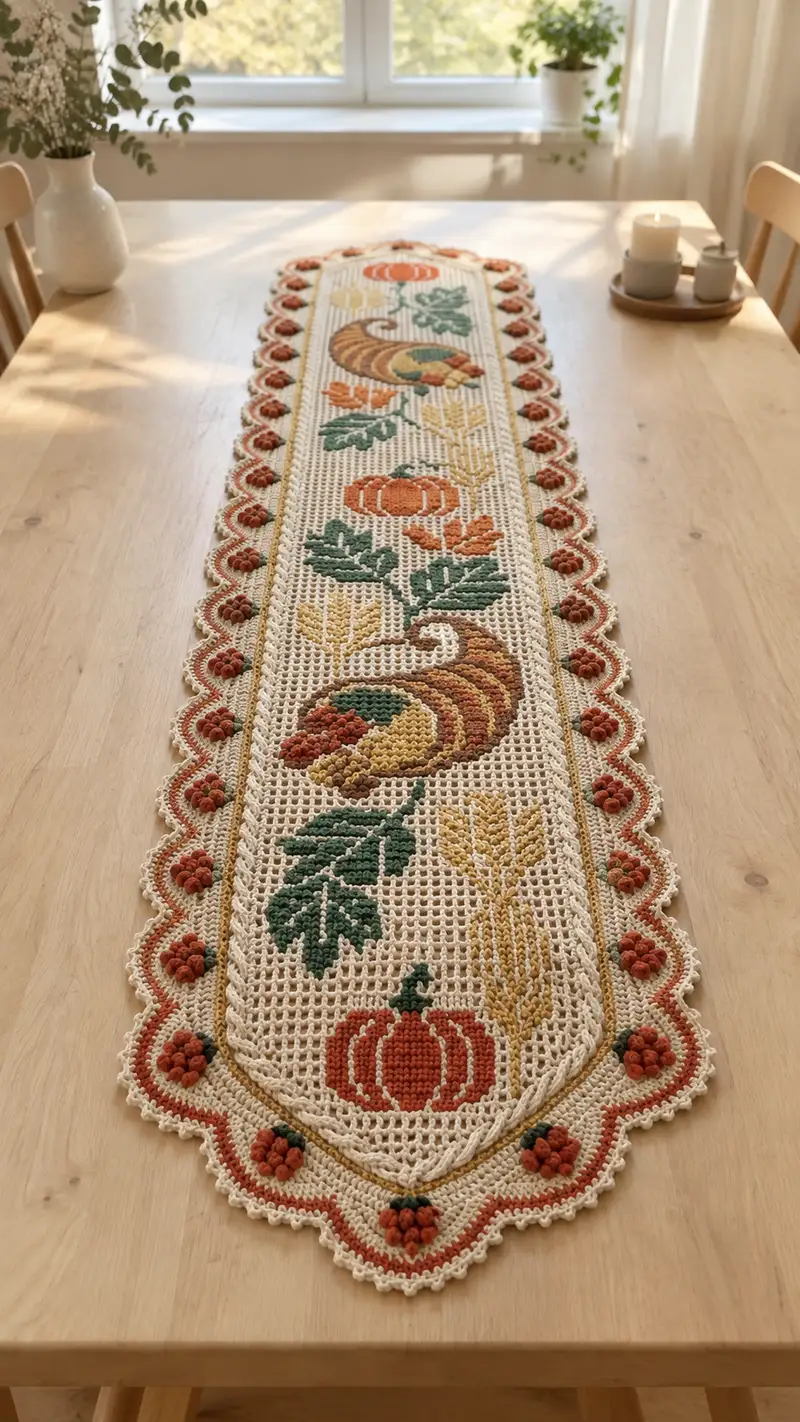
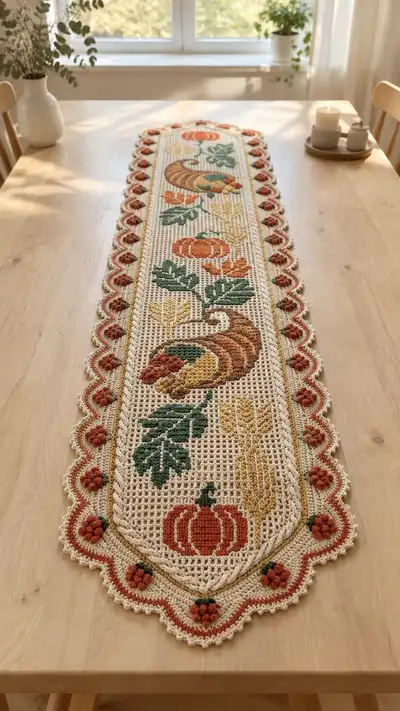
A long, elegant autumn table runner featuring a central cornucopia motif, pumpkins, wheat stalks and leafy greenery worked on a delicate cream mesh. Warm rust, gold and forest green accents and a scalloped bobble border give this runner a vintage, heirloom look. Perfect for seasonal tables or as a special handmade gift.
Progress Tracker
0% Complete
— Materials & Gauge :
Info :
Gauge is not critical for table runner but recommended: 121 sts x 140 rows in single crochet grid = approx 42" x 10" using 3.5mm hook and DK yarn. Adjust hook for desired drape.
Info :
All rows are worked in single crochet across to create a consistent grid for colorwork. Turn at end of each row. Colors are changed following written block sequences; carry yarn along WS and catch floats every 6-10 sts.
— Foundation & Base Rows :
Row 1 :
Ch 122. Sc in 2nd ch from hook and in each ch across (121)
Row 2 :
Ch 1, turn. 1 sc in each st across (121)
Row 3 :
Ch 1, turn. 1 sc in each st across (121)
Row 4 :
Ch 1, turn. 1 sc in each st across (121)
Info :
If you prefer a firmer foundation, use a smaller hook for the first 4 rows then switch back to 3.5mm. Mark the first and last stitch of every 10th row to keep edges straight.
Row 5 :
Ch 1, turn. 1 sc in each st across (121)
Row 6 :
Ch 1, turn. 1 sc in each st across (121)
Row 7 :
Ch 1, turn. 1 sc in each st across (121)
Row 8 :
Ch 1, turn. 1 sc in each st across (121)
Info :
Mark center stitch (st 61) on Row 8. The central cornucopia motif and vertical axis will be aligned with this center marker. Pin the marker for reference throughout colorwork.
— Beginning Motifs: Lower Pumpkin Section (Rows 9 - 36) :
Row 9 :
Ch 1, turn. 1 sc in each st across (121)
Row 10 :
Ch 1, turn. 1 sc in each st across (121)
Row 11 :
Ch 1, turn. 1 sc in each st across (121)
Row 12 :
Ch 1, turn. 1 sc in each st across (121)
Info :
Prepare rust/burnt orange yarn. Beginning pumpkin motif will occupy center panel columns 31-91 (61 sts). Left and right side columns (1-30 and 92-121) remain cream during these motif rows unless otherwise noted.
Row 13 :
Ch 1, turn. 30 sc Cream, 5 sc Rust, 6 sc Cream, 10 sc Rust, 10 sc Cream (arranged as motif center), 30 sc Cream (121)
Row 14 :
Ch 1, turn. 30 sc Cream, 4 sc Rust, 7 sc Cream, 12 sc Rust, 8 sc Cream, 30 sc Cream (121)
Row 15 :
Ch 1, turn. 30 sc Cream, 3 sc Rust, 9 sc Gold, 12 sc Rust, 7 sc Cream, 30 sc Cream (121)
Row 16 :
Ch 1, turn. 30 sc Cream, 2 sc Rust, 10 sc Gold, 12 sc Rust, 7 sc Cream, 30 sc Cream (121)
Info :
Work the transitions by changing color at the last yarn over of the previous stitch to create clean color joins. Carry unused colors along the WS and catch floats every 6 stitches to avoid long loose strands.
Row 17 :
Ch 1, turn. 30 sc Cream, 2 sc Rust, 12 sc Gold, 10 sc Rust, 7 sc Cream, 30 sc Cream (121)
Row 18 :
Ch 1, turn. 30 sc Cream, 3 sc Rust, 14 sc Gold, 8 sc Rust, 6 sc Cream, 30 sc Cream (121)
Row 19 :
Ch 1, turn. 30 sc Cream, 5 sc Rust, 14 sc Gold, 6 sc Rust, 6 sc Cream, 30 sc Cream (121)
Row 20 :
Ch 1, turn. 30 sc Cream, 6 sc Rust, 15 sc Gold, 4 sc Rust, 6 sc Cream, 30 sc Cream (121)
Info :
At the end of Row 20, check the pumpkin shape visually. You should see a rounded top forming. If using a chart, this corresponds to the first arch of the pumpkin bowl. Adjust floats every 8 sts.
Row 21 :
Ch 1, turn. 30 sc Cream, 8 sc Rust, 15 sc Gold, 4 sc Rust, 4 sc Cream, 30 sc Cream (121)
Row 22 :
Ch 1, turn. 30 sc Cream, 10 sc Rust, 13 sc Gold, 6 sc Rust, 2 sc Cream, 30 sc Cream (121)
Row 23 :
Ch 1, turn. 30 sc Cream, 12 sc Rust, 12 sc Gold, 6 sc Rust, 1 sc Cream, 30 sc Cream (121)
Row 24 :
Ch 1, turn. 30 sc Cream, 14 sc Rust, 10 sc Gold, 8 sc Rust, 1 sc Cream, 30 sc Cream (121)
Info :
If you prefer to embroider pumpkin ridges later rather than colorwork stripes, hold off substituting gold now and keep the pumpkin largely rust—surface embroider to indicate ribs after blocking.
Row 25 :
Ch 1, turn. 30 sc Cream, 16 sc Rust, 9 sc Gold, 8 sc Rust, 1 sc Cream, 30 sc Cream (121)
Row 26 :
Ch 1, turn. 30 sc Cream, 18 sc Rust, 8 sc Gold, 7 sc Rust, 0 sc Cream (all motif to edge), 30 sc Cream (121)
Row 27 :
Ch 1, turn. 30 sc Cream, 20 sc Rust, 8 sc Brown, 5 sc Rust, 0 sc Cream, 30 sc Cream (121)
Row 28 :
Ch 1, turn. 30 sc Cream, 22 sc Rust, 10 sc Brown, 3 sc Rust, 0 sc Cream, 30 sc Cream (121)
Row 29 :
Ch 1, turn. 30 sc Cream, 24 sc Rust, 8 sc Brown, 3 sc Rust, 0 sc Cream, 30 sc Cream (121)
Info :
Rows 26-29 deepen the base shading. Use a small hook if you want the brown to recede slightly under the rust for an antique look.
Row 30 :
Ch 1, turn. 30 sc Cream, 26 sc Rust, 8 sc Brown, 1 sc Rust, 0 sc Cream, 30 sc Cream (121)
Row 31 :
Ch 1, turn. 30 sc Cream, 28 sc Rust, 5 sc Brown, 0 sc Rust, 0 sc Cream, 30 sc Cream (121)
Row 32 :
Ch 1, turn. 30 sc Cream, 30 sc Rust, 1 sc Brown, 0 sc Rust, 0 sc Cream, 30 sc Cream (121)
Row 33 :
Ch 1, turn. 30 sc Cream, 30 sc Rust, 1 sc Brown, 0 sc Rust, 0 sc Cream, 30 sc Cream (121)
Row 34 :
Ch 1, turn. 30 sc Cream, 28 sc Rust, 2 sc Brown, 1 sc Rust, 0 sc Cream, 30 sc Cream (121)
Info :
At Row 34 you should see the lower pumpkin complete. Fasten off any shade you no longer need and weave tails along WS. Keep floats for later motifs within 12-16 sts to avoid snagging.
Row 35 :
Ch 1, turn. 1 sc in each st across (121)
Row 36 :
Ch 1, turn. 1 sc in each st across (121)
Info :
Work two neutral rows to create breathing room between motifs. Check width and block gently if foundation has stretched.
— Central Cornucopia & Leaves (Rows 37 - 96) :
Info :
The large cornucopia occupies the central band around the middle rows. It spans columns 31-91 (61 sts) and is worked using multiple color changes: Brown, Gold, Rust, Tan and Green for berries and fill. Keep the left and right 30 stitches cream as background unless instructed.
Row 37 :
Ch 1, turn. 30 sc Cream, 5 sc Brown, 6 sc Gold, 10 sc Brown, 10 sc Tan, 30 sc Cream (121)
Row 38 :
Ch 1, turn. 30 sc Cream, 6 sc Brown, 8 sc Gold, 8 sc Brown, 9 sc Tan, 30 sc Cream (121)
Row 39 :
Ch 1, turn. 30 sc Cream, 7 sc Brown, 10 sc Gold, 8 sc Brown, 6 sc Tan, 30 sc Cream (121)
Row 40 :
Ch 1, turn. 30 sc Cream, 8 sc Brown, 12 sc Gold, 8 sc Brown, 5 sc Tan, 30 sc Cream (121)
Info :
Begin introducing deep green accents for leaf tips at Row 41. Place stitch markers on stitch 31 and stitch 91 at Row 40 to reference motif edges.
Row 41 :
Ch 1, turn. 30 sc Cream, 6 sc Brown, 12 sc Gold, 6 sc Brown, 7 sc Green, 30 sc Cream (121)
Row 42 :
Ch 1, turn. 30 sc Cream, 5 sc Brown, 10 sc Gold, 6 sc Brown, 10 sc Green, 30 sc Cream (121)
Row 43 :
Ch 1, turn. 30 sc Cream, 4 sc Brown, 8 sc Gold, 6 sc Brown, 13 sc Green, 30 sc Cream (121)
Row 44 :
Ch 1, turn. 30 sc Cream, 3 sc Brown, 6 sc Gold, 6 sc Brown, 16 sc Green, 30 sc Cream (121)
Info :
Rows 41-44 form leaf clusters overlapping the cornucopia. Use a slightly firmer tension on green blocks to create a raised look on RS; catch floats tightly but not pulled.
Row 45 :
Ch 1, turn. 30 sc Cream, 2 sc Brown, 5 sc Gold, 6 sc Brown, 20 sc Green, 30 sc Cream (121)
Row 46 :
Ch 1, turn. 30 sc Cream, 2 sc Brown, 6 sc Gold, 6 sc Brown, 22 sc Green, 30 sc Cream (121)
Row 47 :
Ch 1, turn. 30 sc Cream, 3 sc Brown, 8 sc Gold, 8 sc Brown, 14 sc Green, 30 sc Cream (121)
Row 48 :
Ch 1, turn. 30 sc Cream, 5 sc Brown, 10 sc Gold, 10 sc Brown, 6 sc Green, 30 sc Cream (121)
Info :
Shape cornucopia curve by increasing gold bands and narrowing brown sections as you approach the curve tip. Keep counting to maintain 61 motif stitches.
Row 49 :
Ch 1, turn. 30 sc Cream, 8 sc Brown, 10 sc Gold, 12 sc Brown, 3 sc Green, 30 sc Cream (121)
Row 50 :
Ch 1, turn. 30 sc Cream, 10 sc Brown, 12 sc Gold, 12 sc Brown, 1 sc Green, 30 sc Cream (121)
Row 51 :
Ch 1, turn. 30 sc Cream, 12 sc Brown, 14 sc Gold, 12 sc Brown, 1 sc Cream (center curve), 30 sc Cream (121)
Row 52 :
Ch 1, turn. 30 sc Cream, 14 sc Brown, 14 sc Gold, 10 sc Brown, 3 sc Cream, 30 sc Cream (121)
Info :
At Row 52 the cornucopia mouth begins to widen—subtle shading matters here. Keep floats neat on WS and avoid twisting color strands to prevent uneven thickness.
Row 53 :
Ch 1, turn. 30 sc Cream, 15 sc Brown, 14 sc Gold, 8 sc Brown, 4 sc Cream, 30 sc Cream (121)
Row 54 :
Ch 1, turn. 30 sc Cream, 16 sc Brown, 12 sc Gold, 8 sc Brown, 5 sc Cream, 30 sc Cream (121)
Row 55 :
Ch 1, turn. 30 sc Cream, 18 sc Brown, 10 sc Gold, 8 sc Brown, 5 sc Cream, 30 sc Cream (121)
Row 56 :
Ch 1, turn. 30 sc Cream, 20 sc Brown, 8 sc Gold, 8 sc Brown, 5 sc Cream, 30 sc Cream (121)
Info :
Rows 53-56 bring the cornucopia fuller and will be the area where fruit/berries appear as rust and green clusters. Keep a small snipper handy to tidy floats as you weave them in later.
Row 57 :
Ch 1, turn. 30 sc Cream, 22 sc Brown, 6 sc Gold, 6 sc Brown, 7 sc Cream, 30 sc Cream (121)
Row 58 :
Ch 1, turn. 30 sc Cream, 20 sc Brown, 8 sc Rust (berries), 8 sc Green (leaflets), 5 sc Cream, 30 sc Cream (121)
Row 59 :
Ch 1, turn. 30 sc Cream, 18 sc Brown, 10 sc Rust, 10 sc Green, 5 sc Cream, 30 sc Cream (121)
Row 60 :
Ch 1, turn. 30 sc Cream, 15 sc Brown, 12 sc Rust, 14 sc Green, 6 sc Cream, 30 sc Cream (121)
Info :
These rows form the overlapping fruit and green clusters spilling from the cornucopia. If you prefer raised texture, consider replacing some green sc with surface slip stitch vines later.
Row 61 :
Ch 1, turn. 30 sc Cream, 12 sc Brown, 15 sc Rust, 17 sc Green, 7 sc Cream, 30 sc Cream (121)
Row 62 :
Ch 1, turn. 30 sc Cream, 10 sc Brown, 18 sc Rust, 15 sc Green, 8 sc Cream, 30 sc Cream (121)
Row 63 :
Ch 1, turn. 30 sc Cream, 8 sc Brown, 20 sc Rust, 13 sc Green, 10 sc Cream, 30 sc Cream (121)
Row 64 :
Ch 1, turn. 30 sc Cream, 6 sc Brown, 22 sc Rust, 11 sc Green, 12 sc Cream, 30 sc Cream (121)
Info :
At this broadest point of the cornucopia you may be using multiple small color changes across each row. Work slowly and keep floats tidy. Use locking stitch markers to secure floats every 8-10 sts.
Row 65 :
Ch 1, turn. 30 sc Cream, 4 sc Brown, 23 sc Rust, 12 sc Green, 12 sc Cream, 30 sc Cream (121)
Row 66 :
Ch 1, turn. 30 sc Cream, 3 sc Brown, 22 sc Rust, 14 sc Green, 12 sc Cream, 30 sc Cream (121)
Row 67 :
Ch 1, turn. 30 sc Cream, 2 sc Brown, 20 sc Rust, 16 sc Green, 13 sc Cream, 30 sc Cream (121)
Row 68 :
Ch 1, turn. 30 sc Cream, 1 sc Brown, 19 sc Rust, 17 sc Green, 14 sc Cream, 30 sc Cream (121)
Info :
Rows 65-68 begin narrowing the cornucopia as it curves toward the upper pumpkin area. Keep track of how many sts of each color are left to return to your palette in later rows.
Row 69 :
Ch 1, turn. 30 sc Cream, 2 sc Brown, 17 sc Rust, 18 sc Green, 14 sc Cream, 30 sc Cream (121)
Row 70 :
Ch 1, turn. 30 sc Cream, 4 sc Brown, 16 sc Rust, 17 sc Green, 14 sc Cream, 30 sc Cream (121)
Row 71 :
Ch 1, turn. 30 sc Cream, 6 sc Brown, 15 sc Rust, 15 sc Green, 15 sc Cream, 30 sc Cream (121)
Row 72 :
Ch 1, turn. 30 sc Cream, 8 sc Brown, 14 sc Rust, 12 sc Green, 17 sc Cream, 30 sc Cream (121)
Info :
At Row 72 the cornucopia is tapering and leaves are settling. If you want the cornucopia mouth to have a braided look, alternate brown and tan stitches in pairs for a woven effect.
Row 73 :
Ch 1, turn. 30 sc Cream, 10 sc Brown, 12 sc Gold, 12 sc Rust, 17 sc Cream, 30 sc Cream (121)
Row 74 :
Ch 1, turn. 30 sc Cream, 12 sc Brown, 10 sc Gold, 12 sc Rust, 17 sc Cream, 30 sc Cream (121)
Row 75 :
Ch 1, turn. 30 sc Cream, 14 sc Brown, 8 sc Gold, 10 sc Rust, 19 sc Cream, 30 sc Cream (121)
Row 76 :
Ch 1, turn. 30 sc Cream, 16 sc Brown, 6 sc Gold, 8 sc Rust, 21 sc Cream, 30 sc Cream (121)
Info :
These narrowing rows prepare the transition to the upper pumpkin motif. Keep stitch counts exact: every one of these rows totals 121 stitches across.
Row 77 :
Ch 1, turn. 30 sc Cream, 18 sc Brown, 4 sc Gold, 6 sc Rust, 23 sc Cream, 30 sc Cream (121)
Row 78 :
Ch 1, turn. 30 sc Cream, 20 sc Brown, 4 sc Rust, 6 sc Cream (transition), 30 sc Cream (121)
Row 79 :
Ch 1, turn. 30 sc Cream, 22 sc Brown, 6 sc Rust, 3 sc Cream, 30 sc Cream (121)
Row 80 :
Ch 1, turn. 30 sc Cream, 24 sc Brown, 6 sc Rust, 1 sc Cream, 30 sc Cream (121)
Info :
Row 80 marks the end of the main cornucopia body. From Row 81 onward you'll introduce the upper pumpkin and leaf accents mirrored from the lower half for balanced design.
Row 81 :
Ch 1, turn. 1 sc in each st across (121)
Row 82 :
Ch 1, turn. 1 sc in each st across (121)
Row 83 :
Ch 1, turn. 30 sc Cream, 10 sc Rust, 12 sc Gold, 9 sc Rust, 0 sc Cream, 30 sc Cream (121)
Row 84 :
Ch 1, turn. 30 sc Cream, 12 sc Rust, 11 sc Gold, 8 sc Rust, 0 sc Cream, 30 sc Cream (121)
Info :
Row 83-84 will build upper pumpkin. Mirror the lower pumpkin color palette for cohesion. Keep paying attention to floats and secure long floats every 8 stitches.
Row 85 :
Ch 1, turn. 30 sc Cream, 14 sc Rust, 10 sc Gold, 8 sc Rust, 0 sc Cream, 30 sc Cream (121)
Row 86 :
Ch 1, turn. 30 sc Cream, 16 sc Rust, 9 sc Gold, 6 sc Rust, 0 sc Cream, 30 sc Cream (121)
Row 87 :
Ch 1, turn. 30 sc Cream, 18 sc Rust, 8 sc Gold, 6 sc Rust, 0 sc Cream, 30 sc Cream (121)
Row 88 :
Ch 1, turn. 30 sc Cream, 20 sc Rust, 6 sc Gold, 5 sc Rust, 0 sc Cream, 30 sc Cream (121)
Info :
As the upper pumpkin completes, prepare rust yarn bobbles for the outer border—these will be crocheted later in a popcorn cluster round to match the small flowers seen in the photo.
Row 89 :
Ch 1, turn. 30 sc Cream, 22 sc Rust, 5 sc Gold, 4 sc Rust, 0 sc Cream, 30 sc Cream (121)
Row 90 :
Ch 1, turn. 30 sc Cream, 24 sc Rust, 4 sc Gold, 3 sc Rust, 0 sc Cream, 30 sc Cream (121)
Row 91 :
Ch 1, turn. 30 sc Cream, 26 sc Rust, 3 sc Gold, 2 sc Rust, 0 sc Cream, 30 sc Cream (121)
Row 92 :
Ch 1, turn. 30 sc Cream, 28 sc Rust, 2 sc Gold, 1 sc Rust, 0 sc Cream, 30 sc Cream (121)
Info :
Rows 89-92 finish the upper pumpkin shading. Fasten off extra colors as necessary, but leave long tails for tapestry weaving to avoid visible joins on RS.
Row 93 :
Ch 1, turn. 1 sc in each st across (121)
Row 94 :
Ch 1, turn. 1 sc in each st across (121)
Row 95 :
Ch 1, turn. 1 sc in each st across (121)
Row 96 :
Ch 1, turn. 1 sc in each st across (121)
Info :
Two neutral breathing rows after the cornucopia help the central image read well. At this stage weave in long tails along the WS to tidy the panel before starting border treatments.
— Side Stripes & Narrow Gold Line (Rows 97 - 112) :
Info :
Work a pair of decorative side stripes to frame the center: a narrow gold line inside the border will echo the photograph. These rows will use the cream base for most stitches with a continuous single-stitch gold running along stitches 31 and 91 as a vertical stitch marker across several rows.
Row 97 :
Ch 1, turn. 30 sc Cream, 1 sc Gold, 59 sc Cream, 1 sc Gold, 30 sc Cream (121)
Row 98 :
Ch 1, turn. 30 sc Cream, 1 sc Gold, 59 sc Cream, 1 sc Gold, 30 sc Cream (121)
Row 99 :
Ch 1, turn. 30 sc Cream, 1 sc Gold, 59 sc Cream, 1 sc Gold, 30 sc Cream (121)
Row 100 :
Ch 1, turn. 30 sc Cream, 1 sc Gold, 59 sc Cream, 1 sc Gold, 30 sc Cream (121)
Info :
Work this narrow gold line for 16 rows (Rows 97-112). It creates a subtle inner frame. Carry gold on WS when not in use and catch every 8 stitches to secure floats.
Row 101 :
Ch 1, turn. 30 sc Cream, 1 sc Gold, 59 sc Cream, 1 sc Gold, 30 sc Cream (121)
Row 102 :
Ch 1, turn. 30 sc Cream, 1 sc Gold, 59 sc Cream, 1 sc Gold, 30 sc Cream (121)
Row 103 :
Ch 1, turn. 30 sc Cream, 1 sc Gold, 59 sc Cream, 1 sc Gold, 30 sc Cream (121)
Row 104 :
Ch 1, turn. 30 sc Cream, 1 sc Gold, 59 sc Cream, 1 sc Gold, 30 sc Cream (121)
Row 105 :
Ch 1, turn. 30 sc Cream, 1 sc Gold, 59 sc Cream, 1 sc Gold, 30 sc Cream (121)
Info :
At Row 105 check for straightness. If edges ripple, block lightly now, pinning outer edges square before continuing to border rounds.
Row 106 :
Ch 1, turn. 30 sc Cream, 1 sc Gold, 59 sc Cream, 1 sc Gold, 30 sc Cream (121)
Row 107 :
Ch 1, turn. 30 sc Cream, 1 sc Gold, 59 sc Cream, 1 sc Gold, 30 sc Cream (121)
Row 108 :
Ch 1, turn. 30 sc Cream, 1 sc Gold, 59 sc Cream, 1 sc Gold, 30 sc Cream (121)
Row 109 :
Ch 1, turn. 30 sc Cream, 1 sc Gold, 59 sc Cream, 1 sc Gold, 30 sc Cream (121)
Row 110 :
Ch 1, turn. 30 sc Cream, 1 sc Gold, 59 sc Cream, 1 sc Gold, 30 sc Cream (121)
Row 111 :
Ch 1, turn. 30 sc Cream, 1 sc Gold, 59 sc Cream, 1 sc Gold, 30 sc Cream (121)
Row 112 :
Ch 1, turn. 30 sc Cream, 1 sc Gold, 59 sc Cream, 1 sc Gold, 30 sc Cream (121)
Info :
Fasten off gold if you prefer a separate color for border; otherwise carry it up the side to use for a slim accent row before scallop edging.
— Final Neutral Rows Before Border (Rows 113 - 120) :
Row 113 :
Ch 1, turn. 1 sc in each st across (121)
Row 114 :
Ch 1, turn. 1 sc in each st across (121)
Row 115 :
Ch 1, turn. 1 sc in each st across (121)
Info :
Work 6-8 neutral rows to stabilize the top edge before creating the scalloped border. If you want a longer runner, add additional all-cream rows here in multiples of 2 for symmetry.
Row 116 :
Ch 1, turn. 1 sc in each st across (121)
Row 117 :
Ch 1, turn. 1 sc in each st across (121)
Row 118 :
Ch 1, turn. 1 sc in each st across (121)
Row 119 :
Ch 1, turn. 1 sc in each st across (121)
Row 120 :
Ch 1, turn. 1 sc in each st across (121)
Info :
Fasten off and weave in ends along WS. Block the runner flat to the desired measurements before working the decorative border—this makes scallops even and makes popcorn placement predictable.
— Working the Scalloped Border & Popcorn Flowers (Right and Left Sides) :
Info :
With RS facing, join rust yarn at lower right corner (stitch at Row 1, column 121) to work a continuous scalloped border up the right side, across the top, and down the left side, finishing with a narrow picot edge. The scallops are created with shells and picots; small 5-dc popcorn 'flowers' are made inside every scallop using 5-double crochet popcorns grouped in a small circle.
Round 1 (Right Edge) :
Join Rust with sl st to outer edge stitch on RS. Ch 1, sc evenly up the side placing ~6-7 sc per 1" until you reach top corner (estimate 40 sc along side). Count carefully to match left side later.
Round 2 :
Turn corner: Work 3 sc in corner st, then along top edge work sc evenly across top row (121 sc) to opposite corner; 3 sc in corner st, then sc evenly down side to starting point. Fasten off Rust leaving tail for joining (approx total 40+121+40+6 corner stitches = 207 sc)
Info :
Space your side sc so the scallop pattern will divide evenly across the length. If counts don't divide evenly into scallop repeats, adjust side sc spacing by adding or dropping a sc every 12-15 sts to balance.
Round 3 (Scallops - Rust) :
Join Rust at RS. *Skip 2 sc, 5 dc in next sc (shell), sk 2 sc, sl st in next sc; ch 3, sl st in same sc (picot), sl st in next sc* Repeat from * to * around to form scallops spaced evenly. Finish Round with sl st to join.
Round 4 (Cream Picot Trim) :
Join Cream. In each shell space: sl st into shell center, ch 3, sc in next st, ch 3, sl st in next shell center to form a scalloped cream picot trim. Work evenly around and join with sl st.
Info :
The scallop pattern should create 18-22 scallops depending on spacing. Use pins to mark scallop centers and ensure symmetry before sewing popcorn flowers into centers in the next rounds.
Round 5 (Popcorn Flowers Placement) :
Working in Rust, into the center of each scallop: make a popcorn cluster by working 5 dc into same st, remove hook, insert hook into first dc of cluster, pull loop through, sl st to secure cluster (pop). Sl st to adjacent st, ch 1 to move to next scallop center. Repeat in each scallop center. (Pop clusters = number of scallops)
Round 6 (Popcorn Backing) :
With Dark Green, work a tiny sl st ring behind each popcorn by inserting hook from RS into the WS beneath the popcorn, draw up a loop, ch 1, sl st to secure; this will suggest a leaf under each flower and stabilize popcorns.
Info :
Popcorn clusters are the textured accents seen in the photo. Work them firmly so they maintain shape; do not over-tighten to avoid pulling scallops inward. If a popcorn feels loose, secure with an extra sl st on WS.
Round 7 (Optional Gold Ladder) :
With Gold yarn, surface slip stitch a thin line inside the scallops along the row you created for the narrow gold stripe earlier: run a surface sl st connecting the inner points of each scallop to echo the photo's golden frame.
Info :
Surface slip stitch: insert your needle from WS to RS a couple of stitches ahead, lay gold yarn on RS and use tapestry needle to make small sl st stitches on RS. Keep sl st neat and evenly spaced.
— Finishing Edge: Small Picot Fringe (Final Round) :
Final Round :
With Cream, sc evenly around entire edge working into shell centers and picot loops: *sc, ch 3, sl st in first ch (picot), sk 2* repeat to create delicate picot fringe all around. Join and fasten off.
Info :
Weave in all ends along the WS using a tapestry needle. Block the runner to final measurements: pin to blocking mat and steam gently or spray with water and leave to dry. Shape scallops with pins during blocking for crisp curves.
Care :
Hand wash gently in cool water and lay flat to dry. Steam lightly to freshen. Avoid tumble drying to preserve shape of popcorn clusters.
Finishing this runner is a lovely slow-craft moment: the cornucopia and pumpkins come alive as you work the textured popcorn border, and blocking reveals the full charm of the scallops. Each stitch adds warmth and character—perfect for a seasonal centerpiece. 🧶🍂 Display with candles and a simple vase for cozy autumn gatherings. Happy stitching and be proud of every row you complete! 🎃