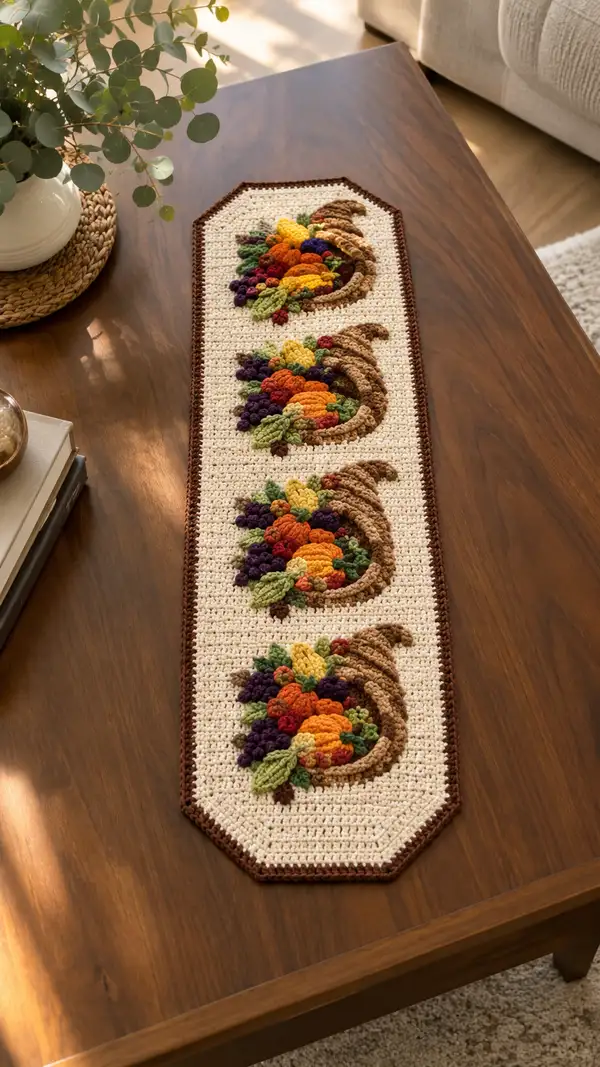
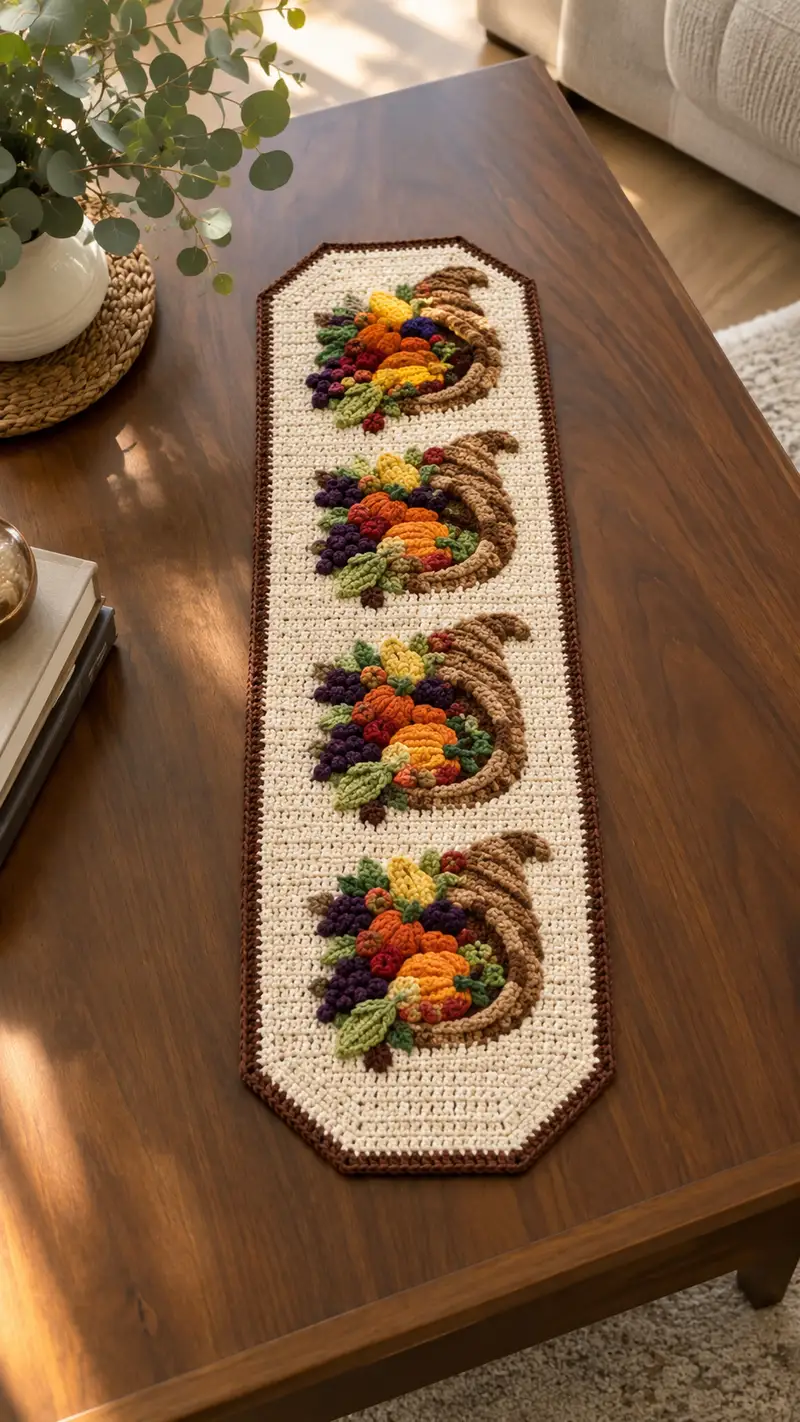
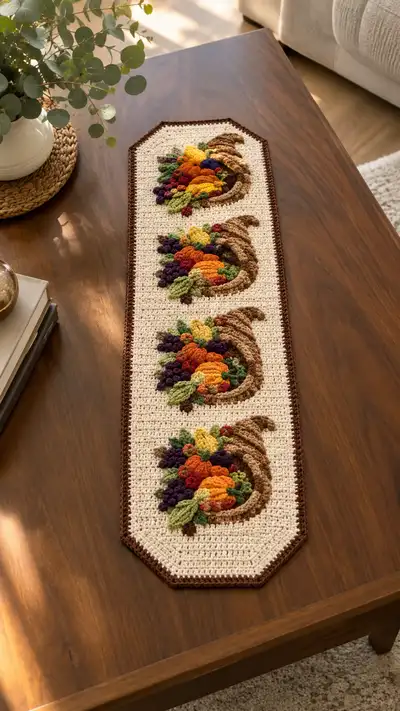
A warm, autumn-inspired table runner featuring four textured cornucopia appliques overflowing with pumpkins, grapes, leaves and acorns. Worked in a neutral cream ground with rich brown edging and colorful 3D motifs, this runner adds seasonal charm to any table. Textured stitches, puff clusters, and layered appliques create a cozy heirloom look. Pattern includes full instructions for base, motifs, and finishing.
Progress Tracker
0% Complete
— Runner Base :
Info :
Base is worked flat in joined rounds to allow octagon ends and continuous border later. Using worsted weight cream yarn and 4.0mm hook, chain a foundation that gives final width about 9.5" — for this pattern chain 56. Gauge is flexible; measure to fit your table. We will work in joined rounds that resemble rows to create a dense, even fabric.
Round 1 :
Ch 56, join with sl st to first ch to form a loop being careful not to twist. Ch 1 (does not count as st), 56 sc around the chain, sl st to join to first sc (56)
Round 2 :
Ch 1, 1 sc in same st, 1 sc in next 54 sts, 2 sc in last st (working into the same joining st to build thickness), sl st to join (58)
Round 3 :
Ch 1, 1 sc in each of first 2 sts, (sc in next 54 sts), 1 sc in last 2 sts, sl st to join (58)
Round 4 :
Ch 1, sc in each st around (58) — this round evens the join and prepares for working in continuous joined rounds
Info :
We will now build length with alternating joined rounds of sc and hdc to create a slightly textured fabric that matches the pictured runner. Maintain 58 sts per round. Place stitch marker at start of each round to keep track.
Round 5 :
Ch 2 (counts as hdc here and throughout), 1 hdc in next 57 sts, join with sl st to top of ch-2 (58)
Round 6 :
Ch 1, 1 sc in each st around, sl st to join (58)
Round 7 :
Repeat Round 5 (58)
Round 8 :
Repeat Round 6 (58)
Round 9-28 :
Repeat Rounds 5 and 6 alternating for 20 rounds (58). This builds the central field length for the runner; stop here when your runner length reaches approx 22" from the first end; we will add two more motif zones later so continue until central length measures appropriately. For pictured runner with four motifs, continue until you have ~60 rounds total before shaping ends (we will instead shape octagon ends in next rounds)
Info :
Place four marker positions on the base to note where the centers of each cornucopia applique will go. Space them evenly along the length; for 60 rounds total place centers at approx Rounds 6, 20, 34, and 48 from one end. Mark positions on RS by placing a removable stitch marker or a small safety pin through the fabric (do not attach yarn yet).
Round 29 :
We will begin shaping first octagon end. Ch 1, sc in next 12 sts, 2 sc in next st, sc in next 10 sts, 2 sc in next st, sc in next 12 sts, 2 sc in next st, sc in next 10 sts, 2 sc in last st, sl st to join — total increases create gentle angled corner increases (66)
Round 30 :
Ch 1, sc in each st around (66)
Round 31 :
Ch 1, sc in next 13 sts, 2 sc in next, sc in next 11 sts, 2 sc in next, sc in next 13 sts, 2 sc in next, sc in next 11 sts, 2 sc in last, sl st join (74)
Round 32 :
Ch 1, sc in each st around (74)
Info :
These increases form the beveled octagon end. After completing end shaping, continue the same alternating hdc/sc rounds for the flat field until you reach the spacing required for all motifs. The opposite end will be shaped the same at the end of the runner.
Round 33-44 :
Work alternating rounds: Ch2 hdc round then Ch1 sc round for 12 rounds maintaining 74 sts (74). Continue until total length includes space for 4 motifs plus final end shaping.
Round 45 :
Shape second octagon end mirror to Rounds 29-32: Ch1 sc in next 13 sts, 2 sc in next, sc in next 11 sts, 2 sc in next, sc in next 13 sts, 2 sc in next, sc in next 11 sts, 2 sc in last, sl st join (82)
Round 46 :
Ch1 sc in each st around (82)
Round 47 :
Ch1 sc in each st BLO for a subtle ridge (82)
Info :
Fasten off cream yarn leaving a long tail for mattress stitch if you wish to tidy the join; otherwise weave ends in. The base is now ready for applique placement. Block lightly to flatten and square edges if desired before applying motifs.
— Cornucopia Horn (Make 4) :
Info :
Cornucopia horn is an elongated, curved applique worked flat in light brown with internal ridges in dark brown. The horn is worked in rows with increases at one edge to create the curve. Use 4.0mm hook and light brown yarn for main horn; use dark brown for surface slip-stitch ridges later.
Round 1 :
Ch 14, turn, 1 sc in 2nd ch from hook and each across (13)
Round 2 :
Ch1, turn, 1 sc in each st across (13)
Round 3 :
Ch1, turn, sc in first 3 sts, inc in next st, sc in next 6 sts, inc in next st, sc in last 2 sts (15)
Round 4 :
Ch1, turn, sc across (15)
Round 5 :
Ch1, turn, sc in first 4 sts, inc, sc in next 7 sts, inc, sc in last 3 sts (17)
Round 6 :
Ch1, turn, sc across (17)
Round 7 :
Ch1, turn, sc in first 5 sts, inc, sc in next 9 sts, inc, sc in last 4 sts (19)
Round 8 :
Ch1, turn, sc across (19)
Info :
To create the curved horn shape, we will now work a series of asymmetric increases on one edge only so the piece curls in on itself. Place a marker at the increasing edge and always increase into the marked edge stitch to build curl.
Round 9 :
Ch1, turn, inc in first st, sc in next 10 sts, inc in first marked edge (work increases into same side each row) — end of row total increases 2 (21)
Round 10 :
Ch1, turn, sc across (21)
Round 11 :
Ch1, turn, inc in first st, sc in next 12 sts, inc in first marked edge (23)
Round 12 :
Ch1, turn, sc across (23)
Round 13 :
Ch1, turn, inc in first st, sc next 14 sts, inc in first marked edge (25)
Round 14 :
Ch1, turn, sc across (25)
Round 15 :
Ch1, turn, sc in first 3 sts, dec (sc2tog) over next 2 sts, sc next 17 sts, dec over next 2 sts, sc in last 3 sts (23)
Round 16 :
Ch1, turn, sc across (23)
Round 17 :
Ch1, turn, sc in first 2 sts, dec, sc next 15 sts, dec, sc last 2 sts (21)
Round 18 :
Ch1, turn, sc across (21)
Round 19 :
Ch1, turn, sc in first st, dec, sc next 11 sts, dec, sc last st (19)
Round 20 :
Ch1, turn, sc across (19)
Info :
Fasten off leaving long tail for sewing. With dark brown yarn and tapestry needle, work surface slip-stitch ridges across the horn surface following the curve: insert hook into FLO at intervals of every 3rd row and work sl st ridges to simulate the horn weave. Sew the horn onto the base with the curved side facing outward so it will cradle the pumpkins.
— Large Pumpkin (Make 4) :
Info :
Large pumpkin is worked in rounds using puff stitches to make raised segments. Use orange yarn and 3.5-4.0mm hook. Each pumpkin is worked in flat rounds then joined and gathered to create a plump 3D shape. Stuff lightly between rounds.
Round 1 :
Make a magic ring, ch1, 8 sc in mr (8)
Round 3 :
(1 sc, inc) x8 — 24
Round 4 :
1 sc in each st around (24)
Round 5 :
*(puff) in next st, sc in next st* rep around finishing with sc so you have 12 puffs and 12 sc alternately (24 stitches counting puffs as single st), sl st to join
Round 6 :
Ch1, sc in each st across working into top of each puff and sc across (24)
Round 7 :
*sc in next st, (puff) in next st* rep around (24)
Round 8 :
Ch1, sc around (24)
Round 9 :
(1 sc, dec) x8 — 16
Round 10 :
Dec around to 8 sts — (8)
Info :
Stuff pumpkin lightly through opening. Pull tail to gather opening closed and sew remaining hole closed neatly. Wrap a small length of brown yarn around the gathered top to create segmenting and stitch a short stem with brown yarn (see Stem section for detail). For a flatter segment look, run stitch around base of puff rows and pull slightly to indent.
— Small Pumpkin / Gourd (Make 4) :
Round 1 :
Magic ring, 6 sc in mr (6)
Round 2 :
Inc in each st (12)
Round 3 :
(1 sc, inc) x6 (18)
Round 5 :
*(puff) in next st, sc next 1* around (9 puffs total counting as 9 sts) (18)
Round 6 :
Sc around into tops of puffs (18)
Round 7 :
Dec around to 12 sts
Round 8 :
Dec around to 6 sts, stuff lightly, fasten off leaving tail and gather closed (6)
Info :
Use small gourds as accents to the larger pumpkins. Vary color between gold and rust for visual interest. Sew into place overlapping edges of horn and large pumpkin to appear naturally piled.
— Grape Cluster (Make 4 clusters) :
Info :
Grapes are tiny bobble clusters made from purple yarn. Make 8-12 bobbles per cluster and sew into compact triangular cluster shapes. Bobble stitch is worked into a small circle or magic ring to form discrete beads.
Round 1 :
Make magic ring, ch1, work 5 dc bobble-like beads: (yarn over, insert hook, pull up loop, yarn over, pull through 2 loops) repeat to create three partial loops then yarn over and pull through all and ch1 to close — this is a small bobble; make 6-8 bobbles into the ring, sl st to join and close. Alternatively, use 3-4 sc in mr to form a tiny round and pull slightly to form grape bead (6-8 small beads)
Round 2 :
Fasten off each bobble with short tail left for sewing. Make 10-12 small bobbles per cluster (10-12)
Info :
Sew bobbles together into triangular clusters (4 across base, 3, then 2, then 1) to mimic grape bunch shape. Attach small green stem detail using single crochet chain and a couple of sl sts. Place cluster on left or right side of pumpkin pile as pictured. Experiment with two shades of purple to add depth.
— Leaf (Make 16-20 Leaves) :
Info :
Leaves are worked flat in greens using a classic crocheted leaf shaped with chains and decreases. Make a variety of sizes—small (7-8 sts long), medium (11-12 sts), and large (15-18 sts) to create layered foliage. Use two tones and seam together or stack for interest.
Round 1 :
Ch 8 (for medium leaf), sc in 2nd ch from hook, hdc in next, dc in next, tr in next, dc in next, hdc in next, sc in last (7 sts plus chain base)
Round 2 :
Working on opposite side of chain: sc in first, hdc in next, dc in next, tr in next, dc in next, hdc in next, sc in last. Sl st to base to close. Fasten off leaving tail for sewing.
Round 3 :
For smaller leaves Ch 6 and work the same proportion (sc, hdc, dc, dc, hdc, sc) or for larger Ch 10-12 and increase center height to tr-tr-tr at center tip. Make 16-20 leaves total mixing sizes.
Info :
For textured veining, use a strand of darker green to embroider a central vein and short lateral veins with a simple backstitch across the leaf surface before sewing to the base.
— Acorn (Make 8-12) :
Round 1 :
Magic ring, 6 sc in mr (6)
Round 4 :
Switch to dark brown for cap: sl st into next st, ch1, (FLO) sc around in dark brown for textured cap (12)
Round 5 :
Dec 6 times to 6 sts, stuff lightly, fasten off leaving tail and close top (6)
Round 6 :
Sew acorn cap slightly overlapping top of tan nut so small textured rim appears. Make 8-12 for scattered detail.
Info :
Acorn caps look great when worked in dark brown and the nut in light brown; vary sizes slightly to appear natural. Attach near leaves and between pumpkins for balance.
— Stem (for Pumpkins, Make 4) :
Round 1 :
With brown yarn ch 6, sl st back into 2nd ch from hook and each across to form a short cord. Fasten off leaving long tail and wrap yarn around base of stem to secure and create thicker stalk. Sew into pumpkin top center.
Info :
For a twisted rope-like stem, twist a 3-strand chain together and fasten with a small stitch. Alternatively use a small twig secured with yarn for a rustic look.
— Surface Embellishment and Texture :
Info :
To add depth and definition to the motifs, use surface slip-stitch embroidery. With dark brown yarn, work surface sl sts around edges of horn and pumpkins to outline. Use a small tapestry needle and darker greens to add veins to leaves. Work sparingly — less is more.
— Edging & Border :
Round 1 :
With dark brown yarn and 4.0mm hook, join with sl st into any st along the edge of the runner. Ch1, sc evenly around entire perimeter placing (3 sc) in each corner bevel to maintain octagon shape. Maintain total count approx 82 sts around; use spacing to keep corners square. Sl st to join.
Round 2 :
Ch1, sc in each st around (use 3 sc in corner clusters) (approx 82)
Round 3 :
Ch2, hdc in each st around, sl st to join (approx 82)
Info :
For a neat finish, work one final round of reverse single crochet (crab stitch) in dark brown or a contrast yarn for a subtle rope edge. This is worked from left to right (reverse) around the piece and helps the runner maintain a clean border that sits flat on the table.
Round 4 :
Reverse sc/crab stitch around entire perimeter, join, fasten off and weave in ends.
Info :
Block again lightly if needed after edging; the border helps mask uneven sides and provides structure for attaching appliques.
— Layout & Placement :
Info :
Place the four cornucopia motifs so that each sits centered in the pre-marked positions. For the pictured runner the horn tapers toward the center of the runner, alternating directions: horns of motifs 1 and 3 face toward top edge and motifs 2 and 4 face toward bottom edge. Pin in place before sewing to ensure symmetry and that motifs do not overlap the border.
— Assembly & Sewing (Detailed) :
Round 1 :
With long tails from each applique and a tapestry needle, baste sew the horn first along its inner edge to the base using whip stitch spaced every 3-4 sts. Knot securely at start and end and weave tails inside horn and base to hide.
Round 2 :
Sew large pumpkin so its back edge tucks into the mouth of the horn. Use mattress stitch for invisible join along curved edges. Make sure seam lines follow shape contour to read as natural overlap.
Round 3 :
Sew small pumpkins, grape clusters, leaves, and acorns into place layering them so they overlap slightly and appear piled naturally. Use short, sturdy stitches with doubled yarn for pieces that may receive handling.
Info :
Reinforce each motif at several points to ensure durability. For pieces that stick up above the runner, sew through the base fabric and the lower edge of each applique two or three times to keep them secure.
Round 4 :
Use surface slip-stitching in dark brown to outline the horn curve and create the weave detail. Add small embroidered highlights in lighter yarn colors on pumpkin ribs if desired. Fasten off and weave all ends securely.
Info :
If you want machine-washable runner, minimize stuffing and secure all pieces with additional whipstitches. Consider sewing a matching fabric backing to cover raw edges and protect appliques in washing; spot clean recommended.
Completing this cornucopia table runner is such a satisfying fall project — the layered appliques and rich texture make a real statement on your table. You’ll enjoy the mix of stitches and the tactile detail of puff pumpkins and bobble grapes. Make one as a gift or keep it as seasonal decor; it’s a wonderful way to celebrate the harvest season. 🧶🍂✨