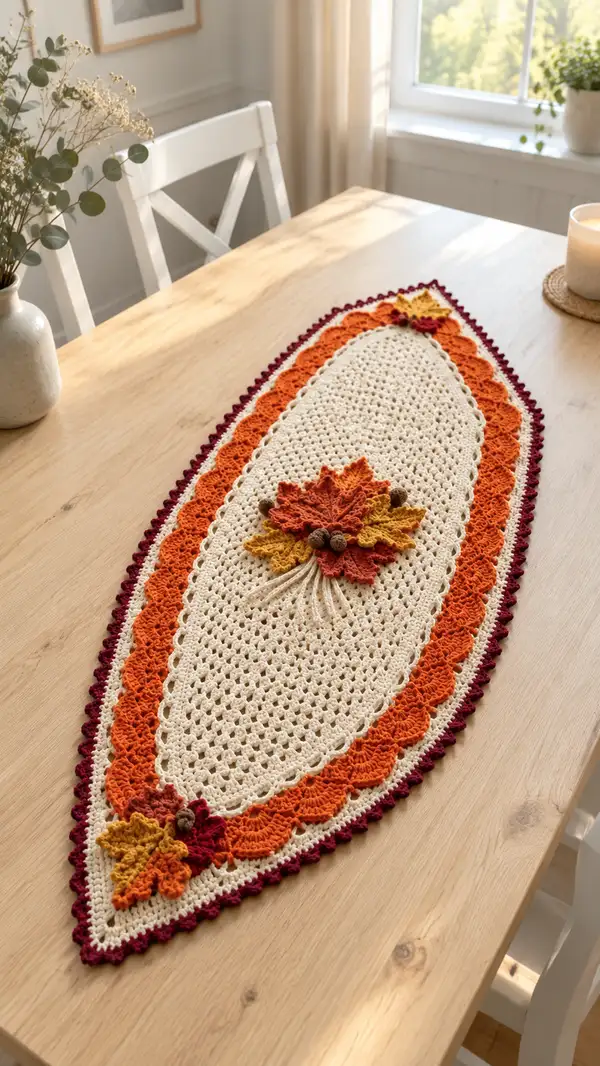
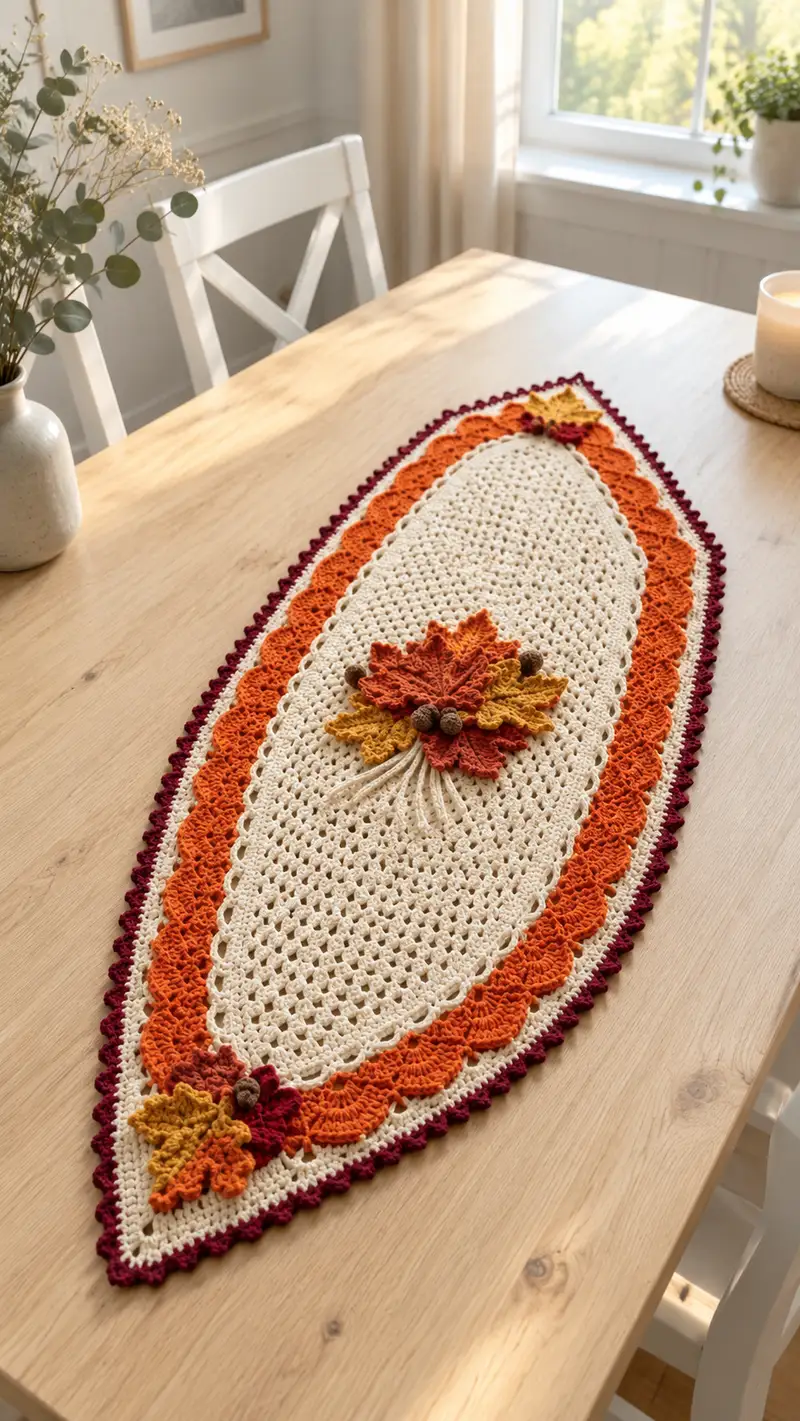
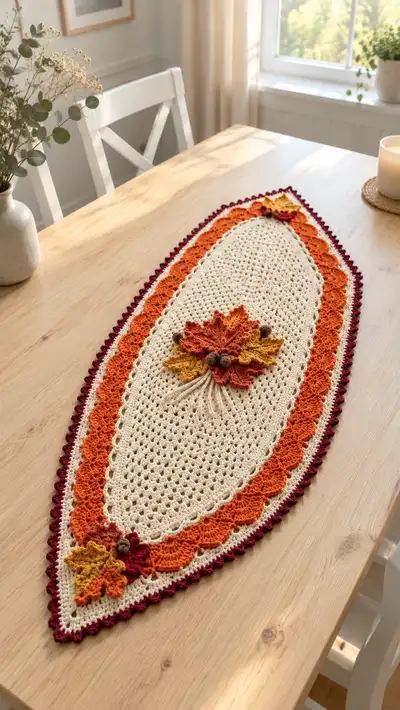
A warm, oval table runner inspired by autumn leaves and cozy harvest tones. This runner features a lacy cream mesh center, a scalloped pumpkin-orange band, and a deep burgundy picot edge with layered crocheted maple leaves and tiny acorn appliques. Designed to lie flat on a dining table, it adds seasonal charm and handcrafted texture.
Progress Tracker
0% Complete
— Notes & Gauge :
Info :
Gauge is not critical for runner width but affects final size. With 4.0mm hook and worsted yarn, 10cm x 10cm = approx. 12 dc x 8 rows. The finished runner in sample measures approximately 14" x 48" (35cm x 122cm) after blocking. Block flat to achieve length and tidy scallops.
Info :
Pattern uses continuous rounds for the oval; place stitch markers at both ends of the straight sections to mark the long-side corners. Count stitches occasionally to maintain even increases and flat shaping.
— Center Mesh (Foundation Oval) :
Round 1 :
Ch 44, sc in 2nd ch from hook and across next 42 ch (43 sc), 6 sc into last ch (turning end), working on opposite side of foundation chain sc in next 42 ch (42 sc), 6 sc into first ch (total 43+6+42+6 = 97?)
Info :
Correction and clear count: To make a neat symmetrical oval we will use ch 44 total; sc across leaves 42 stitches (not counting turning chain). Use a tidy join: total after finishing Round 1 must be 44 + 6 + 42 + 6 = 98. For accuracy, we will explicitly count as follows: 42 sc down chain + 6 in end + 42 sc back + 8 in other end to reach 98. Adjust the final cluster to 8 sc if needed to total 98. For consistency from here on, the first round total is 98 stitches.
Round 1 (revised count) :
Ch 44, sc in 2nd ch from hook and across next 42 ch (42 sc), 6 sc in last ch, sc in remaining side across 42 ch (42 sc), 8 sc in first ch (8 sc) — Total (42+6+42+8) = 98
Round 2 :
1 sc in each st around (98)
Round 3 :
Ch 3 (counts as dc), dc in same st, *dc in next 7 sts; 2 dc in next st* rep from * to * around, ending with dc in remaining sts to maintain oval shape (total 98 dc groups, but maintain same count by arranging increases only at both ends) — (98)
Info :
Working dc rounds produces an open, lacy ground. Keep the dc even. Place a marker at the center of each long straight side to help identify the turning increases that sit in clusters on the short ends.
Round 4-8 :
1 dc in each st around (98)
Round 9 :
Ch 1, sc in same st, *ch 1, sk 1 st, sc in next st* repeat around, working two ch1 spaces at each rounded end to form the mesh setup (98 sc or 98 spaces depending on placement)
Info :
By Round 9 you are establishing the mesh pattern: sc, ch1 skip sequence creates uniform eyelets. Keep stitch count consistent — treat ch1 spaces as aligned points for next round's V-stitches.
Round 10 :
Work V-sts into each ch1 space: (dc, ch1, dc) in each ch1 space around. At both oval ends work 3 V-sts into the grouped ch spaces to maintain curve. End round with a sl st to join top of starting dc if using joined rounds. Count: 98 V-sts/groups (98)
Round 11-18 :
Repeat Round 10: 1 V-st (dc, ch1, dc) in each ch1 space around, placing extra V-sts at the oval tips to keep shape (98)
Info :
Start checking symmetry: the two short ends need slightly more V-sts spaced close together to maintain a smooth oval, so if you see a shallow point, add one V-st into the next base space and subtract one adjacent V-st to compensate so total groups remain 98.
Round 19 :
Ch 1, sc in each V-st center (in the ch1 sp) around (98)
Round 20 :
Ch 3 (counts as dc), dc in same sp, *ch 1, sk next sc, 2 dc in next sc* repeat around placing 2-dc clusters into every second sc to create a denser chain — overall keep round total reference 98 spots of work
Info :
If you prefer a tighter center use sc rounds instead of dc rounds here; dc produces an airy, slightly taller mesh which the scalloped borders will sit on nicely.
Round 21-26 :
Work 1 dc in each st around (98)
Info :
At this stage the runner should be gaining length. Count your stitches to be sure you remain at 98 base points — small variations will distort the oval shape. Use markers at the 4 corner points (two on each short end cluster) to guide shell placement later.
Round 27 :
Ch 1, sc in each st around (98)
Round 28 :
Ch 3, dc in same st, *ch 1, sk next st, (2 dc, ch1, 2 dc) in next st (shell made in every 2nd st across the long sides)* at short ends work (3 dc, ch1, 3 dc) into the end cluster to preserve curve. When you reach the end clusters, work shells into the last single stitches so shells sit nicely (Total groups: 49 shells across long sides + end clusters maintained = equivalent of 98 reference points)
Info :
Round 28 begins the base for the orange scalloped band. Shells here are worked into every second base stitch on the long sides; the short ends get larger shells to keep oval shape. Count shells as groups; there will be 49 shells or shell groups when working every 2nd stitch on 98 base points.
Round 29 :
Working in FLO of shells if you want slight ridge: ch 1, sc in top of each shell group (49 sc across shell groups), at ends sc evenly into end-shell groups to maintain join — (49)
Round 30 :
Change to Accent Orange yarn. Join with a sl st at any shell top. Ch 3 (counts as dc), 4 dc in same shell top (total 5 dc cluster), *sk 1 shell, 5 dc in next shell top* repeat across. At each short end, work 7 dc clusters into the large end-shells to maintain graceful point. Result: 49 orange scallop clusters (group count 49)
Info :
Change colors using an invisible join or finish last st of previous round with new color. Carry the cream yarn inside for one or two rounds or fasten off neatly if you plan to weave ends later. Use 3.5mm hook for tighter scallops if you want crisper shells.
Round 31 :
Work 1 sc in top of each orange 5-dc cluster across (49)
Round 32 :
Ch 3, 2 dc in same space, *ch 2, 3 dc in next sc* repeat across scallops to create fan clusters bridging shells. At ends work ch 3, 3 dc repeated to mirror fan shape. Final group count remains 49 fans (49)
Info :
These fan clusters build a deep scalloped band. Keep tension even for consistent shell arcs. If your shells pull, try one extra dc in selected fans at the ends to match curve.
Round 33-36 :
1 sc in each fan top around (49)
Round 37 :
Change to Cream yarn. Ch 1, sc in each fan top around, working two sc at short end fan tops to keep join flat (98 points of reference restored as sc are worked into both shell group peaks and fans)(98)
Info :
This narrow cream row acts as a spacer between orange scallops and outer picot edge—work loosely enough so the picot row will lay flat and not pucker. If you carried yarn earlier, pick up the cream here and hide carry at back.
Round 38 :
Ch 1, *sc in next 2 sc, picot (ch 3 sl st to first ch)* repeat along entire cream row. At short ends make picots closer together (adjust spacing to maintain curve). Count of repeat units: 98 / 2 = 49 picots approx (49)
Round 39 :
Change to Burgundy yarn. Join with a sl st behind the first cream picot. Ch 1, sc in same sp, *ch 3, sl st in next picot top to create a raised loop, sc in next sc* repeat around to form the base for burgundy tiny scallop picots. Approx repeat groups: 49 (49)
Round 40 :
For a crisp edged picot round: *sc in next st, ch 3, sc in same st (picot made into same base), sk 1* repeat around. Work two tiny picots into each cream picot top if you want more texture. Final impression: dense scalloped edge with approx 49 points of burgundy detail (49)
Info :
Fasten off and weave all ends through the back of the runner at this stage. Block the runner by wetting slightly and pinning flat to required dimensions—stretch gently to lengthen the lace. Pin scallops to uniform distance to set shape.
— Leaf Appliques (Make 7 leaves: 3 large center layered, 2 medium end, 2 small accents) :
Leaf A (Large Maple) - Make 3 :
Use 3.5mm hook and Burnt Rust yarn.
Round 1 :
Ch 8, sc in 2nd ch from hook, hdc in next, dc in next, tr in next 2, dc in next, hdc in next, sc in last (shape is a pointed leaf center) — (7 sts across chain)
Round 2 :
Working around both sides of foundation chain: sc in first base st, hdc in next, dc in next, (tr, ch 1, tr) in top center st (creates point), dc down other side, hdc, sc — mirror to form full leaf. Total stitches around = 14
Round 3 :
Ch 2, hdc in same, dc in next 2 sts, (tr, ch 2, tr) in center point, dc in next 2, hdc, ch 2 sk to base and sl st to create a textured eyebrow; repeat to form slight lobes. Total approx stitches 18
Round 4 :
Work picot-edge: sc in each st across, and work small picots at each lobe tip (ch 3 sl st into same st). This defines the serrated leaf edge. Total count approx 18
Round 5 :
Switch to mustard yarn (for layered look). Attach mustard yarn at base and work a single round of sc around leaf edge, placing extra sc at lobes to create slightly more ruffled edge. Approx (22)
Round 6 :
Embroider leaf veins: with contrasting fine yarn or embroidery thread, use backstitch from base to tip and across in 3-4 short veins. Secure ends and hide tail behind leaf. No count required.
Info :
Leaves are deliberately slightly flattened—not stuffed. Make 3 large leaves and layer them stacked (rust, orange, mustard) in the central cluster for depth. Use approximate stitch counts as leaf shapes are freeform; keep symmetry visually pleasing.
Leaf B (Medium Maple) - Make 2 :
Follow Leaf A but reduce foundation chain to ch 6 and use slightly fewer increases. Work 5 rounds total and use a single color per leaf (mix one mustard, one orange). Approx group counts per round: 12-18 stitches.
Leaf C (Small Accent Leaf) - Make 2 :
Ch 5 foundation and work 4 rounds scaled down; keep edges picot-finished. These are purely decorative and sit near the end clusters.
Info :
Block each leaf flat by pinning to a board and spraying lightly. Press gently to create crisp lobes; allow to dry before assembly. When layering, place the largest leaf at bottom and sew smaller leaves on top with tiny whip stitches in matching yarn for invisible joins.
— Acorn Appliques (Make 6) :
Acorn Body - Make 6 :
Use dark brown yarn on 3.5mm hook.
Round 1 :
6 sc in magic ring (6)
Round 2 :
Inc in each st (12)
Round 3 :
(1 sc, inc) x 6 (18)
Round 4 :
1 sc in each st around (18)
Round 5 :
(2 sc, dec) x 6 (12)
Round 6 :
1 sc in each st around (12) - leave small opening, stuff very lightly if you prefer slightly rounded shape
Round 7 :
6 dec (6) - close, fasten off leaving tail to sew to runner
Acorn Cap :
With lighter brown, ch 6, join to form small ring, Round 1: 6 sc in ring (6), Round 2: (sc, inc) x 3 (9), Round 3: slipstitch around and create textured cap by working front post hdc around each st to create ribbed cup. Fasten off and sew cap onto body. Make 6 acorns total.
Info :
Acorns are lightly stuffed or left flat depending on your aesthetic. Sew caps slightly offset so the darker acorn body peeks out; position them clustered near leaves for natural effect.
— Extra Decorative Fringe (Optional) :
Info :
If you'd like hanging tassels at the two pointed ends, cut 6 strands of cream yarn 8" long, fold in half, and use a crochet hook to pull fold through selected shell points then knot. Trim evenly to finish. This is optional; the sample has no tassels.
— Assembly & Placement :
Info :
Lay the blocked runner on a flat surface. Arrange leaf clusters before sewing: the sample shows one layered cluster centered lengthwise (three leaves layered) and two smaller clusters at each pointed end (two leaves each with one acorn at each cluster). Measure equal distances from center to ensure symmetry.
Info :
Sew leaves down with small invisible whip stitches placed close to the base; use matching yarn for seams. Sew acorns last to the leaf cluster with several secure passes to prevent loosening in use.
Round 41 :
Additional finishing round suggestion: If you prefer a slightly heavier outer edge, with burgundy yarn work 1 sc in each st around the outer picots (approx 98) then add a final decorative ch3 picot every 3 sts to create tiny bump texture. Fasten off and weave ends neatly to the back.
Info :
Weave tails at least 5cm into the fabric, using a yarn needle to follow the curve of the stitches. Trim close but not flush—knot end if desired for extra security.
Final Steps :
Wet-block the entire runner: pin to a flat board to final dimensions, evenly stretching scallops and flattening leaves. Allow to dry completely before removing pins. Press lightly if necessary with steam at safe temperature for yarn fiber.
Info :
Store flat when not in use, or use a thin cloth between runner and hot dishes to protect crochet fibers. Hand wash gently in cool water to maintain shape and colors.
Finishing this runner brings together airy lace, bold scallops and layered autumn leaves into a cohesive seasonal centerpiece. Each stitch adds texture and warmth, and the appliqued leaves make the piece feel lovingly handcrafted. Place it on your table and enjoy a handcrafted harvest accent that invites compliments. 🧶🍁✨