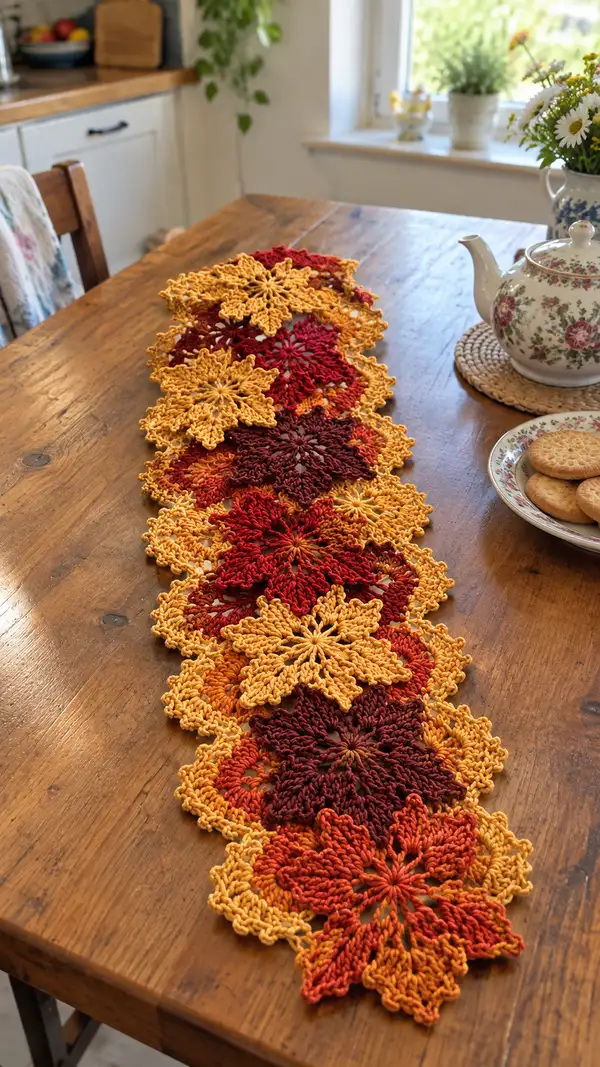
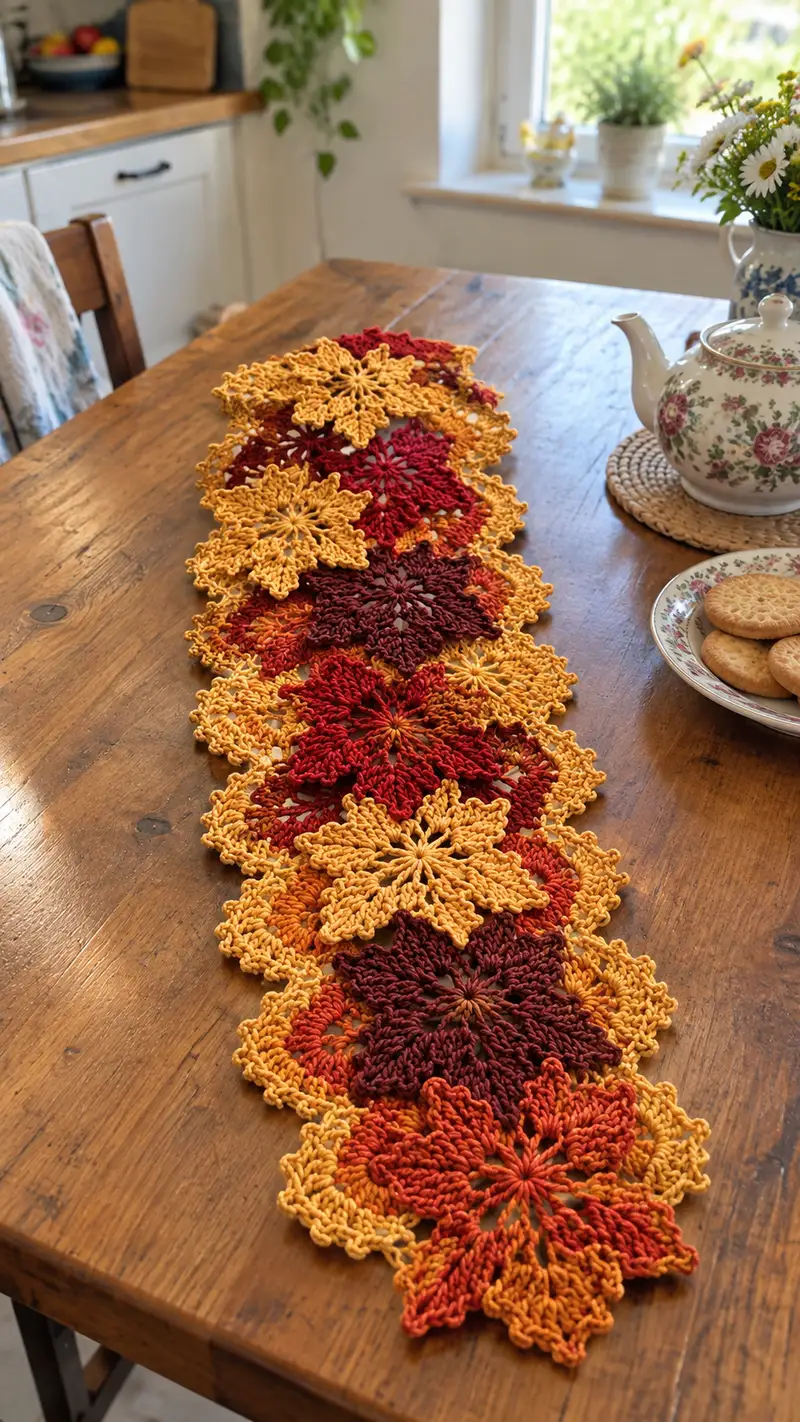
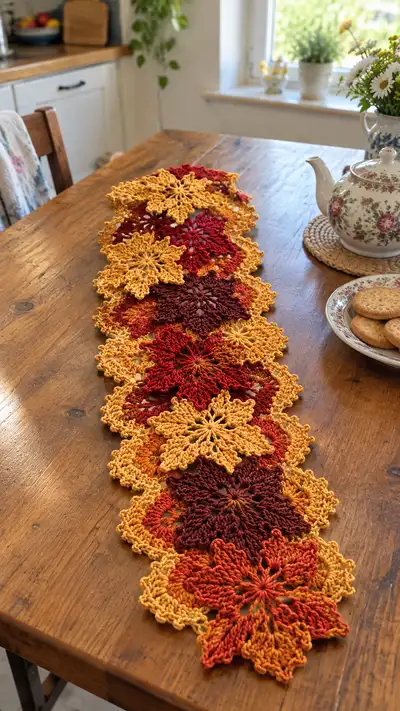
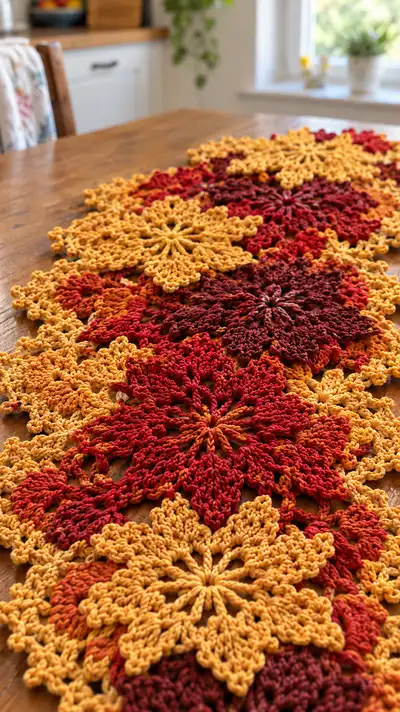
Create a warm, autumnal table runner composed of interlocking floral mandala motifs in rich gold, rust, red and burgundy tones. This pattern guides you through crocheting each star-shaped motif, joining as you go, and finishing with a delicate scalloped border for a polished table centerpiece. The finished runner lays beautifully on a dining table and adds a handmade seasonal touch to your home decor.
Progress Tracker
0% Complete
— Overview :
Info :
This pattern creates a runner by making two motif sizes (Large Daisy Mandala and Small Daisy Connector) and joining them in a staggered, overlapping layout. The sample runner uses alternating solid and variegated motifs in warm gold, orange-rust, red and burgundy. Tension should be moderately tight to preserve motif definition; cotton yarn works especially well for crisp petals.
Info :
Gauge is not critical for motif work but affects final runner length. One Large Daisy Mandala measures approximately 18-19 cm (7-7.5 in) across with recommended yarn and hook; Small Daisy Connector measures approximately 14-15 cm (5.5-6 in) across. Adjust hook size to obtain these diameters if needed.
— Techniques & Preparation :
Info :
Puff/cluster technique (pc) used here: yarn over, insert hook into indicated stitch, yarn over and pull up a loop (repeat 3 times total to have 7 loops on hook), yarn over and pull through all loops, chain 1 to close the puff. Keep loops consistent in height and tension for even petals.
Info :
Blocking: After completing motifs, lightly wet-block each motif to open the lacy sections and smooth scallops. Pin to desired shape; dry completely before joining where possible. For a runner, some join-as-you-go approaches are shown that limit the need for full blocking before joining but final blocking is recommended.
— Materials & Color Plan :
Info :
Sample uses: Color A (Mustard Gold), Color B (Orange-Rust variegated), Color C (Deep Red), Color D (Burgundy). Plan motif sequence before working to ensure pleasing color flow.
— Large Daisy Mandala (Make 7 - each 16 rounds) :
Round 1 :
With Color chosen for the large motif, ch 4, sl st to first ch to form a small ring OR work a magic ring, ch 3 (counts as first dc), 11 dc into ring; sl st to top of ch-3 to join (12 dc)
Round 2 :
Ch 2 (counts as hdc), [ch 2, hdc in next dc] repeat around to create chain spaces between hdc: (12 hdc, 12 ch-2 sps) sl st to first hdc to join (12 hdc, 12 ch-2 sps)
Round 3 :
Info : This round builds the central spokes. Work into ch-2 spaces to create elongated center. Ch 1, *sc in next hdc, ch 3, (dc, ch1, dc) in next ch-2 sp, ch 3, sc in next hdc* repeat around. Sl st to first sc. You will have 12 petal anchors. (12 sc, 12 clusters)
Round 4 :
Ch 4 (counts as tr), in same st work tr, ch 2, 2 tr (corner) in same anchor, *sk next anchor, in next anchor work 2 tr, ch 2, 2 tr* repeat around; sl st to top of ch-4. You will have 6 large tr-corners and 6 skipped anchors forming airy petals.
Round 5 :
Info : This round shapes the raised star petals using puff clusters. Move to front of work to emphasize petals. Sl st to the front loop of a corner tr, ch 1, [pc into next tr space, ch 2] repeat across each petal area (work 8 pcs per petal spaced into the group of trebles and chains), sl st to join. Maintain consistent puff height. (Approx 48 pcs across entire round)
Round 6 :
Ch 1, sc in each st and in each ch-2 space across, working around petals to encase their base. When you encounter a puff, work sc around base (3 sc around) to anchor. Sl st to first sc. (Stitch count variable ~72 depending on sc around puffs)
Round 7 :
Info : Create deeper petal texture. Ch 3 (counts as dc), in next stitch work dc cluster: [dc, tr, dc] across the top of each petal point (work into the highest point of each petal), ch 3 between petals. Repeat around for 6 pronounced petal points. Sl st to join. (6 petal points)
Round 8 :
Ch 1, sc around entire motif working 2 sc in chain spaces and 1 sc in most stitches to round out. At the tip of each petal, work (sc, ch 2, sc) to create small loop for future decorative picots. Slip stitch to join. (Approx 84 sc and 6 loop points)
Round 9 :
Info : Decorative openwork round. Ch 5 (counts as dc + ch2), skip next st, *dc in next st, ch 2, skip next st* repeat around, sl st to 3rd ch of starting ch-5. This creates 12 open arches aligning with petal edges.
Round 10 :
Into each ch-2 arch work: (sc, ch 4, sc) to make elongated loops. Sl st to join. (12 looped arches)
Round 11 :
Info : Begin outer scallop shaping in a contrasting or same color. Ch 1, sc in each st across, in each ch-4 loop work [sc, hdc, 3 dc, hdc, sc] to create a full scallop petal. Repeat across each arch. Slip stitch to join. You will have 12 scallops.
Round 12 :
Ch 3, dc in next st, *ch 2, sk 1, dc in next 3 sts (centered on scallop), ch 2, dc in next st* around to emphasize scallop peaks. Sl st to top of ch-3. (Keeps scallop count at 12)
Round 13 :
Info : Add final textured edging. Switch to smaller hook if you prefer a crisper edge. Ch 1, sc in each st and work picots along scallop peaks: at the top of each scallop work (sc, picot, sc) where picot = ch 3, sl st in 3rd ch. This gives a delicate lacy outline. Slip stitch to join.
Round 14 :
Fasten off leaving a 40 cm tail for join-as-you-go. Weave in short tail now and reserve long tail for joining to adjacent motifs if not using separate joining color. Lightly block to shape. (Motif complete)
Info :
Repeat Rounds 1-14 to make the number of Large Daisy Mandalas desired. In the sample runner alternate colors so the runner has visual texture: make 2 mustard (Color A), 2 variegated orange (Color B), 2 deep red (Color C), 1 burgundy (Color D). Total in sample = 7 large motifs.
— Small Daisy Connector Motif (Make 8 - each 12 rounds) :
Round 1 :
With chosen connector color (often mustard/gold for contrast) ch 4 and join to ring, ch 3 (counts as dc) and 11 dc into the ring; sl st to join (12 dc)
Round 2 :
Ch 1, sc in same st, *ch 3, sc in next dc* repeat around making 12 sc and 12 ch-3 loops; sl st to join. These loops form placement points for petals of the small motif. (12 sc, 12 ch-3 sps)
Round 3 :
Info : Form petite petals. Into each ch-3: (2 dc, ch 1, 2 dc) to make small pointed petals; sl st to join. You will have 12 small petals.
Round 4 :
Ch 2, hdc in same st, sc in next st, *ch 2, sk next petal, sc in next st, hdc in next* repeat around to add small lace supports between petals. Sl st to join. (Approx 36 sts)
Round 5 :
Info : Work a textured round to give body to the connector. Ch 1, sc in each st and in each ch-2 space across; around the top of each small petal work a pc (puff cluster) to accent center. Sl st to join. (Stitch count variable ~48)
Round 6 :
Ch 3, dc in next 2 sts, *ch 2, sk 2, dc in next 3 sts* repeat around to shape small scallops. Sl st to join. (12 small scallops)
Round 7 :
Info : Strengthen outer edge. Ch 1, sc around working 2 sc in chain spaces and sc in most stitches, forming a neat edge for joining. Slip stitch to join. (Approx 60 sc)
Round 8 :
Ch 4, (counts as tr + ch1), *tr in next st, ch1* repeat around to make an open lacy ring; sl st to 3rd ch of starting ch-4. This prepares join points for the join-as-you-go method. (12 tr with ch-1 spaces)
Round 9 :
Info : Add small decorative picots. Ch 1, sc around and at each ch-1 space work (sc, picot, sc). Picot = ch 3, sl st in 3rd ch. This gives a tiny star outline. Sl st to join.
Round 10 :
Fasten off leaving a 30 cm tail for joining. Weave in short tails. Lightly block to even shape. (Connector motif complete)
Info :
Create a mix of 8 Small Daisy Connectors to intersperse between Large motifs where the runner narrows and overlaps. Connectors sit between large petals and visually blend the pattern.
— Join-As-You-Go Layout & Joining Rounds :
Info :
Layout: Arrange the motifs in a staggered, overlapping row: Large - Small - Large - Small - Large - Large - Small - Large (sample). The runner uses overlapping edges so each motif touches adjacent ones at 3-4 points. Pin motifs in place to check final look before joining. Leave long tails for joining if you worked them during motif finish.
Joining Round 1 :
With long tail from completed motif or join color, position next motif overlapping. Insert hook into a picot or ch space on worked motif and corresponding space on adjacent motif, sl st through both pieces to join. Repeat sl st joins at evenly spaced points along the overlap—aim for 6-8 joins per overlapping side depending on motif size. Work careful, even joins. (Join count depends on overlap length)
Joining Round 2 :
Info : Use mattress or whip stitch with tapestry needle if you prefer invisible joins instead of sl st. For an invisible seam, align stitches carefully and use small, even stitches to draw motifs flush together. Double-check alignment to avoid twisting.
Joining Round 3 :
Continue joining motifs across the length of the runner. When joining a Small Connector between two Large motifs, attach the connector to both adjacent large motifs at its three main anchoring points: the top scallop, center, and bottom scallop. This stabilizes the runner and keeps the staggered layout intact. (Repeat until all motifs joined)
Info :
If encountering small gaps, use small sc stitches in contrasting color in the gaps to create decorative bridges. This is a great place to show customization—use mustard for contrast or burgundy for subtle fill.
— Outer Border & Unified Edging (10 rounds) :
Round 1 :
With border color (sample uses Mustard Gold), join yarn to any outer edge point with a sl st. Ch 1, sc evenly around outer perimeter filling small raw gaps: in deep scallops work 4 sc across, in smaller gaps work 2 sc. Place 2 sc in rounded corners to prevent curling. Slip stitch to join. (Stitch count variable)
Round 2 :
Ch 3, dc in each sc around to add body to the border. At each scallop tip work an extra (dc, ch 2, dc) to emphasize points. Slip stitch to join. (Creates a stronger edge)
Round 3 :
Info : For a delicate lacy look, work a picot round next. Ch 1, sc in each st, at every 6th stitch work (sc, picot, sc). For a firmer edge skip picots on 50% of petals to reduce bulk. Picot = ch 3, sl st in 3rd ch.
Round 4 :
Ch 2, hdc in next 2 sts, *sk 1, in next st work (3 dc, ch 2, 3 dc) to form a shell over each shallow gap, skip 1, hdc in next 2 sts* repeat around. Slip stitch to join. This rounds and unifies adjacent motif edges. (Shell count depends on outer edge)
Round 5 :
Info : Work a decorative chain loop round for openwork. Ch 1, *sc in next st, ch 5, sk 5 sts* repeat around and adjust sk count to fit the edge evenly. This creates elongated loops that echo inner lacework.
Round 6 :
Into each ch-5 loop work (sc, hdc, 5 dc, hdc, sc) to make pronounced scallops. Slip stitch to join. This builds a bold final edging that frames the whole runner. (Final scallop count measured by loop count)
Round 7 :
Ch 1, sc around working 2 sc in the sides of large scallops and 1 sc elsewhere to maintain smooth curve. Slip stitch to join.
Round 8 :
Info : Optional final picot highlights. Switch to 3.5mm hook for crisper picots. Ch 1, sc in each st and at each scallop apex work (sc, picot, sc). Fasten off leaving long tail to sew down and tidy corners if needed. Weave tails in.
Round 9 :
Lightly steam or wet block the entire runner. Pin the outer scallops into an even, flowing edge and allow to dry. Final blocking will even the joins and open lace.
Round 10 :
Final finish: Trim all ends, inspect for loose joins and reinforce with matching yarn where necessary. The runner is now complete and ready to use. (End of pattern)
— Notes on Stitch Counts, Variations & Alternate Layouts :
Info :
Stitch counts given as approximate in lace and puff rounds because puff clusters and rounding can slightly vary counts. Maintain consistent repeats when working around motifs; trust the visual symmetry if the numeric count varies by 2-4 stitches in openwork sections.
Info :
Variation: For a longer runner make more Large motifs and connectors as needed. You can also create an even-width runner by using only Large motifs joined edge-to-edge with connectors only at corners for a staggered zig-zag pattern.
Info :
Colorwork tip: Carry color inside loosely when making small color changes within a motif to avoid cutting too many tails; always weave in ends during joins to hide them.
This autumn daisy mandala table runner brings handcrafted warmth and seasonal color to any table. Working these motifs and joining them creates a relaxing, rhythmic project that rewards you with a beautiful centerpiece. Play with color placement to make a runner that's uniquely yours—each petal and scallop is a small, satisfying stitch of joy. 🧶 Harvest the season with handmade charm and enjoy every stitch as your project grows. 🍂