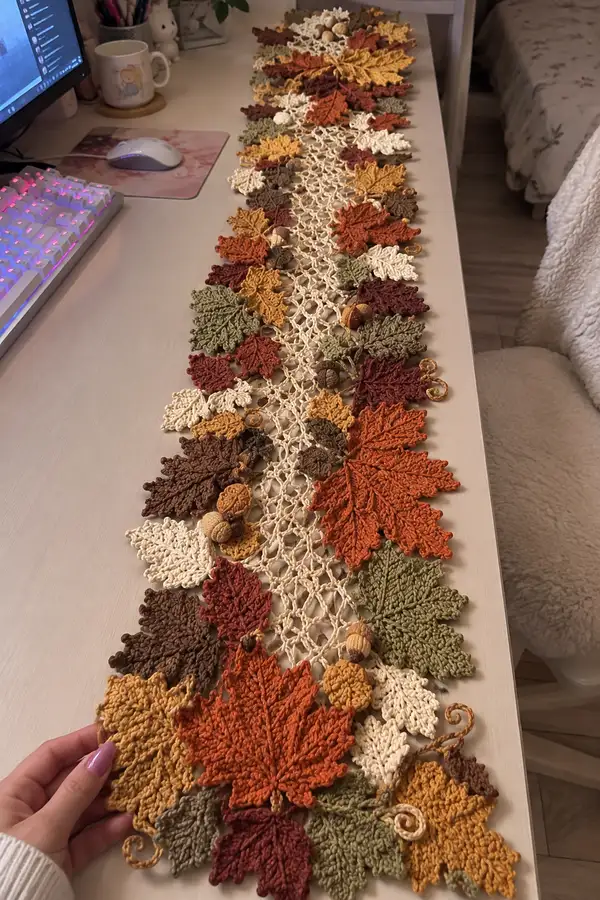
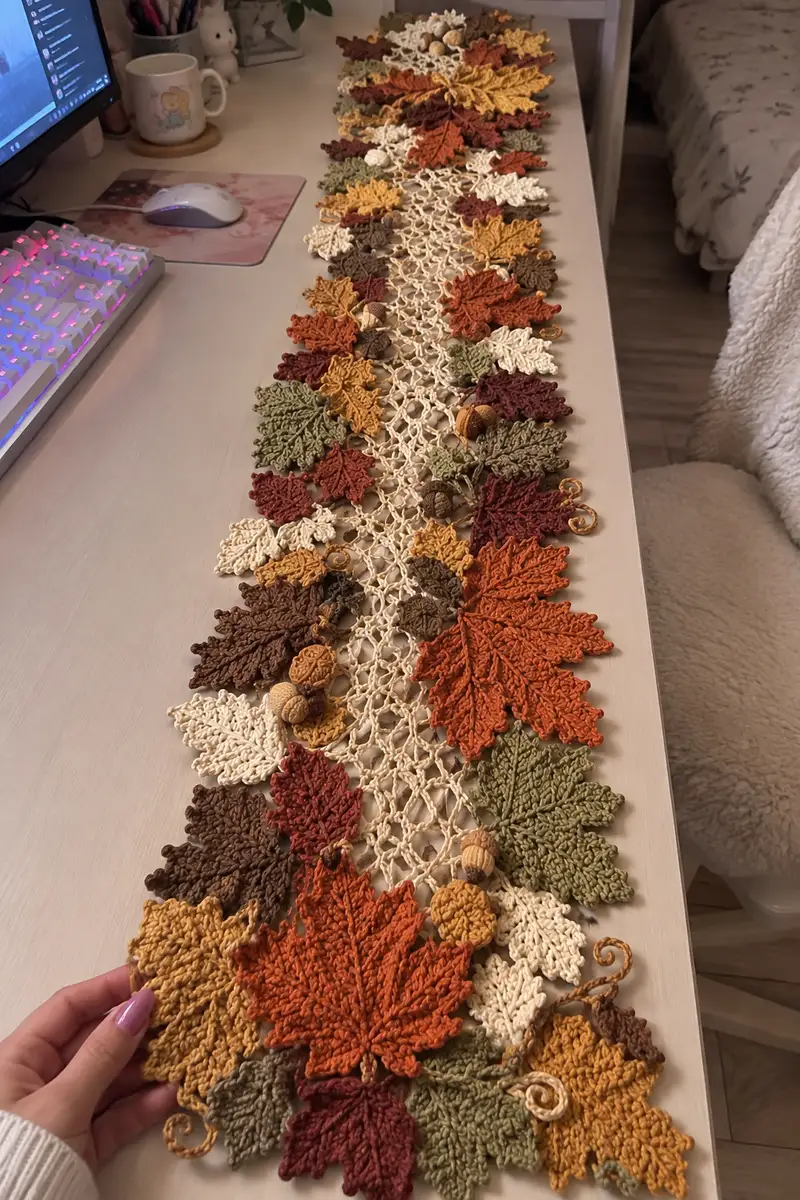
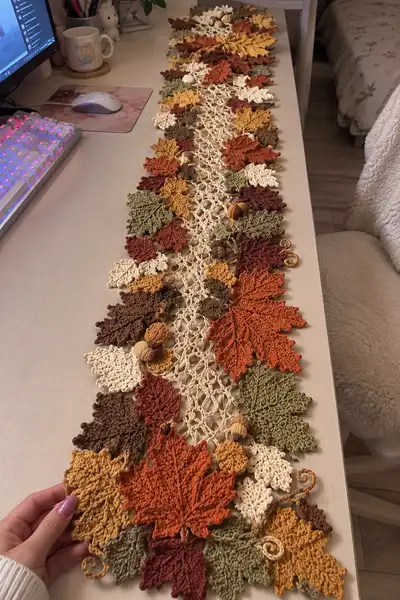
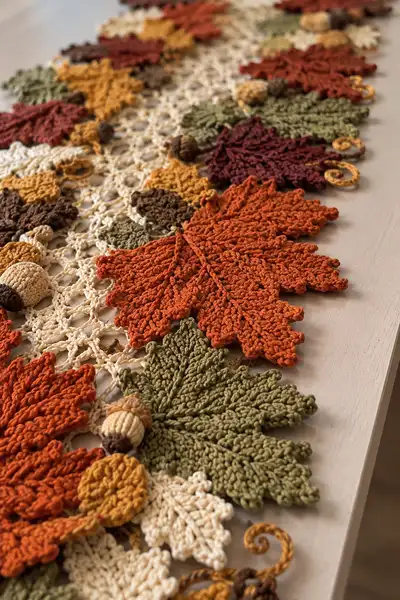
Create a long, elegant autumn table runner featuring layered crochet maple leaves, tiny acorns and a delicate openwork centre. This pattern recreates the warm palette shown — rust, mustard, olive, cream, and deep brown — combining textured leaves and crocheted acorns for a cozy seasonal accent. Worked in cotton or cotton-blend yarn with clear step-by-step instructions for motifs, mesh center, and assembly.
Progress Tracker
0% Complete
— Pattern Overview :
Info :
This runner is composed of three main elements: layered maple leaf motifs (large, medium and small), small round berries/acorns, and a central cream mesh strip that joins motifs. Work motifs separately and block them. Assemble onto mesh while joining with slip stitches and sewing. The pattern below provides detailed round-by-round steps for each motif and the mesh. Adjust the number of motifs to achieve desired runner length.
— Key Notes :
Info :
Gauge is not critical for this decorative piece but for reference: Large maple leaf finished approx 14-16 cm wide when using DK/Light-worsted cotton and 3.5mm hook. Medium leaf approx 9-11 cm, small leaf approx 6-8 cm. Work tightly enough that textured ribs hold shape but not so tight that the fabric refuses to flatten when blocking.
— Large Maple Leaf (Make 6-8 for runner) :
Round 1 :
Start with a foundation chain 12. Join with sl st to form ring or leave as a chain for a pointed tip foundation. (12 foundation chains)
Round 2 :
ch1, sc in 2nd ch from hook and in next 4 ch, inc in next ch, sc in next 4 ch, 3 sc in last ch; now work down opposite side of foundation chain: sc in next 4 ch, inc in next ch, sc in next 4 ch, sl st to first sc. (34 sts including increases and corner cluster)
Round 3 :
ch1, sc in same st, hdc in next 4, (2 dc, ch1, 2 dc) in first lobe point, hdc in next 4, sc in next 2, sl st to base. Work symmetrical on reverse side with same sequence to complete both sides of leaf body. (48 sts approx depending on placement)
Info :
We are building a central spine and symmetrical lobes. Keep counts approximate here; the visual fold and ribbing later is what shapes the leaf. Use stitch markers to mark the central base and central top so you can mirror each side exactly.
Round 4 :
ch2 (counts as hdc), hdc in next 3 sts, (dc, ch1, dc) into first lobe tip to create an elevated ridge, *hdc in next 6, (dc, ch1, dc)* across each lobe, hdc to end, sl st to join. (56).
Round 5 :
ch1, sc in same st, sc in next 5, hdc in next 3, (dc in next 2, tr in tip stitch, dc in next 2) to form point, hdc in next 3, sc in next 6, continue symmetrical down opposite side, sl st to close. (64)
Round 6 :
ch2, BLO hdc in next 6 (this starts a raised rib), BLO dc clusters over lobe points: (BLO dc, ch1, BLO dc) in each tip, BLO hdc next 6, continue symmetry, sl st join. (72)
Info :
Working BLO on this round creates a raised ridge that will act as the prominent vein of the leaf. This is an important shaping round; be consistent on both sides for symmetry.
Round 7 :
ch1, sc in each st around but in each DC cluster work (sc, picot, sc) into the chain-1 space to form jagged serrations along edges. When working around raised ribs, place stitches close together to accentuate pleating. (72)
Round 8 :
ch1, sc in next 8, inc in next (edge increase to broaden), sc in next 10, inc in next, work small shell (hdc, dc, hdc) at each tip for texture, continue on opposite side mirroring. (80)
Round 9 :
ch1, BLO dc in next 10 to deepen vein ridges, *sc in next 3, picot, sc in next 3*, shell at tip, repeat; sl st to join. (80)
Info :
At this point begin shaping the lobes by slightly varying stitch tension: pull a little tighter on the raised ribs to make them stand and leave the lobe edges softer for natural curl. If you prefer a flatter look, block heavily with steam or wet blocking after finishing.
Round 10 :
ch2, sc in next 7, (2 dc, ch1, 2 dc) in tip, sc next 12, dec at base point to narrow central stem area, continue mirrored to other side. (84)
Round 11 :
ch1, sc around placing 2 sc in any long stitch segments to smooth the shape, crochet 3 short picots in every other edge stitch to mimic serrated leaf edge. (88)
Round 12 :
ch1, work 1 sc in each st but in the central row work a chain-2 loop every 6 stitches for decorative air space that resembles vein gaps. (88)
Info :
Begin light blocking now if possible. Pin leaf to desired shape and spray with water or steam. If you plan to stiffen slightly for tabletop use, mix diluted fabric stiffener per manufacturer's instructions and brush lightly after blocking.
Round 13 :
ch2, BLO hdc along central vein (place marker on central stitch), then working outward create short clusters of (hdc, dc, hdc) to suggest smaller veins branching out. Mirror on both sides. (92)
Round 14 :
ch1, sc around adding a refined picot edge: *sc in next 2, (ch2, sl st in same st for reversed picot), sc in next 2* repeat. (92)
Round 15 :
ch1, sc next 10, work a decorative raised slip-stitch row over each prior BLO ridge for extra texture (insert hook from front to back and pull loop through to create raised ridge), continue to finish around. (92)
Round 16 :
ch1, sc smoothing round: sc evenly in each st, fasten off leaving long tail for sewing/attaching to mesh if desired. Weave in ends. (92)
Info :
Fasten off and block flat. Trim ends and shape points carefully. You should have a leaf with a prominent central raised vein and serrated, layered lobes. Adjust final shape during blocking by pinning the lobes slightly cupped if you want a more natural look.
— Medium Maple Leaf (Make 8-12) :
Round 1 :
ch8 foundation. Join to work around both sides to create a tear-drop base. (8)
Round 2 :
ch1, sc in 2nd ch from hook and next 4, 3 sc in last ch; now sc down opposite side 4, inc in next to join, sl st to first sc. (22)
Round 3 :
ch2, hdc in next 3, (2 dc, ch1, 2 dc) in tip to form a small point, hdc in next 3, continue mirrored. (30)
Round 4 :
ch1, BLO hdc across central area for vein, sc around edge placing small picots at lobes (sc, ch3, sl st in same st). (30)
Round 5 :
ch1, sc around increasing at base by 2 stitches total to flatten the leaf (32)
Round 6 :
ch1, sc in each st, add two tiny surface slip-stitch veins: insert hook from front to back along one side and pull loop through creating a raised line. Repeat on opposite side. (32)
Round 7 :
ch1, sc evenly around, FO leaving long tail for sewing. Block shaped. (32)
Info :
The medium leaf is a simplified version of the large leaf. Use the BLO technique on round 4 to give a visible central vein. Work tighter for crisp edges.
— Small Leaf (Make 12-16) :
Round 1 :
ch6 foundation. (6)
Round 2 :
ch1, sc in 2nd ch from hook and next 3, 2 sc in last ch, sc down opposite side 3, sl st to join. (12)
Round 3 :
ch1, BLO hdc around central 4 sts to create small ridge, sc around remaining to tidy edge. (12)
Round 4 :
ch1, sc around adding small picots at every third stitch for serration, FO leaving tail for sewing and blocking. (12)
Info :
Small leaves are accent pieces tacked to cluster edges and acorn bases. Work several in different colors for visual interest.
— Acorn Top (Cap) - Make 8-12 :
Round 1 :
6 sc in magic ring (6)
Round 3 :
(1 sc, inc) x6 (18)
Round 4 :
(2 sc, inc) x6 (24)
Round 5 :
1 sc in each st (24)
Info :
This cap will be slightly domed; work the top a little tighter and leave a long tail for sewing onto acorn bottom. Optionally surface crochet a few textured ridges by working front post hdc around alternating stitches on round 5 for a scaly cap look.
Round 6 :
(3 sc, inc) x6 (30)
Round 7 :
1 sc in each st (30)
Round 8 :
sc2tog x6 (24) - begin slight shaping to brim (24)
Round 9 :
sc around, FO leaving tail for sewing brim to acorn body (24)
Info :
Leave opening slightly large; you will sew the cap onto the acorn body. You can also add a loop of chain for hanging if desired by making a small chain loop before fastening off.
— Acorn Body (Make 8-12) :
Round 1 :
6 sc in magic ring (6)
Round 3 :
(1 sc, inc) x6 (18)
Round 4 :
(2 sc, inc) x6 (24)
Round 5 :
1 sc in each st (24)
Round 6 :
(3 sc, inc) x6 (30)
Round 7 :
1 sc in each st (30) - begin stuffing lightly (30)
Round 8 :
(3 sc, sc2tog) x6 (24) - shaping begins (24)
Round 9 :
(2 sc, sc2tog) x6 (18)
Round 10 :
(1 sc, sc2tog) x6 (12)
Round 11 :
sc2tog x6 (6) - close, FO leaving tail to stitch to cap and weave in. Finish stuffing more firmly before final closure. (6)
Info :
Stuff acorns moderately—firm but not rock-hard. Sew the cap over the top opening and secure with several rounds of whip stitch. Add a small yarn loop or stitch a tiny stem at the top center for realism.
— Round Berry / Pom (Make 10-16) :
Round 1 :
6 sc in magic ring (6)
Round 3 :
(1 sc, inc) x6 (18)
Round 4 :
1 sc in each st (18) - FO leaving tail for sewing, lightly stuff and close by sewing 2-3 rounds across opening. (18)
Info :
These small spheres are decorative and sit in clusters next to leaves and acorns. Work them in mustard or cream for contrast and secure firmly to mesh.
— Decorative Spiral Stem (Make 8-12) :
Round 1 :
ch18, sl st in 2nd ch from hook, sl st in next 16 forming a tight chain. (16)
Round 2 :
ch1, sc in each chain across, FO leaving long tail for attaching and shaping into a spiral. If you prefer a more rigid spiral, use a small length of floral wire and cover with sc stitches. (16)
Info :
To form spiral, wrap the chain around a dowel or pencil and tack into spiral with small stitches at base and tip. Spirals are small decorative flourishes between leaf clusters.
— Centre Mesh Panel (make length to fit runner — shown approx 120 cm long) :
Round 1 :
Create a foundation chain multiple of 8 + 1 for length desired. For example ch 192 + 1 for an approx 120 cm runner (193 chains foundation).
Round 2 :
ch1, sc in 2nd ch from hook and each across, turn. (192 sc)
Round 3 :
ch5 (counts as dc + ch2), *sk 2 sc, dc in next sc, ch2* repeat across to end, dc in last sc; turn. This creates an open chain mesh. (Approx 64 dc with ch2 spaces)
Round 4 :
ch5, *dc in dc, ch2* repeat across, ending dc in last stitch. (64)
Round 5 :
ch1, sc in each dc and 2 sc in each ch2 space to stabilize mesh: *(sc, ch2, sc) in ch2 space, sc in next dc* across. This begins a netting effect and builds a hardy central spine. (Approx 192 sts counted as scs and ch spaces)
Round 6 :
ch5, dc in first sc, *ch2, dc in next sc* repeat across turning each ch2 into a diamond. Continue working even in this mesh until you reach desired width/height of mesh (recommended 28-36 rows of dc/ch2 mesh to achieve a visible net about 7-9 cm wide). (mesh rows ongoing)
Info :
The central mesh is the backbone for joining leaf motifs. Work the mesh to your runner length; add or subtract repeats in multiples of the mesh repeat to alter width. Use stitch markers at regular intervals to keep a straight edge and reference joining points for leaves.
Rounds 7-36 :
Repeat Round 6 for 30 rows (or until mesh reaches approximately 7-9 cm width). Maintain even tension. (repeat counts consistent per row)
Round 37 :
ch1, sc evenly across to tidy edges and create loops for joining leaves: work sc in each dc and (sc, ch3, sc) in each ch2 space to create small joining loops every repeat. FO leaving long tail for sewing. (edge tidy)
Info :
If you prefer a lacy central column, drop to ch3 spaces every alternate row to create larger diamond holes. Test 5-6 rows to see look before committing to full length.
— Leaf Vein Surface Crochet (Optional Decorative Step for All Leaves) :
Round 1 :
With the same yarn or a slightly darker shade, thread tapestry needle with long tail and surface slip stitch or use a hook to surface crochet a chain of sl sts along intended vein line from base to tip. (surface chain)
Round 2 :
Embellish vein by working surface single crochets at 4-6 mm intervals to form small ridges, then add smaller lateral veins branching at 45 degrees to create a realistic look. Secure ends and weave in tails. (decorative veins)
Info :
Surface crochet is optional but gives a high-fidelity 'vein' effect. Work on already blocked leaves to keep lines straight. Use a slightly darker shade for contrast.
— Runner Edge & Joining Motifs (Assembly Preparations) :
Round 1 :
Arrange blocked leaves, acorns and berries along one side of mesh to establish composition. Large leaves placed alternately on each long edge with medium and small leaves filling gaps and overlapping edges. Mark positions with pins. (layout)
Round 2 :
Sew each leaf to mesh through a few slip-stitches along the base using tail left on leaf. Use whip stitch hidden under leaf to make secure join. Attach acorns and berries next with small stitches through mesh loops. (sewing)
Info :
When attaching, aim to hide sewing stitches on the underside of runner. Overlap leaves intentionally to create depth. Anchor large leaves with 4-6 sewing points each, medium with 3-4, small with 2-3.
Round 3 :
After sewing all motifs on one side, flip runner and repeat motif placement symmetrically on opposite long edge. Ensure that acorns and berries sit in visual pockets between leaves. (assembly)
Round 4 :
Once both sides are attached, edge the runner with single crochet around the entire perimeter: sc evenly, skipping into mesh holes when necessary and working 3 sc in each corner if you have a corner. This tidy edge unifies the piece. (perimeter sc)
Round 5 :
For a decorative finish, add a reverse crab stitch (reverse single crochet) around the outermost edge to produce a clean rope-like border. FO and weave in ends. (reverse sc border)
Info :
If you want small hanging loops, leave chain-6 loops at one short edge spaced evenly before final border round. Use these loops to hang the runner or carry decorative garland.
— Final Touches & Stiffening (Optional) :
Round 1 :
Lightly steam press (steam from a distance) or wet block and pin into final shape. If placing on a high-traffic table, apply a diluted fabric stiffener per instructions to the underside to add structure. Dry completely before use. (finishing)
Info :
Take care with stiffeners with colors: test on a scrap before applying to main pieces to ensure colorfastness. If you wish to add weight to keep runner from shifting, tack a few small flat felt discs under larger leaves using fabric glue or hand-stitching.
This autumn table runner brings handmade seasonal charm to your table, combining layered crochet leaves, tiny acorns and airy mesh in a warm palette. Every stitch creates texture and depth, making this runner an eye-catching focal point. Whether you use it on a dining table, console or dresser, it adds a curated, cozy look to your home. 🧶🍂 I hope it brings a little extra warmth and beauty to your space — enjoy arranging and styling it! 🎨