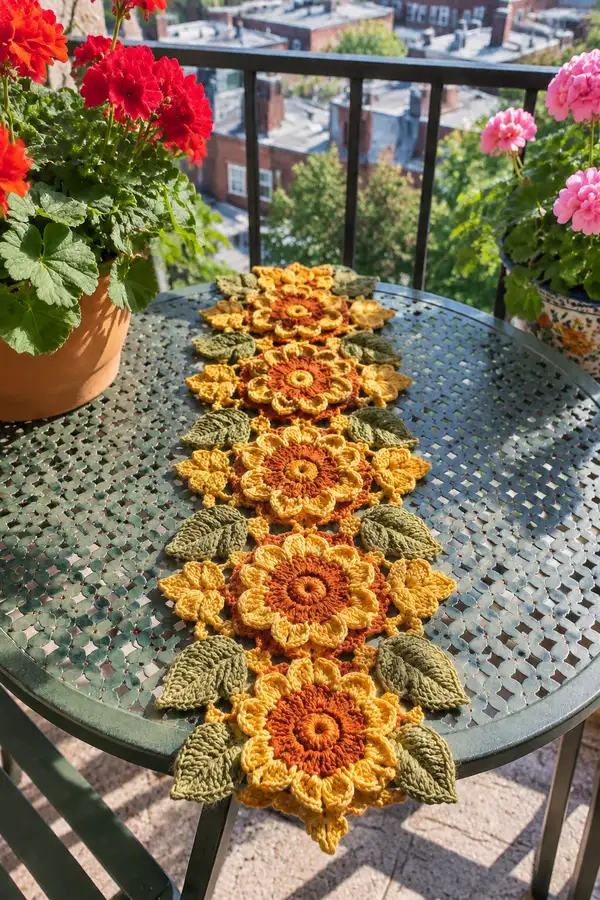
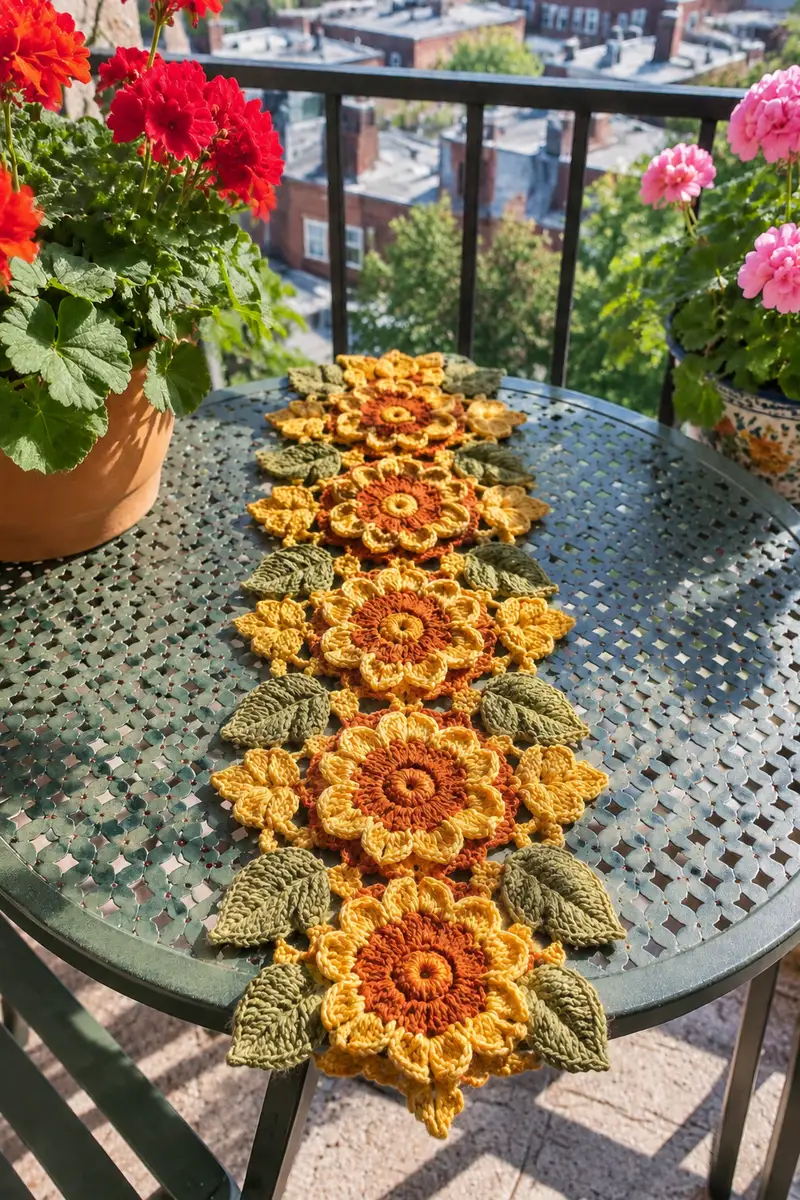
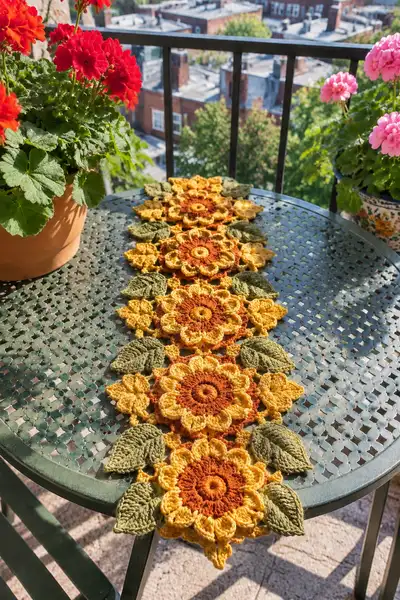
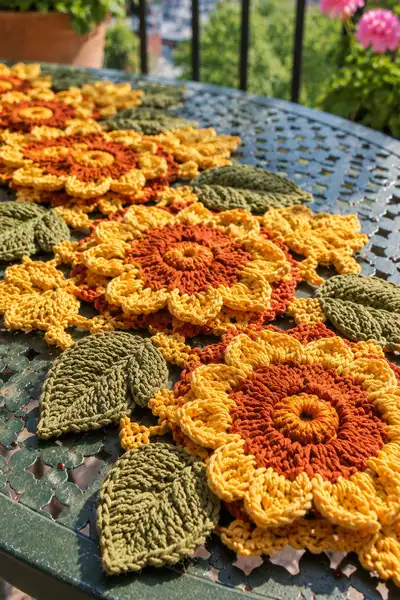
A warm, sunlit table runner made from joined sunflower-style motifs and sculpted leaves in amber, rust and olive tones. This pattern teaches layered floral motifs with raised petals and textured leaves, joined into a long runner perfect for autumn decor. Detailed stitch-by-stitch instructions, color change guidance, and joining techniques make this an enjoyable project for intermediate crocheters. The finished runner showcases dramatic 3D petals and sculpted leaves that sit beautifully on a table.
Progress Tracker
0% Complete
— Materials & Gauge :
Info :
Gauge is not critical for this decorative runner but affects finished size. Using worsted cotton and 4.0 mm hook, one large layered flower motif measures approximately 14-16 cm (5.5-6.5 in) across from petal tip to petal tip; leaves measure about 8-9 cm (3-3.5 in) long. Make a test motif to check size and adjust hook if necessary.
Info :
Colors used: Color A = Rust/Terracotta (center), Color B = Amber/Golden (inner petals), Color C = Bright Yellow (outer petals), Color D = Olive Green (leaves). Carry yarn tails to weave in later or use surface join methods for cleaner transitions.
— Large Layered Flower Motif (Make 6-8 for runner) :
Round 1 :
With Color A, mr, ch1, work 8 sc into magic ring. Pull tight and join with sl st to first sc (8)
Round 2 :
Ch1, inc in each st around (2 sc in each) (16)
Round 3 :
(1 sc, inc) x8 (24)
Round 4 :
(2 sc, inc) x8 (32)
Round 5 :
(3 sc, inc) x8 (40)
Info :
These rounds build a slightly raised center disc. Keep tension firm for a defined center that supports the puff rounds to come.
Round 6 :
1 sc in each st around (40)
Round 7 :
Ch1, *fpdc around next st, sc in next st* rep around to create a subtle ridge (40)
Round 8 :
Change to Color B. Ch1, 1 sc in each st (40)
Info :
Change color by finishing last pull-through of previous round with new color (Color B) to keep the join tidy. Carry Color A inside the work or weave in later.
Round 9 :
(4 sc, inc) x8 (48)
Round 10 :
1 sc in each st (48)
Round 11 :
Ch2 (counts as hdc), *hdc in next 5 sts, (hdc, ch2, hdc) in next st to form petal base* rep 8 times. End sl st into top of beginning ch2. This sets up 8 petal sockets (48 including base stitches)
Info :
The ch2 spaces act as anchor points for puff petals. Count carefully: you should have eight ch2-spaced sockets evenly around the disc.
Round 12 :
Work petal 1 into first socket: join with sl st in ch2 space, (ch2, 5 dc cluster (or 6 dc in US terms working into same space closing together), ch2, sl st back into same ch2) repeat in each of the 8 ch2 spaces to form 8 tall petals. After last petal, sl st to join. Petal staging creates vertical petals (8 petals).
Round 13 :
Turn petals outward: with Color B, working behind the petals, sc around the base between petals to anchor them, approximately 48 sc evenly spaced (48)
Round 14 :
Change to Color C. Ch1, (2 sc, ch3, 2 sc) in top of each petal (8 shell clusters) to create decorative connectors (48 plus ch3 spaces)
Info :
This shell round forms the outline for the second, larger petal layer. The ch3 loops will be used as anchor points for puff petals in the next rounds.
Round 15 :
Working into each ch3 loop: *sl st into loop, ch1, 7 dc puff cluster (work 7 yarn overs, draw through loops, pull through all, ch1 to close) sl st into same loop* rep 8 times to make 8 fuller outer petals. After last, sl st to join (8 full petals)
Round 16 :
With Color C, work sc around the base of outer petals, 2 sc between each petal anchor for even spacing (16 + previous 48 anchors result in an approximate working round of 48–56; work 2 sc between each petal seam for total 64)
Info :
Math check: we created 8 outer petals; placing 2 sc between each petal yields 16 additional stitches plus the 48 existing base stitches, forming a wider circumference. Adjust counts by evenly placing or using 1 sc or 2 sc between petals to keep petal shape flat.
Round 17 :
Sc in each st around to smooth the edge (64)
Round 18 :
(3 sc, inc) x16 (80)
Round 19 :
Ch1, *sc in next 4 sts, (sk 2, 5 dc cluster in next st, sk 2)* rep 16 times to produce scalloped petal tips. Finish with sl st to join. Final visual should show 16 small scallops around an outer ring (80)
Info :
If petals cup too much, block flat with light steam or wet-block. Use pins to coax petals into a gentle concave shape to mimic the image.
Round 20 :
Working behind scallops in FLO only: 1 sc in each st BLO around to create a defined ridge that helps petals lift slightly (80)
Round 21 :
Fasten off Color C leaving long tail for joining. Weave ends into the back of the motif so they are not visible on the front.
Info :
At this stage you have a rich three-part flower: centered rust disc, an inner amber petal layer, and larger bright yellow outer petals with scallops. Make a sample motif and block it lightly to set petal shapes before producing the full set.
— Decorative Cluster Motif (Connector) (Make many) :
Round 22 :
With Color A, mr, ch1, 6 sc into ring, sl st to join (6)
Round 23 :
Ch1, inc in each st around (12)
Round 24 :
(1 sc, inc) x6 (18)
Round 25 :
Ch3, *sk 1, (3 tr cluster) in next st, ch3* rep around forming small lace points; end with sl st to join (18 clusters with ch3 loops)
Info :
These small clusters sit between large flowers to visually link them. Make one cluster per space between petal tips as required by layout. Keep them slightly flat so they act as connectors rather than 3D embellishments.
Round 26 :
Sl st into ch3 loop, ch1, sc3 into loop, sl st into next loop. Fasten off leaving tail for joining.
— Sculpted Leaf Motif (Make 12-16) :
Round 27 :
With Color D, ch10. In 2nd ch from hook, sc, hdc in next, dc in next 3, hdc in next, sc in next, sl st in last to form a short chain-curve base (not a closed round) (8 sts along chain)
Round 28 :
Turn to work along the other side of starting ch: working in back bumps (or turning chain), sc in first, hdc in next, dc in next 3, hdc in next, sc in next. Do not join; you now have a closed oval leaf outline with approx 16 sts around the leaf perimeter (16)
Round 29 :
Working through both layers now, ch1, sc in each st around for one round to firm the edge (16)
Round 30 :
Work a centre ridge: ch1, *fpdc around next 2 dc on right side (creating raised midrib), sc in next 2 sts down toward tip* rep to mid-point, then mirror back down the other side with bpdc around each of the corresponding stitches to create a raised vein. Approx 16 textured actions.
Info :
Front and back post stitches create the sculpted, cupped leaf seen in the photograph. Keep tension even; prevent pulling too tightly or the leaf will pucker.
Round 31 :
Edge crochet: (sc, picot (ch3, sl st into first ch), sc) around to give the leaf a delicate beaded edge. Fasten off leaving long tail for sewing (approx 16 sc with picots)
Round 32 :
Optionally, steam or wet-block the leaf lightly over a curved form so it sits slightly cupped as in the photo.
Info :
Make leaves in olive green with consistent shaping. Leaves in the sample are slightly elongated and thickened in the centre for the 3D look; if desired, use a 3.5 mm hook to produce a tighter, more sculpted leaf.
— Small Petal Fillers (Optional) :
Round 33 :
With Color B, mr, ch1, 8 sc in ring, sl st (8)
Round 34 :
Ch1, inc in each st around (16)
Round 35 :
In each ch-space around, create a bobble: (ch2, 5 dc cluster in same st, ch2, sl st) to form small flowerette; fasten off leaving tail for joining
Info :
These small fillers are placed between petals and leaves to add the lacy connectors visible in the runner photo. They are flat and small; make many as required for your layout.
— Joining Motif Layout & Planning :
Info :
Layout the runner before joining. The photographed runner alternates large flower motifs with pairs of sculpted leaves and small cluster motifs between each flower. A repeating sequence: Flower - small cluster - Flower - pair of leaves - Flower etc. Plan for symmetry and orientation so petal tips and leaves nest neatly.
Info :
Pin motifs to blocking mats in final layout. Lightly steam or wet-block to flatten petal tips or cup leaves. Allow to dry fully before permanent joining to prevent distortion.
— Joining and Connector Rounds (Sequential; work after blocking) :
Round 36 :
With a long tail of the petal color (Color C), position two flower motifs front to front where they will meet. Using tapestry needle and mattress stitch, join at 6 evenly spaced points around the inner petal circle (securely through both motifs). This is an optional sturdy seam for a more permanent join.
Round 37 :
Alternatively, join with slip-stitch and ch connectors: With Color A or Color B, join motif A at a petal seam, sl st into petal top, ch4, sl st into corresponding petal on motif B. Repeat around the touching points, creating small chain connectors that echo the lacy look (approx 6-8 connectors per junction).
Info :
Joining by slip stitch and chain produces a delicate gap that matches the photo’s airy connectors. Use a consistent chain length (ch4 in sample) so joins are even. Where leaves join to flowers, use a slightly shorter chain (ch3) for snug fit.
Round 38 :
For leaf-to-flower joins: with Color D tail, align leaf base to flower underside at the seam between two petals. Using long tail, sew leaf onto back of flower so leaf tip points outward. Make two leaves per flower on alternating sides for the balanced look in the image.
Round 39 :
Place small cluster motifs between petal tips and join into the chain connectors by sewing or slip-stitching the small cluster center into the ch4 connector loops. This locks the lace pattern and creates the continuous runner effect.
Info :
Work slowly during joining. Pin each connector before stitching to ensure shapes are not twisted. Keep joins flat and consistent so runner sits evenly on a table.
Round 40 :
After all motifs are joined into the runner length you desire, weave in all long tails with tapestry needle, securing ends with a knot where necessary and trimming close to the fabric.
— Edge Stabilization & Final Scallop Edging :
Round 41 :
With Color C, working around the entire outer edge of the joined runner, sc evenly around to create a base for edging. Where there are chain connectors, work 2 sc into connector loops to stabilize (work around entire perimeter; stitch count will vary by runner length).
Round 42 :
Ch1, *sc in next 3 sts, (sc, ch3, sc) in next st for scallop center, sc in next 3 sts* rep around edge to produce gentle scalloped edging that echoes the petal shapes. Finish with sl st and fasten off
Info :
Scallop spacing should follow natural petal rhythm; adjust counts to avoid puckering. If your runner is long, work edging in sections and join with sl st for cleaner curves.
Round 43 :
Optional decorative picot round: With Color B, attach in center of each scallop: (sl st, ch3, sl st into same st) to create small points that catch the light.
Info :
Blocking lightly after edging will help scallops relax and lie flat. Use pins to shape scallops uniformly and allow to dry overnight.
— Finishing Touches & Reinforcement :
Round 44 :
Inspect runner for loose joins. Reinforce high-stress connection points (where leaves meet flowers) with additional invisible stitches on the underside. Use matching yarn color to hide stitching.
Round 45 :
Weave in all remaining tails at least 4-5 cm into interior motif rounds in different directions to secure; trim close to fabric. Use a dab of fabric glue on difficult tails for extra security if the runner will be laundered frequently.
Info :
Care instructions: hand wash gently in cool water with mild detergent, reshape and lay flat to dry. Cotton may shrink slightly if machine-washed or tumble dried; blocking after washing will restore shape.
— Optional Variation Rounds & Techniques :
Round 46 :
If you prefer a denser petal, add an extra textured round between Rounds 16 and 17: work (sc, puff, sc) into each petal base to raise petals further. This will add approx 8–16 stitches depending on placement.
Round 47 :
For a laceier runner, substitute chain connectors with 2-row granny-style mini squares: work 3 dc clusters separated by ch2 into a small 3x3 dc square and join squares between flower motifs instead of ch loops.
Info :
These variations slightly change stitch counts and motif tension. Make one sample of each variation and compare before committing to the full runner to ensure consistent look across motifs.
— Complete Round Summary (for reference) :
Info :
Flower motif Rounds 1-21 build center and two petal layers. Connector motif Rounds 22-26 produce small lace clusters. Leaf motif Rounds 27-31 create sculpted leaves. Join and edging occupy Rounds 36-45. Total rounds across pattern sections as written: 45 main instructional rounds plus optional rounds and numerous small repetitive actions across motifs; repeat sequences per motif until the desired runner length is reached.
Info :
Note: The sample runner pictured uses 6 large flowers, multiple leaves between flowers (pairs per interval), and many small connectors to create a flowing, elongated runner approximately 120–130 cm long depending on spacing. Adjust motif number for desired length.
This autumn-inspired table runner brings the warmth of late-summer sunflowers to your tabletop with layered petals, sculpted leaves, and careful joining. Each motif builds on simple rounds to form a rich, textured runner you'll love to display at seasonal gatherings. The detailed instructions guide you from first stitch to final block, making this an enjoyable and rewarding project. 🧶🍂 Spread handmade warmth across your dining table and enjoy the compliments—happy crocheting! 🍁