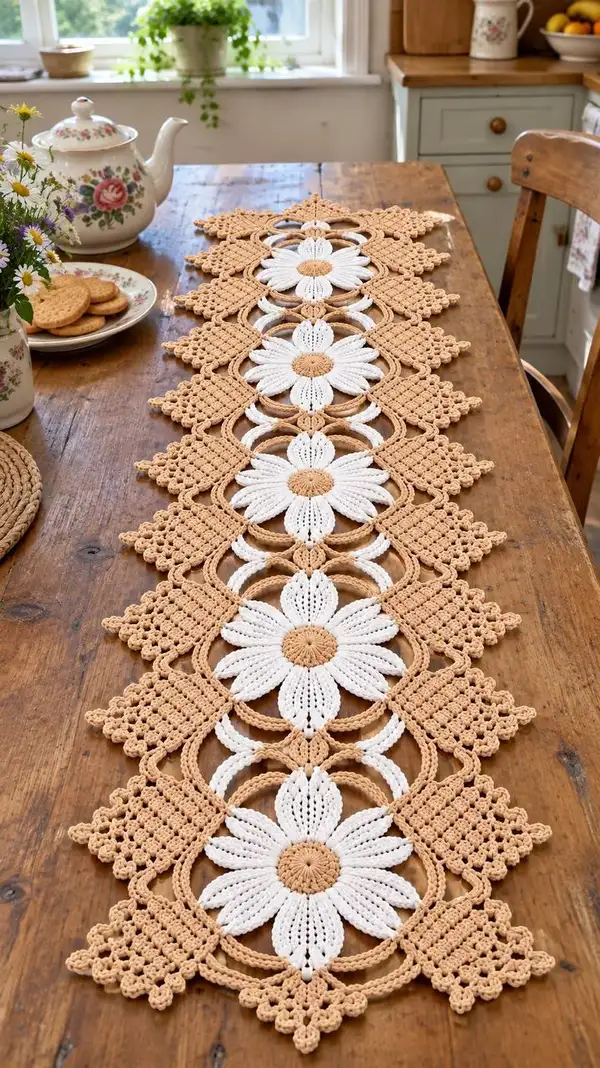
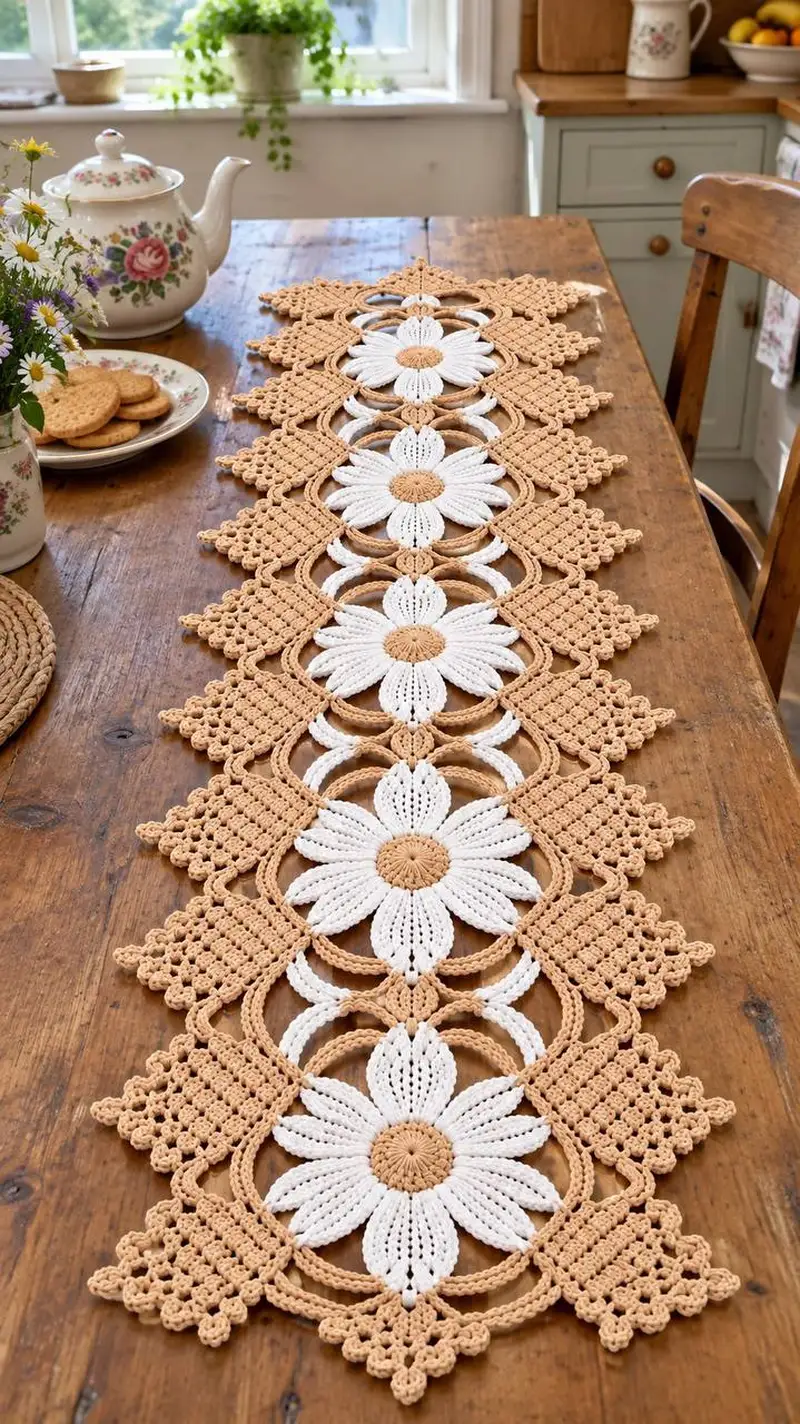
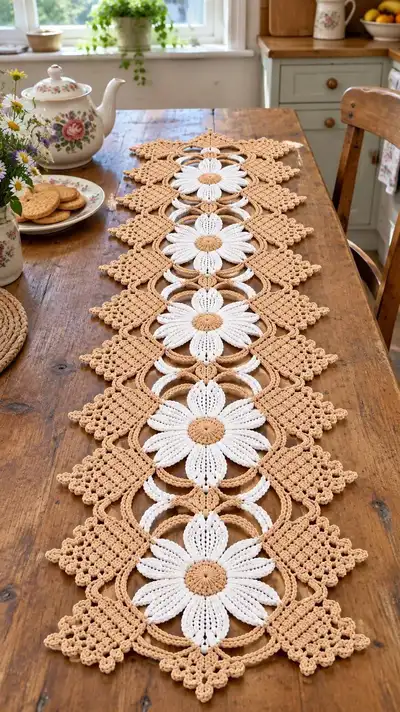
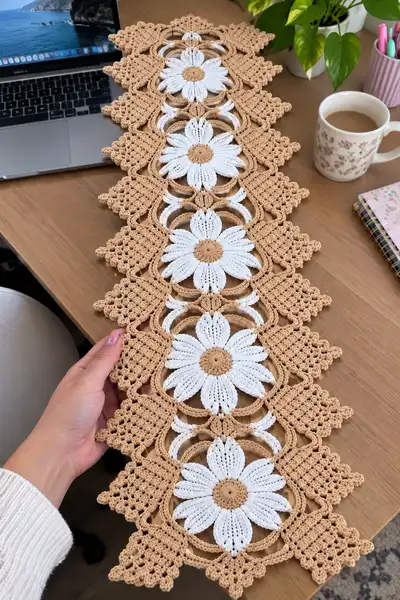
A vintage-inspired autumn daisy table runner featuring a repeating daisy medallion joined by lacy diamond connectors. Warm beige and crisp white create a soft, cozy contrast perfect for seasonal tables or everyday cottage decor. The runner is built from modular motifs — flower centers, elongated petals, circular frames and textured diamond joins — assembled into a long, elegant centerpiece. Detailed stitch-by-stitch instructions guide you through each motif, joining method and finishing edge.
Progress Tracker
0% Complete
— Notes & Gauge :
Info :
This pattern is modular and worked motif-by-motif using DK cotton. Gauge is flexible but each completed daisy medallion (center + petals + inner rings + outer loops) should measure approximately 18–20 cm (7–8 in) across when blocked. Keep stitches fairly firm for structure. The pattern below is written for a runner with five daisies end-to-end; increase the number of repeats for a longer runner.
— Daisy Medallion (Make 5 for pictured runner):
Round 1 :
With beige yarn, make a magic ring, ch1, 8 sc into ring, pull tight (8)
Round 2 :
Inc in each st around (16)
Round 3 :
(1 sc, inc) x 8 (24)
Round 4 :
(2 sc, inc) x 8 (32)
Round 5 :
(3 sc, inc) x 8 (40)
Info :
This creates a slightly larger circular center base that will sit beneath the petal bases. Keep stitches even and weave in the starting tail later toward the center.
Round 6 :
(4 sc, inc) x 8 (48)
Round 7 :
1 sc in each st around (48)
Round 8 :
Switch to white yarn in the last pull-through of round 7. Ch1, 1 sc in same st, *ch6, skip 5 sts, sc in next st* — repeat around to form 8 evenly spaced loops (8 ch-6 loop spaces). If necessary adjust loop chain length to have exactly 8 loops spaced evenly (48 sts should allow ch6 loops)
Info :
Change to white yarn for petals. The ch-6 loops are the foundation for the elongated petals; count carefully so there are exactly 8 loops (one per petal).
Round 9 :
Work petals into each ch-6 loop as follows: attach white yarn at loop base, ch1, into loop do (sl st, ch3, 2 tr, ch1, 2 tr, ch3, sl st) to create a tall petal arch; fasten off after each petal. Repeat at each loop so you have 8 petal arches around center. (This round creates petal scaffolding; petal shaping continues next)
Round 10 :
Re-join white at base of first petal arch: ch2 (counts as hdc), 10 hdc into arch, sl st into base to anchor (11 hdc across petal). Fasten off and repeat for each petal so that each petal has 11 hdc worked into the arch (8 petals x 11 hdc). After finishing petals, weave in small tails but leave joining tails long for later blocking.
Info :
Petal stitch count (11 hdc) keeps the petal dense and slightly raised. For a more sculpted look, use front post hdc in the center of the petal row in later repeats (instructions below).
Round 11 :
Work around petals to sculpt the petal edge: join white yarn at back base of a petal, ch1, sc through back loops only across the 11 hdc of petal (11 sc), sl st to base; repeat for each petal creating a tidy back loop ridge. After last petal, do not fasten off.
Round 12 :
With white still attached, rotate to front and, into each petal center, work 1 sc into front loop of first sc row, *ch2, skip 1 sc, 3 dc cluster into next center stitch of petal, ch2, sc into next center stitch* — repeat around each petal to create delicate lacy veins. This round forms decorative vertical lines on petals (do each petal consistently).
Info :
These decorative clusters thin the petal visually and mimic the radiating veins of a daisy. Keep clusters and ch spaces consistent across all petals for symmetry.
Round 13 :
Join beige yarn in the space between two adjacent petal bases at the outermost base stitch. Ch1, sc in same space, *ch5, sc in next space between petals* repeat 8 times to create an 8-loop frame around the petals (8 ch-5 loops). Fasten off white after this if desired.
Round 14 :
Into each ch-5 frame loop work: sc, hdc, (3 dc, ch1, 3 dc), hdc, sc. This builds a decorative ring of small arches that will visually separate petals from the outer circular frame. Repeat into each of 8 loops (creates 8 arches).
Info :
The arch pattern (3 dc, ch1, 3 dc) creates a small eye motif. Keep tension consistent so that all arches lie flat when blocked.
Round 15 :
Switch to beige yarn. Slip stitch to the top of the first arch, ch3 (counts as dc), work 11 dc evenly spaced across the arch top to form an outer ring petal support (12 dc per arch including turning ch3). Repeat into each arch so outer ring has (12 x 8 = 96) dc total around.
Round 16 :
1 dc in each dc around (96)
Info :
This outer ring sets the diameter of the flower medallion. If your gauge produces smaller or larger rings, adjust number of dc per arch to keep round counts consistent (aim for multiples of 8).
Round 17 :
(11 dc, inc) x 8 (104)
Round 18 :
1 sc in each st around (104)
Round 19 :
Work 8 evenly spaced vertical chains around to form loops for joining: *sc 12, ch6, skip 6 sts, sc in next* - repeat across to create 8 ch-6 spaces for later joining to rings. Adjust ch length if necessary to keep loops even around circumference.
Info :
At this point block the medallion flat with pins to set petal shape and ring round. Use a damp or steam block suitable for your yarn. Allow to dry completely before joining.
— Inner Circular Ring (Make 5 per medallion — two concentric rings are used in the photo):
Round 1 :
With beige yarn, make a magic ring, ch1, 12 sc into ring (12)
Round 3 :
(2 sc, inc) x 8 (32)
Round 4 :
1 sc in each st around (32)
Info :
This small ring acts as the inner decorative ring that sits just outside the petal base and creates a crisp circular profile when joined to the medallion.
Round 5 :
Ch6, sl st into same st to form little loop; *ch6, sl st into next st* repeat around to create 8 ch6 loops (8 loops). Fasten off leaving tail for joining.
Round 6 :
Work 1 sc into base of each ch6 loop around the small ring, then 5 sc between loops to create even spacing back onto the ring. After finishing, you should have 32 sc total; adjust by adding or omitting sc evenly so spacing is neat.
Info :
Make two of these inner rings for each daisy medallion to build the layered circular look seen in the photo. One will sit directly around the petal base and the second slightly outside, connected by arches.
— Arch Connector (Make 1 set around each medallion):
Round 1 :
With beige yarn, attach to an outer ring loop of medallion with a sl st, ch3, 3 dc in same space, ch3, sl st into loop on corresponding inner ring to connect, continue *ch3, 3 dc in next outer loop, ch3, sl st into next inner ring loop* repeat to create 8 connecting arches between rings. Fasten off and weave tails.
Info :
These arches should be slightly taut but not tight; they form the decorative lacy bridge between inner rings and the outer circular frame and will read visually as petal outlines in the finished runner.
— Diamond Connector Motif (Make 8 side diamonds per daisy medallion — see layout):
Round 1 :
With beige, ch10, join with sl st to form a small loop, ch1, work 8 sc into loop, join to form a small base square (8)
Round 2 :
Ch3, turn, work (2 dc, ch1, 2 dc) into first side of small square to begin formation of a textured diamond cluster; continue around to create a rounded-square motif (total 4 corner arches)
Round 3 :
Turn work and in next round build mesh: ch3, *skip 1 st, (3 dc, ch2, 3 dc) into next corner chain space, ch3* repeat to form four larger arches. You will now have a base for the diamond lattice.
Info :
These small diamond units are worked flat and later folded and edged to produce the small scalloped textured blocks seen between daisies. Keep each diamond block identical for consistent join geometry.
Round 4 :
Edge the diamond: sc evenly around the entire diamond motif, placing (sc, ch3, sc) at each point to make a looped corner. This prepares join points for the picot corner and the join-as-you-go connections to circles.
Round 5 :
Work 5 rows of mesh filet over the diamond body: each row = ch3, turn, (sc in first loop, ch2) across to create airy lattice; repeat 5 times so diamond height equals ring spacing. Finish with a row of sc around and small picot at points (ch3, sl st into base). Fasten off leaving long tail for joining.
Info :
Each diamond motif in the photo is a compact 5-row block with a small picot on its outer corner; you will need eight such diamonds per daisy medallion (four on each side alternating up and down along the runner length).
— Joining & Runner Assembly (Join motifs join-as-you-go):
Info :
Layout plan: Each daisy medallion will be joined at four cardinal points to adjacent diamonds and rings: top and bottom diamonds connect to the next medallion, while side diamonds fill the lateral spaces forming the scalloped zigzag edge. For a five-daisy runner you will create 5 medallions, 10 inner rings (2 per medallion), and 40 diamond connectors (8 per medallion). Adjust counts for longer runners.
Round 1 :
Position medallions on a flat surface; using beige yarn and a yarn needle, place first diamond along the outer ring so that the picot corner aligns with the ring ch-6 loops. Use join-as-you-go: with diamond facing up, insert hook through diamond corner and through corresponding ring loop, sl st through both, ch1, sc across corner edge to secure then sl st into ring. Repeat at each connection point to attach diamonds to the first medallion.
Info :
Use straight pins to hold pieces in place before joining. Join-as-you-go gives a cleaner edge than sewing later and reduces bulk from extra seams.
Round 2 :
After attaching diamonds to the first medallion, prepare the second medallion and align so that diamonds between medallions overlap; join adjacent diamonds to one another and to the second medallion’s outer ring using the same sl st through both motif loops method. Continue row by row until all five medallions are joined end-to-end and side diamonds are in place.
Round 3 :
Where two motifs meet at a corner, secure by working sl st through both motif edges and the ring loops beneath; then add an optional picot (ch3, sl st) on top to create the little scalloped point seen at runner edges.
Info :
Keep tension moderate while joining; too tight joins will pull motifs inward and distort the runner; too loose joins will gape. Pin and check the runner layout frequently.
— Outer Scallop Border (Edge finishing rounds across entire runner):
Round 1 :
With beige yarn and working around the entire assembled runner, pick up yarn at one outer point and work sc around the outer-most edges of diamonds and rings, placing (sc, ch3, sc) at each external point to create uniform small loops (this will form the base for final picot rounds).
Round 2 :
Into each loop around the edge work: (3 sc, picot, 3 sc) to form small scallops. Picot = ch3, sl st in 3rd ch from hook. Repeat continuously around the runner's perimeter until you return to start. Join with sl st and fasten off.
Info :
These scallops give the delicate edge seen in the photo. Block once more after edging to open picots and shape the runner into a flat, even piece.
— Alternate Decorative Backstitch Ridge (Optional):
Round 1 :
For added texture across the inner rings, work a back post dc ridge round: join beige, *fpdc around next 3 dc, bpdc around next 3 dc* repeat around to create alternating raised ridges between arches. This is optional but replicates the subtle raised rings in the picture.
Info :
Back post and front post stitches are used sparingly to create low-relief ribs across the ring without changing flatness. Work evenly and block after completion.
— Detailed Stitching & Puff/Petal Variations (Optional embellishments):
Round 1 :
To accent petal veins, use long single crochet (lslc) or elongated hdc down the center of each petal: insert hook 2 rows down into petal body, pull up loop to height of working row, complete sc or hdc. Repeat once per petal center for raised fibrous vein effect.
Round 2 :
For a more cottagey look, embroider very small French knots around centers with embroidery thread in a slightly darker shade of beige to mimic seed textures. Use a yarn needle and 2-strand embroidery for small knots.
Info :
Embellishments should be applied before final blocking if they will be stitched through the fabric. Use small, neat stitches to avoid bulk.
— Blocking & Final Finishing :
Info :
After assembly, lay the runner flat on a blocking board or towel. Pin each petal tip, ring and diamond corner to create sharp edges and even spacing. Lightly steam or wet block according to yarn instructions. Allow to dry fully before removing pins.
Round 1 :
Weave in all tails using a yarn needle, following the lines of stitches to hide ends. Trim close. For extra security at join points, tie a small knot in the tail and weave it through multiple stitches.
Info :
Blocking is the final step that transforms your crocheted motifs into a geometric, flat runner. Proper blocking dramatically improves the finished look, especially for lace cotton yarns.
— Sizing & Repeat Guidance :
Info :
The pattern above is written to create medallions that are approximately 18–20 cm (7–8 in) across and a runner with five medallions yields a finished length of about 110–120 cm (43–47 in) not including scallop borders. To make a longer runner, simply create more medallions and the corresponding number of diamonds and rings to join them. Keep motif counts proportional for a consistent edge.
Round 1 :
If you want a narrower table runner, reduce the number of diamonds between medallions to 6 and adjust ring spacing accordingly. For a placemat version, make a single medallion and trim surrounding diamonds to create a circular mat.
Info :
Keep a sparse stitch count record for each motif as you work so you can reproduce identical diamonds and rings. This helps maintain pattern consistency when scaling up or down.
Completing this autumn daisy table runner is such a satisfying, calming process — all the tiny petals and eyelet diamonds come together into a stunning, handcrafted centerpiece. I love how the warm beige pairs with crisp white to create a cozy, cottage-style look that enhances wooden tabletops and seasonal displays. Block it flat, add delicate scallops and let your handiwork shine at the next tea or family meal. 🧶🍂🌼