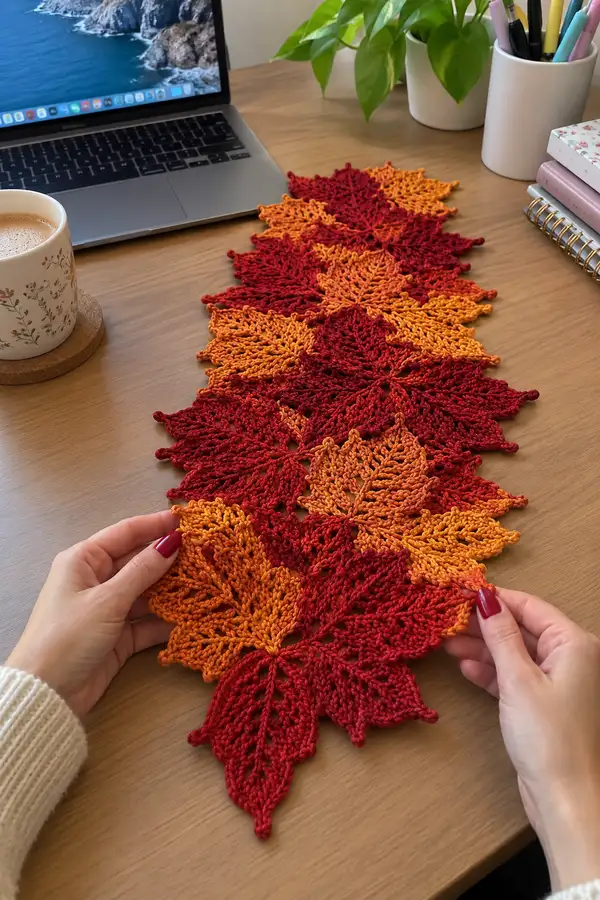
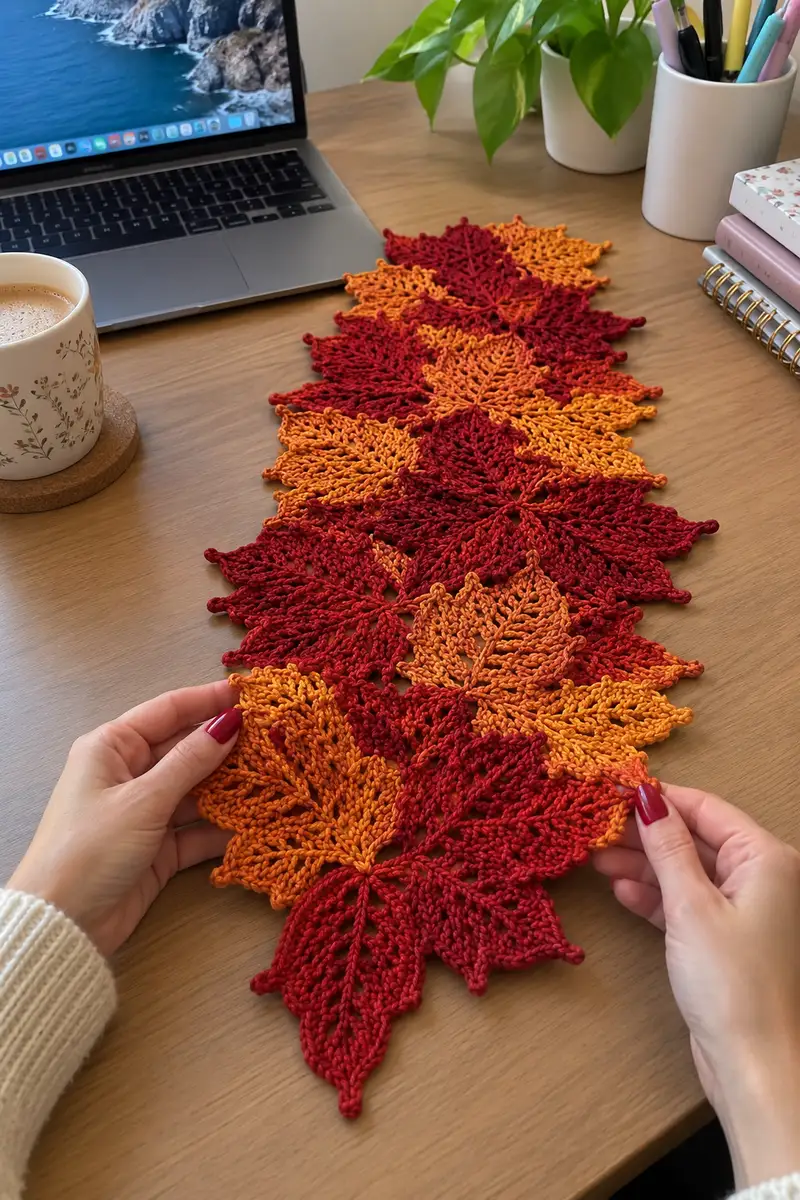
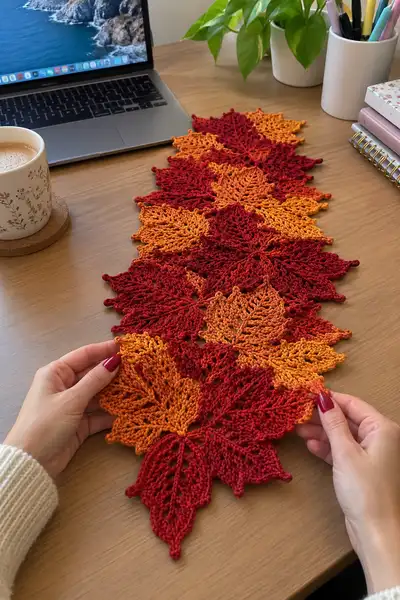
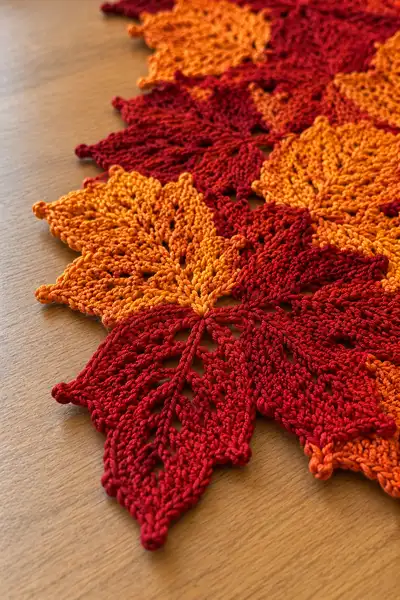
Create a stunning autumn leaf table runner worked in warm fall gradient colors. This elegant runner is made from interlocking leaf motifs with lacey veins and picot edges for crisp definition. Perfect to style a console or dining table, it features rich reds, burnt orange and golden hues and a delicate scalloped border for a finished look.
Progress Tracker
0% Complete
— Notes & Gauge :
Info :
Runner photographed measures approximately 14 inches wide at the widest points and 36 inches long using 12 leaf motifs (8 full leaves + 4 half-edge leaves). Gauge is not critical, but for best drape: 20 dc = 4" in pattern yarn with 3.5mm hook. Work tightly enough that picots and openwork hold shape. Adjust hook size to match tension.
Info :
Abbreviations follow US terms. Piece is worked in leaf motifs joined as you go. Each full leaf motif is worked from the center outward in rounds; half leaves are simplified versions for edges. After making all motifs, work one or two rounds of joining to tidy the back and then a decorative scalloped border.
— Leaf Motif (Full leaf) :
Round 1 :
Work a magic ring, ch 3 (counts as dc), 11 dc into ring, pull ring closed and join with sl st to top of ch-3 (12 dc) (12)
Round 2 :
Ch 1, sc in same st, ch 5, sk next st, sc in next st, ch 5, sk next st, sc in next st, *ch5, sk next st, sc in next st; rep from * around to form 6 ch-5 loops, join with sl st to first sc (12 sc positions, 6 loops)
Info :
These ch-5 loops become the base for leaf lobes; place a stitch marker at the join at the end of this round to maintain orientation for the central vein that will be worked in following rounds.
Round 3 :
Work each ch-5 loop separately as follows: sl st into loop, (ch2, 3 dc, ch2, sl st) into same loop to form short petal; repeat around into each loop creating 6 short petals; after last, ch3 and turn to begin central spine build (6 petals, chain turning)
Round 4 :
Ch3 (counts as first dc of spine), 1 dc in same st, *ch1, skip 1, 2 dc in next petal top, ch1, skip 1; rep across central row to create a raised ridge; when you reach last petal work 2 dc, ch1, sl st to base join to form a continuous spine across centre (approx 24 dc distributed across two sides including ch3) (24)
Info :
Work loosely on ch spaces to allow the leaf to spread. Place an extra stitch marker at the true top center after this round to align future increases symmetrically.
Round 5 :
Rotate motif to work one side of leaf: ch1, sc in same st, ch3, 2 dc in next sp, ch3, sc in next centre chain space; working along one side only: (ch3, skip next dc, 2 dc in next ch sp, ch3, sc in next centre chain) repeat 3 times to form 4 side lobes, then work mirror sequence down other side finishing with sc to anchoring stitch (one complete round that builds side lace) (approx 36 stitches including chains)
Round 6 :
Ch2, 1 hdc in same st, *ch2, (3 dc cluster) in next ch-3 loop, ch2, hdc in next centre ridge st; rep along side creating elongated leaf veins; when you reach tip work (5 dc cluster) to elongate tip then work back along opposite side mirroring clusters; join with sl st (approx 42 clustered dc placements)
Info :
Counts in lace motifs include chains. For stitch-count tracking, count only solid stitches (sc, hdc, dc). Chains form spaces for later trellis stitches. Keep the first and last spine stitches mirrored for a neat central vein.
Round 7 :
Work vein stitches into chain spaces: sl st to first ch sp, ch 1, 1 sc, ch 4, 1 sc in next ch sp; along the body alternate (sc, ch4, sc) into each major ch space to create elongated eyelets that will be filled next round (approx 48 eyelet spaces)
Round 8 :
Filling round: in each ch-4 eyelet work (sc, hdc, 3 dc, hdc, sc) to form a mini shell — this creates the internal lacey texture; complete shells along both sides and mirror at tip (approx 48 shells)
Info :
At this stage the leaf should begin to look like a botanical leaf with a visible center spine and eyelet-filled surfaces. Lay flat and ensure symmetry; if one side looks larger, adjust by reducing one shell in the next round on that side.
Round 9 :
Edge shaping: ch1, sc in same st, *ch3, sk next shell, sc in tip of next shell; rep around for a pierced scallop edge. At tip of leaf ch3, then work 3 dc cluster to extend the tip; continue around and join (approx 54 palpable edge points)
Round 10 :
BLO round for crisp edge: turn work, 1 sc in each st BLO around including into spaces (54 sc) — this draws the edge in and defines the leaf border
Info :
Working BLO here creates a raised outer ridge. If you prefer a flatter look, work this round in regular sc instead. Place a new stitch marker at the start of the BLO round to mark the base for picot tips.
Round 11 :
Picot tip formation: *sc in next 6 sts, ch3, sl st into 3rd ch from hook (picot), sc in next 6 sts, (into very tip place an extended picot: ch5, sl st into 5th ch) ; repeat around forming small decorative picots at each secondary point (54 sc + picots)
Round 12 :
Surface vein: Using same color or a contrast color (Info before round), work a surface slip-stitch line down the center as follows: sl st along top of center ridge from base to tip, making small evenly spaced sl sts to mimic a stitched vein. Fasten off and weave in tail. This is optional but adds realistic texture.
Info :
Change to contrast color now for a darker vein if desired. Use a tapestry needle to stitch a raised running stitch instead if you prefer embroidery rather than slip-stitch surface work.
Round 13 :
Reattach original color if using contrast vein and pick up at base: ch1, sc evenly around base of leaf in back loops only to create a neat joining edge when you connect motifs later (approx 56 sc)
Round 14 :
Stabilizing round: 1 sc in each st (56) — keep tension even to avoid warping; this round prepares the leaf for join-as-you-go connection points
Info :
At completion of Round 14, block the leaf gently to shape points and flatten shells. Pin the leaf, steam lightly or spray with water, and let dry. Blocking makes joining far easier and gives crisp, identical points.
Round 15 :
Reverse picots: Working from base, create small reverse picots along inner base where leaves will join: *ch2, sl st into base st at 2 sts intervals across bottom edge, repeat to create small loops that will be used as anchor points for join-as-you-go (approx 12 small reverse picots)
Round 16 :
Final tidy: 1 sc evenly around including picot anchors to reinforce them; fasten off leaving a 14" tail for join-as-you-go sewing (approx 60 sc). Weave in short tail but keep long tail for assembly as instructed below.
Info :
Make as many full leaves as desired. For the runner in the photo make 8 full leaf motifs and 4 half-leaves for the ends (pattern for half-leaf follows). Keep long tails for joining. Block all motifs before joining for best results.
— Half Leaf Motif (Edge leaf) :
Round 1 :
Begin with a magic ring, ch3 (counts as dc), 5 dc into ring, pull closed and join with sl st to top of ch-3 (6 dc) (6)
Round 2 :
Ch1, sc in same st, ch5, sc in next st, ch5, sc in next st, ch5, sc in next st (three ch-5 loops created) — this starts the half leaf foundation (approx 6 sc positions)
Round 3 :
Into each ch-5 loop work (ch2, 3 dc, ch2, sl st) to create half petals (3 petals); ch3 and turn to begin spine extension (3 mini petals)
Round 4 :
Ch3, 1 dc in same st, ch1, 2 dc in next petal top, ch1, 2 dc in next petal top, extend with clusters toward tip: (ch1, 2 dc) across creating a tapered spine; join with sl st (approx 14 dc)
Info :
Half leaf mirrors one side of the full leaf and has fewer rounds; it will sit flat against the edge when joined. Make 4 half leaves for both ends of the runner shown.
Round 5 :
Work side lobes by alternating (ch3, 2 dc cluster, ch3) into each ch-1 spine space to create three lobes; at tip make a 5-dc cluster for a pronounced point; reverse back along base with sc anchoring stitch (approx 20 dc clusters/spaces)
Round 6 :
Edge and picots: ch1, sc in each st around including ch-spaces; add picots at the three outward points (sc x4, pic, sc x4, pic, sc to base) — fasten off leaving long tail for joining (approx 26 sc + picots)
Info :
Block half leaves flat as well. When positioned at runner edges, the straight base of the half-leaf will be sewn to the body; ensure picots face outward to match photo styling.
— Layout & Color Plan :
Info :
Photographed runner uses alternating colors in a repeating sequence: Deep Crimson, Burnt Orange, Golden Amber, Deep Crimson, Burnt Orange, Golden Amber, etc. Lay out all blocked motifs in the desired order before joining. Alternate orientation (rotate every other leaf 180 degrees) so veins flow along the length for a natural, woven look.
Info :
To create a central staggered column like the photo, place full leaves in pairs forming central diamonds; add half leaves at ends. Use pins to hold motifs while you join-as-you-go.
— Join-As-You-Go Sequence (Joining full motifs into runner) :
Info :
Select two full leaves to join first. You will work a single joining round on the second leaf as you come to attach it to the first. Join at the back loops of the final tidy round on the first leaf.
Join Round 1 :
On the second leaf pick up at the base long tail: join with sl st into a chosen base stitch where leaves will meet, ch1, sc in same st, now position second leaf over first and using tapestry needle or hook, sl st through corresponding sc on first leaf to anchor; continue working 1 sc in next 2 sts, sl st into matching sts on first leaf to create 1:1 anchors along the shared edge for the next 6 anchor points (approx 12 anchoring stitches across shared base)
Info :
When joining, keep tension relaxed enough to allow the leaves to lay flat but not so loose that gaps appear. Use the long tail you left at Round 16 of the full leaf for this join to hide ends inside the seam.
Join Round 2 :
After anchoring base, work along the side seam: *ch3, sl st through corresponding ch-space on the adjacent leaf, ch3, sc in next edge st of current leaf; rep along the edge creating decorative chain bridges. At tip, secure with 3 sc into the tip to avoid flaring (approx 14 chain bridges)
Info :
Chain bridges produce an airy connection that echoes the leaf eyelets. If you prefer a stronger seam, replace each ch3 bridge with sl st through both motifs then sc in next st for a flatter join.
Join Round 3 :
When two leaves are joined, proceed to attach a third leaf in the same manner on the opposite side of the second leaf so that motifs interlock in a zig-zag. Use the same number of anchor points along each shared edge for symmetry. Continue joining motifs in a row until central column is complete.
Info :
Always join with motifs right sides facing up so your visible joins are uniform. Work joins on the back of the runner when possible to keep front clean; the chain bridges will look deliberate on the front side as decorative negative space.
Join Round 4 :
For staggered double-column joins (to create the diamond shapes seen), attach an adjacent row of leaves by aligning the top of one leaf to the side of another and use 1 sc to 1 sc anchoring with ch2 spaces between anchors for a subtle spacing effect (match number of anchors to leaf size, typically 8-12 anchors per side)
Info :
Work slowly at points where three leaves meet; secure the central meeting point by sewing a small reinforced sl st through all three motif bases to hold junctions flat and stable.
Join Round 5 :
After joining all full leaves in the center as planned, add half-leaves at each end using the same anchoring method: align flat base of half-leaf to the outermost full leaf base and sew sl st anchors every other sc. The half-leaf base usually requires 6-8 anchors depending on your stitch counts (6-8 anchors)
Info :
Check the runner length as you join; you can stop after fewer motifs for a narrower runner or add additional motifs to lengthen. Keep a straight central seam by counting anchors and making sure orientation alternates to keep diamond shapes symmetric.
Join Round 6 :
Stitch the back: once join-as-you-go anchors are complete along the entire runner, flip runner over and make a neat back seam: using yarn and needle, work small ladder stitches through anchor points to flatten and hide chain bridges. Weave the seam yarn under a couple of stitches on each motif for secure hold (work across whole length)
Info :
If you prefer an invisible join, use mattress stitch with a thin yarn and pull gently to close spaces. For a decorative look, use a contrast yarn to outline the seam lines.
— Decorative Scalloped Border (optional but photographed) :
Border Round 1 :
With runner front facing, join yarn at the base point of a half-leaf at one end with a sl st, ch1, work 1 sc into each edge stitch around entire runner including into ch bridges and picot anchors (work evenly to maintain shape). Keep counts consistent around each leaf (typical round count across runner ~420 sc depending on number of motifs)
Info :
This round evens the edges and provides a base for scallops. Work slowly along chain bridges so you do not accidentally split the chain; insert the hook under both loops when possible for strength.
Border Round 2 :
Ch3, skip 2 sts, (5 dc in next st), skip 2 sts, sl st into next st; repeat around to create shell scallops at each outward leaf point. At inner junctions use (3 dc) shells to keep the border compact. Join with sl st to first ch-3 (creates alternating shells around tips)
Border Round 3 :
Ch1, sc in same st, *ch3, picot into next shell tip (ch3, sl st into 3rd ch), sc in center of shell; rep around to add delicate points to each scallop tip (approx 40-50 picots depending on motif count)
Info :
For a deeper scallop repeat Border Round 2 and 3 once more. Use a slightly smaller hook for the scalloped rounds if you want crisper shell definition.
Border Round 4 :
Final trim: work 1 sc in each st around to tidy up, work a small reverse picot at each pivot point (ch2, sl st in base) and fasten off. Weave in all ends into back of runner and trim.
Info :
If you used multiple colors, change to main accent color for the border to unify the look. Carry color tightly or weave ends later at joins to avoid color pooling.
— Blocking & Finishing :
Info :
Pin the runner flat on a blocking board stretching each leaf point gently to its final shape. Aim for uniform point lengths — measure from center to tip and match across leaves. Lightly steam or spray with water and let dry completely. Pin picots so they remain pointed rather than curled.
Info :
Weave in all tails on the back using a yarn needle. For stubborn tips add a tiny bit of fabric glue where picots meet to anchor them, then hide glue under a few stitches. Store runner flat or rolled to avoid creases.
— Tips & Variations :
Info :
To make a longer runner, add another set of full leaves in the pattern sequence. To create a narrower runner, substitute more half-leaves along the edges. Use fingering yarn and smaller hook for a daintier lace runner, or heavier cotton and larger hook for a table centerpiece that lies heavier on the table.
Info :
For holiday variations, change color palette: deep green and metallic gold for winter, pastels for spring. You can also add small sewn-on beads at the tip of each leaf or in center eyelets for a subtle sparkle.
You did it — a rich, textured autumn leaf runner that brings seasonal warmth to any surface! Each carefully blocked and joined motif forms a flowing ribbon of leaves with crisp picot tips and an elegant scalloped edge. This piece is both functional and decorative, and the gradient colors make it feel like harvest on your table. Enjoy placing it under a vase or across a mantel — and don't forget to share a photo of your finished runner! 🧶🍂