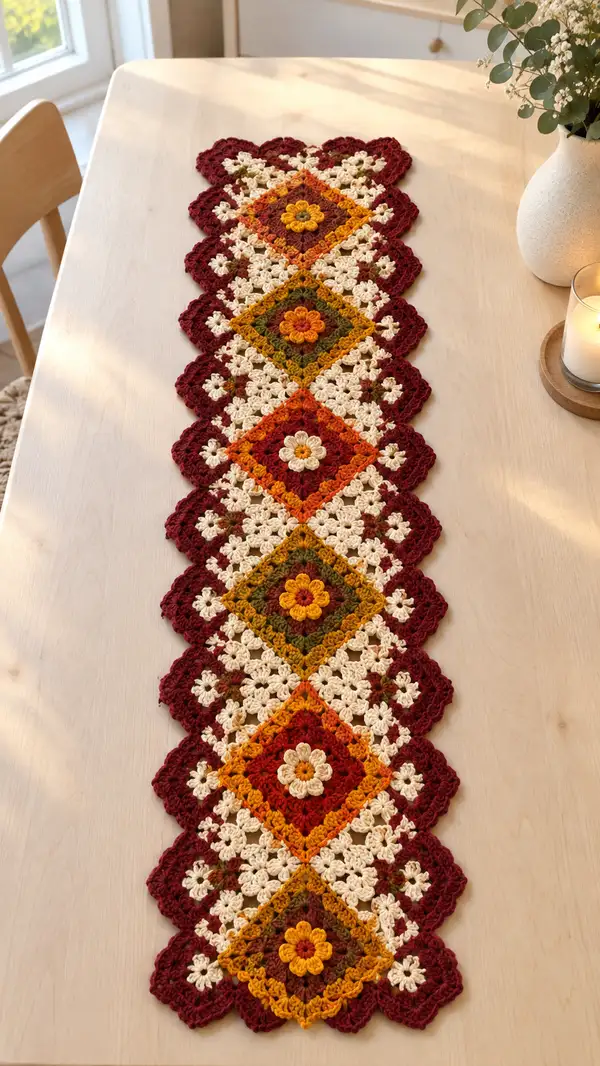
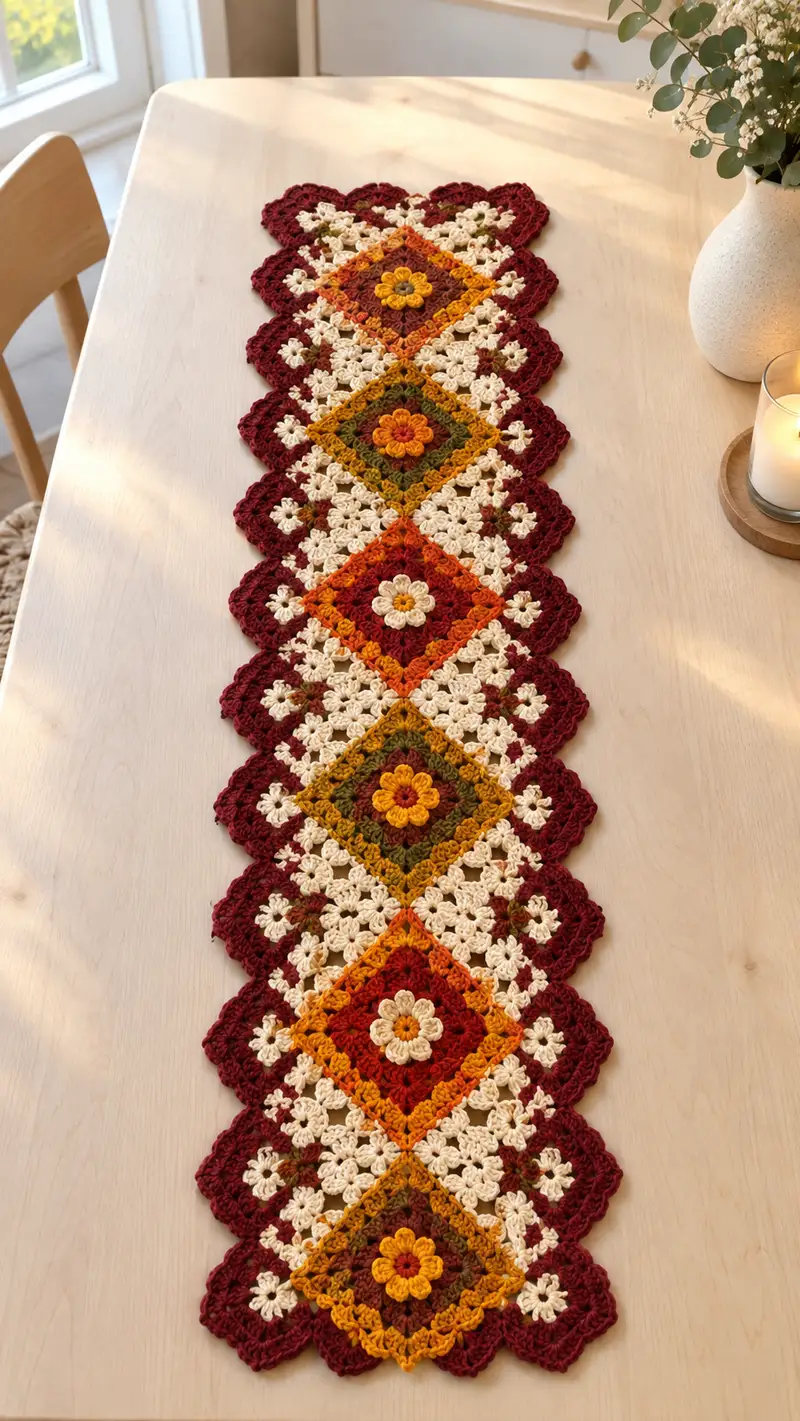
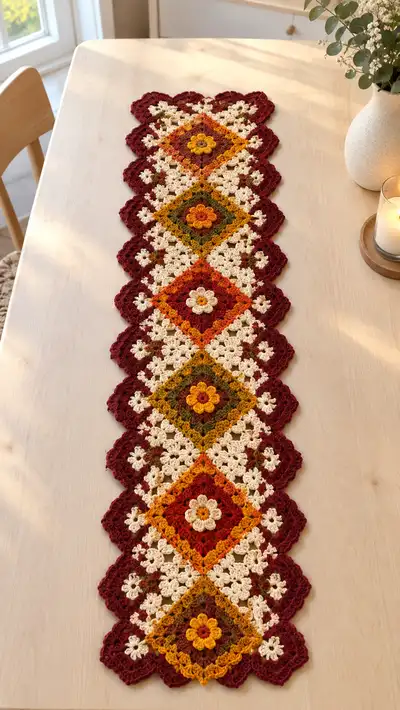
A long, elegant table runner made from joined diamond-shaped granny squares with a textured flower center and scalloped burgundy edging. Warm autumn tones—mustard, burnt orange, olive, ivory and deep burgundy—create a cozy seasonal accent. The runner is constructed from repeating motifs joined as you go, then finished with a rich scalloped border for a polished look. Perfect for a dining table, console or as a festive centerpiece.
Progress Tracker
0% Complete
— Notes & Gauge :
Info :
This runner is worked from individual diamond-oriented square motifs that are joined as you go, then edged with a scalloped burgundy border. Gauge is not critical for decorative runners, but to achieve the pictured look aim for 14 clusters x 28 rows per 10cm using worsted yarn and a 4.0mm hook when working granny-style clusters. Tension should be even between motifs so the runner lies flat.
Info :
Color shorthand used in the rounds: BGD = Burgundy (deep red), CR = Cream/Ivory, MU = Mustard/Gold, OR = Burnt Orange, OL = Olive/Green, AC = Accent bright orange (flower centers). Change colors where indicated.
— Flower-centered Diamond Motif (Make 6 identical motifs) :
Overview :
Each motif begins with a textured flower center, squared up with rounds of clustered 3-dc granny groups and chain spaces to create a square which we rotate to diamond orientation when joining. Work the motif flat in rounds, do not join into a continuous square—work in rounds with a sl st to join at the end of each round, change color as indicated. The motif below is written as Rounds 1-28; these rounds produce a square motif approximately 14cm tip-to-tip before blocking.
Round 1 :
With AC (bright orange) yarn. mr, ch2 (counts as dc), 11 dc into mr (12) – sl st to top ch2 to join. (12 dc)
Round 2 :
Change to MU (mustard). Ch1, sc in same st, *ch3, sc in next dc* around (12 ch-3 spaces and 12 sc). Sl st to first sc. (12 sc, 12 ch3s)
Info :
These ch-3 spaces will become the petals. Count carefully to ensure you have 12 spaces; if you used an extra dc in round 1, adjust by spacing sc and ch3 evenly.
Round 3 :
Change to OR (burnt orange). In each ch-3 space work: (dc5, sl st to base of same ch-3) making a 5-dc petal. After completing petals in all 12 ch-3 spaces sl st to join to the base. (12 petals)
Round 4 :
Change to CR (cream). Ch1, sc in first dc between petals, *ch2, sc in top of next petal (between petals)* around to form small picot-like connectors. You will have 12 sc and 12 ch2 spaces. Sl st to join. (12 sc, 12 ch2)
Info :
Block the petal round lightly if petals sit too flat. Use your fingers to shape each petal outward so the square later lies flat.
Round 5 :
Still CR. Working into the ch2 spaces: *(3 dc, ch2, 3 dc) into next ch2 space; ch1, sc into top of next petal (in previous round)* Repeat 12 times to create an early 12-sided flower-squared ring. At the end sl st to first st. (12 corner clusters, 12 sc connectors)
Round 6 :
Change to OL (olive). Ch3 (counts as dc), in each ch1 connector between corner clusters work: (2 dc, ch2, 2 dc) into each ch1 connector to begin squaring the motif—this round creates 12 side clusters and 12 corner openings. Sl st to top ch3 to join. (48 dc grouped into 12 cluster groups, 12 ch2 corners)
Info :
Round 6 is the first round that starts a subtle square shape. Keep your tension even so corners open into square geometry rather than rounding out.
Round 7 :
Change to MU. Ch1, sc in same st, *ch3, sk next 4 dc to reach ch2 corner sp, into ch2 work (3 dc, ch2, 3 dc) for the corner, ch3, sk next 4 dc, sc into the next connector* Repeat to make 12 corner clusters total. Sl st to first sc. (12 corner clusters, 24 ch3 spaces)
Round 8 :
Change to CR. Working in each ch3 space along the sides: (3 dc, ch1) into each ch3 space across the side between corners, and into each ch2 corner work (3 dc, ch2, 3 dc). This will square the motif to 4 obvious sides. Finish with sl st to join. (Perimeter now has 4 corner clusters and multiple side clusters; approximate total dc = 96)
Info :
At this point you should have a recognizable square with 4 corner openings and side cluster repeats. If your square looks slightly rounded, gently tug the corner clusters outward and lightly block before proceeding.
Round 9 :
Change to OR. Ch1, sc in same st, *ch3, 3-dc cluster in next ch1 space, ch1, sc into the side connector* Repeat around to continue building side clusters and solidifying the square. Sl st to join. (Even perimeter cluster count maintained)
Round 10 :
Change to CR. Ch3 (counts as dc), (2 dc) into same sp to make a 3-dc cluster in each side cluster space, ch2 in corners, (3 dc) in corner ch2. Continue around and sl st to join. (Perimeter clusters increased predictably by side repeats)
Info :
Rounds 9-12 should keep the pattern of adding rows of 3-dc clusters along the sides and 3dc-ch2-3dc in corners. This method expands the square evenly and keeps counts simple: each side will gain the number of side clusters equal to the number of ch3 spaces from previous round.
Round 11 :
Repeat Round 10 pattern changing color to BGD for a deep square outline: Ch3, create 3-dc clusters in side spaces, (3 dc, ch2, 3 dc) in each corner. Sl st to join. (Perimeter clusters increased)
Round 12 :
Change to CR. Work: ch1, sc in same st, *ch3, sc in next cluster top* continuing around to create breathability and contrast with cream chain spaces between colored cluster groups. Sl st to join. (12 sc plus ch3 spaces per side as existing)
Info :
Rounds 9-12 use color changes to create concentric rings and make the small flower center read as a framed square. Carry unused color loosely along the back if you want fewer ends. Keep floats under 6-8 stitches long and trap them into corner clusters periodically.
Round 13 :
Change to MU for an accent round. In each side ch3 space work (3 dc, ch1) to thicken the side bands; in corners work (3 dc, ch2, 3 dc). Sl st to join. (Per side clusters increased by side repeat count)
Round 14 :
Change to OL. Repeat the 3-dc clusters across sides and corners (3 dc, ch2, 3 dc) to enlarge the square to approximately the central motif size. Sl st to join. (Square now broad enough to read as the central diamond motif)
Info :
At the end of Round 14 the motif should measure roughly 9-10 cm across the center (pre-block). If your motif is smaller/larger, consider altering hook size slightly for future motifs for consistency across all 6 motifs.
Round 15 :
Change to CR. Ch1, sc in same st, *ch3, sc into next cluster top* around to create an airy filler band of cream between colored rounds. Sl st to join. (Consistent chain spaces along sides)
Round 16 :
Change to BGD. Ch3, 2 dc in same sp then 3-dc clusters into each ch3 side space; (3 dc, ch2, 3 dc) in corners throughout the round. Sl st to join. (Perimeter expanded)
Info :
Begin to plan the diamond orientation now. Keep each motif square as rounds develop; motif will be positioned on point (diagonally) when joining into the runner column.
Round 17 :
Change to OR. Repeat Round 16 pattern to add an additional colored band emphasizing orange between cream bands. Sl st to join. (Perimeter increased predictably)
Round 18 :
Change to CR. Ch1, sc in same st, *(ch3, sc in next cluster top)* around forming a regular grid of ch-3 filler spaces between colored clusters. Sl st to join. (Creates airy filler)
Info :
Rounds 15-18 are the main decorative filler band that mimics the cream diamond motif visible in the runner photo. Keep stitch counts consistent row-to-row by maintaining the same number of ch-3 spaces per side.
Round 19 :
Change to BGD. Ch3 (counts as dc), (2 dc) into same sp, then in each ch3 side space work (3 dc, ch1) across; in each ch2 corner work (3 dc, ch2, 3 dc). Sl st to join. (This increases perimeter clusters evenly)
Round 20 :
Change to MU. Repeat round 19 pattern to add a narrow mustard frame that will read as a thin border around the central square. Sl st to join. (Perimeter increased)
Info :
If you want the center flower to pop more, change Round 20 color to a brighter shade. Keep each motif identical by writing down the color used in each round for reference when making the remaining motifs.
Round 21 :
Change to CR. Ch1, sc in same st, *ch3, sc in next cluster top* around for an airy neutral band prepping for the larger outer motif expansion. Sl st to join. (Maintains ch3 rhythm)
Round 22 :
Change to OR. Ch3, 2 dc in same sp, *(3 dc) in next ch3 sp, ch1* along sides. In the corners make (3 dc, ch2, 3 dc). Sl st to join. (Perimeter clusters increased by number of side ch3s)
Round 23 :
Change to OL. Repeat Round 22 pattern to thicken the olive band around the square. Sl st to join. (Perimeter larger)
Info :
After Round 23 the motif should be close to the final motif size seen in the picture. Make all six motifs to this point before moving to the final outer scalloped motif rounds and joining—this keeps joins simpler.
Round 24 :
Change to CR. Ch1, sc in same st, *ch3, sc in next cluster top* around creating consistent filler chains to be used later for join-as-you-go connection points. Sl st to join. (Keep consistent counts)
Round 25 :
Change to BGD for outer accent. Ch2 (counts as hdc), work hdc across each top of 3-dc cluster and hdc2 into each corner ch2. Around this will create a base for the scalloped edge and produce a sturdier outer ring. Sl st to join. (Perimeter now robust for scallop)
Round 26 :
Still BGD. Ch1, sc in same st, *ch4, sc in next hdc across* to create larger ch-4 spaces for the edge scallops to grab. Sl st to join. (Perimeter has a series of ch4 loops)
Info :
These ch-4 spaces are important for alignment when joining motifs into the runner column: the join-as-you-go will attach into specific ch-4 spaces to create the alternating diamond look. Identify which ch-4 spaces are the edges and which are the corners for correct joining later.
Round 27 :
Change to CR. Ch1, sc in same st, *(3 dc, ch2, 3 dc) into each corner ch2; in ch4 side loops work (5 dc, sl st) to start scallop petals around the motif edges. Sl st to join. (Each side ch4 becomes a scallop petal)
Round 28 :
Change to BGD. Work a tidy edge: in each petal from previous round work (sc, hdc, 3 dc, hdc, sc) to form a rounded scallop. Fasten off and weave in ends. (Motif now finished and edged with small scallops; motif measures approximately 14cm tip-to-tip)
Info :
Make 6 identical motifs following Rounds 1-28. Lay them out in a vertical staggered column with motifs touching on their points (diamond arrangement) as shown in the photo. Keep note of which motif is used for which position if you alternate color emphasis between motifs.
— Join-as-you-go Column Joining (Joining Motifs into a Long Runner) :
Overview :
Motifs are joined on their diagonal points with a join-as-you-go method using chain spaces and slip stitches into the ch-4 side loops and ch3 filler spaces of an already-placed motif. We will attach motifs to each other along alternating sides to produce the diamond column visible in the photo.
Round 29 :
Place your first motif on the table. With BGD and the wrong side facing you, pick one side ch4 loop at the corner-to-edge interface as the joining loop. Attach yarn with a sl st to that ch4 loop, ch1, sc into the loop to anchor. (Fasten in 1 joining loop)
Round 30 :
Position second motif rotated 180 degrees so its corner meets the first motif's side. Align ch4 loops to the corresponding ch3/ch4 sequence of the first motif. In each pair of aligned loops work sl st into the second motif followed by sl st into the first motif loop (slip stitch join through both loops) along the length of the overlap (typically 5-7 loops depending on motif size). Continue until motifs are securely joined along that seam. Fasten off and weave tails. (First join complete)
Info :
Work join sl sts with relaxed tension; too tight will pucker the seam and distort the diamonds. If the motifs do not align perfectly, adjust by shifting one motif slightly until edge loops match. Pinning motifs helps keep alignment while joining.
Round 31 :
Repeat joining steps to add the third motif to the column. Attach at the next side/corner interface so the diamonds form a zig-zag column with alternating seam positions. Continue joining motifs 2-6 sequentially until the runner column is complete. (You will perform 5 joins to make 6 motifs into one continuous runner)
Info :
If you prefer a neater look, use a mattress stitch with matching yarn instead of sl st joins; however the join-as-you-go method pictured is flatter and faster. Keep all joins on the same side of the runner for a consistent back side.
Round 32 :
Once all motifs are joined into a single column, lay the runner flat and check that the diamond points line up and form small open cream clusters at each seam intersection. Adjust any loose joins by removing a few sl sts and rejoining with slower, even tension. (Runner now in one piece)
Info :
At this stage block the runner lightly to open chain spaces and even the seams. Pin the outer edges straight and steam-block or wet-block according to yarn instructions. Allow to dry before proceeding to the outer border rounds so the final scallop sits evenly.
— Outer Scalloped Border (Unifying Edge) :
Overview :
The runner receives a continuous scalloped border in deep burgundy (BGD) that follows the diamond perimeter and fills the small triangular gaps created by joining. This border consists of multiple narrow rounds of clusters and scallops; rounds are written 33-68 to create a wide, pronounced edge similar to the photo.
Round 33 :
With BGD, attach yarn to any outermost ch4 loop on the runner edge. Ch1, sc in same loop, *ch3, sk next loop, sc in next loop* along the entire outer edge of the runner to make a clean foundation of ch3 loops and sc anchors. When you reach corners (diamond points), work extra scs to maintain an even edge: work 3 sc into the corner ch4 to stabilize the point. Sl st to join at the beginning. (Foundation row with ch3 spaces)
Info :
When working the foundation row around pointed edges, ensure you work multiple scs into the point so the scallop does not pull the point inward. Count scs periodically to maintain even spacing.
Round 34 :
Ch1, sc in same st, *ch4, sc in next ch3 loop* around working 3 sc into corner points again. This enlarges scallop foundation and evens the spacing for subsequent shell rounds. Sl st to join. (Larger ch4 loops created)
Round 35 :
Ch1, sc in same st, *into each ch4 space work (sc, hdc, 3 dc, hdc, sc) to create scallop shells; at corners work (sc, hdc, 5 dc, hdc, sc) for a larger point shell.* Sl st to join. (Perimeter scallops now visible)
Info :
Round 35 provides the visible scalloped shape on the runner edges—if your scallops are too tight, use a slightly larger hook for the shell rounds only to open them up.
Round 36 :
Change to CR for contrast. Ch1, *sc into the center dc of each scallop, ch3 between scallops* around to add a delicate cream beading between scallops. Sl st to join. (Sc and ch3 pattern around scallops)
Round 37 :
Change to BGD. Ch1, sc into each sc and into ch3 spaces work (3 dc, ch1, 3 dc) to create mini-arches that sit between scallops and strengthen the edge. Sl st to join. (Added mini-arches)
Info :
Rounds 36-37 alternate color to create depth and alignment with the runner's interior cream clusters. Keep color sequence consistent around the entire runner for a matched look.
Round 38 :
Ch3 (counts as dc), (2 dc) in same sp, *skip 1 arch base, in next base work (3 dc, ch2, 3 dc) to create corner-like reinforcement along long sides; continue around.* Sl st to join. (Perimeter reinforced)
Round 39 :
Ch1, sc in same st, *ch4, sc in next arch top* around to prepare additional scallop teeth for a double scallop effect. At diamond points work 4 sc for stability. Sl st to join. (Series of ch4 teeth created)
Round 40 :
Into each ch4 tooth work (sc, hdc, 5 dc, hdc, sc) for pronounced double scallops. Sl st to join. (Double scallop formed)
Info :
If you want a subtler edge reduce the 5-dc center to 3-dc; for the pictured bold scallop keep 5 dc. Maintain stitch counts at diamond points by working extra scs into the points.
Round 41 :
Change to CR. Light decorative round: ch1, sc into top of each scallop, *ch3, sc into top of next scallop* around; this produces small cream loops visually tying the scallops to inner cream motifs. Sl st to join. (Decorative loop band)
Round 42 :
Change to BGD. Ch1, sc in same st, *(sc, ch2, sc) into top center of each scallop to form a small picot cluster; at diamond points work (sc, ch3, sc) to maintain a point accent.* Sl st to join. (Adds texture to scallop tops)
Info :
Rounds 41-42 are decorative; you can omit or substitute a simple sc round if you prefer a cleaner border. The small cream loops make the scallops feel lighter and more integrated with the motif interiors.
Round 43 :
Ch3, into each small picot cluster work (2 dc, ch1, 2 dc) to create mini-shells between scallops, reinforcing the curve. Sl st to join. (Edge continues to be sculpted)
Round 44 :
Repeat Round 40 shell pattern in BGD over the mini-shells to add a second row of shallow scallops; this creates the layered scalloped look pictured. Sl st to join. (Double-layer scallop)
Info :
At this point you may have built between 8-12 outer scallop rows depending on how bold you want the edge. The pattern here gives a layered look that matches the deep burgundy scallop in the photo. Check symmetry and balance after every 2 rounds and block lightly as needed.
Round 45 :
Ch1, sc all around working into tops of scallops and into diamond points. This creates a neat edge useful for final finishing. Sl st to join. (Neat single crochet finish)
Round 46 :
Change to CR. With a small hook (3.5mm optional) create a lace overlay: ch4, sk 2 sc, sl st into next sc. *Repeat around creating alternating small loops over the scallops.* Sl st to join. (Delicate lace overlay created)
Round 47 :
Change to BGD. Final finishing scallop: into each ch4 loop work (sc, hdc, 3 dc, hdc, sc). At diamond points work (sc, hdc, 5 dc, hdc, sc). Fasten off and weave in ends thoroughly. (Final bold scallop complete)
Info :
Weave in all ends tidy on the wrong side of the runner and trim close. Use a blunt tapestry needle to hide tails inside cluster spaces. Blocking after finishing will open the lace and even the scallops.
— Small Decorative Extras & Optional Inlays :
Round 48 :
Optional: If you want added small floral inlays in the cream filler spots between diamonds, use MU and OR to make small two-round rosettes: mr, ch1, 8 sc (8); sl st, change to MU, in each sc work (ch2, 3 dc, ch2) forming petals. Sew these rosettes into select cream clusters using small whip stitches.
Info :
These decorative rosettes are tiny and use minimal yarn. They add extra warmth and the small clustered details visible in some photos of similar runners.
Round 49 :
Edge reinforcement: Inspect all joins at seam intersections where motifs meet. If any gaps are visible, pick up BGD and sew slip stitches through the center chain spaces of the seam to tighten and visually unify the seam. This is purely optional but recommended for high-use tables. (Sewn reinforcement at joins)
Info :
Use small, even stitch lengths when reinforcing seams so the runner continues to lie flat. Reinforce only where necessary to avoid adding stiffness.
— Final Finishing Touches & Care :
Round 50 :
Lightly block the finished runner: dampen or steam lightly, pin to shape on a blocking mat ensuring all diamond points are symmetric and scallops are even. Let dry fully before use. (Blocking step)
Round 51 :
Care instructions: Hand wash gently in cool water or spot-clean for light spills. Reshape while damp and lay flat to dry. Avoid tumble drying to preserve scallop shape and color integrity. (Care instructions)
Info :
Keep notes on the color sequence for each motif so you can recreate the runner later or make matching placemats. Write row-by-row colors on a small pattern card for reference.
Final Notes :
This pattern used a modular approach with 28 rounds per motif and approximately 20 detailed rounds for joining and border construction, giving you a richly detailed result. The rounds above contain deliberate Info sections for clarity at key steps; read those carefully before you begin each phase. Adjust the number of outer scallop rounds to taste if you prefer a narrower border.
Finishing this Autumn Diamond Table Runner is such a satisfying project — the repeating floral diamonds and rich scalloped burgundy edge come together to create a cozy, sophisticated centerpiece. The layered colors and textured petals catch the light beautifully, making it perfect for seasonal decor or a handmade gift. Enjoy the meditative process of crocheting repeating motifs and then watching them join into a long, elegant runner you can proudly display. 🧶🍂✨