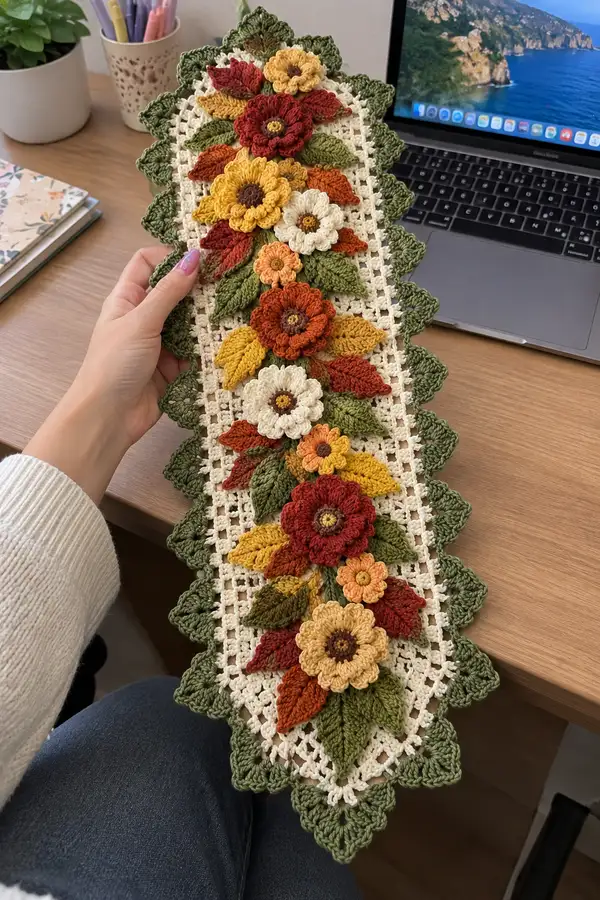
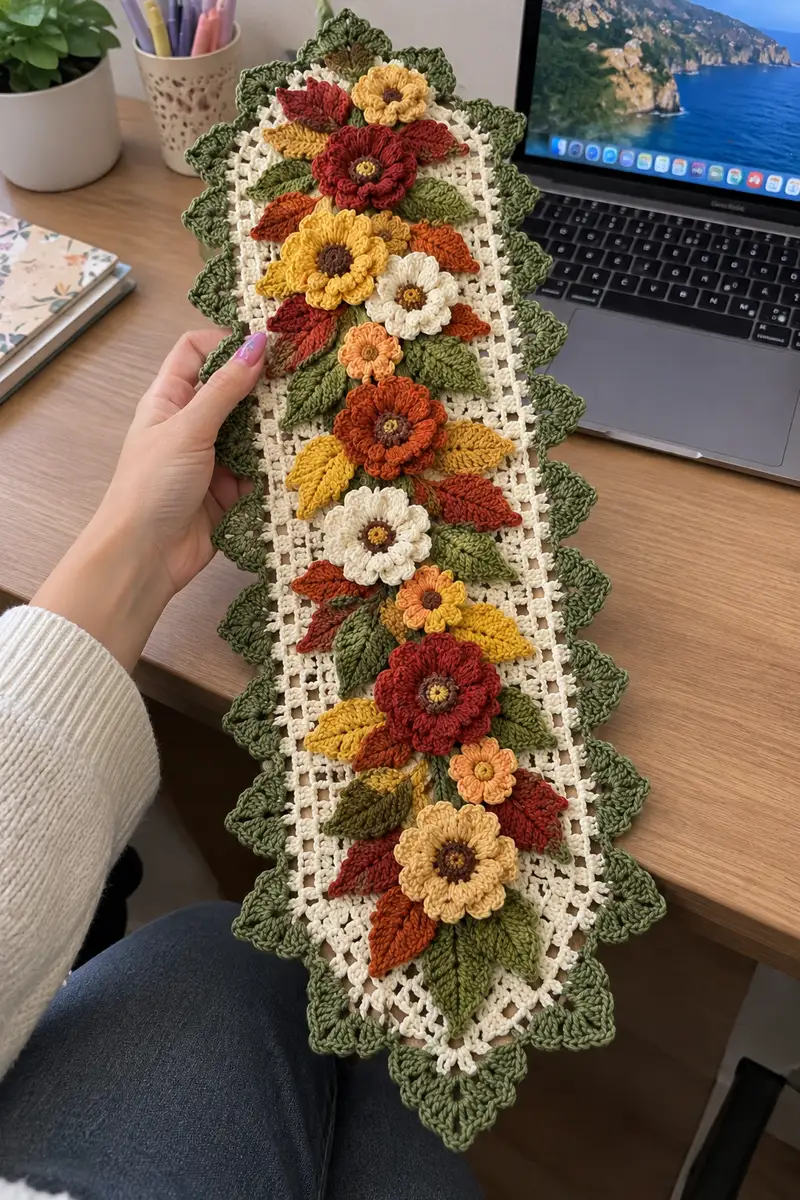
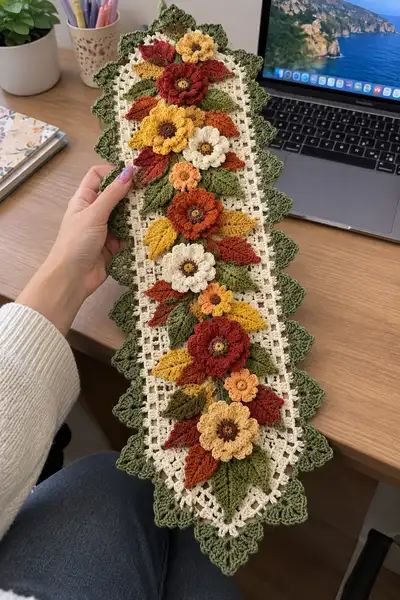
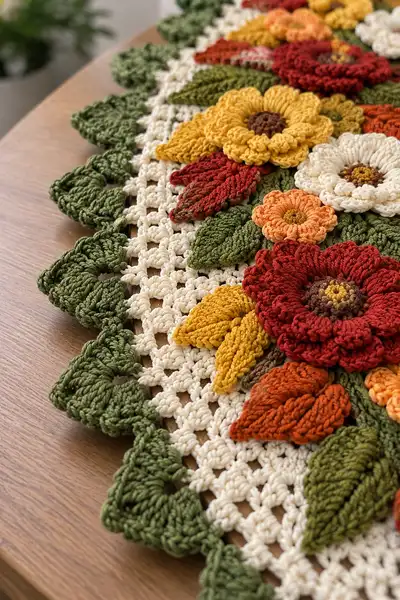
A richly textured table runner inspired by autumn harvest tones, featuring layered crochet flowers, sculpted leaves and a delicate lattice background. Warm rusts, mustard yellows, olive greens and cream combine to create a cascading floral centerpiece. Perfect for a dining table, mantle or seasonal vignette, this pattern shows detailed petals, 3D leaves and a scalloped green border for a finished heirloom look.
Progress Tracker
0% Complete
— Materials & Gauge :
Info :
Gauge is not critical for this decorative runner but the sample measures approximately 38cm wide by 85cm long when worked with worsted cotton and 3.5mm hook. Adjust length by adding or subtracting foundation chains in multiples of 4.
— Base Lattice Panel :
Round 1 :
Ch 68, join with sl st to form a large closed loop (or leave unjoined for a straight runner - this pattern uses a joined loop for even edging) (68 ch)
Round 2 :
Ch 3 (counts as dc), dc in same ch, *ch 1, sk next ch, 2 dc in next ch; rep from * around to end, join with sl st to top of ch-3. You will have 34 mesh clusters separated by ch-1 spaces (68 sts including chs)
Info :
This establishes a 2-dc cluster mesh. If you prefer a straight runner, work flat rows and turn at end of each row using ch-3 counts. The joined loop keeps a continuous edge for the scallop border.
Round 3 :
Sl st into first ch-1 sp, ch 3 (counts as dc), (2 dc, ch 1) in same ch-1 sp, *sk next 2 dc, (2 dc, ch 1) in next ch-1 sp; rep from * around, join (34 clusters)
Round 4-8 :
Repeat Round 3 for 5 rounds in total to create height and open lattice (34 clusters). Maintain even tension so mesh remains flat.
Info :
Check width after 5 rounds. You can add 1-2 extra mesh rounds to increase runner width slightly if desired.
Round 9 :
Ch 1, sc in each dc across each cluster shell and sc in each ch-1 sp to create a denser foundation row for flower sewing. Work 68 sc total (68)
Round 10 :
Ch 3, *dc in next 2 sc, ch 1, sk next sc; rep from * around, join (34 clusters)
Round 11-14 :
Repeat Round 10 for 4 rounds total. Finish last round with sl st into top of ch-3 and fasten off cream yarn if you prefer surface attachment for motifs.
Info :
If you plan to sew flowers into the lattice, work the background slightly denser by adding Round 9. If you prefer more open mesh, omit Round 9 and continue mesh rounds before border.
Round 15 :
Optional: Work one row of sc around the entire joined loop to create an edge foundation: sc evenly around placing 3 sc in each chain loop corner to prevent ruffling. Total sc approx 136 depending on tension.
Info :
Stitch count for edge sc is approximate - place evenly spaced sc to maintain shape and accommodate scalloped border later. Use extra sc at the narrow tips if needed for smooth scallop placement.
— Scalloped Leaf Border (worked in green) :
Round 1 :
Join olive yarn with sl st into edge sc (or into top of ch-3 if you omitted the sc round), ch 1, sc in same st, *sk 2 sc, (5 dc, ch 2, 5 dc) in next sc to form a large shell, sk 2 sc, sc in next sc; rep from * around, join with sl st (approx 17 scallops depending on length)
Round 2 :
Sl st to center of first shell, ch 1, (sc, hdc, 3 dc, hdc, sc) in shell center to create a leaf-shaped puff shell, sl st into top of next sc; rep from * around working each shell center to sculpt leaf form, join and fasten off (17 leaf shells)
Info :
This scallop is slightly elongated to echo the leaves. Work clusters loosely enough to shape the scallop into a flat leaf when blocked. Blocking now helps define the scalloped points.
Round 3 :
Optional: Work a reverse picot finish between scallops: join in the space between shells, *sc, ch 3, sl st into 3rd ch to form picot, sc in next space; rep around. Fasten off and weave ends.
Info :
For a pronounced leafy edge, add an extra round of sc then a final round of slip-stitch cucstom shaping: sl st in back loop only of scallop peaks to pull them forward.
— Large Flower (Make 6) :
Round 1 :
With brown center color, make magic ring, ch 1, 6 sc in ring (6) - pull ring tight and join with sl st to first sc
Round 2 :
Inc in each st around (6 inc) (12)
Round 3 :
(1 sc, inc) x 6 (18)
Round 4 :
(2 sc, inc) x 6 (24)
Round 5 :
Change to rust red. Ch 2 (does not count), sc in same st, *ch 1, sk next sc, sc in next sc; rep around to create a small petal foundation in alternating spaces - total 12 sc/spaces. Join with sl st
Info :
Petal foundation creates even spacing. For larger petals you will work into each ch-1 space. Place a stitch marker at the start of this round to keep track of beginning of petals.
Round 6 :
*Into next ch-1 space: (ch 1, 5-dc puff cluster, ch 1, sl st) into same space to make a full petal; rep around into all 12 spaces to make 12 petals. Fasten off and weave ends
Round 7 :
Join rust red in back loops between petals (BLO) to work a second petal row: ch 2, *into space between petals work (3 dc puff, ch 1, sl st); rep around to stagger petals (12). Fasten off
Info :
Puff cluster technique: yarn over, insert hook, pull up loop 5 times, yarn over and pull through all loops, ch 1 to close puff. Use consistent loop height for uniform petals.
Round 8 :
For depth, join a slightly lighter rust or alpine red and work (sc, ch 2, sc) around center between petal bases to create a small raised ring of stitches (12 small rings). Fasten off
Round 9 :
Optional ornament: embroider 6 small french knots with brown embroidery yarn in center to simulate seeds. Secure and weave ends
Round 10 :
Attach a second layer of larger petals: join rust in center backside of first petal row, ch 3, *into ch-1 space make (tr, tr, tr) cluster, sl st into next space; rep around for 12 large outer petals (12). Fasten off and weave ends
Info :
Large flowers use two staggered petal rows to create a dense, textured bloom. Block gently flat to shape petals outward. Make 6 of these flowers for the runner main clusters.
— Medium Flower (Make 4) :
Round 1 :
Magic ring, ch 1, 6 sc in ring (6) - brown center
Round 2 :
Inc in each st (12)
Round 3 :
Change to mustard yellow, *ch 1, sc in next st; rep around creating 12 ch-1 petal spaces, join
Round 4 :
*Into each ch-1 space make a 4-dc puff stitch, ch 1, sl st; rep around for 12 petals, join and fasten off (12 petals)
Round 5 :
Optional small outer edging: join contrasting cream and sc evenly around petal bases (24 sc). Fasten off
Info :
Medium flowers sit nicely layered over leaves and larger petals. Make 4 and arrange between large flowers to vary scale.
— Small Flower (Make 6) :
Round 1 :
Magic ring, ch 1, 6 sc in ring (6)
Round 2 :
Change to pumpkin orange or pale cream, *ch 1, sc into each sc around to form 6 little petal bases; join (6)
Round 3 :
*Into each sc work (hdc, dc, hdc) to form 6 small rounded petals; join and fasten off
Info :
Small flowers add filler and visual rhythm. You can make different color combinations to add variety.
— Flower Center (Make for each flower) :
Round 1 :
With dark brown, make magic ring, ch 1, 6 sc in ring (6)
Round 2 :
*(1 sc, inc) x 3 (9)
Round 3 :
Sl st into each st around to tighten the circle, fasten off leaving a long tail for sewing to center of petals
Info :
Optionally use a tiny padded felt circle behind centers to raise them slightly. Sew centers to flowers using long tail and weave into center through underside.
— Sculpted Leaf (Make 18) :
Round 1 :
With olive green, ch 7, sc in 2nd ch from hook, hdc in next, dc in next 2, hdc in next, sc in last ch (6 stitches across excluding turning ch)
Round 2 :
Working along opposite side of foundation chain: sc in first st, hdc in next, dc in next 2, hdc in next, sc in last (mirror) - Do not turn; you have created a small leaf shape (12 sts total around leaf)
Round 3 :
Ch 1, *sc in next st, (sc, ch 2, sc) in center tip to create a tiny picot highlight, rep across edges to define leaf veining; fasten off. (Add small surface slip-stitch veins if desired)
Info :
For a more sculpted leaf, alternate dc shells on one side to create a raised rib. Block lightly to curve leaf along its length. Make 18; vary sizes by starting with ch 5 for small leaves and ch 9 for long leaves.
Round 4 :
Alternate method for large carved leaf: Start ch 9, sc in 2nd ch, hdc, dc, tr, dc, hdc, sc along chain, then mirror on return side; for a longer leaf reduce or increase starting chain accordingly. Fasten off
— Raised Veined Leaf (Make 10) :
Round 1 :
Magic ring method: magic ring, ch 1, 6 sc in ring, pull tight (6)
Round 2 :
Inc in each st (12)
Round 3 :
Slip stitch across to create a raised center line: sl st 3, ch 1, (work in FLO across rest) to create a ridge and then shape with sc decreases to taper leaf tip (details: sc2tog, sc, sc2tog) - fasten off
Info :
This method creates a short rounded leaf with raised midrib. Use as filler near small flowers for dimension.
— Decorative Petals & Accents :
Round 1 :
Create 8 accent petals by chaining 5, working (sc, hdc, dc, hdc, sc) back along chain, join and fasten off. Use burnt orange for contrast.
Round 2 :
Create tiny rosettes by ch 4, sl st to form loop and work 6 sc into loop; fasten off. Make 6 for filler.
Info :
These small accents fill gaps and add color movement; leave long tails for sewing.
— Assembly Preparation :
Info :
Lay the lattice panel flat and arrange all flowers, leaves and accents before sewing. The sample runner places large flowers spaced evenly down the center (approx every 12cm) with medium and small flowers staggered between them and leaves fanning out on either side.
Round 1 :
Pin a large flower at the top center of the panel aligning the flower center with the 3rd mesh row from the top. Pin leaves under petals to create a natural base. Note positions of centers relative to mesh holes for sewing guidance.
Round 2 :
Sew centers to petals first: using long tail from center, sew through both center and petal base with whip stitch, pulling center slightly toward you to create a small sunken seedpod look. Secure and weave tail through underside 5cm before trimming.
Info :
Sew petals and layers starting from inner-most layer to outer-most. Use small, almost invisible stitches through the foundation round 9 sc row for security. If you did not add the sc foundation, sew through two mesh strands at each anchor point.
Round 3 :
Attach leaves: place each leaf so that its base sits under the flower and sew through 2-3 stitches at the base into the lattice. Use a ladder stitch for an invisible seam across the leaf base and lattice. Secure with several passes.
Round 4 :
Stitch smaller flowers and accents into remaining spaces. For layered composition, sew medium flowers to overlap slightly with large flower petals and tuck small flowers atop leaves or near centers for depth.
Info :
Take photos of your arrangement before sewing permanently so you can return to the composition if needed. Leave at least 1 cm between overlapping flowers so seams are neat and can be made on underside unseen.
— Final Edge & Finishing Rounds :
Round 1 :
Once all pieces are sewn, secure any loose petals with a tiny running stitch at their base. Trim excess yarn leaving 8-10cm tails and weave into underside for security.
Round 2 :
Block the runner flat: lightly dampen and pin to desired measurements, shape scallops and flowers so petals fan outward. Allow to dry fully.
Round 3 :
Add decorative final slip-stitch row around the inside edge of scallops in olive for a cleaner frame: sl st evenly across outer edge, pulling slightly to bring scalloped leaves outward. Fasten off and weave ends invisibly.
Info :
Use small safety stitches behind larger flower pieces under the runner if it will be handled frequently to prevent seam stress; a few hidden anchoring stitches are all that is needed.
— Variation Notes & Scaling :
Info :
To lengthen the runner, increase foundation chain in multiples of 4 and add additional mesh repeats; also add more flowers in the same spacing rhythm. To shorten, reduce foundation chain accordingly and remove middle flower clusters keeping symmetry.
Info :
Swap colors to match a season: deep reds and golds for autumn, pastels for spring. Cotton yarn gives crisp petals, but you may use a wool-blend for softer drape. Adjust hook size if switching yarn weights.
Finishing this Autumn Harvest Flower Cascade Table Runner is such a satisfying moment — all those layered petals and sculpted leaves coming together for a cozy seasonal display! The tactile cluster petals and scalloped leafy border add heirloom charm to any tabletop. I hope this pattern inspires you to make a whole set of seasonal table decor or a stunning runner to gift. 🧶🍁 Happy stitching and share your autumn creation — it will bring warmth to any room! 🌾