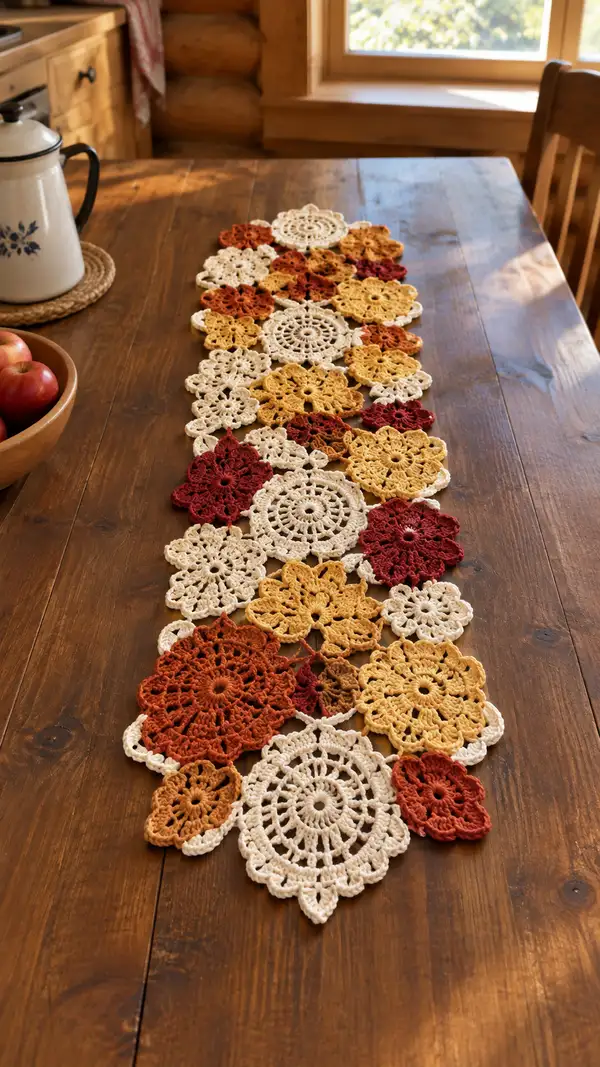
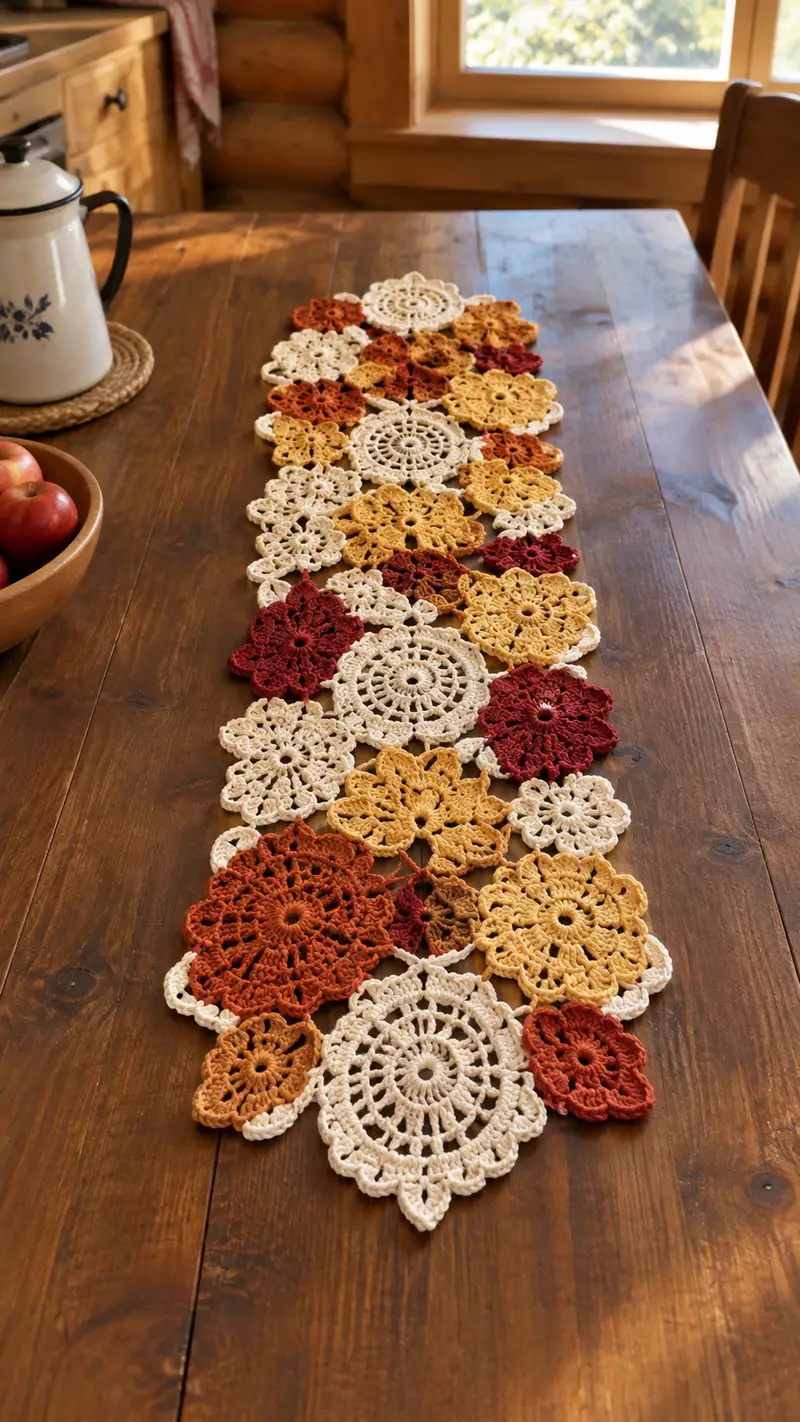
A warm, lace-like table runner made from an assortment of crochet motifs joined into an organic, flowing runner. This pattern recreates layered floral doilies in ivory, rust, mustard and deep red. Detailed motif instructions, join-as-you-go tips, and finishing notes let you make a cozy autumn accent for your table.
Progress Tracker
0% Complete
— Notes :
Info :
This pattern is modular. Each motif below is written to be made individually in specified colors, then joined using the Join-As-You-Go (JAYG) method described in Assembly. Stitch counts shown are total stitches or repeats at the end of each round. Use a 3.5mm hook with worsted-weight cotton to match gauge; change hook if your lace is too loose or too tight. Blooms and medallions are intentionally lacy — blocking is crucial to obtain the crisp shapes seen in the photo.
— Large Medallion Motif A (Ivory) :
Round 1 :
Make magic ring, ch1, 8 sc into ring; pull tight (8)
Round 2 :
Inc in each st around (8 inc) (16)
Round 3 :
(1 sc, 1 inc) x8 (24)
Round 4 :
(2 sc, 1 inc) x8 (32)
Info :
Keep tension even. This first shaping creates a flat disk; use stitch marker at first st of every round to check alignment.
Round 5 :
(3 sc, 1 inc) x8 (40)
Round 6 :
(4 sc, 1 inc) x8 (48)
Round 7 :
1 sc in each st (48)
Round 8 :
1 sc in each st BLO (48)
Info :
Working BLO on Round 8 creates a subtle ridge that helps the next lace shell sit nicely.
Round 9 :
(3 dc, ch2, 3 dc) in next st; *skip 2 sts, sl st in next st, ch3, sl st in next st, skip 2 sts; repeat from * around to create 8 shells (8 shell groups, counts based on shells)
Round 10 :
Into each shell: sl st to center, ch1, (2 sc, ch3, 2 sc) in shell center; *ch2, sc in sl st gap between shells; repeat from * around (8 larger petals, and 8 ch2 gaps)
Info :
Use stitch marker to mark every shell center so that in later rounds you can place picots or pointed edges evenly.
Round 11 :
*In each petal: ch1, (3 dc, ch2, 3 dc) into ch3 space; ch1, sc in ch2 gap between petals; rep from * around (8 petals)
Round 12 :
Working behind petals: join yarn at a gap, ch1, sc in same sp, *(ch3, skip petal top, sc in next gap) x around to make 8 ch3 loops between petals (8 loops)
Round 13 :
Into each ch3 loop: (sc, hdc, 3 dc, hdc, sc) to form a scallop (8 scallops)
Info :
If your scallops curl, block flat later. These scallops create the medallion outer shape; adjust tension if scallops are too tight.
Round 14 :
Ch2, *(2 dc, ch2, 2 dc) in peak of scallop, ch3, sl st in space between scallops; repeat around (8 large picot-like points)
Round 15 :
*Into ch3 spaces: sc, ch5, sc to make little loops between points; repeat around to create decorative lace (8 loops)
Round 16 :
Working along points: in each point work (sc, ch2, 3 dc, ch2, sc) to reinforce points and shaping (8 reinforced points)
Info :
At this stage, check motif diameter; large medallion should measure about 6-7 inches after blocking. Adjust hook if needed for size consistency with other motifs.
Round 17 :
Slip stitch around to tidy: sl st evenly around point edges, spacing 4-6 sl sts per point to create a neat outer rim (approx 64 sl sts total depending on spacing)
Round 18 :
Fasten off leaving 6-8 inch tail for joining. Weave tail to wrong side and block gently into shape.
— Large Medallion Motif B (Rust) :
Round 1 :
Magic ring, ch1, 8 sc into ring; pull tight (8)
Round 2 :
Inc in each st around (16)
Round 3 :
(1 sc, inc) x8 (24)
Round 4 :
(2 sc, inc) x8 (32)
Round 5 :
(3 sc, inc) x8 (40)
Info :
Use a rust tone for a warmer look; tightly made centers keep the medallion flat. If working with cotton that splits, use a slightly larger hook for outer decorative stitches to maintain lacy effect.
Round 6 :
1 sc in each st (40)
Round 7 :
*Ch4, skip 1 st, sc in next st; repeat around to create 10 ch4 loops (10 loops)
Round 8 :
Into each ch4 loop: (sc, 4 dc, sc) forming thinner petals; repeat around (10 petals)
Round 9 :
Ch1, sc around petal bases working between petals, *ch3, sc in space; repeat around to make lace connectors (10 ch3 spaces)
Info :
Count petals and spaces carefully — the rust medallion uses 10 repeats to create a more jagged flower, giving visual contrast to the ivory medallions.
Round 10 :
In each ch3 space: (sc, hdc, 3 dc, hdc, sc) to make fuller petals (10 petals)
Round 11 :
Ch2, *(2 dc, ch2, 2 dc) in top of each petal; sl st into next sc; repeat around to create picot-style points (10 points)
Round 12 :
Work small shell edging: into each ch2 between points work (sc, ch2, sc) to soften edges (10 shells)
Round 13 :
Even slip stitch round along tops of shells to tidy and prepare for joining; sl st evenly spaced (approx 50-60 sl sts)
Round 14 :
Fasten off leaving long tail for joining and weave in short tails. Block flat to open petals.
— Medium Flower Motif (Mustard) :
Round 1 :
Magic ring, ch1, 6 sc into ring; pull tight (6)
Round 2 :
Inc in each st around (12)
Round 3 :
(1 sc, inc) x6 (18)
Round 4 :
Ch3, *skip 1 st, dc in next st, ch1; repeat around to create 9 dc separated by ch1 spaces (9 dc)
Info :
This slightly smaller flower has nine petals; the ch1 spaces create lacy gaps that give a petal look. Keep the tension for the dc round slightly loose to allow petals to lay flat after blocking.
Round 5 :
Into each dc: (1 sc, ch3, 1 sc) to make small petal arches (9 arches)
Round 6 :
Into each ch3 arch: (sc, 3 dc, sc) forming fuller petals (9 petals)
Round 7 :
Ch2, sl st in middle top of petal, ch2, sl st in next middle; repeat around to create subtle connecting loops (9 loops)
Round 8 :
In each loop: sc, ch5, sc (9 decorative loops)
Round 9 :
Work a picot edge: *(sc in next 3 sts, picot (ch3, sl st in first ch)); repeat around (approx 36 sc + picots)
Round 10 :
Sl st evenly around to tidy and fasten off leaving tail for joining. Block each motif to 3.5-4.5 inches diameter.
— Small Rosette (Tan) :
Round 1 :
Magic ring, ch1, 6 sc into ring; pull tight (6)
Round 2 :
Inc in each st around (12)
Round 3 :
(1 sc, inc) x6 (18)
Round 4 :
*Ch4, sl st in next st; repeat around to create 6 ch4 loops (6 loops)
Round 5 :
Into each ch4 loop: (sc, 3 dc, sc) to make six small petals (6 petals)
Round 6 :
Ch1, sc around petal joins working between petals, finish with sl st and fasten off leaving short tail for joining. This motif is approx 1.75-2 inches after blocking.
— Small Petal Motif (Deep Red) :
Round 1 :
Magic ring, ch1, 6 sc into ring; pull tight (6)
Round 2 :
Inc in each st around (12)
Round 3 :
(1 sc, inc) x6 (18)
Round 4 :
*In next st: (sc, ch3, sc) repeat around to form 6 ch3 loops (6 loops)
Round 5 :
Into each loop: (sc, 5 dc, sc) to make fuller rounded petals (6 petals)
Round 6 :
Ch1, sc between petals around then sl st and fasten off leaving join tail (approx 18 sc)
Info :
Small petals act as dense accent points. Use deep red sparingly to create contrast with ivory and mustard medallions.
— Scallop Oval Motif (Ivory) :
Round 1 :
Ch10, join to form ring with sl st; ch3 (counts as dc), 15 dc into ring (16 dc total)
Round 2 :
Ch1, sc in same st, *ch3, sc in next dc; repeat around to form 16 ch3 loops (16 loops)
Round 3 :
Into each ch3 loop: (sc, 3 dc, sc) to create small scallop (16 scallops)
Round 4 :
Ch1, sc around scallops, at ends of oval add additional (sc, ch3, sc) sets to shape ends into rounded points; repeat to form an oval shape (approx 32 sc + 4 end points)
Round 5 :
Edge with picot: *(sc in next 2 sts, picot ch3, sl st in first ch) repeat evenly around outer edge to create a delicate border
Round 6 :
Sl st evenly around, fasten off leaving long tail for joining. Block gently into oval shape approximately 4.5 inches long.
— Connector Mini Motif (Tan Small Ring) :
Round 1 :
Magic ring, ch1, 6 sc into ring; pull tight (6)
Round 2 :
(1 sc, inc) x3 (9)
Round 3 :
*Ch4, sl st to next st; repeat around to create 3 ch4 loops (3 loops)
Round 4 :
Into each loop: (sc, 3 dc, sc) to form three mini petals; sl st to join and fasten off leaving tail for joining.
Info :
These tiny connectors are perfect to tuck into gaps and act as secure joining points between larger motifs. Make plenty — you'll use more small pieces than you think.
— Blocking & Sizing Info :
Info :
After completing motifs, press each under a damp cloth or steam lightly and pin to shape on blocking board. Large medallions should block to roughly 6-7 inches across; large rust medallions slightly smaller if made tighter. Medium and small motifs will block to 3.5-4.5 inches and 1.75-2 inches respectively. Blocking evens stitches and opens lace patterns.
— Color Placement Recommendation :
Info :
Arrange motifs in an organic pattern similar to the photo: larger medallions staggered down center, medium flowers clustered around them, with small rosettes and deep red accents filling gaps. Keep ivory motifs frequent to visually tie the design together. Photograph shows roughly 4 large medallions and 6 medium flowers for a runner about 32-40 inches long, but you can lengthen as desired by adding repeats.
— Join-As-You-Go (JAYG) Method for Motifs :
Info :
Join motifs in the last working round when possible. Lay out both motifs right sides up, align the intended join points, and when you reach the join stitch on the active motif, insert hook in the corresponding stitch or space on the adjacent finished motif and sl st to join, then continue your round. Use the long tails left when fastening off to slip-stitch or whip-stitch extra secure joins where needed. Alternate slip-stitch joins on the front and back to keep runner flat.
Round Detail Example (Joining Large Medallion A into Runner) :
Work Round 17 of Large Medallion A as written; when you reach a designated point for joining (marked during layout), instead of sl st to next space, insert hook into corresponding space on neighbor motif, yarn over, pull up loop, sl st to join, then continue Round 17. Each join is one sl st; for stronger connection use sc instead of sl st at every 3rd join.
Info :
Mark join points during blocking with pins. When joining, keep tension similar to your finishing round to avoid pulling motifs out of shape. If a gap appears, add a tiny connector mini motif or use a short whip-stitch to close it invisibly on the wrong side.
— Assembly & Layout Guidance :
Info :
Lay out all motifs on a large flat surface in the shape you want your runner. Move motifs until the silhouette is balanced. Use pins to hold positions on blocking board. Join motifs using JAYG in one continuous pass when possible: pick a motif and work around it, joining to previously placed motifs as you reach each join point. For isolated motifs that are hard to reach, use ladder stitch to sew them in place after all motifs are made.
Info :
Work from center outward: assemble a central spine of larger medallions first, then add medium flowers, then fill gaps with small rosettes and connector minis. Alternate colors so rust and deep red motifs are balanced on both ends.
— Finishing Edging Round (optional continuous border) :
Round 1 :
Once runner is fully joined, with ivory yarn and 3.5mm hook pick up loops around entire perimeter, sc evenly around to create a base edge (count approx 4-6 sc per inch depending on motif spacing)
Round 2 :
*Ch3, sl st in next sc to create small picot arches; repeat around for uniform scalloped edge (approx 40-60 ch3 loops)
Round 3 :
Into each ch3 arch work (sc, hdc, 3 dc, hdc, sc) to make gentle scallops around edge; sl st and fasten off. Weave in tails and block entire runner flat.
Info :
If runner feels too floppy, consider a spray-starch treatment or fabric stiffener following manufacturer instructions to keep shape during use; test on a scrap first.
— Extra Tips and Troubleshooting :
Info :
Use a slightly smaller hook for the central rounds of large medallions to ensure flat centers, then use the stated 3.5mm to open lace in outer rounds. Always count repeats at the end of each round and use stitch markers to track round starts. When joining, ensure right sides of motifs face up for consistent joins. If a motif flares, block more aggressively; if it cups, use a larger hook or add a few more outer stitches to stretch it flat.
Completing this Autumn Floral Motif Table Runner is so rewarding — every lace motif adds personality and seasonal charm to your home. The layered medallions and tiny rosettes knit together into a welcoming centerpiece that feels handcrafted and heirloom-ready. Block and finish with care and you'll have a runner that brightens your dining table for many seasons to come. 🧶🍂