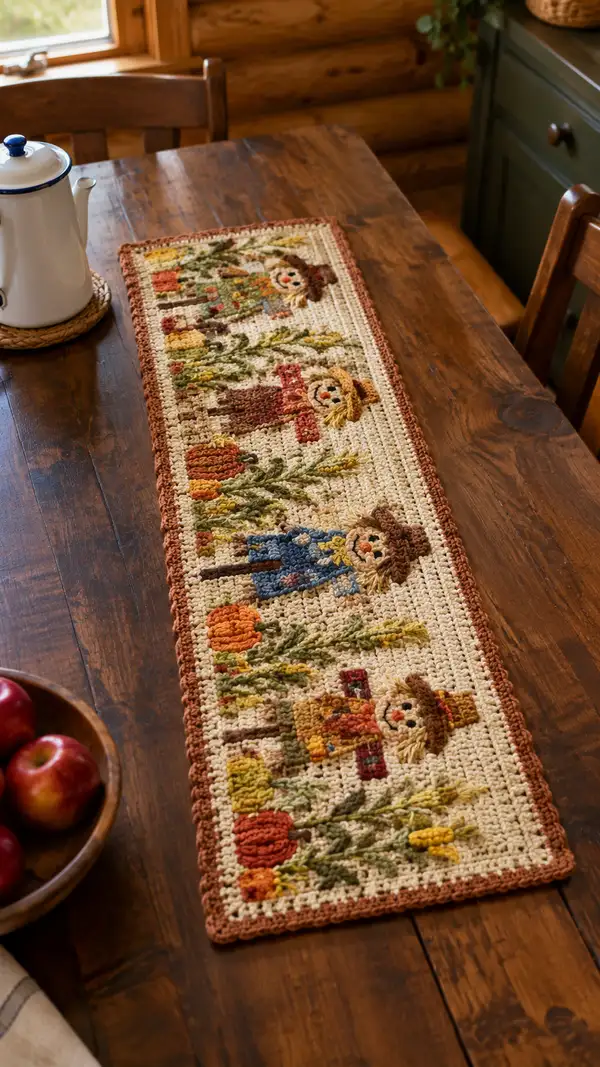
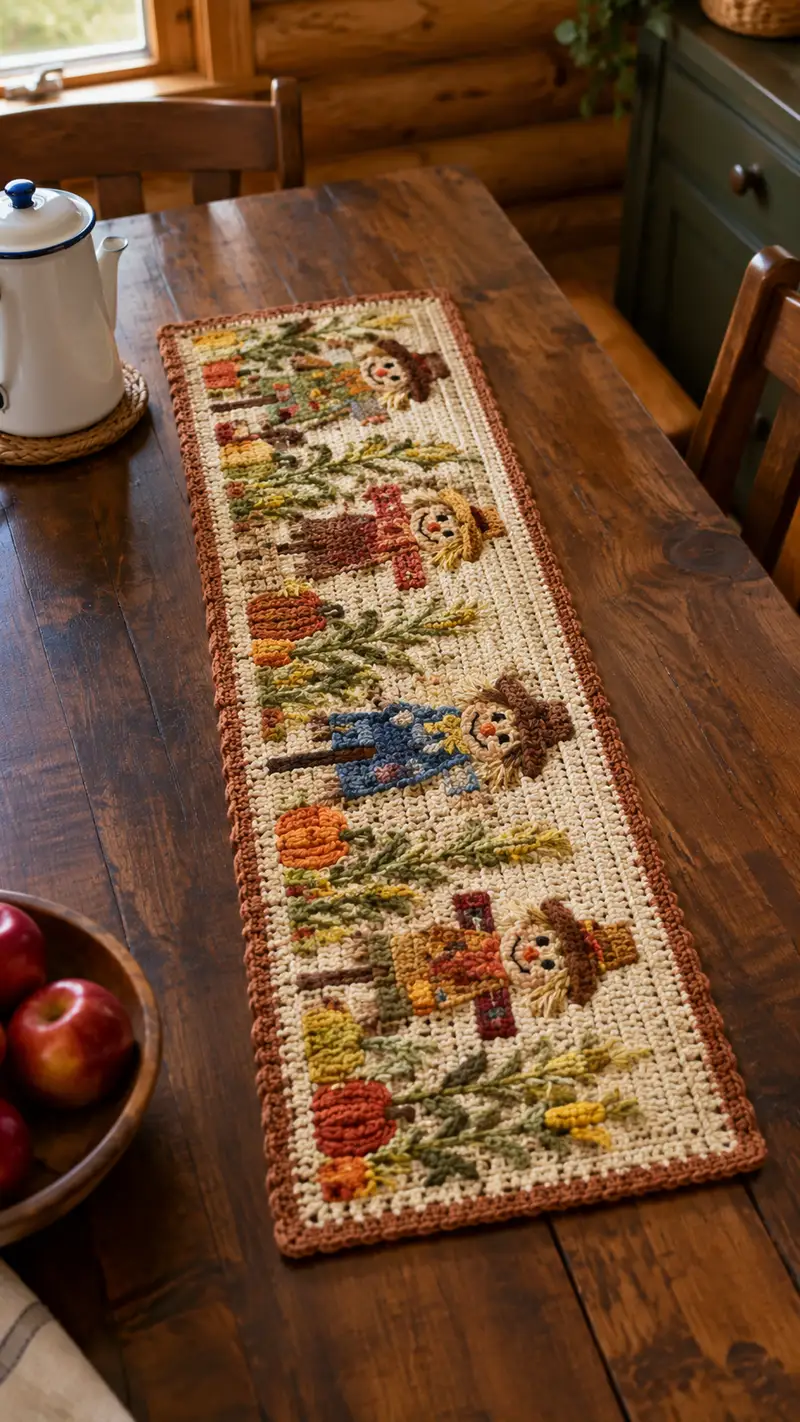
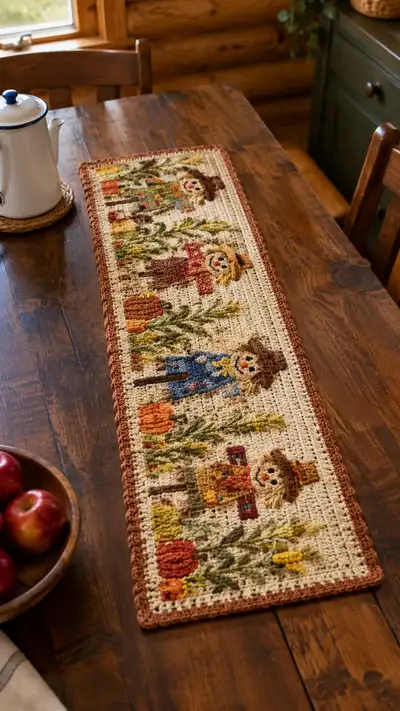
A warm, rustic table runner featuring three charming scarecrow panels, pumpkins, corn stalks and a textured border. Worked in single crochet tapestry-style colorwork on a neutral cream background, with autumn tones of rust, mustard, olive and brown for a cozy farmhouse finish. Perfect for fall centerpieces, long dining tables, or seasonal decor. Detailed row-by-row instructions and finishing tips included to recreate this heirloom runner.
Progress Tracker
0% Complete
— Notes & Gauge :
Info :
This runner is worked flat in rows using tapestry-style single crochet color changes. Gauge is not critical for motif clarity but try for approximately 18 sc x 24 rows = 4" (10cm) in single crochet with worsted weight and a 4.0mm hook. Final runner pictured measures approximately 12" wide x 48" long depending on tension and edging. All rows have 120 stitches unless otherwise noted.
Info :
Colors referred to through pattern as: Cream (A), Rust (B), Dark Brown (C), Olive (D), Mustard (E), Orange (F), Blue (G), Light Brown (H), Black (I). Carry floats on wrong side, trapping yarn every 3-4 stitches if needed. Change color in last pull-through of previous stitch for neat edges.
— Foundation & Top Border :
Round 1 :
Ch 121, sc in 2nd ch from hook and across — 120 sc (120)
Info :
Turning chain counts as first stitch each row. Place a stitch marker in the first st of each row to track the row start. Work rows flat, turning at end of each row.
Round 2 :
1 sc in each st across (120)
Round 3 :
1 sc in each st across (120)
Round 4 :
1 sc in each st across (120)
Info :
These first four rows create a tidy top border before starting the motif panel. Keep tension even; after Row 4 your foundation edge should be square and even.
— Main Panel: Overview :
Info :
The Main Panel contains three scarecrow motifs separated by background spacing and small pumpkin/corn accents. Each row below totals 120 stitches across. For clarity I include color blocks with counts per row; add tapestry technique: carry unused colors along the WS and trap the float when turning or every 3-4 sts.
Round 5 :
18 sc A, 6 sc D, 78 sc A, 6 sc D, 12 sc A (120)
Round 6 :
18 sc A, 6 sc D, 78 sc A, 6 sc D, 12 sc A (120)
Round 7 :
16 sc A, 8 sc D, 76 sc A, 8 sc D, 12 sc A (120)
Info :
Rows 5-10 start forming the tall corn stalks framework that flank each scarecrow. Use Olive (D) for stalk stems and Mustard (E) for small corn kernels in later rows.
Round 8 :
16 sc A, 8 sc D, 76 sc A, 8 sc D, 12 sc A (120)
Round 9 :
14 sc A, 10 sc D, 74 sc A, 10 sc D, 12 sc A (120)
Round 10 :
14 sc A, 10 sc D, 74 sc A, 10 sc D, 12 sc A (120)
Info :
Rows 5-10 create the background and initial stalk heights. Keep floats neat; when a motif color runs more than 6 stitches, consider changing directly and carrying the background instead.
Round 11 :
12 sc A, 12 sc D, 70 sc A, 12 sc D, 14 sc A (120)
Round 12 :
12 sc A, 12 sc D, 70 sc A, 12 sc D, 14 sc A (120)
Round 13 :
10 sc A, 6 sc D, 6 sc E, 68 sc A, 6 sc E, 6 sc D, 10 sc A (120)
Info :
Introduce Mustard (E) here for corn kernel clusters. Small blocks of E are carried where they appear. Embroidery later adds kernel definition if desired.
Round 14 :
10 sc A, 6 sc D, 6 sc E, 68 sc A, 6 sc E, 6 sc D, 10 sc A (120)
Round 15 :
10 sc A, 10 sc D, 60 sc A, 10 sc D, 30 sc A (120)
Round 16 :
8 sc A, 12 sc D, 58 sc A, 12 sc D, 30 sc A (120)
Info :
These rows create the tall stalks that occasionally intersect with motif heads. If a motif color crosses too many stitches, carry it along the WS and trap it to avoid long floats.
Round 17 :
8 sc A, 12 sc D, 58 sc A, 12 sc D, 30 sc A (120)
Round 18 :
6 sc A, 14 sc D, 56 sc A, 14 sc D, 30 sc A (120)
Round 19 :
6 sc A, 14 sc D, 56 sc A, 14 sc D, 30 sc A (120)
Info :
Begin introducing small orange pumpkin tops (F) at the outer edges in upcoming rows — these are short clustered blocks and work best when changed in the last pull-through of the preceding stitch.
Round 20 :
6 sc A, 10 sc D, 4 sc F, 56 sc A, 4 sc F, 10 sc D, 30 sc A (120)
Round 21 :
6 sc A, 10 sc D, 6 sc F, 54 sc A, 6 sc F, 10 sc D, 28 sc A (120)
Round 22 :
6 sc A, 10 sc D, 8 sc F, 52 sc A, 8 sc F, 10 sc D, 26 sc A (120)
Info :
These rows build short pumpkins on the left and right edges. For pumpkin ridges, later add surface looped stitches in Orange (F) across vertical sections to simulate ribbing.
Round 23 :
6 sc A, 10 sc D, 10 sc F, 50 sc A, 10 sc F, 10 sc D, 24 sc A (120)
Round 24 :
6 sc A, 8 sc D, 12 sc F, 48 sc A, 12 sc F, 8 sc D, 26 sc A (120)
Round 25 :
6 sc A, 8 sc D, 14 sc F, 46 sc A, 14 sc F, 8 sc D, 24 sc A (120)
Info :
At this stage motifs for the first scarecrow’s lower body and a pumpkin are starting to appear in the middle area. Keep an eye on color placement so the scarecrow shapes remain balanced left-to-right.
Round 26 :
6 sc A, 8 sc D, 16 sc F, 44 sc A, 16 sc F, 8 sc D, 22 sc A (120)
Round 27 :
6 sc A, 8 sc D, 18 sc F, 42 sc A, 18 sc F, 8 sc D, 20 sc A (120)
Round 28 :
6 sc A, 6 sc D, 18 sc F, 42 sc A, 18 sc F, 6 sc D, 24 sc A (120)
Info :
Start the first scarecrow motif’s feet and legs in Dark Brown (C) and body fill in Rust (B). The scarecrow occupies roughly stitch columns 36-84 across the panel depending on color changes; ensure the head/hat later centers in this zone.
Round 29 :
6 sc A, 6 sc D, 8 sc C, 12 sc B, 36 sc A, 12 sc B, 8 sc C, 6 sc D, 18 sc A (120)
Round 30 :
6 sc A, 6 sc D, 8 sc C, 14 sc B, 34 sc A, 14 sc B, 8 sc C, 6 sc D, 18 sc A (120)
Round 31 :
6 sc A, 6 sc D, 6 sc C, 18 sc B, 32 sc A, 18 sc B, 6 sc C, 6 sc D, 22 sc A (120)
Info :
These rows form the lower torso/legs area for the first scarecrow. Use Dark Brown (C) for boot shapes (small blocks 6-10 sts) and Rust (B) for shirt/body. Later we will add small overalls detail with Blue (G) on the central scarecrow row switch.
Round 32 :
6 sc A, 6 sc D, 6 sc C, 20 sc B, 30 sc A, 20 sc B, 6 sc C, 6 sc D, 20 sc A (120)
Round 33 :
6 sc A, 6 sc D, 5 sc C, 22 sc B, 28 sc A, 22 sc B, 5 sc C, 6 sc D, 20 sc A (120)
Round 34 :
6 sc A, 6 sc D, 5 sc C, 24 sc B, 26 sc A, 24 sc B, 5 sc C, 6 sc D, 18 sc A (120)
Info :
Add Light Brown (H) for straw hair starting in upcoming rows — small thin blocks (2-6 sts) that can be made more textured later with looped or surface stitches. Place them where the scarecrow head will be centered.
Round 35 :
6 sc A, 6 sc D, 6 sc H, 24 sc B, 24 sc A, 24 sc B, 6 sc H, 6 sc D, 18 sc A (120)
Round 36 :
6 sc A, 4 sc D, 8 sc H, 24 sc B, 24 sc A, 24 sc B, 8 sc H, 4 sc D, 18 sc A (120)
Round 37 :
6 sc A, 4 sc D, 6 sc H, 26 sc B, 22 sc A, 26 sc B, 6 sc H, 4 sc D, 16 sc A (120)
Info :
Rows 35-40 center the scarecrow head region. For the face (use Cream A for face base and Black I for eyes), plan to add small black stitches or embroidery for eyes after completing the runner to avoid perforations during tapestry crochet.
Round 38 :
6 sc A, 4 sc D, 4 sc H, 28 sc B, 20 sc A, 28 sc B, 4 sc H, 4 sc D, 18 sc A (120)
Round 39 :
6 sc A, 4 sc D, 4 sc H, 28 sc B, 20 sc A, 28 sc B, 4 sc H, 4 sc D, 18 sc A (120)
Round 40 :
6 sc A, 2 sc D, 4 sc H, 28 sc B, 20 sc A, 28 sc B, 4 sc H, 2 sc D, 20 sc A (120)
Info :
Hat shapes will begin above the head in the next rows using Dark Brown (C) and Rust (B) brims. Keep the hat centered above the face region by aligning the larger color blocks centrally in the stitch counts shown.
Round 41 :
6 sc A, 2 sc D, 8 sc C, 26 sc B, 20 sc A, 26 sc B, 8 sc C, 2 sc D, 22 sc A (120)
Round 42 :
6 sc A, 2 sc D, 10 sc C, 24 sc B, 20 sc A, 24 sc B, 10 sc C, 2 sc D, 22 sc A (120)
Round 43 :
6 sc A, 2 sc D, 12 sc C, 22 sc B, 20 sc A, 22 sc B, 12 sc C, 2 sc D, 22 sc A (120)
Info :
Hat crown and brim are forming. For additional dimension, later add a row of looped stitches in Light Brown (H) as straw poking from under the hat rim using a small hook and pulling loops approximately 6-8mm tall, then secure them on the WS.
Round 44 :
6 sc A, 2 sc D, 14 sc C, 20 sc B, 20 sc A, 20 sc B, 14 sc C, 2 sc D, 22 sc A (120)
Round 45 :
6 sc A, 2 sc D, 16 sc C, 18 sc B, 20 sc A, 18 sc B, 16 sc C, 2 sc D, 22 sc A (120)
Round 46 :
6 sc A, 2 sc D, 18 sc C, 16 sc B, 20 sc A, 16 sc B, 18 sc C, 2 sc D, 22 sc A (120)
Info :
At these rows the hat completes its crown — if you want a floppy hat brim, work the border later in BLO with Rust (B) to create a scalloped outer edge that sits atop the runner.
Assembly Instructions
- Block the runner flat: soak lightly, gently squeeze out excess water, lay on blocking mat and pin to square measurements. Let dry completely to even stitches and flatten motifs.
- Add surface embroidery for eyes and mouths: Using tapestry needle and Black (I) for eyes, embroider small satin or French knot eyes centered approximately at Rows 36-38, counting across to center of each scarecrow panel.
- Create straw hair: Using Light Brown (H), pull looped stitches along the head row area (Rows 35-39) with a small hook to create fringe, then secure ends on the WS with a few short stitches.
- Add pumpkin ribs: On pumpkin blocks (Rows 22-28 and similar), use Orange (F) to create vertical surface slip-stitch lines or chain-loop ridges to mimic pumpkin segments.
- Sew down loose yarn tails: Weave all ends to the wrong side using a tapestry needle for 6-8 stitches and trim close; avoid leaving bulky knots.
- Attach border: Work the final shell border in Rust (B) around the entire perimeter after blocking, following the shell row sequence to create a scalloped trim.
- Pin motifs if necessary: Before any surface sewing, pin accessories in place to double check placement and symmetry across three scarecrow panels.
- Final press and inspection: After all surface embroidery and edging, lightly steam-block (do not press directly) to relax any tight stitches and give a professional finish.
Important Notes
- 💡Use stitch markers consistently at the beginning of each row to avoid counting errors and maintain proper shaping across long tapestry rows.
- 💡Stuffing is not used for this flat runner. Instead, manage floats and tension to keep fabric flat and even; avoid pulling carried yarn too tight.
- 💡When changing colors, always change in the last pull-through of the previous stitch for a neat vertical color edge.
- 💡Maintain consistent tension throughout; too tight makes the runner stiff and hard to block, too loose shows gaps where stuffing (or table use) may expose floats.
- 💡Weave in ends regularly during the project if you dislike working with many tails; leave short tails and reweave later if preferred.
- 💡For a cleaner edge, work a final round in BLO before adding the scalloped shell border to create a defined frame.
- 💡Pin the runner during blocking to correct any slight warping from colorwork before the border is added.
- 💡If making this runner for frequent table use, consider using a washable wool-blend or acrylic for durability and easy care.
This autumn table runner is a delightful seasonal accent that combines tapestry colorwork with subtle surface texture for a handcrafted charm. Each scarecrow, pumpkin and stalk is designed as a flat motif so the runner lays smoothly while still offering dimensional detail. Block and finish carefully and the piece will be a welcoming centerpiece for many harvest seasons. 🧶🍁 Enjoy stitching and sharing the cozy warmth of handmade fall decor! 🎃