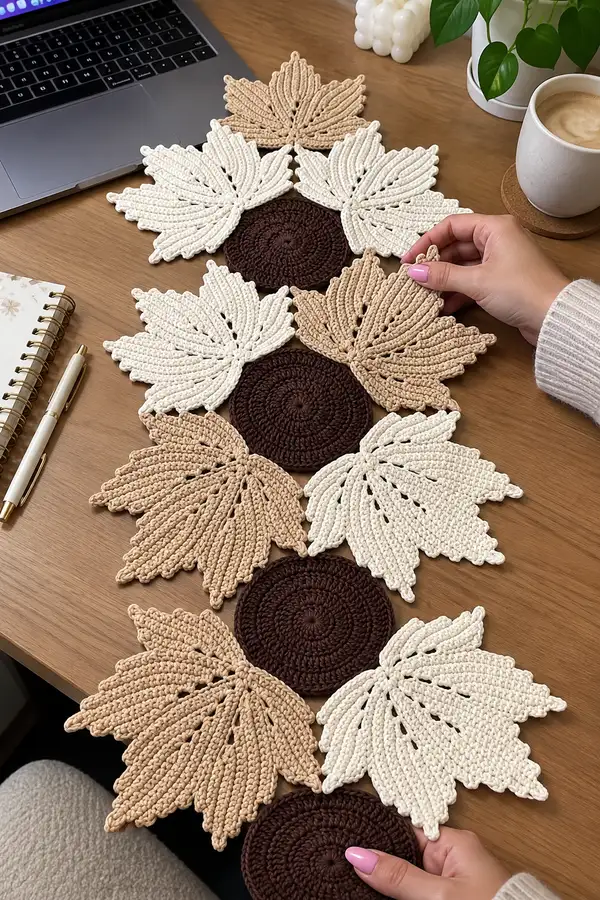
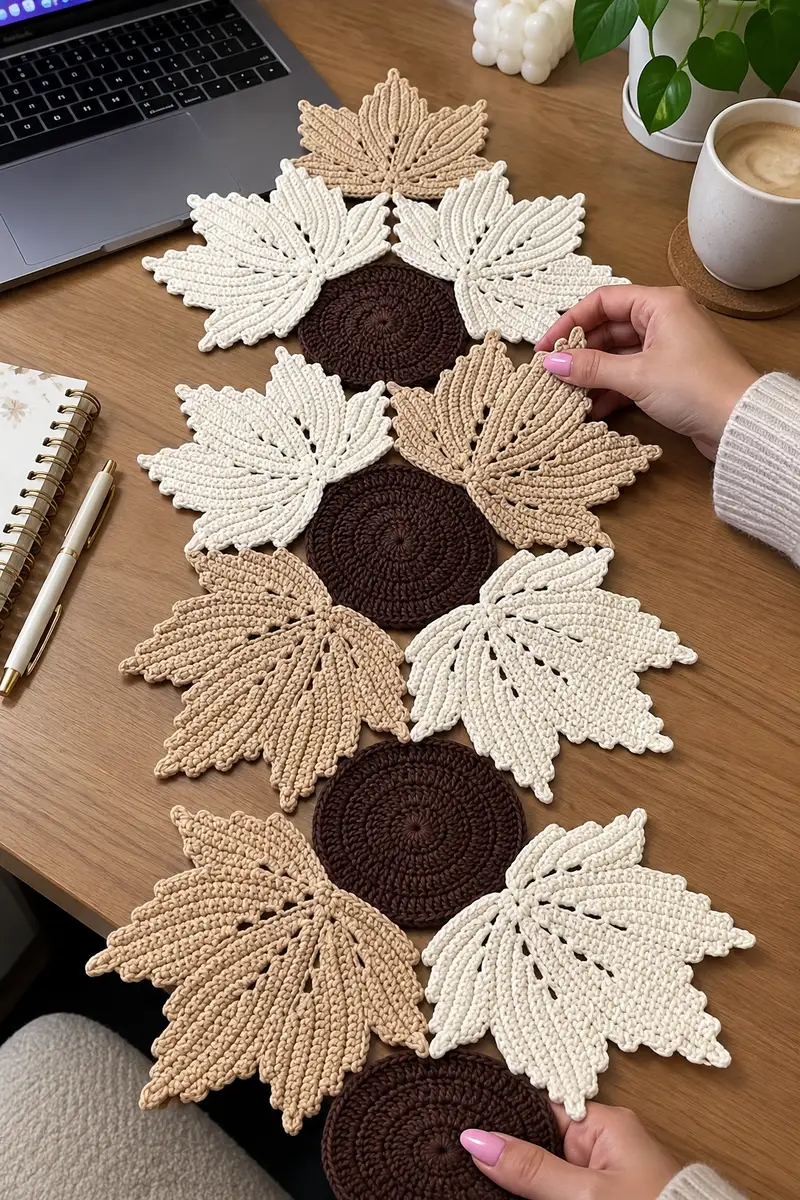
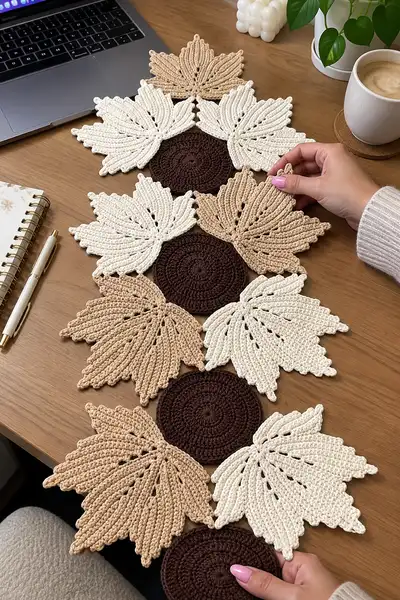
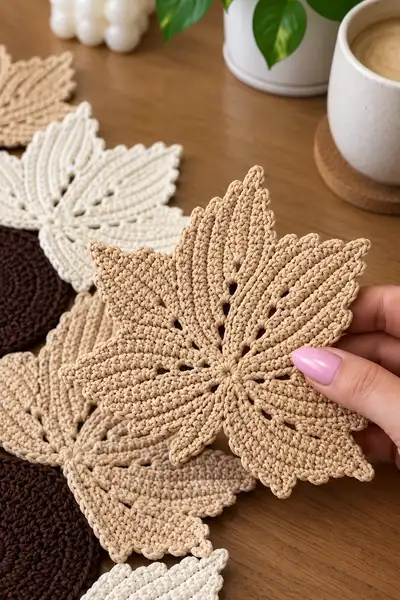
Create a warm, sculptural table runner made of layered maple-style leaves and deep round centers. This neutral-toned runner alternates cream and beige textured leaves around rich chocolate circular hubs, perfect for autumn and cozy home decor. The pattern uses raised post stitch ribs and careful shaping to produce crisp leaf veins and scalloped tips. Ideal for a decorative centerpiece or seasonal table accent.
Progress Tracker
0% Complete
— Notes and Gauge :
Info :
Gauge is not critical for motif joinability but will affect finished size. With worsted cotton and 4.0mm hook: one completed leaf measures approximately 10.5-11 cm (4.25") from center to tip when blocked; center circles measure ~9-10 cm (3.5-4") across. Work tightly enough to avoid gaps but not so tight that post stitches are impossible to work.
Info :
Pattern is modular. Make sets of a dark center and six leaves (three cream, three beige) and join centers and leaves in alternating order to create the runner. The sample runner shown is 4 centers long (connected) with leaves arranged around each center giving an overall runner length ~90-100 cm (35-39"). Adjust motif counts for desired length.
— Center Circle (Make 4 for runner) :
Round 1 :
6 sc in magic ring (6)
Round 3 :
(1 sc, inc) x 6 (18)
Round 4 :
(2 sc, inc) x 6 (24)
Round 5 :
(3 sc, inc) x 6 (30)
Round 6 :
(4 sc, inc) x 6 (36)
Round 7 :
(5 sc, inc) x 6 (42)
Round 8 :
(6 sc, inc) x 6 (48)
Round 9-12 :
1 sc in each st around (48)
Info :
Maintain an even round count. If your center begins to cup, work one extra even round and then start gentle decreases; if it ruffles, skip one increase round earlier. Block centers flat before joining.
Round 13 :
(6 sc, dec) x 6 (42)
Round 14 :
(5 sc, dec) x 6 (36)
Round 15 :
1 sc in each st around (36)
Info :
Fasten off leaving a long tail (approx. 40-50 cm) for sewing centers to leaves. Weave tail into back of work to tidy edge. Block circle fully to open center and flatten spiral.
— Leaf Motif (Make 24 total; 12 cream, 12 beige as sample; pattern below makes one leaf) :
Leaf Round 1 :
6 sc in magic ring (6)
Leaf Round 3 :
(1 sc, inc) x 6 (18)
Leaf Round 4 :
(2 sc, inc) x 6 (24)
Leaf Round 5 :
(3 sc, inc) x 6 (30)
Leaf Info :
We will use the small round as a central base from which 6 primary leaf lobes are built. The motif pictured has six main lobes with narrow splits between them. If you prefer an 8-lobe look, work 8 base segments in the following rounds using adjustments in chain counts.
Leaf Round 6 :
Join with sl st to center and ch1. Place a marker at first st. *Ch8, skip 2 center rounds and sl st in next st to anchor chain base* repeat around to make 6 chain foundations; join with sl st to base (6 ch-sp foundations).
Leaf Info :
Each ch8 will form the foundation for a lobe. Adjust chain length if you want longer or shorter leaves (ch10 = longer). Keep chains even; using a stitch marker to mark base anchors helps when working back into chains.
Leaf Round 7 :
*Work into first ch8 foundation: sc in 2nd ch from hook, hdc in next, 2 dc, 3 tr (or 3 dc if you prefer shorter ribs), 2 dc, hdc, sc in last ch; sl st into next anchor on center* rep around for all 6 lobes. After last lobe join with sl st to first sc of first lobe; count per lobe = 10 sts approx; total around ~60 sts across lobe fronts (60)
Leaf Info :
These tall stitches create the peak of each lobe. If your cotton is stiff, use tr sparingly; substitute 3 dc where indicated for easier blocking.
Leaf Round 8 :
Ch1, turn to work back along lobe: *sc in each st across lobe back (10 sc), sl st into center anchor* rep around (60)
Leaf Round 9 :
Ch2 (counts as hdc), 1 hdc in each st across first lobe back (10 hdc), sl st to center; rep for all lobes (60)
Leaf Round 10 :
Ch3, (counts as dc), 1 dc in each st across lobe (10 dc), sl st to center anchor; rep around (60)
Leaf Info :
Rounds 7-10 build the thickness of each lobe. You will notice a raised petal profile. Keep tension consistent so all lobes align evenly.
Leaf Round 11 :
Now we shape the outer edge: Working evenly around all lobe tips: (sc, sc, hdc, dc, dc, hdc, sc, sc) into each lobe tip area to create a scalloped outer edge. Repeat across each lobe then sl st to join (approx 8 stitches per lobe, total ~48)
Leaf Round 12 :
Ch4, sl st into first sc of scallop to create a small picot edge; *sl st into next scallop center, ch4, sl st;* rep across all scallops to create a delicate pointed rim. Fasten off and weave in ends.
Leaf Info :
At this point you have formed an introductory leaf motif. To get the deep ribbed veins seen in the photos we will add a series of front-post and back-post rows worked from center outwards along the lobes. Join yarn at the base of any lobe to begin post work.
Leaf Round 13 :
Join yarn at the base of first lobe. Ch2 (counts as hdc), working along the center seam: *fpdc around the first dc stitch from the previous row along the center line (this makes a raised rib), ch1, bpdc around next dc to create a trough; Rep fpdc/bpdc alternating across center line and along each lobe base* Work so each lobe has one raised center vein and two small trough stitches between ribs. Count is variable by lobe; maintain consistent rhythm across all lobes. After completing all lobes join with sl st.
Leaf Round 14 :
Ch1, 1 sc in each st across entire row including over posts (work over the top to compress posts slightly) to even out surface. This anchors the ribs (approx 48-60 sc depending on previous counts).
Leaf Info :
Front post double crochet (fpdc) will push forward and look like a raised rib. If you prefer more pronounced ribs, work fpdc3 (front post treble) instead on alternate ribs. Keep an even number of ribs per lobe for symmetry (typically 5 ribs per lobe in the sample).
Leaf Round 15 :
Begin rib-building rows across each lobe: Place marker at the first rib of lobe one. *Ch2, work fpdc in the rib stitch from the center row, ch1, work fpdc in next rib stitch, ch1, continue fpdc across the rib line until you reach tip; sl st to join at base.* Repeat for all 6 lobes so each lobe has an identical set of fpdc ribs extending to the tip (this round consists primarily of fpdc clusters; total stitch count equals number of ribs created, approx 30-40 posts).
Leaf Round 16 :
Ch1. Work 1 sc in each space between ribs and 1 sc over top of each fpdc post to compress ribs slightly and secure them. Work all the way around the motif and join. This evens row count; expected total ~80 sc depending on rib count.
Leaf Info :
These alternating post rounds and single crochet anchor rounds are what give the leaf its sculptural, ribbed look. Keep the sc rounds tight so ribs remain raised and defined. If you see some ribs taller than others, rework the preceding fpdc row with fpdc3 or extra chain depth to balance visual height.
Leaf Round 17 :
Edge shaping: Work (sc, sc, hdc, dc) into the valley between ribs to define small scallops and points along each rib edge; when you reach the tip of the lobe work (dc, hdc, sc) to round the tip then continue around (expected stitch count ~84).
Leaf Round 18 :
Work 1 round BLO sc around entire motif to create a clean underside finish (84)
Leaf Info :
Blocking now helps set ribs and scallops. Lightly steam block or pin flat to the dimensions you prefer. Repeat for each color leaf as you make them so all motifs block consistently before assembly.
Leaf Round 19 :
Optional surface detail: With same color or slightly darker contrast yarn, use sl st or embroidery floss to work a small central vein line down each lobe by stitching through the front loops of the fpdc ribs. This is done post-blocking and creates delicate contrast.
Leaf Round 20 :
Fasten off leaving long tail for sewing (approx. 40 cm). Weave in ends to backside, leaving the front ribs clean. Make the total number of leaves desired (sample runner: 24 leaves: alternating 12 cream & 12 beige).
Info :
If you prefer a slightly smaller leaf, shorten the chain foundation at Round 6 (ch6 instead of ch8) and reduce tall stitches in Round 7 accordingly. The rib technique still applies but with fewer stitches and a smaller finished size.
— Leaf Repeats (List of individual leaf builds as made in sample runner) :
Leaf 1 :
Work Leaf Rounds 1-20 in color A (cream). Block and set aside.
Leaf 2 :
Work Leaf Rounds 1-20 in color B (beige). Block and set aside.
Leaf 3 :
Work Leaf Rounds 1-20 in color A (cream). Block and set aside.
Leaf 4 :
Work Leaf Rounds 1-20 in color B (beige). Block and set aside.
Leaf 5 :
Work Leaf Rounds 1-20 in color A (cream). Block and set aside.
Leaf 6 :
Work Leaf Rounds 1-20 in color B (beige). Block and set aside.
Leaf 7 :
Work Leaf Rounds 1-20 in color A (cream). Block and set aside.
Leaf 8 :
Work Leaf Rounds 1-20 in color B (beige). Block and set aside.
Leaf 9 :
Repeat Leaf 1 (cream)
Leaf 10 :
Repeat Leaf 2 (beige)
Leaf 11 :
Repeat Leaf 3 (cream)
Leaf 12 :
Repeat Leaf 4 (beige)
Leaf 13 :
Repeat Leaf 5 (cream)
Leaf 14 :
Repeat Leaf 6 (beige)
Leaf 15 :
Repeat Leaf 7 (cream)
Leaf 16 :
Repeat Leaf 8 (beige)
Leaf 17 :
Repeat for additional length as desired; pattern sample used 24 leaves total
Info :
We have listed repeated leaves individually above to help you track counts as you work. Keep a small box or tray to store leaves by color and number to make assembly straightforward.
— Joining Centers and Leaves (Assembly Preparation Rounds) :
Info :
Place a center circle flat and arrange six leaves evenly around its circumference (three on top half, three on bottom half) or arrange as in sample where leaves overlap slightly to create layered effect. Pin each leaf to the center using sewing pins before stitching. Ensure alternate colors are placed for visual rhythm: cream, beige, cream, beige, etc.
Join Step 1 :
With the long tail from the center circle, use whipstitch or ladder stitch to sew the base of each leaf to the center circle. Work through center round stitches and the back loops of the first anchoring round of each leaf for a flat join. Use approx 8-10 stitches per leaf base for security.
Info :
Sew carefully so the leaf bases are evenly spaced; the pattern uses 6 leaves per center with ~6 center anchor points. Use pins to keep position as you stitch; stitch through center spiral and leaf base evenly to avoid twisting.
Join Step 2 :
When joining adjacent centers to form the runner, place centers end-to-end so outer leaves overlap slightly. Use a mattress stitch or whipstitch along the edges of the centers to connect them. For stability, make 6-8 evenly spaced stitches between centers, catching both center rounds.
Info :
For the sample runner, centers are connected edge to edge forming a single column. Leaves naturally overlap the next center slightly. Pin entire runner layout on blocking mat and check symmetry before final sewing.
Join Step 3 :
Secure outer leaf overlaps by sewing the overlapping tips lightly to the adjacent center or leaf underside with small invisible stitches. This prevents shifting and helps the runner lie flat under weight (dishes, candles, etc.).
Info :
Make sure not to pull stitches too tight when sewing overlaps—leave a slight ease so runner lies flat with gentle curves, not puckered junctions.
— Decorative Edge and Finishing Rounds :
Edge Round 1 :
Once runner is fully assembled, join yarn in any outer lobe tip and work 1 round sc around the entire outside edge, working sc evenly into tips and around scallops to create a neat border (work lightly to avoid tightening). Work approx 1 sc per tip and 1 sc per valley for even look.
Edge Info :
This single crochet round unifies the runner and hides minor joining stitches. Work tight but not tight enough to distort lobes. If you prefer a decorative edge, substitute picot points every third stitch: (sc, ch3, sl st into sc) to add tiny points.
Edge Round 2 :
Optional: Work 1 round of reverse sc or crab stitch (reverse sc) around the outermost edge for a twisted rope look. This also stiffens the border slightly and gives a tailored finish. Fasten off and weave in all tails.
Info :
If you used different yarn weights or cotton rope, match your edging technique to the body fabric; chunky yarn benefits from the crab stitch, fine yarn looks best with a neat sc border.
— Blocking and Final Touches :
Info :
Carefully pin the entire assembled runner to blocking mat, gently stretching and smoothing each leaf to desired shape. Use steam or spray block for cotton yarn. Allow to dry completely. If you wish for a stiffer runner use a light diluted fabric stiffener applied evenly, then reshape and dry flat.
Info :
Sew in any remaining tails on the underside and trim. If your runner will be used under hot items, consider adding a thin piece of heat-resistant material between runner and table or use the runner for decorative use only.
— Alternate Arrangements and Variations :
Info :
You can make this pattern into round placemats by making a single center and surrounding it with 6 leaves and adding an extra wide border. For a longer table runner make more centers and repeat leaf pattern in alternating colors. Swap color placement to create gradient ombre or seasonal palettes.
Info :
For a more delicate lightweight runner use DK cotton with a 3.5mm hook and scale down chain foundations by two chains; adjust rib height from tr to dc accordingly. For a chunky, sculptural look use cotton rope or bulky cotton and a 5.0mm hook, increasing chain length at Round 6 to ch10-12.
This neutral-toned table runner makes a beautiful, handmade centerpiece that brings cozy texture to your home. Each leaf is sculpted with raised ribs and scalloped edges for a realistic autumnal look that feels lovingly handmade. The modular design lets you adapt length and colors to your space and style. Enjoy the meditative process of creating each motif and the satisfaction of joining them into a harmonious runner you will be proud to display. 🧶🍂