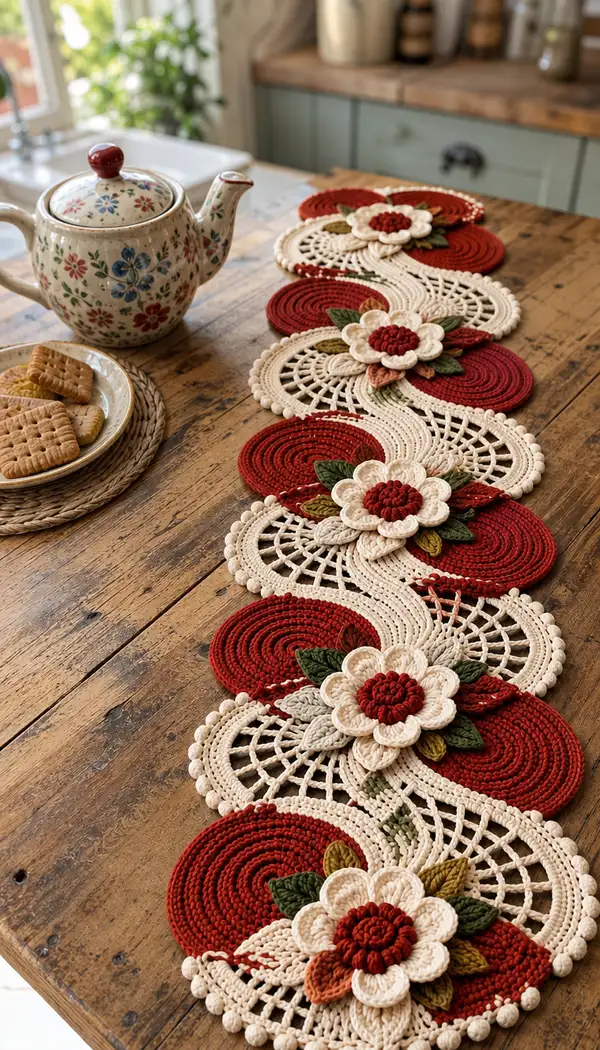
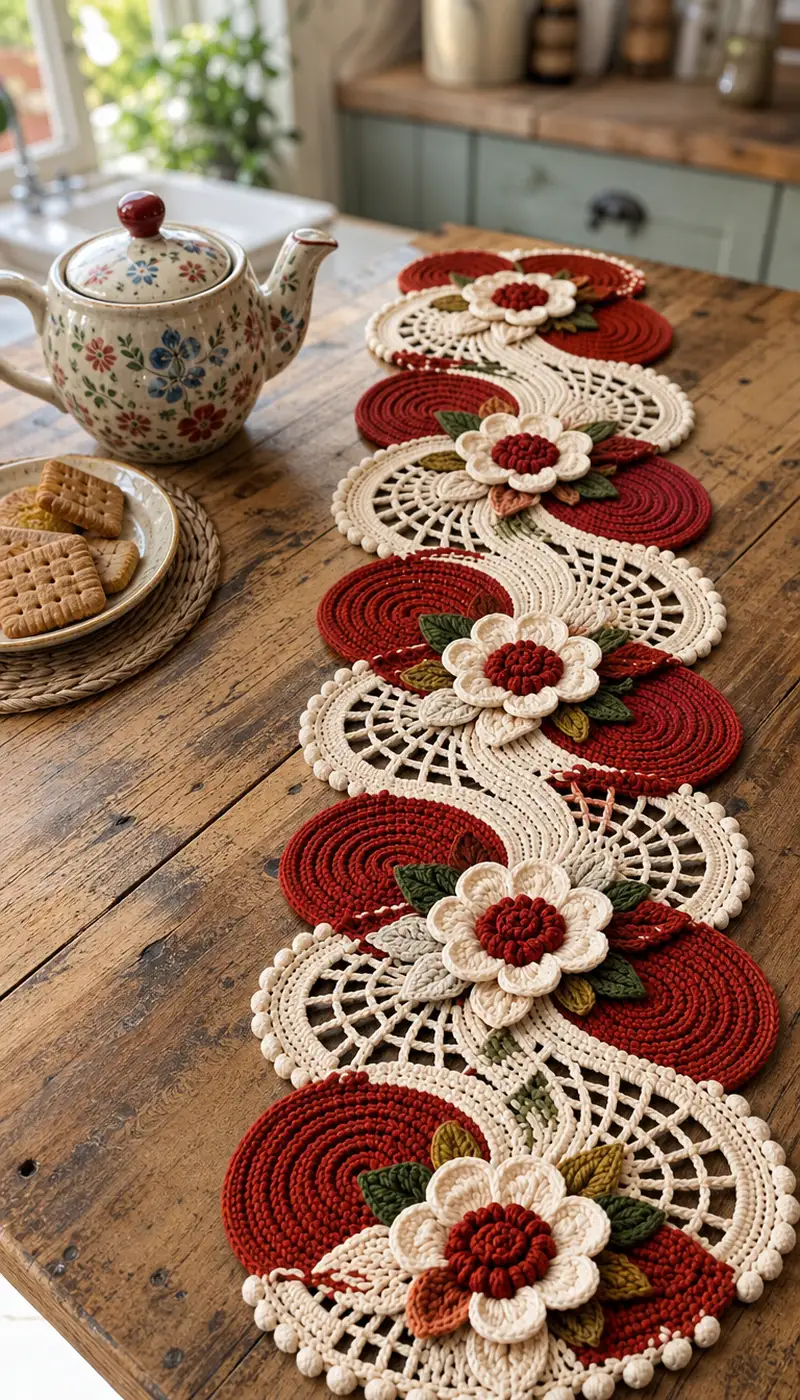
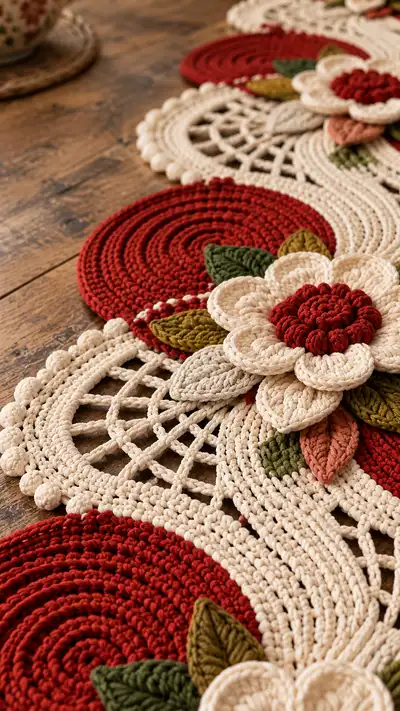
Create a stunning autumn-inspired table runner made from woven circular motifs, lacy semicircles and layered floral appliques. This pattern builds a long, sinuous centerpiece of deep red discs, warm cream lace panels and sculpted cream-and-rust flowers with olive leaves. Clear, step-by-step instructions walk you through every round, stitch and assembly technique so you can recreate this heirloom-ready runner for your dining table or mantel.
Progress Tracker
0% Complete
— Overview :
Info :
This pattern is modular: you will make repeating red circular discs (make 6), cream lace semicircles (make 6), a long central curved band (single long piece made in joined rounds), layered flowers (make 6) and leaves in several sizes. The pieces are assembled alternately to create a flowing runner approximately 120-140 cm long depending on spacing and number of repeats. Work tightly with cotton cord for crisp texture. Gauge will vary by yarn; see tips in Info blocks for adjusting hook size.
— Red Circular Disc (Make 6) :
Round 1 :
6 sc in magic ring (6)
Round 3 :
(1 sc, 1 inc) x 6 (18)
Round 4 :
(2 sc, 1 inc) x 6 (24)
Round 5 :
(3 sc, 1 inc) x 6 (30)
Round 6 :
(4 sc, 1 inc) x 6 (36)
Round 7 :
(5 sc, 1 inc) x 6 (42)
Round 8 :
(6 sc, 1 inc) x 6 (48)
Round 9 :
(7 sc, 1 inc) x 6 (54)
Info :
Keep stitches evenly spaced and work in continuous spiral if you prefer no seam. For joined rounds, sl st to join and ch1 at start of each round. Use a stitch marker to mark the first stitch.
Round 10 :
(8 sc, 1 inc) x 6 (60)
Round 11 :
(9 sc, 1 inc) x 6 (66)
Round 12 :
(10 sc, 1 inc) x 6 (72)
Round 13 :
(11 sc, 1 inc) x 6 (78)
Round 14 :
(12 sc, 1 inc) x 6 (84)
Round 15 :
(13 sc, 1 inc) x 6 (90)
Round 16 :
(14 sc, 1 inc) x 6 (96)
Round 17 :
(15 sc, 1 inc) x 6 (102)
Round 18 :
(16 sc, 1 inc) x 6 (108)
Round 19-22 :
1 sc in each st around to build thickness (108)
Info :
These rounds create a firm, flat disc. If your disc is cupping, switch to a slightly larger hook for the last two rounds. If it flares, switch to a smaller hook. Make six identical discs for the runner.
Round 23 :
1 sc in each st BLO (108)
Round 24 :
1 sc in each st (108)
Round 25 :
sl st across and fasten off, leaving 15-20cm tail for sewing (108)
Info :
Weave tail under several rounds on the underside to hide tail when sewing motifs together. Block discs lightly by pinning flat and spraying with steam if necessary to smooth spiral joins.
— Cream Lace Semicircle (Make 6) :
Round 1 :
6 sc in magic ring (6)
Round 3 :
(1 sc, 1 inc) x 6 (18)
Round 4 :
(2 sc, 1 inc) x 6 (24)
Round 5 :
(3 sc, 1 inc) x 6 (30)
Round 6 :
(4 sc, 1 inc) x 6 (36)
Round 7 :
(5 sc, 1 inc) x 6 (42)
Round 8 :
(6 sc, 1 inc) x 6 (48)
Round 9 :
(7 sc, 1 inc) x 6 (54)
Round 10 :
(8 sc, 1 inc) x 6 (60)
Round 11 :
(9 sc, 1 inc) x 6 (66)
Round 12 :
(10 sc, 1 inc) x 6 (72)
Info :
Round 12 yields a stable full circle base of 72 sts. The semicircle will be formed by working openwork over half of this circle and adding a bobble scallop to the outer edge to echo the motif in the photo.
Round 13 :
Change to lace stitch: *sl st in next st, ch6, skip 3 sts, sl st in next st* across to create chain arches (72 base anchor points used)
Round 14 :
Working into chain arches: *sl st in arch, ch3, 3 dc cluster into arch, ch3, sl st into same arch* repeat across to form open netting. Anchor into base points with sl st between arches so top of arch aligns evenly (72)
Round 15 :
1 sc in each base st around to stabilize openwork (72)
Round 16 :
*ch5, skip 1 base st, sc in next base st* around to create raised lattice intersections; finish with sl st (72)
Info :
When forming the netting, keep a small tension so openings lie flat. Pin this semicircle into shape before working the outer bobble edge so spacing is even.
Round 17 :
Bobble row: *(3 sc, bobble) x 18* (72) Work a bobble every 4th placement; bobble = (yarn over, insert, pull up, repeat 4 times, yarn over and pull through all loops) finishing clean bobbles
Round 18 :
sl st around and fasten off leaving long tail for sewing to central band (72)
Info :
Make six semicircles. Blocking is important for the lace; pin each semicircle flat to measurement before sewing. The semicircle's straight edge will be placed against the runner's central band and the scalloped bobble edge will face outward.
— Central Curved Band (Single long piece) :
Info :
This long central band forms the sinuous S-curve between alternating discs and semicircles. Work a foundation chain of 140 (or longer if you prefer a longer runner). Join with sl st to form a loop being careful not to twist.
Round 1 :
ch140, join with sl st to first ch to form a loop, ch1, 1 sc in each ch around (140)
Round 2 :
1 sc in each st (140)
Round 3 :
Work rib detail: 1 sc in next 6, BLO for next 4 sts to create shallow ridges, repeat around (140)
Round 4 :
1 sc in each st (140)
Round 5 :
Curve shaping begins: *(10 sc, inc) x 10,(10 sc, dec) x 10* across loop to create gentle bulges and constrictions that cause an S-curve; total 140+0 (mathematically net zero but redistributed for shaping)
Info :
Shaping for curve uses visual increases and decreases distributed along the band rather than changing overall stitch count. This creates wider and narrower zones that let the finished strip lay in an S shape when joined with other motifs. Work this band with the same yarn as your semicircles so joins are neat.
Round 6-10 :
1 sc in each st around (140)
Round 11 :
Add open ribbing for decorative detail: *ch3, skip 2, sc in next 3* repeat around, anchoring evenly into base so the band looks lacy in places (still using 140 anchors)
Round 12 :
Work a row of small bobbles to echo semicircle edging: *(6 sc, bobble) x 17, 2 sc* (140)
Round 13-20 :
1 sc in each st, work lightly stuffed raised ridges by working front post sc rows every 4th round to add texture (140)
Info :
Length: make the band as long as needed to join the required number of motifs. For the pictured runner, a band approximately 120-140cm was used. If your table requires a different length, add or subtract foundation chains in multiples of 4 to keep pattern repeats aligned.
Round 21 :
Edge finish: sl st around, make neat long tail for sewing to discs and semicircles, do not fasten off yet if you prefer to join motifs directly to this band
Info :
If you prefer, you may crochet two narrower bands and join them instead of one wide band; this provides more sculptural depth. For best results pin the band to the table and place motifs to decide exact positions before sewing.
— Flower Center Rosette (Make 6) :
Round 1 :
6 sc in magic ring (6)
Round 3 :
*(1 sc, 1 inc) x 6 (18)
Round 4 :
*Work 18 small puff stitches into next round: puff in each st around (18 puffs). To make puff: yarn over, insert, pull up loop repeat 3 times, yarn over and pull through all loops, ch1 to close puff* (18)
Info :
These puffs form the raised central button that you see in the photo. Work puffs tightly and keep them evenly spacd by using a stitch marker at the start.
Round 5 :
1 sc in each st around the puff round to lock them (18)
Round 6 :
sl st and fasten off leaving tail for sewing to petal base
Info :
Make six rosettes. These will be attached to the center of the larger petal layer for a deep, textured floral center.
— Flower Petals (Make petal layer x6, each flower has two petal layers) :
Petal Round 1 :
ch6, sc in 2nd ch from hook, hdc in next, dc in next 2, hdc in last, sl st into same base st to form first petal. Repeat to make 8 petals around a small ring or ch8 and join to rosette using the long tail (make 8 petals) (8 petals)
Petal Round 2 :
Working around each petal base, sc base and into petal body work: *sc, hdc, 3 dc, hdc, sc* in each petal to thicken and shape (work over each petal) (8 petals)
Petal Round 3 :
Make a second, slightly smaller layer of petals to stack: ch5 and shape into scallop petals (8 small petals)
Info :
Petal numbers and sizes create the layered floral look in the photograph. Stack larger petals first, then smaller petals on top, then sew rosette center over both layers. Use a long tail and whip stitch through the petal bases for secure attachment.
Petal Round 4 :
Fasten off each petal layer leaving a long tail to sew. Arrange petals and tack together with scrap yarn before final stitching to ensure even spacing.
Petal Round 5 :
Sew petal layers together and attach rosette center, weave ends and tidy
Info :
If you prefer deeper petals like the photo, use a slightly larger hook for petal rounds so they puff and sit over the cream disc. For cleaner edges, block each petal on a pin board.
— Leaves (Make assorted sizes: small, medium, large) :
Leaf Small - Round 1 :
ch6, sl st to form ring or work directly from magic ring: 6 sc in ring (6)
Leaf Small - Round 2 :
*(1 sc, inc) x 3 (9)
Leaf Small - Round 3 :
Shape tip: dec, 3 sc, dec (7)
Leaf Small - Round 4 :
Work central ridge: ch1, turn, BLO 1 sc in each st across to make a defined center, then FLO rows for the reverse side for natural curl (7)
Leaf Small - Round 5 :
Edge: sc evenly around leaf to create crisp edge, sl st and fasten off leaving tail for sewing (7)
Info :
Make 8 small leaves in olive and 4 small in terracotta as accents. Small leaves tuck under petals and give the clustered floral look in the image.
Leaf Medium - Round 1 :
ch8, 8 sc in ring or magic ring (8)
Leaf Medium - Round 2 :
(1 sc, inc) x 4 (12)
Leaf Medium - Round 3 :
(*2 sc, inc) x 4 (16)
Leaf Medium - Round 4 :
Tip shaping: dec, 4 sc, dec (14)
Leaf Medium - Round 5 :
Ridge row: work BLO sc across then FLO sc back to create raised spine (14)
Leaf Medium - Round 6 :
sc around to neat edge, sl st and fasten off leaving long tail (14)
Info :
Make 6 medium leaves in olive and 4 in mustard/khaki for the autumn feel. Vary placement of leaf needles so flowers look layered and natural.
Leaf Large - Round 1 :
ch10, 10 sc in ring or magic ring (10)
Leaf Large - Round 2 :
(1 sc, inc) x 5 (15)
Leaf Large - Round 3 :
(2 sc, inc) x 5 (20)
Leaf Large - Round 4 :
(3 sc, inc) x 5 (25)
Leaf Large - Round 5 :
Shape tip: (3 sc, dec) x 5 (20)
Leaf Large - Round 6 :
Ridge: BLO sc across base, FLO sc for reverse then sc around edge, sl st and fasten off leaving a long tail (20)
Info :
Make 6 large leaves in deep olive. Stiffen occasionally with a little water starch if you want leaves to hold shape more than cotton cord naturally does.
— Small Decorative Lentil/Teardrop Leaves (Make various) :
Round 1 :
ch6, 6 sc in ring (6)
Round 2 :
(1 sc, inc) x 3 (9)
Round 3 :
sc around, flatten and sc through both layers to form teardrop, sl st and fasten off leaving tail (9)
Info :
Use these to fill gaps between flowers and to mimic the burnt orange accents visible in the image.
— Decorative Bobble Border for Semicircles and Band :
Round 1 :
Working on semicircle outer edge anchor points: *(3 sc, bobble) x 18* (72)
Round 2 :
sl st to join, ch1 and sc in each st to tidy edging (72)
Info :
The bobble size can be adjusted by using 3 or 4 loops in the bobble stitch. Keep bobbles uniform by practicing on a scrap first. These small beads around the edge give that charming bead-like look in the photo.
— Finishing Touches and Optional Stitching Details :
Info :
If you want added texture on the red discs, work matched spaced rows of surface slip stitch spirals starting from the center outward with contrasting cream for a stitched accent. Use this sparingly for a subtle highlight only where pictured.
Info :
Leave long tails on all motifs and appliques so you can position and tack them before making final invisible stitches. Use a mattress stitch or whip stitch with matching yarn for neat joins.
Info :
Block all flat components (discs, semicircles, petals) by pinning to size on a blocking mat and spraying with steam. Allow to dry thoroughly for crisp final assembly.
Info :
Trim yarn ends close to the surface after weaving them through a few rounds to prevent unraveling but avoid cutting too short so ends cannot slip out later.
Completing this autumn floral table runner is pure satisfaction — every spiral disc, delicate lace semicircle and layered flower builds a unique centerpiece with vintage charm. The deep rust and warm cream palette pairs beautifully with olive leaves for a cozy, seasonal feel. I hope you enjoy the process as much as the finished runner — it makes a gorgeous gift or table accent! 🧶🍁✨