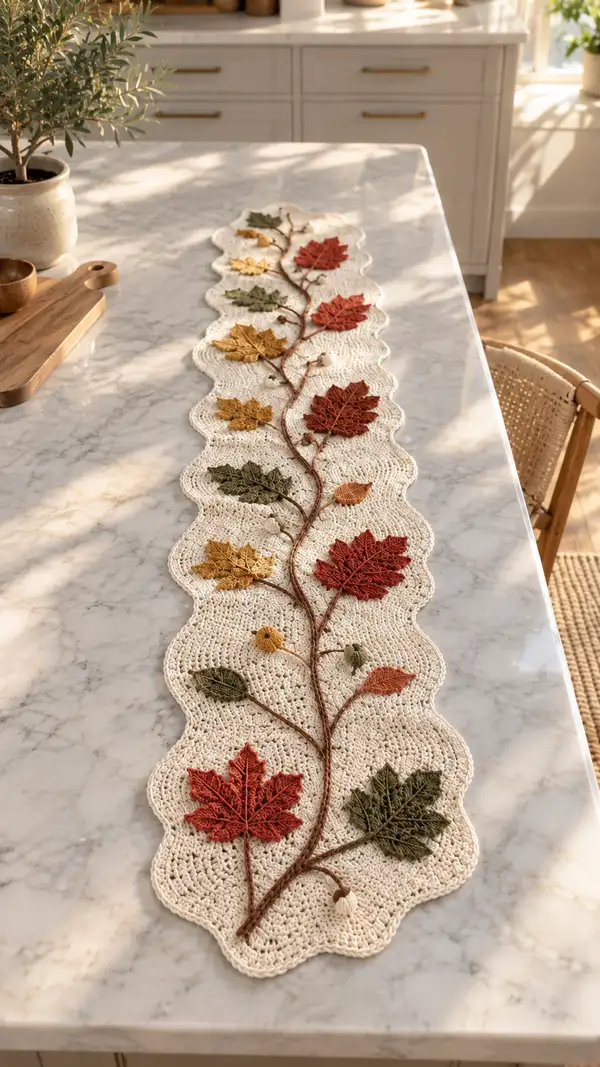
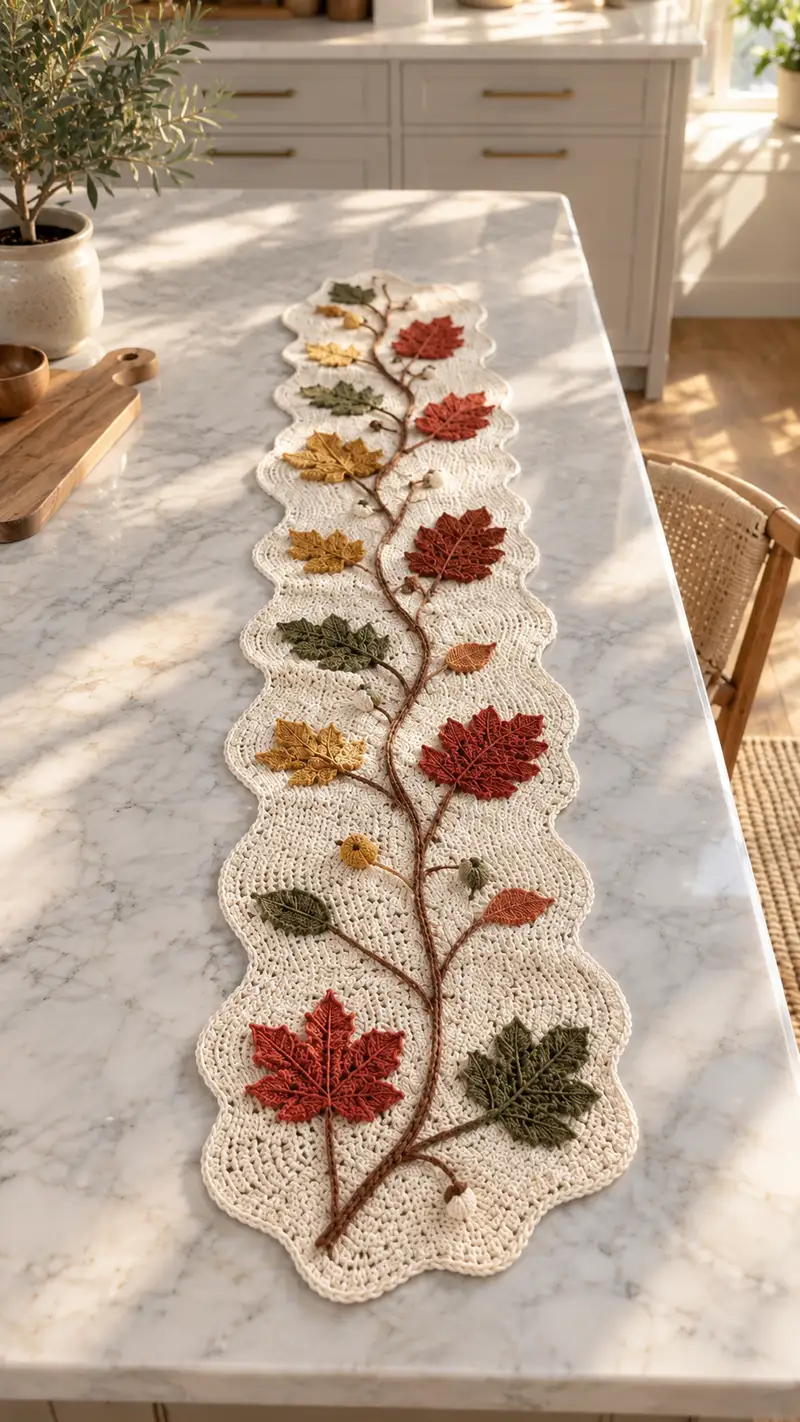
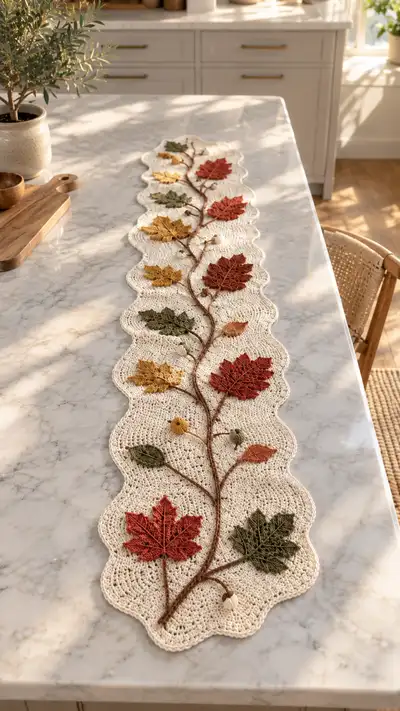
A long scalloped table runner worked in a warm cream base with stitched-on autumn leaves, acorns and a braided vine. Subtle openwork rows create a delicate linen-like texture, while raised leaves and tiny buds add cozy fall charm. Perfect for a dining table centerpiece or seasonal decor, this pattern combines simple repeat rounds and applique leaf motifs for a sophisticated handmade look.
Progress Tracker
0% Complete
— Runner Base :
Materials :
Use main color Cream/Ecru, 4.0mm hook. The base is worked in continuous rounds to create a long oval panel with scalloped edges. Finished width is approximately 10-12" (adjust by changing starting chain length).
Foundation :
Ch36 (this determines width of the runner; longer chain = wider runner). This pattern uses an oval-in-round construction: work along the chain, continue around the far end and back along the chain foundation.
Round 1 :
Working into 2nd ch from hook, 1 sc in each ch across to last ch, 3 sc in last ch (turning end), continue on opposite side of foundation chain, 1 sc in each ch back to the first ch, 3 sc in first ch (corner). Total = 76 sc (35 sc along each side + 3 sc at each end).
Round 2 :
1 sc in each st around (76).
Round 3 :
Increase round at both ends: Work 1 sc in each straight-side stitch until you reach the first end-cap of 3 sc; in that group of 3 sc work 2 sc in each of those 3 stitches (total 6 sc in that cluster). Continue down the opposite side doing the same at the far end. This adds 6 stitches total. Total = 82.
Info :
The '3 sc' end groups are the rounded ends of the oval. Increasing in those clusters expands the oval evenly; always work increases only in those end clusters to preserve the long shape.
Round 4 :
1 sc in each st around (82).
Round 5 :
Repeat Round 3: Increase by making 2 sc in each stitch of each 3-sc end cluster (adds 6). Total = 88.
Round 6-8 :
1 sc in each st around (88) for three rounds. Maintain tension and watch for any rippling; if edge waves excessively, work one round of BLO sc to stabilize.
Info :
At this stage block lightly if you prefer to lock in a more level base before continuing many rounds. Use stitch markers at the junction between straight side and end-cap for future increases.
Round 9 :
Increase again in each end cluster by working (sc, inc, sc) across the three stitches at each end (adds 6). Total = 94.
Round 10-15 :
1 sc in each st around (94). These even rounds build the height of the runner base. Keep stitches consistent and pull rows flat gently as you work.
Round 16 :
Work 1 sc in each st BLO (94). This creates a subtle ridge and texture line useful as a reference for applique placement.
Info :
Measure your runner now; these sets of eight rounds equal one repeat block. Continue repeats until you reach desired length. The sample runner is worked to reach seven leaf placements; total rounds for the base shown = 60 rounds. Adjust length by adding/subtracting repeat sets of 6 rounds.
Rounds 17-22 :
1 sc in each st around (94) for 6 rounds. This is one full repeat. Pin or mark every 6 rounds to act as reference stripes for leaf placement.
Info :
Place stitch markers every 12th stitch along one side to help you map where vine will cross the base. Marking placement now prevents re-counting when you attach leaves later.
Round 23 :
Repeat end-cap increase sequence at both ends to maintain oval curvature: add 6 stitches. Total = 100.
Rounds 24-29 :
1 sc in each st around (100) for 6 rounds. Keep surface flat by blocking lightly between repeat sections if desired.
Round 30 :
Begin shallow openwork texture: *ch2, skip 1, sc in next; rep around.* This creates a subtle ladder effect while keeping structure. Work in pattern around (100 approximate -- stitch count will be similar but work evenly to maintain circumference).
Info :
Openwork rows offset where the vine crosses will make applique stitches easier to hide; use this round placement as your main vine track if you like the look.
Rounds 31-36 :
1 sc in each st around (100) for 6 rounds. Keep an even edge and take time to smooth the work every few rounds.
Round 37 :
Work BLO sc around (100) to provide a shallow ridge to help scalloped edging attach in the next rounds.
Info :
At this point determine final runner length. The shown runner is 60 rounds total for the base. If you want a longer runner, continue repeating rounds 31-36 sets until desired length.
Round 38-46 :
1 sc in each st around (100) for rounds 38-46. These rounds create the central uninterrupted panel where your leaf appliques will be positioned. Mark the center line down the length of the runner using temporary contrasting yarn or pins to help symmetry.
Round 47 :
Begin finishing rounds for scalloped edge: *[sk 1, 5 dc in next, sk 1, sl st in next]* repeat around to form shells. Work shells evenly spaced around entire oval to create gentle scallops. You may need to adjust spacing so shells land evenly around end-caps; aim for approximately 20 shells per long side and adjust corners with 5-dc shells clustered.
Info :
Test one shell spacing and count shells around the oval; if shells bunch at ends, add or remove one sc between shells at symmetric points until shells are even. This is a common adjustment for oval shaping.
Round 48 :
Work 1 sc in the top of each dc and in each sl st around (this anchors shells) (approx stitch count variable dependent on shell spacing).
Round 49 :
Finish scallop with a round of crab stitch (reverse sc) along the top of shells to create a finished edge: *crab st in each st around.* This creates a neat reversed edge and highlights scallop curves.
Info :
Fasten off and weave ends for the base. Block the runner flat to open the stitches and define scallops before sewing on appliques. Pin leaf placement using the markers you made earlier.
— Large Leaf (Make 3) :
Use :
Rusty red yarn; 3.5mm hook recommended for crisp shaping. These large maple-style leaves are worked flat in rounds with surface slip-stitch veins and raised ribbing using post stitches.
Round 1 :
Make a magic ring, ch1, 6 sc into ring. Pull tight (6).
Round 2 :
Inc in each st around (12).
Round 3 :
(1 sc, inc) x6 (18).
Round 4 :
(2 sc, inc) x6 (24).
Info :
From here the leaf shape is built by working half-leaf shaping on one side then mirroring on the other. Place a marker at the center stitch which will become the midrib reference.
Round 5 :
Work 10 sc across — this forms the base of one half (10), ch1, turn to work other half: continue 10 sc across remaining sts (24 total). Position marker at center stitch before turning to shape.
Round 6 :
Start shaping point: *sc2tog, 6 sc, inc, 6 sc, sc2tog* — this begins the point and creates first small lobes. Count = 22.
Round 7 :
Work even around: 1 sc in each st (22).
Round 8 :
Form lobes using increases: *(sc, inc) x3, 10 sc, (sc, inc) x3* (adds 6) Total = 28.
Info :
Switch to BLO for one round at this point to create a natural raised edge on the leaf margin if you want a more sculpted look.
Round 9 :
1 sc in each st around (28).
Round 10 :
Begin midrib: Ch1, work surface slip stitch line down center by marking the middle chain on top side. Then—working on wrong side—use back-post sc along the midline to raise a central rib for texture (see Info below). 1 sc in each st around (28).
Info :
Surface rib technique: With RS facing, insert hook from front to back around the post of the stitch that lies down the center, pull up loop and sl st along a line to form the vein; then return and cover with a row of back-post sc to make the vein raised. Do this before final rounds are closed so you can secure ends neatly.
Round 11 :
Decrease to form tip: (3 sc, dec) x4 (24).
Round 12 :
(2 sc, dec) x6 (18).
Round 13 :
(1 sc, dec) x6 (12).
Round 14 :
6 dec (6) — but do not close fully. Fasten off leaving long tail for sewing. Block lightly to open shape and emphasize points.
Info :
After blocking, embroider additional lateral veins with contrasting or same color yarn using surface slip stitch: start at base and stitch towards tip, making short branches on each side to mimic maple leaf venation.
— Medium Leaf (Make 3) :
Round 1 :
Magic ring, 6 sc (6).
Round 2 :
Inc around (12).
Round 3 :
(1 sc, inc) x6 (18).
Round 4 :
(2 sc, inc) x6 (24).
Info :
These medium leaves are slightly narrower; after round 4 begin shaping into a tapered leaf by working increase/decrease combinations to form small lobes but keep the overall leaf height smaller than the large leaf.
Round 5 :
1 sc in each st (24).
Round 6 :
(3 sc, inc) x6 (30).
Round 7 :
1 sc in each st (30).
Round 8 :
Begin ribbing: 1 sc next 10, back-post sc next 10 (create central raised area), 1 sc remaining (30).
Round 9 :
(4 sc, dec) x5 (25).
Round 10 :
(3 sc, dec) x5 (20).
Round 11 :
(2 sc, dec) x5 (15).
Round 12 :
(1 sc, dec) x5 (10).
Round 13 :
5 dec (5). Fasten off leaving long tail for sewing. Embroider veins using surface slip stitch or a long running stitch down the center and short branches off the midrib.
Info :
Make three medium leaves in mustard and olive tones. Blocking each leaf on a towel will deepen creases and raise the veins for a lifelike look.
— Small Leaf (Make 4) :
Round 1 :
Magic ring, 6 sc (6).
Round 2 :
Inc around (12).
Round 3 :
(1 sc, inc) x6 (18).
Round 4 :
Work shaping: sc across for small oblong shape: 1 sc in each st (18).
Round 5 :
(3 sc, dec) x3 (15).
Round 6 :
(2 sc, dec) x3 (12).
Round 7 :
(1 sc, dec) x3 (9).
Round 8 :
3 dec (3). Fasten off leaving tail for sewing. Add a surface line of slip stitches down the center for a simple midrib.
Info :
Small leaves are ideal for filling gaps. Work four in burnt orange and small olive to balance composition.
— Vine and Main Stem :
Method :
Create a twisted, raised vine that runs the length of the runner. This is worked as a long braided cord (i-cord style) using medium brown yarn and slip stitches, then twisted and seamed to make it thicker. Length for sample runner ~82" measured before twisting; make length to match your runner.
Round 1 :
Ch a long foundation chain to desired vine length plus 2 (sample ch86). Sl st in 2nd ch from hook and in each ch across to end to form a flat slip-stitch cord. Fasten off and join another strand and repeat to form three cords for braiding, or work single thicker cable by working three parallel slip-stitch strands and sewing them together.
Info :
If you prefer a squashier vine, make three narrower cords and braid them, then whipstitch ends to secure. Another option is to work a crochet i-cord by repeating 3-4 sts in the same few chains to create a tubed cord with continuous sc.
Round 2 :
Option A (braided vine): Make three cords (each approx 86 ch, sl st across), braid loosely, then stitch braid along its length with running stitch to hold shape.
Round 3 :
Option B (i-cord vine): With 4.0mm hook, ch4, sc2tog across leaving 2 sts on hook and pull through, then ch and continue in tube fashion to desired length (this produces a rounded tube). Fasten off and flatten slightly before sewing to base.
Info :
Twist or braid and steam-block the vine if needed for a natural look. Place the vine on the runner and pin before sewing. Allow the vine to meander loosely across the runner and loop around leaf stems for realism.
— Acorn (Make 4) :
Cap Rnd 1 :
Using brown yarn, magic ring, 6 sc (6).
Cap Rnd 2 :
Inc around (12).
Cap Rnd 3 :
(1 sc, inc) x6 (18).
Cap Rnd 4 :
1 sc in each st around (18). Fasten off and set aside.
Nut Rnd 1 :
Using tan/off-white yarn, make a small magic ring, 6 sc (6).
Nut Rnd 2 :
Inc around (12).
Nut Rnd 3 :
1 sc in each st around (12).
Nut Rnd 4 :
(1 sc, dec) x4 (8). Stuff lightly. Fasten off leaving tail for sewing.
Assembly :
Sew nut into cap and stitch cap to vine at desired locations. Optionally add a tiny loop of yarn at top of cap to appear like a stem point.
Info :
Acorns are very small; use a yarn needle to position and tack along the vine so they look nestled near leaves.
— Tiny Flower Bud (Make 3) :
Round 1 :
With mustard yarn, magic ring, ch1, 6 hdc in ring (6). Pull ring closed.
Round 2 :
Inc in each st (12). Pull tight and fasten off leaving tail; shape into a small dome and stitch to vine or runner at chosen spots.
Info :
These tiny buds add visual variety; tuck them under leaves and secure with small stitches from the back so no knots show on the RS.
— Surface Veining and Leaf Details :
Step 1 :
Using a contrasting darker shade of each leaf color or same color for subtlety, add surface slip-stitch veins: Thread yarn into yarn needle, and working from base to tip, sew a single running line then secure at the underside with a few invisible stitches. For lateral veins, make short angled slip-stitch lines off the midrib, about 6-8 per leaf depending on size.
Info :
For more texture, use front-post and back-post single crochet rows on the leaf center before finishing to create a raised rib. Refer to leaf instructions where back-post sc was introduced.
— Attaching Applique :
Step 1 :
Position vine along one side of the runner, letting it meander toward the center and back. Pin vine lightly in place every 3-4" using sewing pins so it doesn't shift while you tack.
Step 2 :
Pin leaves next to the vine to create an organic grouping; alternate colors and sizes for balance. Use the reference markers on rounds (every 6 rounds) to place leaves symmetrically down the length.
Step 3 :
Sew vine to base using matching brown yarn and small mattress stitches along underside of braid — keep stitches small and invisible on RS. Tack leaves at their base to the vine first, then around edges using small whipstitches so leaves are secure but still slightly raised.
Info :
Stitching the vine first gives secure anchor points. When sewing leaves, use the long tail left from each leaf to sew through the base rounds of the runner and back through the leaf, making several passes to secure.
Step 4 :
Sew acorns and buds near leaf clusters. Add a few isolated small leaves into empty scallops near ends to create a natural trailing effect.
Step 5 :
Weave in all ends on the WS of the runner. Block entire runner flat to open stitches and secure applique. Light steam-blocking works well for cotton or blended yarns; avoid excessive heat for acrylics.
Final Info :
Once all elements are sewn, step back and check balance. Trim any visible long threads and make one last pass around the vine and leaf bases with a few extra securing stitches if needed. Your runner is now ready to style on the table.
Working through this pattern yields a show-stopping seasonal runner that feels like a handmade heirloom — scalloped edges, rich leaves, and a twisting vine that bring autumn indoors. The design is relaxing to make and rewarding to see laid across your table. Enjoy the process of blocking and arranging appliques — it's where the runner truly comes to life. 🍂🧶