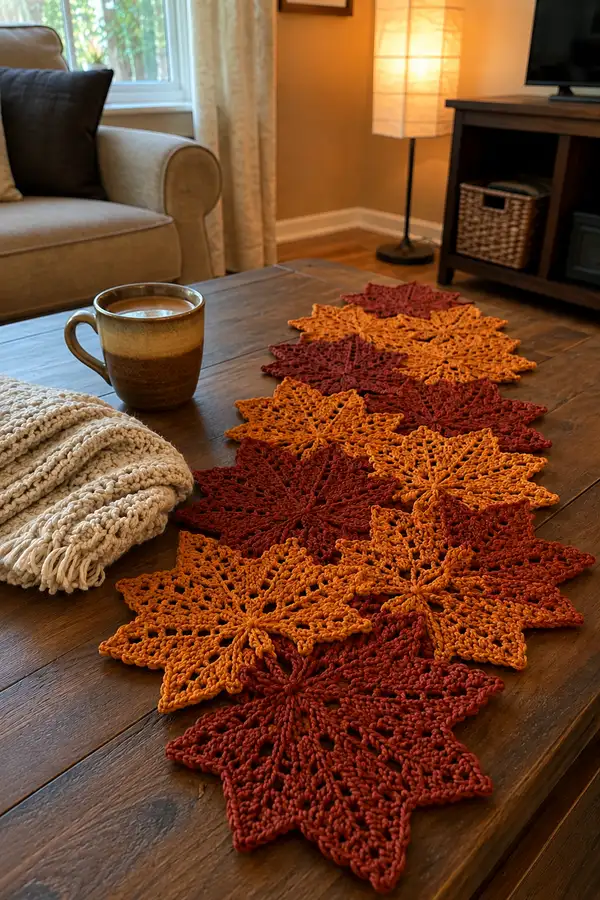
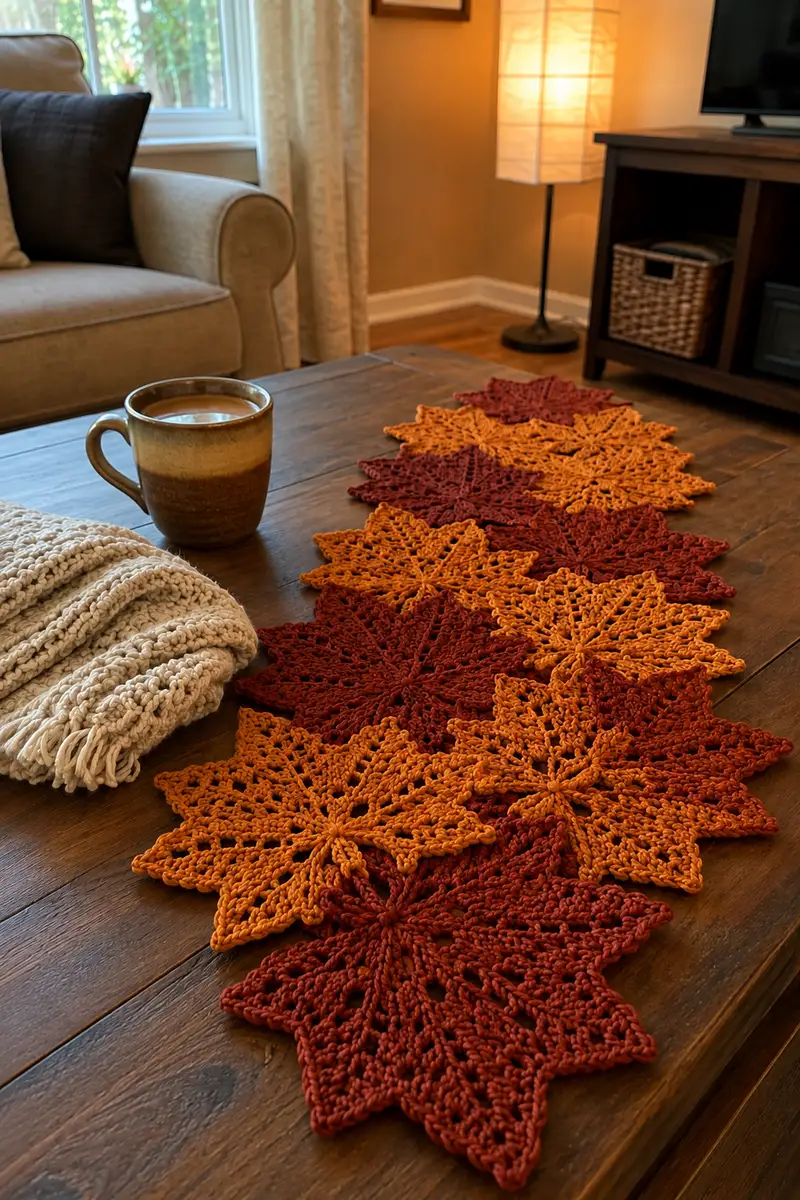
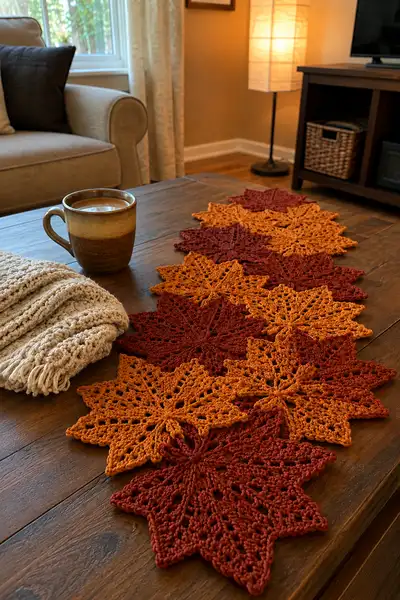
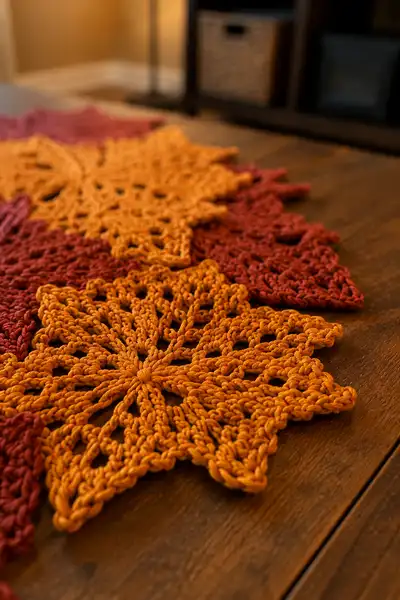
Create a warm autumn centerpiece with this overlapping lacy maple leaf table runner in rust and golden orange. The pattern uses an elegant eight-point leaf motif worked in worsted-weight cotton or cotton-blend yarn with open lacy stitches and raised ribs for texture. Leaves are crocheted individually and joined in an offset, overlapping layout for a realistic layered look—perfect for a coffee table, sideboard, or mantel.
Progress Tracker
0% Complete
— Overview :
Info :
This pattern describes a single lacy eight-point maple leaf motif worked from the center outward, then how to make multiples and join them into an overlapping runner. The motif is written to create one large leaf approximately 10-11 inches across point-to-point when worked in worsted-weight cotton with a 4.0mm hook. Gauge will vary by yarn; please check your motif size and adjust hook as needed. Make an even number of motifs or mix counts for a runner length you desire; photos show 9 overlapping leaves in alternating colors.
— Leaf Motif (Make as many as needed) :
Round 1 :
MR, ch1, work 8 sc into magic ring, tighten (8)
Round 2 :
(1 sc, inc) x4 around = (1 sc, 2 sc in next st) repeated gives (12)
Round 3 :
(2 sc, inc) x4 around (16)
Info :
At this point you have a small disc that will become the center hub. Place a removable marker in the first stitch to mark the beginning of rounds; leaves rely on symmetry so keep consistent starting points.
Round 4 :
(3 sc, inc) x4 around (20)
Round 5 :
(4 sc, inc) x4 around (24)
Round 6 :
1 sc in each st around (24)
Info :
We will now form eight spokes that act as the start points for each leaf point. To create eight points, we work chains and join into specific stitches; keep stitch counts even to maintain symmetry. You will be working into chain spaces created during the next round.
Round 7 :
*Ch6, sk 2 sc, sl st into next sc* repeat * to * around to create 8 ch-6 loops; you will have 8 loops and small gaps between, ending with a sl st to join (8 ch-loops)
Round 8 :
Work into each ch-6 loop as follows: sl st into loop, ch3 (counts as dc), 2 dc, ch2, 3 dc, sl st into next join. Repeat for all 8 loops to create 8 small petals (work symmetrical clusters to maintain counts)
Info :
These initial petals form the base shape of each maple leaf lobe. Keep tension even and do not tug tightly on chain spaces; the lace needs room to open. If your loops look too tight, use a slightly larger hook for these rounds and switch back later.
Round 9 :
Ch1, work 1 sc evenly across the small spaces between petals and into the petals’ top sts so that you form a continuous round; total sts should be approximately 64 depending on how many outer stitches formed—aim for consistency across motifs (estimate 64)
Round 10 :
Ch3, *dc cluster shell in next sp: (dc, ch2, dc) worked into the top of the petal cluster, sk 1 sc between shells, ch2*, repeat around for 8 shells; join with sl st to top of beginning ch3 (count will vary; shells are forming each point)
Info :
From here on, rounds create each of the eight pointed lobes with tall stitches and chain arches; stitch counts are descriptive because the motifs rely on shell-and-arch placement rather than strict per-stitch counts across the whole round. Keep track of the start of each lobe using a stitch marker as you work around.
Round 11 :
Into each shell: *ch4, (tr, ch2, tr) into shell apex, ch4, sl st into next small space between shells* repeat around to deepen the lobes
Round 12 :
Ch1, sc evenly around working into sl st joins and chain spaces to stabilize; aim for firm even tension. This round acts as an even base to continue increasing the lobe wings (approx 96 sc across but adjust to tension)
Info :
If you'd like slightly smaller, denser points, replace some tr in rounds 11-13 with dc. For the photos’ open lacy look, continue with tall stitches. At this stage, the motif visually shows eight defined lobes.
Round 13 :
Start increasing each lobe wing individually: Working in front loop only (FLO) into the sc round, *ch5, sk 3 sc, sc in next sp (this creates an arch)* repeat 16 times distributed around the eight points (two arches per lobe)
Round 14 :
Working into each ch5 arch: sl st, ch3, 4 dc, ch3, sl st into the same arch to create a tall fan; repeat for every arch to build lacy wings
Round 15 :
1 sc in each st and bridge between fans to tidy edge and lock fan placement. Aim to maintain even stitch count across repeated fans (approx 160 sts depending on fans created)
Info :
Now we will establish the raised ribs that define each maple point. The ribs are created with front-post and back-post stitches to give depth. Use a stitch marker to mark the apex of each lobe so rib placement remains consistent.
Round 16 :
*At the center of a lobe apex: ch1, fpdc around the base stitch right of apex, ch2, bpdc around the base stitch left of apex, ch1; then 1 sc in the next bridge between lobes.* Repeat for all 8 lobes. This establishes the first raised rib sequence
Round 17 :
Ch3, work a row of tall stitches along each rib: into each ch2 rib space work (dc, ch1, dc) forming a raised ridge; join each ridge with a sl st into the sc bridges between ridges
Round 18 :
1 sc evenly across to stabilize, weaving in around the raised ribs (counts will vary but keep the same number of bridge sc as previous sc-round)
Info :
These rib rounds create the 3-dimensional look seen in the photos. Use your fingernail to gently push ribs outward so they read clearly. If you like a softer look, reduce post-stitch height to fpdc/bpdc only.
Round 19 :
Work the lobe shaping outward: At each lobe apex, ch6, into the large open space work: (dtr, ch2, dtr), ch6 and sl st into the next bridge; this makes extended pointed tips (points will lengthen noticeably)
Round 20 :
Ch1, 1 sc evenly around to bring the extended points into the round; carefully keep stitches even at each point junction so they mirror one another
Round 21 :
Into each extended tip: *ch5, tr, ch3, tr, ch5, sl st into the body at the tip base.* This adds decorative picot-like lobing to the tip for the delicate scalloped edge visible in the images
Round 22 :
1 sc in each st around to lock picots in place and tidy edges (take care around long chains; pull gently so points remain flat)
Info :
At this point the motif should take on its full leaf silhouette with elongated pointed tips and opened lace between. Check symmetry across the eight points; use blocking pins to shape while wet-blocking each motif before joining.
Round 23 :
Decorative mesh row: *ch4, sk next 2 sc, sc in next st* repeat around to create a triangular mesh inside each lobe wing; this further lightens the motif and gives the airy lace seen in the photos
Round 24 :
Work into each ch4 mesh: sl st, ch3, 3 dc, ch3, sl st to form elongated fans inside each lobe; repeat consistently in every mesh to keep balance
Round 25 :
Ch1, sc around to stabilize fans (approx 220-240 sc depending on fan size). Pull yarn taut to ensure fans sit close to the leaf body—this prevents too much floppiness.
Info :
We will now add a defined outer edging on each point so leaves overlap neatly when joined. The edging uses BLO to create a raised rim along each leaf perimeter for structure and crisp silhouette.
Round 26 :
Work 1 sc in each st, but in the outermost round work in BLO only to create a ridge: 1 sc in each st BLO around (sc count same as previous round)
Round 27 :
Into each point tip: ch3, (2 dc, ch2, 2 dc) into the tip apex to create a pointed shell, sl st into next ridge space. Repeat for all 8 apexes to form pronounced points.
Round 28 :
Ch1, sc in each st around to join and even the apex shells (counts equal number of previous sc round). At the end of this round fasten off and weave in tail unless color change for runner assembly is immediate.
Info :
Fasten off leaving a 12-18" tail for seaming if you plan to join motifs by sewing; if you will slip-stitch join, leave a smaller tail. Wet-block each leaf gently to open lace, pin into a flat eight-pointed star, and allow to dry fully before assembly. Blocking is crucial for even joins and to match leaf sizes.
— Motif Size Notes :
Info :
After blocking each leaf should measure ~10-11 inches point to point (approx 25-28 cm). If your motifs are larger or smaller, you can change hook size or adjust a few tall stitch counts (reduce dtr to tr for smaller, increase to dtr/dtr cluster for larger). Keep all motifs consistent for an even runner.
— Color Alternation & Making Multiple Motifs :
Info :
For the pictured runner alternate rust and golden orange leaves in a repeating sequence. Make 8-10 motifs for a medium-sized runner or add more for a longer table. Keep color changes between leaves tidy by fastening off and weaving ends in near the center where they will be covered by overlapping leaves.
— Joining Motifs (Overlap Join Method) :
Info :
This runner is assembled by overlapping leaf points so the front leaf slightly covers the back leaf, mimicking natural layerings. You can join motifs by sewing with a tapestry needle using the long tail you left, or by slip-stitch joining through both motifs’ outer BLO ridge for a crocheted seam. The sewn join is nearly invisible and recommended for a delicate look; the slip-stitch join gives a subtle ridge on the back, which is fine for a runner.
Round 1 (Joining Row Concept) :
Place two blocked leaves with right sides up in the overlapping arrangement shown in photos: one leaf offset so two of its points overlap and tuck beneath two points of the leaf above. Pin in place at 4 overlap points per join.
Round 2 :
Sew join method: Using the 12-18" tail from the overlapping leaf, thread a tapestry needle and whipstitch through the outer ridge of the lower leaf and the underside ridge of the upper leaf at the pinned overlap points. Use 8-10 neat stitches per overlap edge for stability. Tie a secure knot and weave tail back into the center of the lower leaf (repeat for each overlap junction).
Round 3 :
Slip-stitch join method: With the right sides facing up, insert hook through the BLO ridge of the lower leaf and into the corresponding BLO ridge of the upper leaf. Ch1, sl st through both layers around the overlap perimeter—work 2-3 sl st per overlap rib to hold firmly. Fasten off and weave in ends. This creates a visible joining ridge on the underside.
Info :
As you join leaves, check that joins lay flat and points are not twisted. Pin each leaf before sewing. For a natural look, offset each new leaf so it overlaps the previous two leaves’ tips by about 1.25–2 inches. The photos show an alternating zig-zag arrangement: insert each leaf so its apexes sit between apexes of neighboring leaves.
— Assembling an Overlapping Runner Layout :
Info :
Layout the runner beforehand on a large flat surface: alternate colors rust/golden-orange in a staggered pattern. The pictured runner uses 9 leaves in an alternating color pattern (rust, gold, rust, gold, rust down the center). For a longer runner add leaves keeping the same stagger to preserve overlap rhythm.
Round 1 :
Work left-to-right in strips: join first two leaves at two overlapping points, then join the third leaf overlapping the second and first in the same offset. Continue adding leaves one at a time, always overlapping the previous leaves in the same direction so the pattern runs consistently.
Round 2 :
When your runner is the desired length, weave in all ends securely and trim; double-check overlapping edges to ensure uniform coverage and symmetry.
Info :
If you want a denser runner, overlap leaves more heavily; if you want a more see-through lace look, leave slightly larger gaps between leaves. The joining method remains the same regardless of overlap distance.
— Edging & Border Stabilization :
Info :
To stabilize the runner and give crisp outer edges, work an optional single-round crocheted border around the entire assembled runner. This border follows the perimeter of the overlapping leaves and will require working in and around edges, treating the assembled runner as one large piece.
Border Round 1 :
Using matching yarn and 4.0mm hook, join yarn at any outermost point. Ch1, work 1 sc evenly into each outermost stitch across the perimeter; when you reach concave areas between points, work *(sc, ch2, sc)* into the chain space to bridge gaps and keep the edge even. Continue around the entire runner, join with sl st and fasten off. This round adds structure but keeps the leafy silhouette.
Border Round 2 :
Optional decorative round: join contrasting yarn color with sl st at any outer edge, ch3, *(2 dc, ch2, 2 dc) in each point apex to create a scalloped shell; sc between apexes.* Repeat around for subtle scallop. Fasten off and weave in ends.
Info :
If using the decorative scallop, adjust shell counts to fit actual number of apexes around the assembled runner perimeter—some apexes will be hidden in overlaps and not receive shells. Work shells only on visible outer tips.
— Finishing, Blocking & Care :
Info :
Once assembled, wet-block the entire runner flat on a blocking mat to unify motif sizes and open the lace. Pin each outer point carefully and shape the overall silhouette. Allow to dry completely. For a crisper finish, use a light starch spray after blocking. Spot-clean with mild detergent; hand wash in lukewarm water only. Avoid machine washing to prevent fraying and reshaping.
Info :
Optional embroidered veins: use a darker rust or brown and a yarn needle to add surface embroidery veins along the ribs you created with post stitches. This adds realism but is entirely optional.
— Tips & Troubleshooting :
Info :
Keep motifs consistent by using the same hook size and blocking each leaf the same way. If one motif grows larger during working, unpick back to the last symmetrical round and rework with slightly tighter tension. Always pin and measure motifs before joining to ensure even sizing.
This overlapping maple leaf runner brings the golden warmth of autumn into your home with handcrafted charm. Each lacy leaf combines texture and airy openness, forming a layered centerpiece that looks lovely on a coffee table, console, or dining table. The modular construction makes it easy to lengthen, shorten, or recolor to match your decor. 🍁🧶 Enjoy the rhythmic satisfaction of making each leaf and watching the runner take shape—happy hooking!