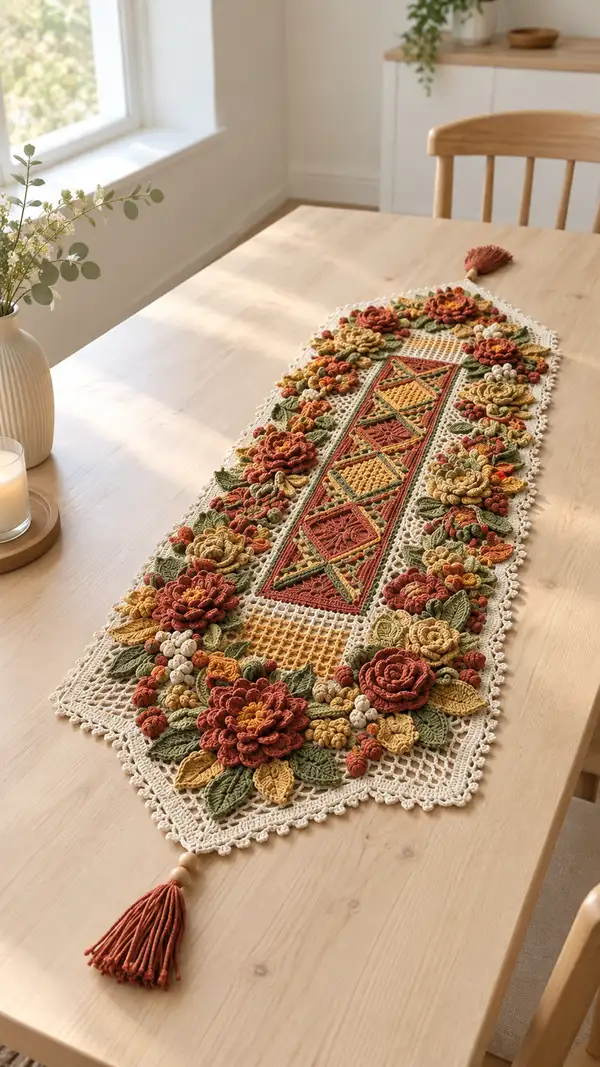
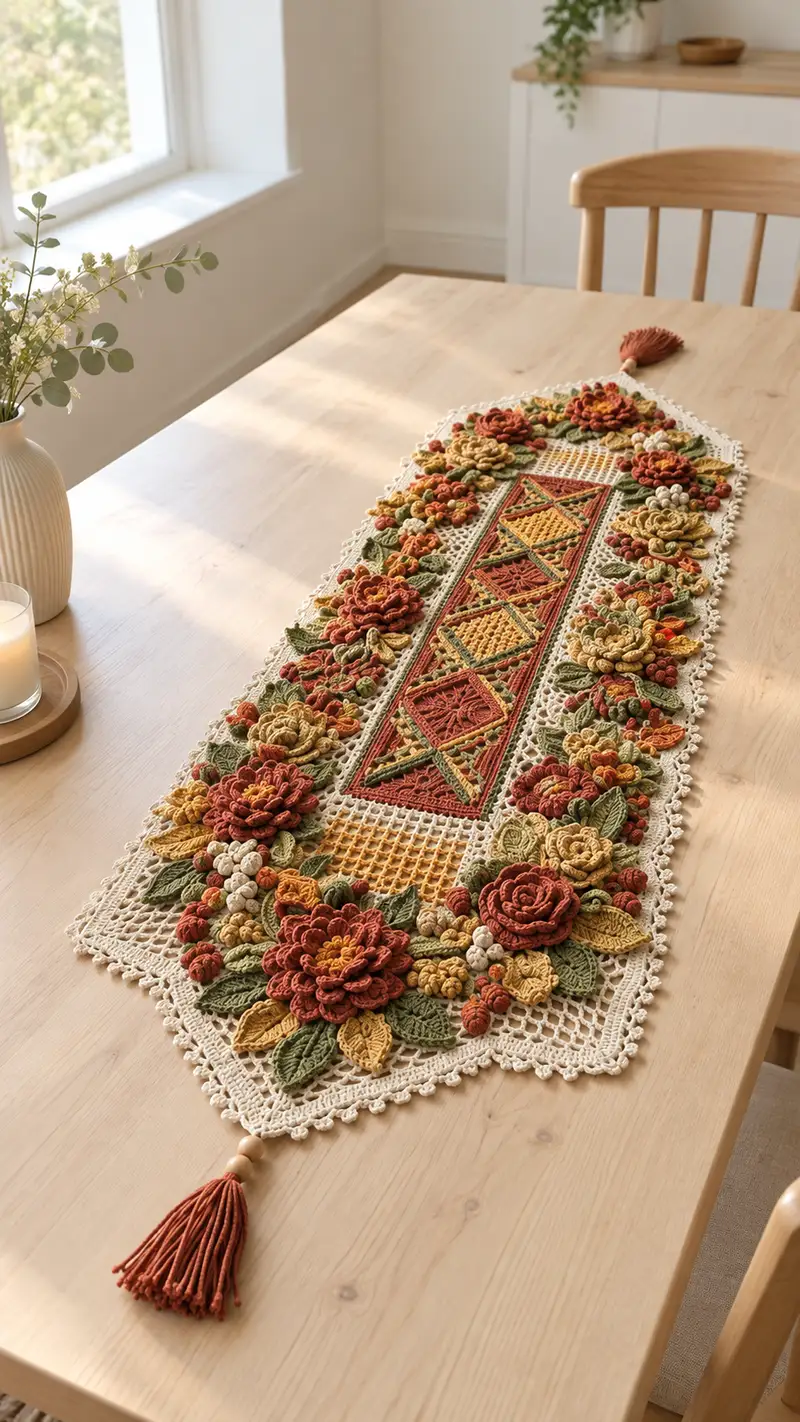
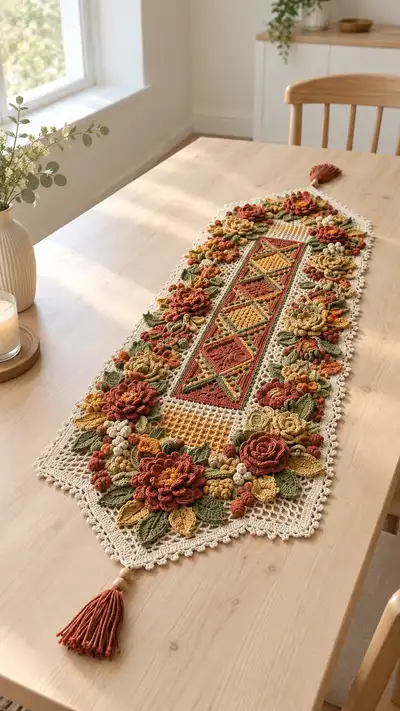
A richly textured autumnal table runner featuring layered 3D flowers, sculpted leaves, delicate bead-like berries and an openwork lace base. Warm rust, mustard and olive hues sit on a soft cream background, framed with a picot lace border and tasseled ends. This pattern shows how to build modular panels and appliques, assemble them into a long runner and finish with a polished edging and wooden-bead tassels. Perfect for seasonal décor or a handmade centerpiece.
Progress Tracker
0% Complete
— Materials & Gauge :
Info :
Gauge is flexible for this decorative runner but aim for approximately 18 sc x 20 rows = 10cm with 3.5mm hook in DK cotton. Blocking will alter final measurements; block base to desired length and width before attaching appliques
— Foundation Mesh Base :
Info :
Make the open mesh rectangular foundation in cream. The sample runner measures approximately 120cm long x 30cm wide before border. You may adapt length by adding repeats of the central panel section. The mesh uses grid/ filet-style rows to create attachment points for appliques.
Row 1 :
Ch 94 (or desired width multiple + 2). Sc in 2nd ch from hook, *ch 3, sk 3 ch, sc in next ch* repeat across until last 2 ch, sc in last ch. Turn. (Approximate mesh repeat across 94 chains)
Row 2 :
Ch 1, sc in first st, *ch 3, sk 3 ch-space or sts, sc in next st* repeat across, ending sc in final st. Turn. (Establishes mesh grid)
Row 3-40 :
Rep Row 2 for 38 more rows (or until base measures approx 60cm; this is half-runner length). Keep counts consistent. (Maintain mesh grid across entire foundation)
Info :
Work flat in rows. Place stitch markers at both short ends and at central column positions where central panels will be sewn. Block the mesh flat to desired half-length before continuing to make the opposite half; mirror mesh for second half or continue to full length of runner.
Row 41-80 :
Continue repeating Row 2 until full runner length is reached (for sample work total 80 rows). Finish last row with sc across to create stable edge for border. Fasten off leaving long tail for border join. (Final mesh grid established)
Info :
If you prefer, make two identical mesh halves (approx 60cm each) and join with a narrow joining strip; this provides a seam for central motif insertion.
— Central Motif Square (Make 4 identical panels) :
Info :
Each square panel is worked in rounds beginning in the center to create a textured diamond/square inset. Use terracotta for outer square, mustard and olive for accents. Each panel finishes approximately 18cm square.
Round 1 :
With terracotta, mr, ch 1, 8 sc into ring, pull to close (8)
Round 3 :
(1 sc, inc) x 8 (24)
Round 4 :
(2 sc, inc) x 8 (32)
Round 5 :
(3 sc, inc) x 8 (40)
Round 6 :
1 sc in each st (40)
Round 7 :
BLO 1 sc in each st (40) (creates inner ridge)
Info :
Change to mustard yarn. Carry terracotta behind or fasten off. The BLO round helps define the inner square which will be textured by post-stitches in next rounds.
Round 8 :
With mustard, ch 2 (counts as hdc), *hdc, ch 2, sk 1 st, hdc in next* around creating woven-lattice look inside square (40)
Round 9 :
Switch to olive, work 1 round FPdc/BPdc pattern: *FPdc around next st, BPdc around next st* rep to end (40)
Round 10 :
Return to terracotta, 1 sc in each st (40)
Round 11 :
(3 sc, dec) x 8 (32)
Round 12 :
(2 sc, dec) x 8 (24)
Round 13 :
(1 sc, dec) x 8 (16)
Round 14 :
Dec around to square off slightly and finish edges (8)
Info :
Fasten off leaving long tail for whip-stitching panel into mesh base. Block square flat to 18cm square before assembly. Make 4 panels for runner center.
— Central Diamond Motif (Inset into each square) :
Info :
These small diamond medallions are worked separately and sewn into the center of each square. Use mustard for the diamond center and terracotta for outer triangles.
Round 1 :
With mustard, mr, ch 1, 6 sc into ring (6)
Round 3 :
(1 sc, inc) x 6 (18)
Round 4 :
Change to terracotta, (2 sc, inc) x 6 (24)
Round 5 :
Ch 1, sc evenly to form diamond points by working small ch-2 arches at the four compass points: *sc 5, ch 2, sc in next st, sc 5* create subtle points (24)
Info :
Flatten diamond and block lightly; sew centered in each central panel using yarn tail. Use small invisible stitches to attach without distorting the square.
— Large Layered Flower (Make 8) :
Info :
Large 3D flowers are the focal point. Each flower is made in rounds with layered petals. Use terracotta for outer petals and mustard/olive for inner petals and centers. Each finished flower is approx 10-12cm diameter.
Round 1 :
With terracotta, mr, ch 1, 8 sc into ring (8)
Round 3 :
(1 sc, inc) x 8 (24)
Info :
Work first two rounds firmly; this forms the flower base to anchor petals. Do not stuff base; keep flat so it will be sewn to mesh.
Round 4 (First petal round) :
*Ch 3, 5 dc in next st, ch 3, sl st in same st* repeat around to create 8 large petals. After completing petals, sl st to join. (8 petals)
Round 5 :
Sc around base of petals to secure, sc in each petal base and between petals (48)
Round 6 (Second layered petal) :
Join mustard at back of first petal round, *ch 2, 7 tr around base of a petal working behind previous petal (use BLO if desired to push petals forward), ch 2, sl st in next petal base* repeat for each petal to create elevated second layer. (8 elevated petals)
Round 7 :
Sc around to stabilize (48)
Round 8 (Inner petal cluster) :
Switch to olive, work small tight petals: *ch 1, 5 dc in next space, sl st back into same space* around at inner ring, creating 8 small ruched petals. Join and sc around. (8 small petals)
Round 9 (Center) :
With mustard, mr, 6 sc in ring, pull and secure to create a small puff center, fasten off leaving long tail. Sew center onto middle of flower, adding light stuffing only if a bit of volume is desired.
Info :
For each petal round you may add a tiny bit of fiberfill folded inside the petal before closing it to create more sculptural petals. Use very small amounts to keep petals shaped without bulk under the seam.
Round 10 :
Weave long tail through back of flower to make a small loop for sewing. Fasten off and weave ends. Make 8 identical large flowers.
— Medium Flower (Make 12) :
Round 1 :
With mustard, mr, ch 1, 6 sc into ring (6)
Round 3 :
(1 sc, inc) x 6 (18)
Round 4 :
*Ch 2, 5 dc in next st, sl st in next* repeat around to create 6 medium petals. Sl st to join. (6 petals)
Round 5 :
Sc around base and finish with a small puff center: mr, 6 sc, pull tight and sew to center. Fasten off leaving tail for sewing. (Neat medium flower)
Info :
Make 12 medium flowers using a mix of terracotta and mustard to vary visual weight. Slightly offset petals relative to large flowers for a natural arrangement.
— Small Rosette / Bud (Make 20) :
Round 1 :
With cream or small accent color, ch 2, 12 hdc in 2nd ch from hook and join (12)
Round 2 :
*Ch 3, sl st into next st* repeat around 12 times to create small rosette loops. Fasten off leaving tail. (12 loops)
Info :
These small buds are slightly stuffed or tightly gathered to make spherical berries. Make 20-30 for clusters along floral border.
— Leaf (Make 30-36) :
Round 1 :
With olive, ch 11. Row 1: sc in 2nd ch from hook, hdc in next, dc in next, tr in next 3, dc in next, hdc in next, sc in last st, then rotate and work along opposite side: sc, hdc, dc, tr x3, dc, hdc, sc (approx 18 sts). Sl st to join at base. (Leaf shape)
Round 2 :
Ch 1, BLO sc around to create a raised central vein: sc in each st BLO across leaf (18)
Round 3 :
Work 1 round of slip stitches around edge to neaten. Fasten off leaving long tail for sewing. (Finished leaf)
Info :
Make a combination of small, medium and large leaves by adjusting initial ch: ch 9 for small, ch 13 for large. Block leaves lightly with pins if desired to keep curved shape.
— Tiny Folded Leaf (Make 20) :
Round 1 :
With olive, ch 6, sc in 2nd ch, hdc, dc, hdc, sc in last, then turn and work sc across opposite side to base, sl st to join. Pinch center and sew through to create folded look. Fasten off. (Tiny leaf)
Info :
Tiny folded leaves work wonderfully tucked under large petals; use double thickness thread or a small dab of glue to keep them folded while sewing into place.
— Berry / Puff Cluster (Make many) :
Round 1 :
With cream, mr, ch 1, 10 sc into ring (10)
Round 2 :
*Ch 2, 3 dc in same st, sl st in next st* repeat to create small bobble loops; or alternately use popcorn stitch: (5 dc in same st, remove hook, insert hook in first dc, pull loop through) to form a bobble. Make clusters by grouping 3-6 bobbles on short yarn tails and sew as a cluster. Fasten off. (creates berry look)
Info :
Lightly stuff tiny berries with a pinch of fiberfill before closing for plump look. Use different sizes and colors to add natural variation.
— Small Curled Leaf / Sprout (Make 24) :
Round 1 :
With mustard, ch 8, sc in 2nd ch, hdc, dc x3, hdc, sc, then sl st down opposite side and leave long tail. Curl by sewing a running stitch along edge and pulling slightly to curl. Fasten off. (Curled sprout)
Info :
These curled sprouts add movement; attach them near flower bases and berries to create lively clusters.
— Assembly Prep :
Info :
Block the mesh base flat and pin to blocking board to exact final measurements (sample 120cm x 30cm). Block motifs (panels, flowers, leaves) flat to shape and press lightly with a damp cloth if cotton. Arrange motifs on the mesh while pinned to visualize composition. Use photos to ensure symmetry left-to-right.
— Attaching Central Panels :
Info :
Position four central square panels evenly along the center line of the runner. Each panel will be whip-stitched into the mesh through the loop spaces of the square and the adjacent ch-3 mesh openings so the panel sits flush. Use a matching terracotta thread for nearly invisible stitches.
Step 1 :
Pin the first panel centered in the mesh area defined by your markers. Thread yarn needle with long tail left when you fastened off the square. From back side, whip-stitch through the sc rounds of the panel and the mesh ch-3 spaces all around, using evenly spaced stitches. Work slowly to avoid puckering. Repeat for all four panels, ensuring consistent spacing (approx 2-3 cm gap between panels in sample).
Info :
If panels resist lying flat, unpick a few stitches from the outer rounds and slightly ease the fabric. Do not stretch the mesh base; instead allow the panel to rest naturally in grid openings.
— Placement & Sewing of Flowers and Leaves :
Info :
Lay out the large flowers first: place one large flower at each corner of the runner and two more near the center along the long edges for balance. Surround each large flower with 3-4 medium flowers, clusters of small rosettes, and varied leaves to create dense garlands. Use pins to hold each piece.
Step 1 :
Thread yarn needle with matching color tail from each applique. For large flowers sew through the back loop of the flower base and the mesh openings with small whip-stitches around the circumference (8-12 stitches per flower) securing a stable attachment. Hide the tail by weaving through the back and knotting invisibly under the work.
Step 2 :
Attach medium flowers and small rosettes similarly, using shorter stitches to keep them close to the mesh. For berries, stitch at least 3 passes through base and mesh to avoid shifting. For leaves, sew through the base and a couple of mid-edge stitches to keep them laying flat or slightly cupped depending on desired look.
Info :
Sew motifs through both the mesh spaces and the adjacent sc/hdc stitches of central panels where applicable to create stronger attachment and a seamless look between panel edges and floral garlands.
— Securing & Shaping Petals :
Info :
To create a natural petal lift, sew one or two hidden tacking stitches through the petal base to the mesh only at off-center points. For deeper curls, add a few tiny running stitches at petal tips and pull gently to shape before knotting and hiding ends.
Technique :
Use thread that matches flower color, and pass yarn needle through only the inner back loops of petals to keep surface neat. Check each flower from the top to ensure no heavy stitches are visible on petals.
— Border and Lace Edging :
Info :
Once all appliques are sewn, prepare to add the picot lace border. You will work around the entire runner edge in cream to create a neat finish and delicate picot points. Work from the right side, attaching to the last sc row of mesh or the outermost stitches of appliques where they extend beyond edge.
Round 1 :
With cream, join at one corner, ch 1, sc evenly around edge spacing approximately 3 sc per 2 mesh rows or adjusting to fit evenly across edges and corners. Work 1 sc in each st around; at corners work (sc, ch 2, sc) to assist turning. Join with sl st. (Creates base edge)
Round 2 :
Ch 4 (counts as dc + ch 1), *sk 1 st, dc in next st, ch 1* repeat around; at corners work dc, ch 2, dc. Join with sl st. (Creates scalloped loops)
Round 3 (Picot round) :
Ch 1, sc in same st, *ch 3, picot (ch 3, sl st into base of ch-3), sc in next dc/ch-1 loop* repeat around to form delicate picot points. Join and fasten off. Weave in ends neatly. (Picot lace finish)
Info :
At areas where appliques join the edge, slip st through applique backing to make the border sit flush. Keep picot spacing uniform for professional finish.
— Final Finishing & Tassel Assembly :
Step 1 :
Make two tasseled cords in terracotta: wrap yarn approx 60-80 times around a 10cm piece of cardboard for each tassel, tie at top, cut along bottom and bind with a length of yarn. Add two wooden beads to the top of tassel using cotton cord looped through runner corner and knot from underneath. Secure knot and hide ends inside weave.
Step 2 :
Weave all loose ends through backing and where possible under appliques for invisible finish. Trim any stray fibers and lightly steam block the entire runner on low setting to set shape; do not press directly on petals, use a cloth between iron and crochet to avoid flattening 3D elements.
Info :
Consider stiffening only the lace border with a diluted starch if your runner needs more drape control on a sloped table. Do not stiffen the appliques; they should remain soft and tactile.
— Care Instructions :
Info :
Hand wash cold, reshape and dry flat. Avoid vigorous wringing which may distort delicate appliques. Store flat or rolled in tissue to protect petals. Spot clean stains promptly.
Notes :
This pattern outlines one complete approach; you may vary motif counts and placement to customize length, density and color balance. Keep notes of layout and counts for reproducibility.
Congratulations — you've completed a richly textured autumn table runner full of layered floral charm! Each pinned piece you stitched into place adds personality, elevated depth and a handmade warmth to your table. The tactile petals and sculpted leaves invite curious fingers and admiring glances. Take a moment to enjoy the finished composition, photograph it in natural light, and share your creation with friends. 🧶🍂 This is a project that rewards patience and attention to detail — well done, and happy gifting or decorating! 🎁