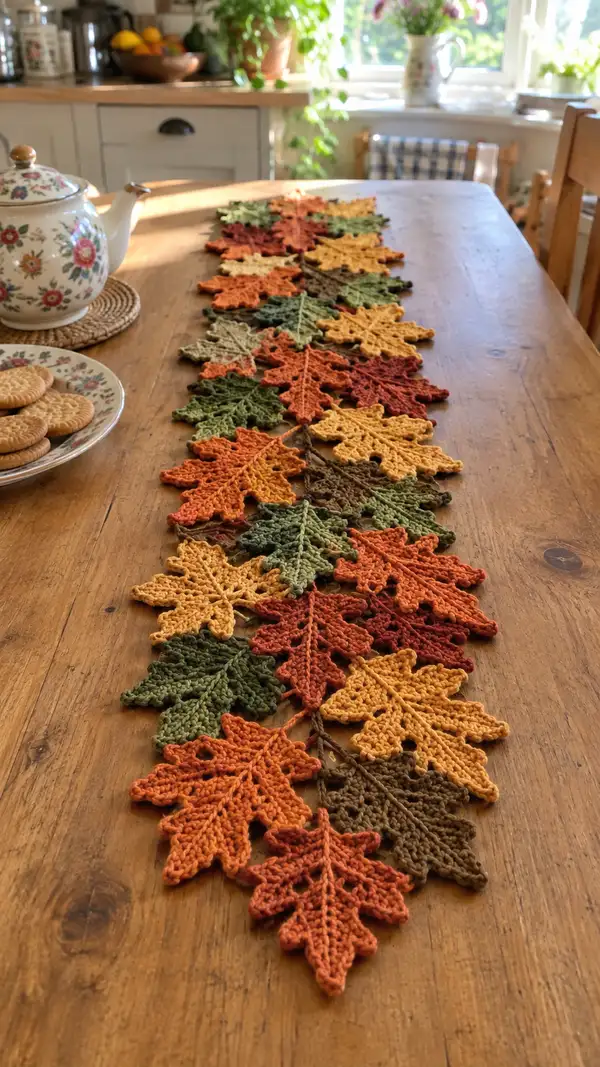
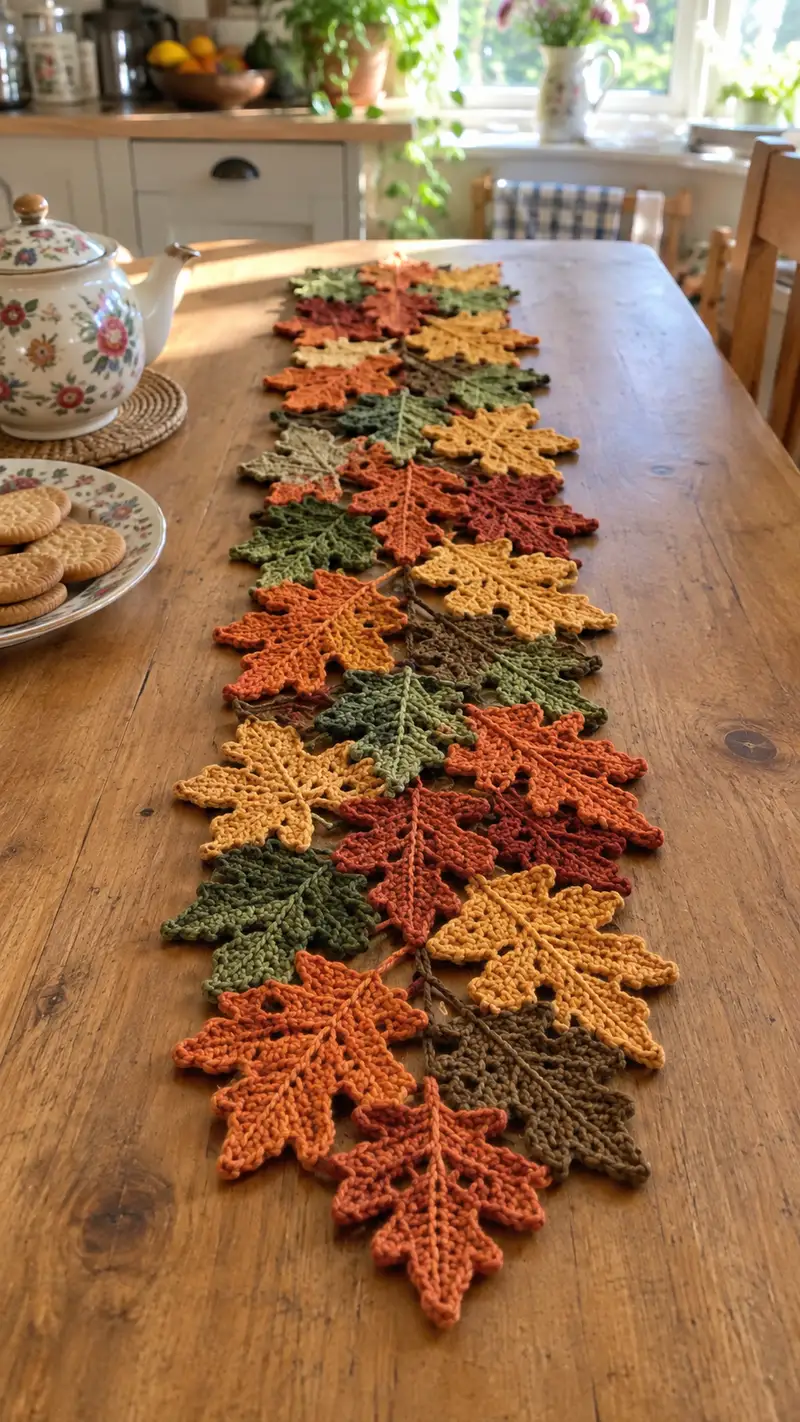
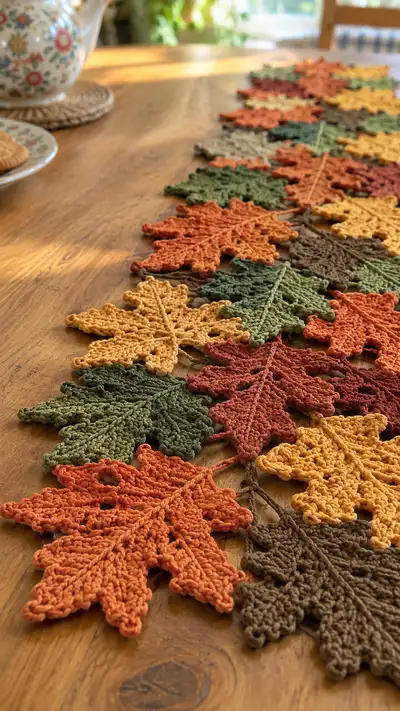
Create a warm, seasonal table runner made from a cascade of crocheted leaves in rich autumn tones. This pattern recreates layered maple-style leaves joined along a textured stem to form a charming runner or centerpiece. The finished runner showcases multiple leaf sizes and colors with a hand-blocked, sculpted look—perfect for mantel or table styling. Clear step-by-step instructions guide you through making and joining each leaf for a polished seasonal display.
Progress Tracker
0% Complete
— Overview :
Info :
This pattern is written in US terms. You will make leaves in three sizes (Large, Medium, Small), a textured stem/connector, an optional edging, and then join leaves into a runner. Each leaf is worked in the round from a small center and sculpted outward into lobes and points. Blocks and tips are included to replicate the crisp, natural shapes shown in the photos. The pattern uses standard increases and decreases to keep stitch counts mathematical and consistent.
— Large Leaf (Make as many as you wish) :
Round 1 :
MR, 6 sc in magic ring (6)
Round 3 :
(1 sc, inc) x 6 (18)
Round 4 :
(2 sc, inc) x 6 (24)
Round 5 :
(3 sc, inc) x 6 (30)
Info :
At this stage your work forms a small round centre. The next sequence begins to stretch the fabric into lobes for a leaf silhouette. Keep tension even and do not pull too tightly; you will add texture later.
Round 6 :
(4 sc, inc) x 6 (36)
Round 7 :
(5 sc, inc) x 6 (42)
Round 8 :
(6 sc, inc) x 6 (48)
Round 9-10 :
1 sc in each st (48)
Info :
These even rounds create a broad base to define the leaf centre. Place a stitch marker in the stitch you plan to use as the center-point of the top lobe; this helps for mirror shaping later on.
Round 11 :
(6 sc, dec) x 6 (42)
Round 12 :
(5 sc, dec) x 6 (36)
Round 13 :
(4 sc, dec) x 6 (30)
Info :
Begin shaping lobes: the pattern of decreases above pulls the circle into a flatter, star-like shape. At the end of this round, flatten the piece and check the lobe points. If you prefer sharper points, tighten decreases slightly; if rounder, keep looser tension.
Round 14 :
(3 sc, dec) x 6 (24)
Round 15 :
(2 sc, dec) x 6 (18)
Round 16 :
(1 sc, dec) x 6 (12)
Info :
We will now add defined lobes/points by working small raised clusters into selected stitches around the reduced round. These clusters are worked into the stitch and will be counted as decorative additions; maintain the base stitch count for shaping accuracy.
Round 17 :
*Place marker at start of round. For each of the six lobe bases do: sc in next 1 stitch, ch3, (hdc, dc, hdc) in same st (forming a small fan), sc in next 1 stitch; rep from * around. (Base st count remains 12, plus decorative fans)
Round 18 :
Working into the spaces between fans: sl st into first fan space, ch1, (sc, hdc, dc, hdc, sc) into each fan space to enlarge each lobe; sl st into next sc on base to anchor. Repeat around. (Anchors remain 12)
Round 19 :
1 sc in each base anchor st and 1 sc along fan edges where there is an obvious anchor—maintain even pressure while crocheting to create outward radiating points (12 anchors + decorative stitches)
Info :
Use picots on the very tips for a serrated edge: when you come to a lobe tip, ch3, sl st into first ch to create a firm picot, then continue along the edge. Picots are decorative and do not change the main stitch count; they create crisp teeth on the leaf edge.
Round 20 :
Edge round: sc evenly around entire leaf, placing a picot (ch3, sl st to base) at each lobe tip (this is decorative). Keep 1 sc in each obvious stitch or space to keep the leaf flat and wide (estimated total including picots equivalent to 48 base points)
Round 21 :
Spine round: Attach working yarn at center base. Ch1, sc in base stitch, *ch6, sl st into center top lobe base to create a decorative stem insertion, return to center sc and sc 2 more stitches; rep across to sketch a raised spine with chain loops across the midline (this is decorative and does not change the leaf perimeter sc counts).
Round 22 :
Return to edge: 1 sc in each st around to smooth edges and secure picots (work firmly but not tightly) (48)
Round 23 :
Optional contrast round: switch to a slightly darker shade and work 1 sc around the very outer edge in BLO to create a raised rim. 1 sc in each st BLO (48)
Round 24 :
Fasten off and leave a 12-18 inch tail for sewing/joining. Weave tail to backside for a neat finish.
Info :
Block this leaf: dampen lightly and pin each tip and lobe so the leaf opens to its full shape. Allow to dry and apply light spray starch if a firmer, more sculpted edge is desired. Repeat for every large leaf.
— Medium Leaf (slightly smaller, make many) :
Round 1 :
MR, 6 sc in magic ring (6)
Round 3 :
(1 sc, inc) x 6 (18)
Round 4 :
(2 sc, inc) x 6 (24)
Round 5 :
(3 sc, inc) x 6 (30)
Info :
The medium leaf uses fewer shaping rounds to keep it proportionally smaller. Maintain neat tension—this leaf will act as a mid-sized element to layer between large leaves.
Round 6 :
1 sc in each st (30)
Round 7 :
(3 sc, dec) x 6 (24)
Round 8 :
(2 sc, dec) x 6 (18)
Round 9 :
(1 sc, dec) x 6 (12)
Round 10 :
Decorative fans: Into each of the six anchor stitches work (sc, hdc, dc, hdc, sc) to create small lobes. Anchors = 6 with fans in between
Round 11 :
Edge smoothing: 1 sc around to tidy and add small picot points at three primary tips (maintain base counts) (12 anchors + decorative stitches)
Round 12 :
Optional: BLO contrasting border round, 1 sc in each st BLO (12)
Round 13 :
Fasten off leaving 12 inch tail for joining.
Info :
Block medium leaves slightly less aggressively than large leaves so they nest visually under or between larger shapes without overpowering them.
— Small Leaf (accent leaves) :
Round 1 :
MR, 6 sc in magic ring (6)
Round 3 :
(1 sc, inc) x 6 (18)
Round 4 :
1 sc in each st (18)
Round 5 :
(1 sc, dec) x 6 (12)
Round 6 :
Make small picots at alternating stitches around to create serration: (sc, picot) repeat around (12 base anchors)
Round 7 :
Fasten off and leave tail for sewing/joining
Info :
Small leaves are used to fill gaps and add fine texture. Make lots of these in contrasting colors for a lively runner.
— Stem / Connector Cord (Make long cord for joining leaves) :
Round 1 :
Ch 120 (or desired runner length). This will be the main spine that leaves are sewn/attached to. For shorter tables ch 60-80; for long tables ch 140-200.
Round 2 :
Work back along chain: starting in 2nd ch from hook, sc in each ch (119) to create a flat cord. This creates a sturdy, slightly textured base to attach leaves.
Round 3 :
Optional: 1 sc in each st BLO to make a raised ridge on top (119)
Info :
If you want a rope-like stem rather than a flat cord, use a crochet i-cord technique or a three-strand braid of crocheted chains. Keep the cord flexible enough to lay flat on the table.
Round 4 :
Fasten off leaving long tails at both ends for finishing. If you would like a thicker stem, make two cords and sew them together with overhand stitches along the length.
— Decorative Leaf Vein (Optional raised stitch on each leaf) :
Round 1 :
Using your yarn needle and a strand of contrasting brown or darker shade, stitch a central raised vein by weaving from leaf base to tip with a tapestry needle using a chain stitch imitation: Insert at base, pull yarn through, insert a few stitches along center and pull the yarn up slightly to create a raised line. Repeat for each leaf.
Info :
Alternatively you can crochet a narrow raised chain across the leaf. Example: attach yarn at base, ch15 along center, sl st back along chain to create a raised spine. Secure and weave tails on backside.
— Joining Leaves to Stem (Detailed join sequence) :
Info :
Plan layout: arrange leaves on a flat surface and stagger sizes so edges overlap naturally. Take photos or mark positions so you sew consistently. Leaves are joined to the stem by sewing the leaf base and a small portion of the underbody to the cord. Alternate sides so the runner looks organic.
Round 1 :
Position a large leaf with its base overlapping the cord by 3-5 stitches. Using the long tail left from the leaf, whip stitch through the leaf base and around the cord for 6-8 secure stitches. Tie a small knot and weave in tail inside the cord.
Round 2 :
Attach a medium leaf 3-4 inches from the first, stitching through the underside and catching the cord every 3 stitches for a stable attachment. Use small, neat stitches on the underside to avoid visible disruption on the top surface.
Round 3 :
Sew small leaves clustered between large/medium leaves. For clusters, stack 2-3 small leaves with slightly offset bases and sew through all layers into the cord with a single thread for a tidy cluster effect.
Round 4 :
For a natural drape, alternate the side of the cord that leaves attach to; this creates an undulating runner that sits well on a table.
Info :
When sewing leaves, keep stitches tight but not puckering. If you find the leaves move, add a few more discrete stitches through the tip areas to tack them down to the cord in addition to the base.
— Edge Finish & Optional Border :
Round 1 :
With stem attached and all leaves sewn in place, single crochet around the entire runner perimeter catching leaf edges and the stem edge to produce a unified border. Work evenly to avoid ruffling (estimated 1 sc in each obvious edge stitch).
Round 2 :
Optional scallop: *skip 1 st, 5 dc in next st, skip 1 st, sl st in next st; rep along any straight sections you want to accent. Avoid scallops at leaf tips to protect the picots.
Info :
A neat edge unifies the runner. If you prefer a raw, organic look, leave the edges unbordered after blocking for a looser effect.
— Finishing Touches & Blocking :
Round 1 :
Weave in all loose ends: Use a tapestry needle to bury tails through at least 3 cm of fabric and trim close. For any visible tail, stitch under the spine or underside of the leaf to hide.
Round 2 :
Block the entire runner flat. Pin all leaves in position on a towel or blocking mat to match how you want it to lay. Lightly wet-spray each leaf and allow to dry overnight; if you want a crisper look, use a light spray starch before drying.
Info :
If you want a semi-rigid runner for display, you can lightly attach fusible interfacing strips to an underside fabric backing (cotton) using fabric glue before tacking the runner on top - test on scrap yarn first to ensure no damage.
— Troubleshooting & Variations :
Info :
If your leaf edges pucker, re-block and steam them flat. To change size: use a thicker yarn and larger hook for bigger leaves; reduce rounds for smaller leaves. Add beads or small embroidered veins for extra detail. To make a garland instead of a runner, shorten the stem chord and add ties at both ends.
Summary :
Make multiple leaves in varied colors, block them, sew them along a long flat cord, and optionally add a tidy edge. This modular approach lets you customise length, color layout and density for small or large tables. Enjoy arranging and readjusting before final sewing for best visual balance.
This autumn leaves runner is such a satisfying make—each leaf is a little project with a big payoff when they are all joined together. The layered colours and textured veins create a cozy, handmade centerpiece that brightens any table. I love how it folds and drapes, and how easy it is to customise the length and palette. 🧶🍂😊