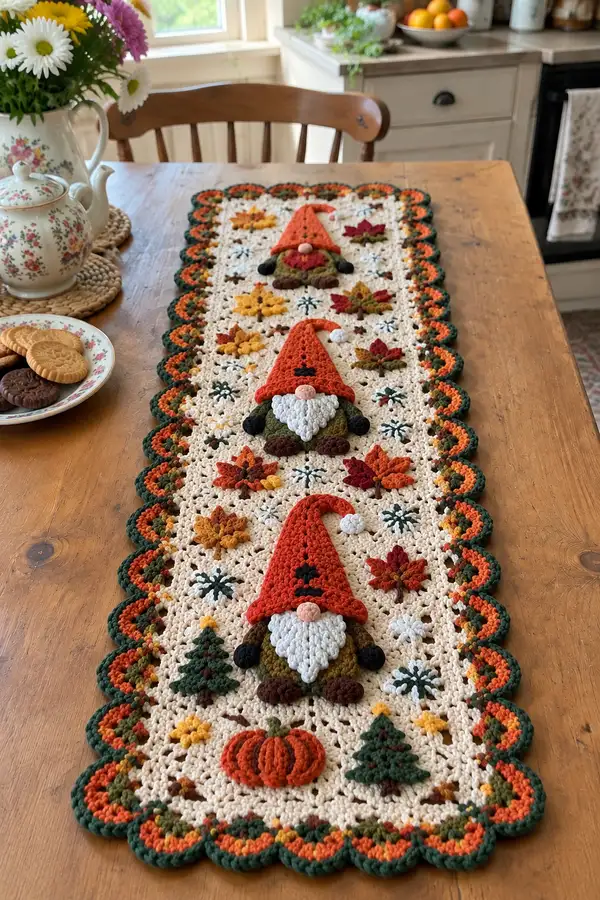
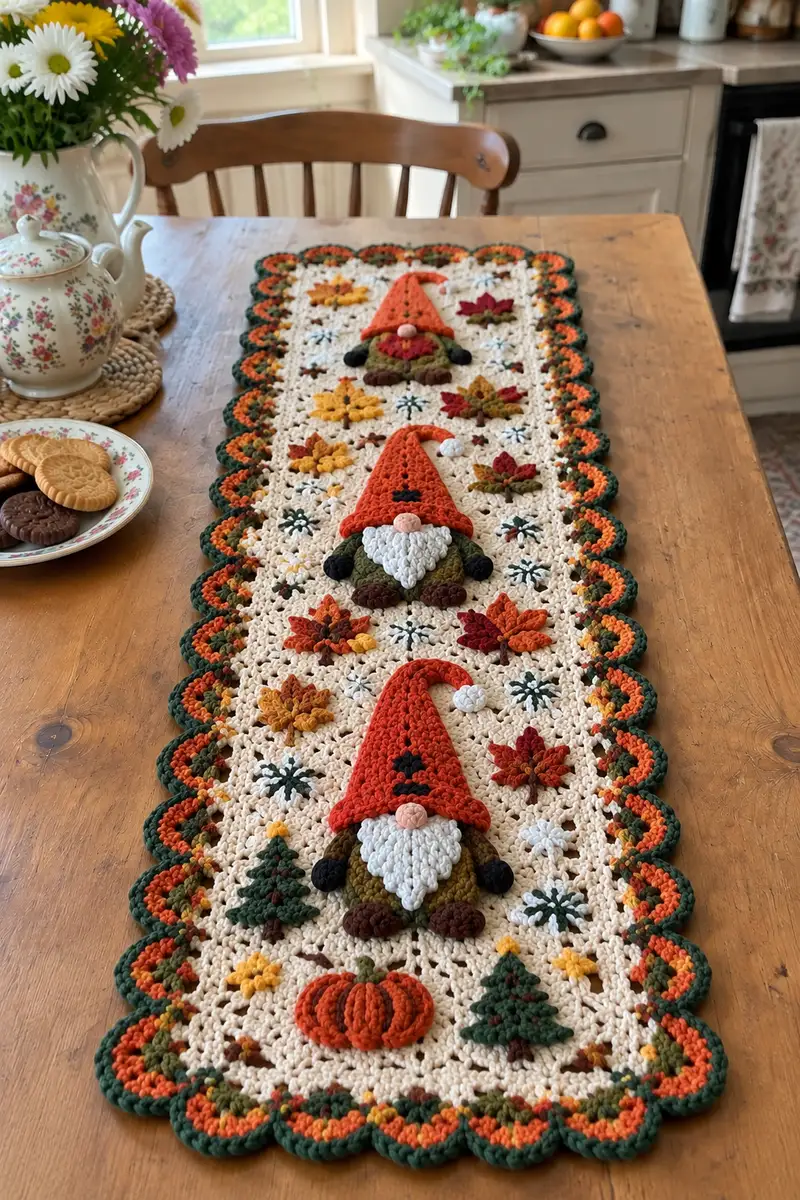
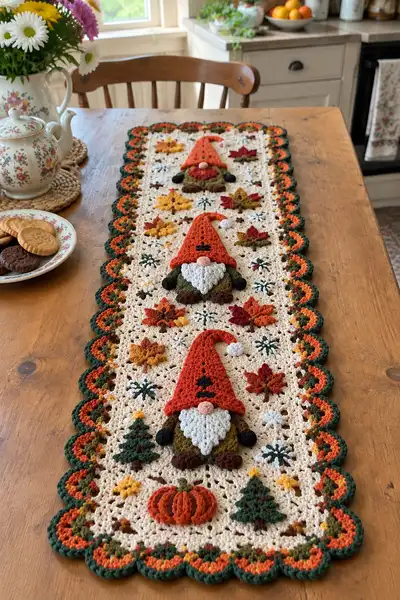
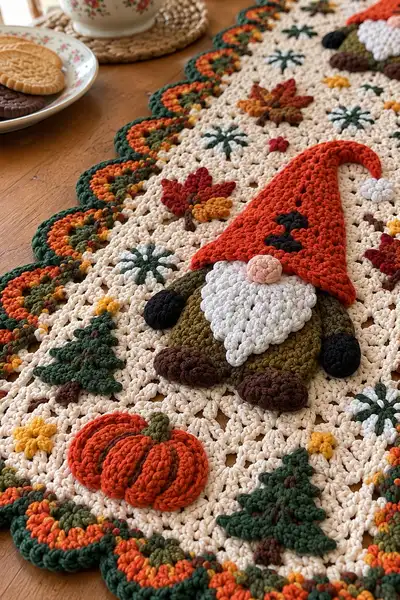
This warm, detailed table runner features three plump autumn gnome appliques surrounded by pumpkins, layered maple leaves, tiny trees and starburst flowers on a cream lattice background. Rich fall tones of burnt orange, olive, deep green and mustard give a cozy harvest feel. A scalloped scallop border in alternating greens and oranges finishes the piece with a playful ripple. Perfect for dressing a dining table, sideboard or mantle during autumn gatherings.
Progress Tracker
0% Complete
— Notes & Gauge :
Info :
This pattern is worked using worsted weight yarn (category 4) and a 4.0mm hook for the main lattice. Gauge is approximately 12 dc x 6 rows = 4 in on 4.0mm, but gauge is flexible for a decorative runner. For a snug amigurumi-style applique, use a 3.5mm hook to keep shapes defined.
Info :
All motifs are worked in continuous rounds unless otherwise noted. Use a stitch marker to mark the first stitch of each round. We recommend blocking the flat motifs lightly before joining to ensure consistent edges.
— Granny Star Motif (Make 9 in total; motif = openwork square) :
Round 1 :
ch4, join with sl st to form ring, ch3 (counts as dc), work 15 dc into ring, join to top of ch3 with sl st (16 dc)
Round 2 :
ch3, dc in same st, ch2, (2 dc in next dc, ch2) x 7, join to top of ch3 with sl st — creating 8 groups with ch2 corners (32 dc, 8 ch-2 corners)
Round 3 :
sl st to first ch-2 space, ch3, (2 dc, ch2, 2 dc) in same ch-2 space (corner made), *dc in each st across to next ch-2 space, (2 dc, ch2, 2 dc) in corner; rep from * around, join (approx 64 dc with 8 corners)
Round 4 :
sl st to first corner, ch1, sc in corner space, ch3, sc in same corner space; *sc in middle of side (work 8 sc evenly across side), ch3, sc in corner space twice; rep from * around, join (creates 8 picot-like clusters and ch-3 side spaces)
Round 5 :
sl st into ch-3 space, ch3, 2 dc in same space, ch2, 3 dc in same space (corner shell); *3 dc in each ch-3 side space, corner shell in each corner; join (shells form lacy square) (approx 96 dc total)
Info :
These motifs are slightly open to allow background airiness. Make 9 motifs (3 across by 3 down) for a runner section that fits three gnome rows. Adjust number for desired runner length.
Round 6 :
ch1, sc evenly around working 3 sc in each corner shell, place 1 sc in each dc across side spaces to create a solid outline, join, fasten off and weave ends (approx 100 sc)
Info :
Block each motif lightly to square up and make joining easier. Arrange motifs in 3 columns and 3 rows with gnome placement centered on the middle column motifs.
— Joining The Motifs into Runner Base :
Round 1 :
Lay motifs in your chosen layout (recommended 3 across x 9 down for extended runner or 3x3 per panel and join panels end-to-end). Join motifs using join-as-you-go slip stitch method: align two motifs right sides up, sl st through corresponding sc on both motifs every 3-4 stitches until edge joined.
Info :
For a longer runner like the pictured piece, create three motif blocks (each 3 motifs long) and seam the blocks lengthwise so you have a long row of repeated motifs. Leave the center of each block to be embellished with a gnome applique.
Round 2 :
After joining all motifs into a single rectangle, go around the entire rectangle in cream with 1 sc in each st and 3 sc in each corner to even the edge. This creates a finished baseline for the border to attach later (approx perimeter sc count depends on layout)
Info :
Keep counts consistent across long edges. If motifs produce uneven edges, add or remove sc at corners to square the runner. Pin the runner on blocking mats and steam lightly to flatten before adding appliques.
— Gnome Set (Make 3; each gnome assembled from separate parts) :
— Head / Upper Body (rounded torso that the hat sits on) :
Round 1 :
mr, 6 sc in mr (6)
Round 3 :
(1 sc, inc) x6 (18)
Round 4 :
(2 sc, inc) x6 (24)
Round 5 :
(3 sc, inc) x6 (30)
Round 6 :
(4 sc, inc) x6 (36)
Round 7 :
(5 sc, inc) x6 (42)
Round 8 :
1 sc in each st around (42)
Info :
This piece forms the top of the gnome torso/head combo that the hat will slip over. Use olive color here for body/torso. Place this element on the motif background aligning to the center of the motif square; positioning will be refined when appliques are sewn on.
Round 9 :
1 sc in each st around (42)
Round 10-12 :
1 sc in each st around (42)
Info :
Rounds 8-12 create height for a plump upper body. Keep an even tension so the hat fits snugly later. No stuffing required for this base; this piece is lightly stuffed once assembled with beard and nose attached for a slightly raised 3D effect.
Round 13 :
(5 sc, dec) x6 (36)
Round 14 :
(4 sc, dec) x6 (30)
Round 15 :
(3 sc, dec) x6 (24)
Round 16 :
(2 sc, dec) x6 (18)
Round 17 :
(1 sc, dec) x6 (12)
Info :
Fasten off, leaving a long tail for sewing. Lightly stuff with a small amount of fiberfill (the head is intentionally slightly flattened to make the hat sit crisply). Set aside for assembly.
— Hat (Make 3 in Pumpkin Orange) :
Round 1 :
mr, 6 sc in mr (6)
Round 3 :
(1 sc, inc) x6 (18)
Round 4 :
(2 sc, inc) x6 (24)
Round 5 :
(3 sc, inc) x6 (30)
Round 6 :
(4 sc, inc) x6 (36)
Round 7 :
(5 sc, inc) x6 (42)
Round 8 :
(6 sc, inc) x6 (48)
Round 9-14 :
1 sc in each st around (48)
Info :
These rounds create the main bell shape of the hat. Work tightly; hat should be slightly larger in circumference than the top of the head so it can be slipped over. For the curved tip seen in the photos, we will shape the final rounds to create a gentle curl rather than a straight cone.
Round 15 :
(6 sc, dec) x6 (42)
Round 16 :
1 sc in each st around (42)
Round 17 :
(5 sc, dec) x6 (36)
Round 18 :
(4 sc, dec) x6 (30)
Round 19 :
1 sc in each st around (30)
Round 20 :
ch1, sc in each st for 3 rows to build up brim if desired (30)
Round 21 :
For curled tip: *sc in next 5 sts, dec; rep around once, then sl st into next st, ch10 (for tail), sc back along the chain to tip, fasten off leaving long tail to sew into curl (24)
Info :
To create the distinct curled tip, flatten the last chain tail and sew down the curl into a soft spiral. Use stuffing sparingly inside the hat just to give body to the curve. The hat in the photo folds forward and down; experiment with shaping while sewing into position.
— Beard (Make 3 in Cream White) :
Round 1 :
mr, 6 sc in mr (6)
Round 3 :
(1 sc, inc) x6 (18)
Round 4 :
(2 sc, inc) x6 (24)
Round 5 :
(3 sc, inc) x6 (30)
Round 6 :
1 sc in each st around (30)
Round 7 :
Switch to texture: ch2, *yo and pull up loop three times in same st (tr cluster/puff), yo and pull through all loops, sl st to lock; skip next st, sl st in next st; rep across to create scalloped puff beard (approx 15 puffs)
Info :
Beard is worked flat with prominent puff clusters to create the scalloped, layered look. After finishing, flatten and sew the top edge to the face area of the gnome base, allowing the puffs to hang down for a full beard effect.
Round 8 :
Fasten off leaving long tail for stitching. Trim and shape puffs gently with fingers to make them consistent. Block lightly if necessary.
— Nose (Make 3 small round noses in Blush Pink) :
Round 1 :
mr, 6 sc in mr (6)
Round 3 :
1 sc in each st around (12)
Info :
Stuff lightly with fiberfill to create a small round nose. Fasten off leaving long tail for sewing. Position just below hat brim and above beard center, sew through top few rounds to anchor.
— Arms (Make 2 per gnome; small rounded mitts then short arm) :
Round 1 :
mr, 6 sc in mr (6)
Round 3-4 :
1 sc in each st around (12)
Round 5 :
(1 sc, dec) x4 (8)
Round 6-8 :
1 sc in each st around (8)
Info :
These are little fingerless mitten shapes for the gnome hands. Use black or dark chocolate for mitts as in photo. Lightly stuff the mitts for body and sew to sides of torso with the opening pointing toward body so they look tucked in.
— Feet (Make 2 per gnome; little rounded booties) :
Round 1 :
mr, 6 sc in mr (6)
Round 3 :
(1 sc, inc) x6 (18)
Round 4 :
1 sc in each st around (18)
Round 5 :
(1 sc, dec) x6 (12)
Round 6 :
1 sc in each st around (12)
Info :
Use warm brown for booties and add a small decorative ridge using BLO single crochet around the top for a cuff effect. Stuff lightly and sew to bottom of the torso piece so feet peek out beneath the beard.
— Small Decorative Elements (Pumpkin — Make 3 small pumpkins) :
Round 1 :
ch6, join to form ring, ch1, 10 sc into ring (10)
Round 3 :
(1 sc, inc) x10 (30)
Round 4 :
1 sc in each st around (30)
Round 5 :
Switch to puff ribs: ch1, *7-tr puff in same st (yo, insert hook, pull up loop 7 times total, yo, pull through all loops), sl st in same st to lock puff; sl st in next st to separate rib; rep around to form distinct ribs (approx 15 ribs)
Info :
After forming puff ribs, gather the top and bottom with a length of yarn through the center to create the classic pumpkin segments. Sew a short brown stem by making a small 6-sc tube or a short frogged ch-4 stem and sew to top.
Round 6 :
Fasten off leaving long tail for sewing. Stuff lightly first, then cinch center gathering and close. Sew to runner base where indicated by photo layout.
— Maple Leaf Applique (Make multiple in varying colors) :
Round 1 :
ch6, sl st to form ring, ch1, 5 sc into ring (5)
Round 2 :
*(ch4, sl st in 2nd ch from hook to form point) twice to create first lobe, sl st into next sc; rep from * around to create 5 lobes, fasten off leaving tail to sew (leaf with 5 points)
Info :
Layer two or three leaf shapes in different sizes and slightly offset them to create the multi-colored layered leaf seen in the photos. Use small running stitch in center to tack layers and create veins with a contrasting color yarn.
— Evergreen Tree Applique (Make several small trees) :
Round 1 :
ch6, 1 sc in 2nd ch from hook and in each ch across to form a short strip of 5 sc, turn and work along one long side to create a triangle: ch1, sc2tog across the next two sts at the base, continue to decrease each row until tip formed; fasten off and sew a tiny brown stem (1 sc x3) at base
Info :
Or work a triangular motif: mr, ch3 (counts as tr), tr3, ch2, tr4 in same base for a layered effect; continue building layers by alternating tr and dc rows to create the evergreen silhouette. Use forest green and a small brown trunk.
— Starburst Flower (Make many small starbursts) :
Round 1 :
mr, ch3, 12 dc into ring, join (12)
Round 2 :
*ch5, sl st into next dc to create spiky petal; rep around 6-8 times to create starburst; fasten off and sew onto runner inbetween other motifs
Info :
Use deep green for small starbursts as accent in the cream latticed spaces — they emphasize depth and mimic little sprigs of foliage in the openwork background.
— Scalloped Border (Worked around entire runner in rounds; uses three colors: Forest Green, Olive, Pumpkin) :
Round 1 :
With cream, sc evenly around edge of runner, placing 3 sc in each corner for neat turn; join with sl st (sc count varies by runner perimeter)
Info :
Keep stitch count even so scallops sit evenly. Use pins to mark every 8th or 10th stitch as guide for scallops depending on runner width.
Round 2 :
Change to Pumpkin color. *ch3, skip 2 sts, sc in next st; rep around to create slight wave (this creates small arch markers for scallops); join with sl st
Round 3 :
Change to Olive. Work 1 sc around each arch space, then in each arch work (sc, hdc, 3 dc, hdc, sc) to form shell scallop; rep around for entire edge; join with sl st
Round 4 :
Change to Forest Green. Work along edge of each scallop: sl st into center dc of scallop, ch1, 7 sc into center dc to create a puffed scallop ridge; sl st into next scallop center; rep around to create the bold green scallop rim
Round 5 :
Fasten off and weave in ends. If desired, add a final round of slip stitch in contrasting color along inner edge to emphasize scallops.
Info :
Alternate the order of colors if you prefer different accent layering. In the pictured runner the sequence creates a deep outer green rim, a mid olive shell and a bright pumpkin inner scallop for a layered look.
— Final Assembly & Placement Notes :
Info :
Pin all appliques in place on the cream lattice base before sewing. Place gnome bodies centered within their respective motif squares, ensuring equal spacing from ends. Use a yarn needle and matching yarn to sew appliques securely with small whip stitches. For puffed elements (pumpkins, leaves), sew through the base rounds and anchor into the cream background at multiple points to prevent sagging.
Info :
For the gnomes: attach the beard first, then the nose, then the hat. Sew mitts to either side of the torso; sew feet under the beard so they peek out naturally. Adjust stuffing before final stitching for best silhouette.
Info :
Weave in all ends neatly and block the finished runner once assembled to set stitches. For heavy use, consider sewing an invisible fabric backing to protect the runner and appliques.
This autumn runner blends delicate openwork with plush, cheerful appliques to bring a heartwarming seasonal accent to your home. Each gnome tells a story of cozy evenings and harvest gatherings, and the tactile pumpkins and layered leaves add irresistible texture. I hope this pattern brings you as much joy making it as you will feel displaying it — stitch by stitch, you create a little fall wonderland for your table. Happy hooking and enjoy those warm autumn vibes! 🍁🧶