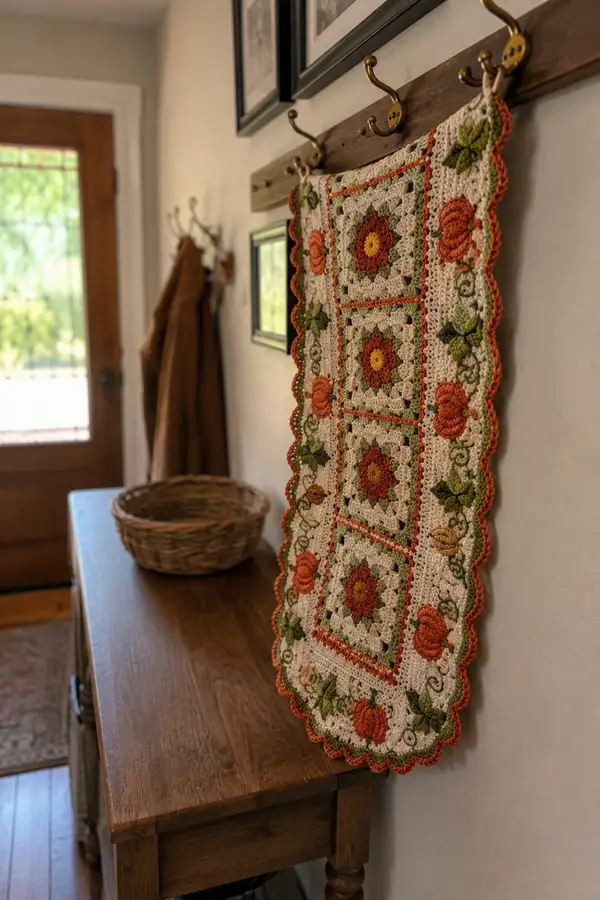
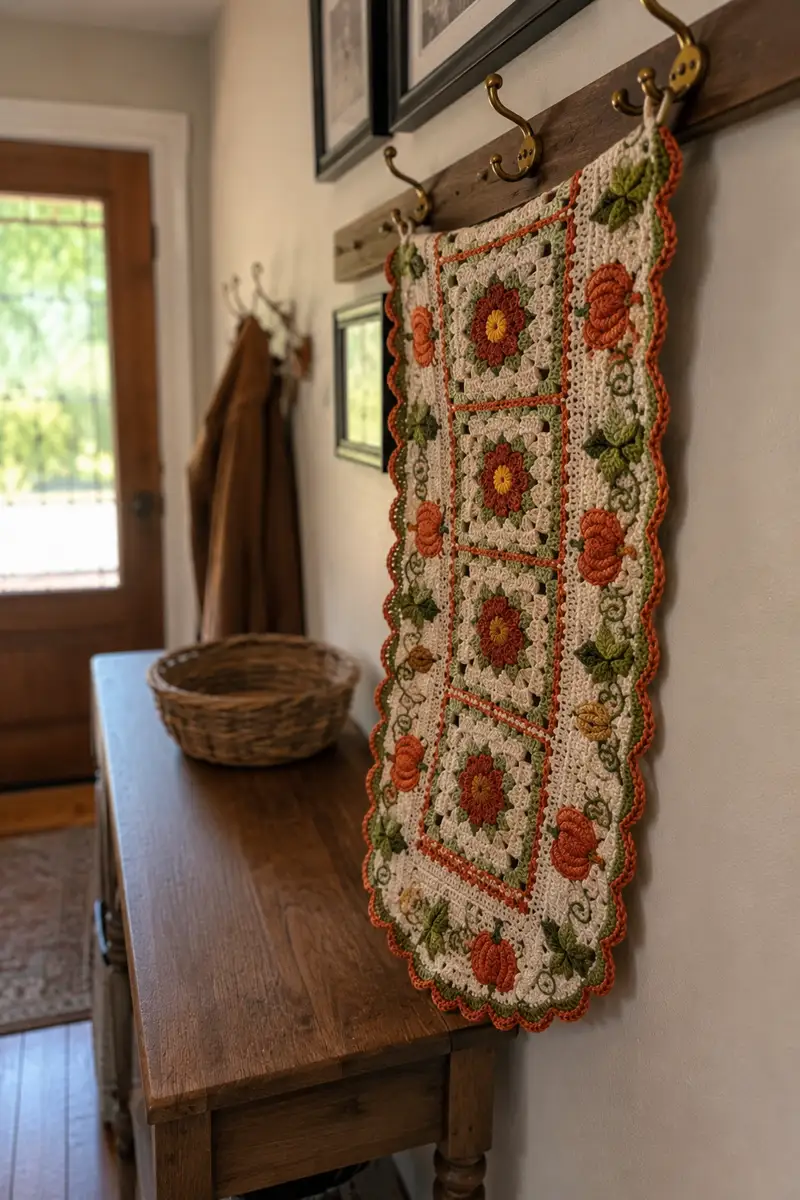
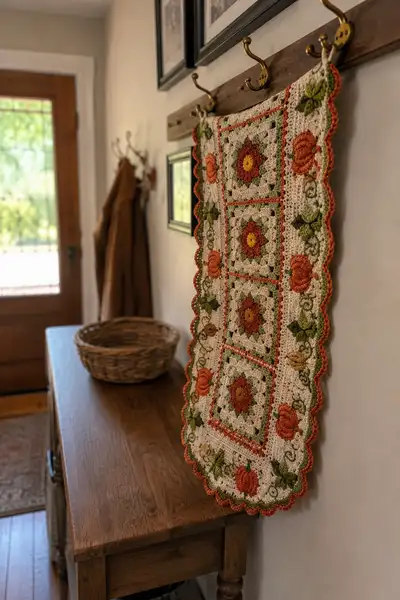
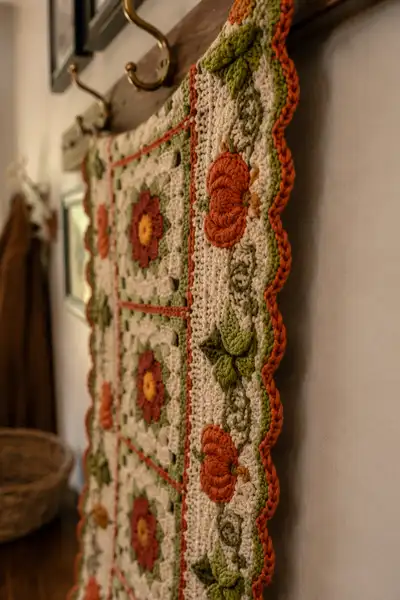
This detailed pattern recreates a cozy autumn table runner featuring three floral granny squares, embroidered pumpkin vines, 3D pumpkin appliques and a scalloped edge. Worked in warm pumpkin, rust, moss and cream tones, the runner hangs beautifully or lays flat as a seasonal accent. The pattern includes step-by-step square construction, appliques, vine embroidery and a layered border for a richly textured finish.
Progress Tracker
0% Complete
— Notes & Gauge :
Info :
This pattern is worked in worsted weight (#4) yarn. Gauge is not critical but aim for a dense fabric; 16 sc x 16 rows = 4" in single crochet when using 4.0mm hook. Work tightly for appliques so stuffing does not show. Use stitch markers at the start of each round for round sections and keep consistent tension throughout.
— Center Floral Granny Square (Make 3 identical) :
Round 1 :
8 sc in magic ring (8)
Round 3 :
(1 sc, 1 inc) x 8 (24)
Round 4 :
(2 sc, 1 inc) x 8 (32)
Round 5 :
(3 sc, 1 inc) x 8 (40)
Info :
Change to rust/flower color for the central petal rounds. Leave the cream yarn tail to be sewn in later and carry small color tails neatly along the back or fasten off after the round if preferred.
Round 6 :
Switch to rust color: (4 sc, 1 inc) x 8 (48)
Round 7 :
Switch to mustard yellow for flower center: 1 sc in each st (48)
Round 8 :
Return to rust: (5 sc, 1 inc) x 8 (56)
Round 9 :
Work petal row in puff clusters: *ch1, (yo, insert, pull up loop) 3 times in next st, yo and pull through all loops, ch1, sl st in same st; sk 2, sc in next* rep around to create defined petal points (56)
Info :
Puff clusters above are worked in the rust petal color to create a raised flower texture. Keep the puff loops loose enough to close smoothly with the final pull-through. Count rounds and markers to ensure petals land evenly.
Round 10 :
Switch to moss green for small leaf clusters: (6 sc, 1 inc) x 8 (64)
Round 11 :
Switch to cream: 1 sc in each st (64)
Round 12 :
Shell-round for square shaping: *dc, ch2, dc in same st (corner), sc in next 14 sts; rep to make four corners* This forms four corners using clusters and spaces; counts will vary slightly depending on corner spacing; aim for 4 corner clusters evenly spaced.
Info :
Round 12 uses dc and ch2 corners to create a square shape. Arrange 16-18 sc between corners on each side to keep the square balanced. Adjust spacing so final square edges are even.
Round 13 :
Work a trimmed lace round: sc across sides and 3 sc in each ch2 corner; pay attention to keeping side stitch counts equal (approx 18 sc per side, 72 total)
Round 14 :
Edging round: *sc in next 3, (sk 1, dc, sk 1) in next st to create small open diamond, sc in next 3* rep around (72)
Round 15 :
Final square frame: Change to cream for the outer frame: 1 sc in each st BLO to create a defined ridge (72)
Round 16 :
Bordering round: sc evenly around, placing 3 sc in each corner to maintain square (72)
Info :
Make three identical squares. Block each square lightly to even out edges and ensure they are the same size before joining. Weave in tails or leave long tails for joining using mattress stitch.
— Join Squares Vertically :
Round 1 :
Lay squares face down in vertical order (top, middle, bottom). Using cream yarn and tapestry needle, whip stitch or mattress stitch along adjacent outer frames to join squares; leave approximately 2-3 sts between join points for slight flexibility. Join through both loops for a secure seam.
Round 2 :
After joining, pick up working yarn at top edge and sc along the seam line to create a narrow seam-covering ridge: 1 sc in each st across joined seam (count will equal the width of square, approx 72)
Round 3 :
Return to cream and work 1 round sc around the entire assembled three-square panel to stabilize joins: sc evenly around, placing 3 sc in each outer corner (approx 230-240 sc depending on side counts)
Info :
Check that the assembled panel lays flat. If one join pulls in, remove a few joining stitches and re-position. Blocking the large assembled panel now will help the subsequent border rounds sit evenly.
Round 4 :
Work a decorative frame in rust: *ch2, sk 1, dc in next st* rep around to create a dotted line frame. Maintain even spacing (approx 1 dc every 3-4 sc) (count matches previous round)
Round 5 :
Sc around the panel in cream to create a wide neutral field that will later receive appliques and vines: 2 rounds of sc evenly (round 5 and 6 total) (maintain counts across both rounds)
Info :
These neutral sc rounds are the ground for pumpkin placement. Mark positions where pumpkins and leaves will be attached: along the side margins at the center of each side of each square and at the runner ends. Use pins to place motifs before sewing.
— Side Panels & Background Strips (Make Left and Right) :
Round 1 :
With cream, join at top side of assembled squares along one long edge. Foundation: ch (approx 68 to match vertical length) + 1 turning ch, sc in 2nd ch from hook and in each ch down to create a strip of 68 sc (68)
Round 2 :
1 sc in each st across (68)
Round 3 :
Repeat Round 2 to build height of side strip (68)
Round 4 :
Change to moss green: work a leaf-motif base by alternating sc and ch1 picot spaces to give texture along the edge: *sc in next 4, ch1, sk1* rep across (approx 54 sc and 14 ch1 spaces)
Info :
Work two identical strips for left and right. These strips will be the place to attach the pumpkins and leaves. Mark the intended pumpkin spacing: top, center of each square, bottom — total 4 pumpkins per side (8 pumpkins total across both sides).
Round 5 :
Return to cream: 1 sc in each st across to create a smooth panel (68)
Round 6 :
Work a shallow lacy round in cream: *dc, ch1, sk1, sc* rep across to give subtle texture (68)
Round 7 :
Repeat Round 5 to even out thickness (68)
Info :
Place the strips and pin to the laminated square panel edges; use long tail mattress stitch to join strips to the main panel on both sides. Ensure pumpkins and leaves will sit centered between the inner square borders and the outer scalloped edge.
— Pumpkin Applique (Make 8) :
Round 1 :
Magic ring, 6 sc in mr (6)
Round 3 :
(1 sc, 1 inc) x 6 (18)
Round 4 :
(2 sc, 1 inc) x 6 (24)
Round 5 :
(3 sc, 1 inc) x 6 (30)
Info :
Change to pumpkin orange at Round 6 to form visible pumpkin ribs. Use a tighter hook (3.25mm) if you prefer a more compact applique.
Round 6 :
(4 sc, 1 inc) x 6 (36)
Round 7 :
Rib shaping: *sc in next 2, puff in next st (yo, insert, pull up loop 3 times), sc in next 2, sk 1* rep around to create 6 ribs (36)
Round 8 :
Work a round of sc tightening base: 1 sc in each st (36)
Round 9 :
Surface rib round: Using front post hdc (fp-hdc) around every 6th st to accent ribs: *2 sc, fp-hdc, 2 sc* rep around (36)
Round 10 :
Stem & finishing: Sl st to centre, ch4, sl st back to create short stem, fasten off leaving tail to sew. Stuff center lightly with a pinch of fiberfill to create bulbous shape; do not overstuff (36)
Info :
Sew pumpkin appliques to the cream side panel where marked. Use mattress stitch through the back ridges, catching the panel fabric and the applique base so the pumpkin sits slightly raised. Add a few whip stitches around the base to secure and then embroider 2-3 spiral vines leading away from the pumpkin base.
— Small Pumpkin Accent (Optional extra layer on some pumpkins) :
Round 1 :
6 sc in magic ring (6)
Round 3 :
(1 sc, 1 inc) x 6 (18)
Round 4 :
Fold center slightly and sl st to make a shallow dome, fasten off and leave tail for sewing (18)
Info :
Place this smaller dome on top of the larger pumpkin center if you want an extra layered pumpkin look. Sew in place with hidden stitches and add a tiny yarn knot for a stem.
— Leaf Applique (Make 12) :
Round 1 :
Ch 6, sc in 2nd ch from hook, hdc in next, dc in next, tr in last (5 stitches along chain) turn to work other side of chain: dc, hdc, sc (total leaf 7 sts)
Round 2 :
Working around the leaf edge, sc evenly around with 3 sc in tip (7 + 3 corners = approx 14 sc)
Round 3 :
Using BLO: 1 sc in each st BLO to give a pronounced ridge for vein (14)
Round 4 :
Using moss green darker shade: embroidery vein using back stitch down the center of leaf; fasten off leaving tail to sew to panel
Info :
Sew leaves near pumpkins, tucking the tail of the leaf beneath the pumpkin base slightly for a natural overlap. Add 1-2 leaves per pumpkin, alternating shades of green for depth.
— Vines & Embroidered Details :
Round 1 :
Info : Positioning: With the pumpkins and leaves attached, plan vine pathways using a disappearing-marker pen or basting yarn. Typical vine placement runs up and down the side panels weaving between pumpkins and leaves.
Round 2 :
Using moss green yarn and a yarn/darning needle, do surface chain stitch (or sl st surface crochet) from pumpkin stem points outward to create curls. Make each vine approximately 15-30 stitches long depending on panel space.
Round 3 :
Work small spiral tendrils: chain 6, slip stitch back along chain to base to form a curl. Secure end with tiny stitch under the leaf or into the cream background.
Round 4 :
Add embroidered tiny seed accents and smaller vines in olive using French knots (2-3 per cluster) and small straight stitches for a dimensional look.
Info :
Embroidery is forgiving: step back and look at motif balance. Work symmetrically on left and right sides, repeating motifs at the same relative positions to keep the runner balanced visually.
Round 5 :
Outline certain petals and leaves lightly with single-strand darker green in back stitch to lift features away from the cream background.
— Lower & Upper End Panels (Make 2 ends) :
Round 1 :
Using cream, pick up along the short edge of the assembled square stack: sc evenly across the short edge to create a rounded end field approx 36 sc (36)
Round 2 :
1 sc in each st across (36)
Round 3 :
Work a small arc: sc for 4 sts, ch4, sc in next 4 sts to create a shallow scallop base for end appliques (36)
Round 4 :
Place a pumpkin and leaf cluster centered on the end panel using the applique methods above; sew in place securely and embroider vine connections integrating the end motifs into the side panel vines.
Info :
Blocking end panels after joining helps keep the scallop points nice and even. Use pins and steam or wet-blocking for best results.
— Two-Round Inner Border (Rust Accent) :
Round 1 :
With rust color, join yarn at a corner and *ch2, dc in every 3rd st along sides to form a dotted line* continue around four sides; maintain even distribution (count will equal the perimeter stitch count)
Round 2 :
Work a slip-stitch frame in cream around the rust dots to embed them into the edge: sl st evenly across, placing 3 sl st in each corner (perimeter count)
Info :
These two rounds visually separate the central squares from the wider scalloped border and echo the rust tone of petals and pumpkins.
— Scalloped Outer Edge (Two-color scallop) :
Round 1 :
With moss green, work 1 sc evenly around the entire runner edge to create a firm base for scallops (perimeter count)
Round 2 :
Switch to pumpkin orange: *skip 2 sts, (5 dc) all in next st (shell), skip 2 sts, sl st in next st* rep around to create shells; place 3 shells in each corner to keep curve balanced. Count: number of shells equals perimeter/6 approx (perimeter dependent)
Round 3 :
Work a reverse scallop in cream: *sc in top of shell, ch2, sc in next shell top* rep alternating to accent edge (shell count remains equal)
Info :
Place a stitch marker at the center of each long side and adjust shell counts on each side so whole runner scallops are symmetrical. If needed, add or remove shells in side sections to match counts corner-to-corner.
Round 4 :
Final tidy round: Work 1 sc in each stitch around the scallop edge to tidy points and secure the shells. Fasten off and weave ends into the back of scallops for a neat finish.
— Final Finishing & Blocking :
Round 1 :
Info : Pin the entire runner to a blocking mat using rust and cream pins to form a smooth stretched shape. Lightly steam or wet-block until dry to set scallops and square up the runner.
Round 2 :
Trim any excess tails and weave in ends invisibly using the yarn needle. Tidy applique backs so there are no bulky lumps visible when runner lies flat.
Round 3 :
Optional: Add a few small beads or decorative buttons at pumpkin stems if desired; sew securely from the back so they are stable for handling.
Info :
Once fully blocked and finished, place runner on table or hang as decor. The runner will relax slightly after blocking; if you want a stiffer finish, use a light fabric stiffener sprayed sparingly and dried flat.
Completing this Autumn Granny Square Table Runner yields a richly textured, seasonal centerpiece you'll be proud to display! Each floral square, raised pumpkin and embroidered vine builds into a cozy, heirloom-quality runner that suits farmhouse and rustic decor alike. The step-by-step process balances meditative repetitive crochet with creative embellishment—perfect for savoring the craft. 🧶🍂 Display or gift it proudly; the warmth of the colours and handmade details will be admired all season long. 🎃