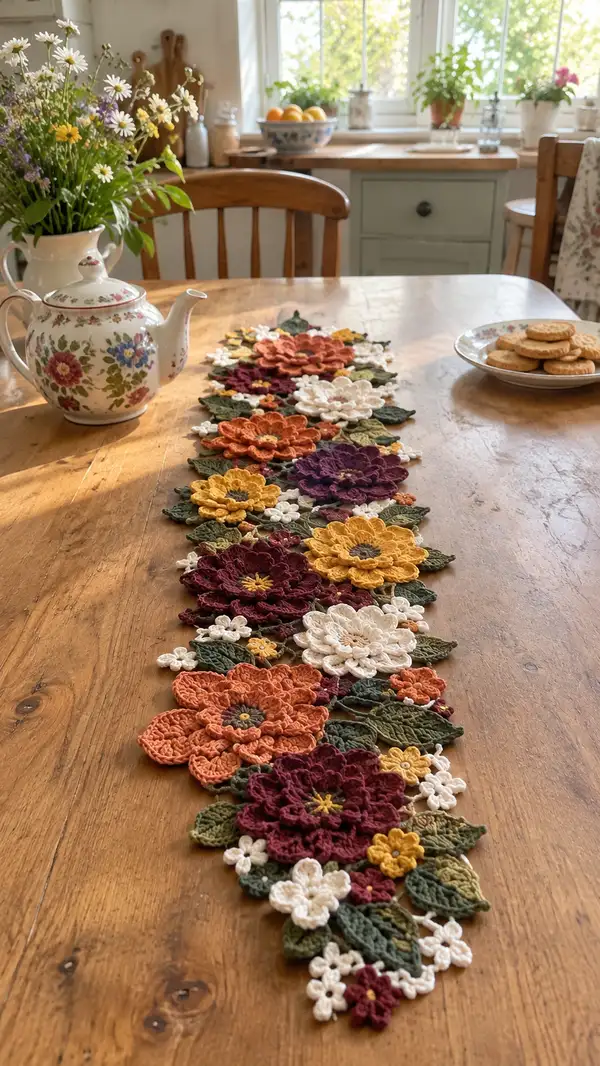
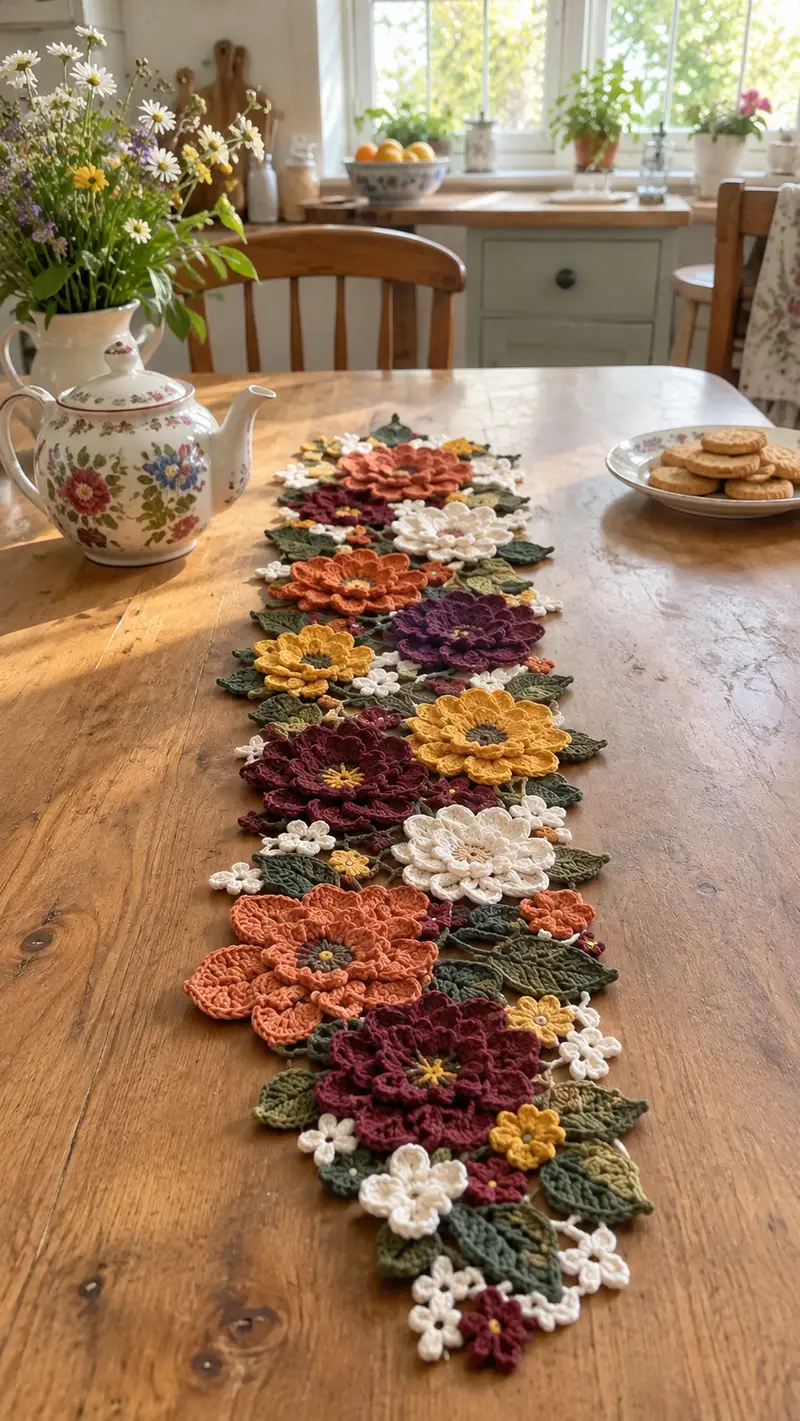
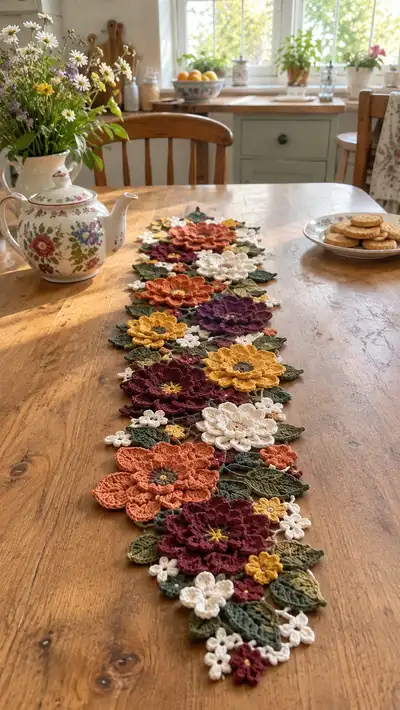
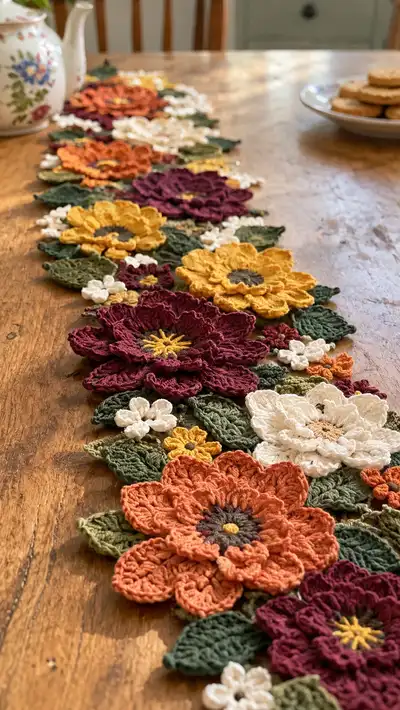
Create a long, layered floral table runner inspired by late-summer and autumn gardens. This design features large layered blooms, tiny five-petal fillers, and textured olive leaves worked in warm mustards, rusts, burgundy and cream. The motifs are worked separately and joined as you go for a delicate lace-like centrepiece—perfect for a dining table, sideboard, or seasonal display.
Progress Tracker
0% Complete
— Large Layered Flower (Burgundy) : (Make 3)
Round 1 :
6 sc in magic ring (6)
Round 3 :
(1 sc, 1 inc) x 6 (18)
Round 4 :
(2 sc, 1 inc) x 6 (24)
Round 5 :
(3 sc, 1 inc) x 6 (30)
Round 6 :
(4 sc, 1 inc) x 6 (36)
Round 7 :
(5 sc, 1 inc) x 6 (42)
Round 8 :
(6 sc, 1 inc) x 6 (48)
Info :
This creates a firm central disc. Keep tension even; use a 3.5mm hook for a dense center. The center will act as an anchor for petal layers.
Round 9 :
1 sc in each st (48)
Round 10 :
1 sc in each st (48)
Info :
These rounds establish the base circumference. If you want a slightly larger bloom, increase each round by spacing incs evenly to reach 54 or 60—maintain multiples of 6 for petal alignment.
Round 11 :
*sc 2, ch 3, skip 2* repeat around to create 12 ch-spaces for petals (48 base stitches remain)
Round 12 :
*In next ch-3 space: (sl st, ch1, 3 dc, ch1, sl st) forming a shallow petal base; sc in the next 2 sc between spaces* x12 (48 anchors)
Info :
Petal anchors are worked into the ch-3 spaces. Use a stitch marker at the first petal to track rounds. The stitch count remains 48 because petals use spaces, not additional base stitches.
Round 13 :
Petal Layer 1: In each petal anchor work: sl st into base, ch2, (hdc, dc, tr, dc, hdc) all in same anchor, ch2, sl st back into anchor. Repeat x12 (12 raised petals)
Round 14 :
1 sc in each base stitch around to tidy and anchor petals (48)
Round 15 :
Petal Layer 2 base: *sc 3, ch 4, skip 3* x12 (48)
Round 16 :
Petal Layer 2: In each ch-4 space: (sl st, ch1, 5 dc, ch1, sl st) to create larger scalloped petals. Work gently to shape each petal so they loft upward (no count change)
Info :
Use your fingers to open each petal while the yarn is warm/relaxed. If petals look too flat, reduce tension and use a slightly larger hook for this layer to increase loft.
Round 17 :
1 sc in each st around to tidy petal bases (48)
Round 18 :
Decorative ridge: *sc 1 BLO in next 4 sts, sc 1 FLO in next 2 sts* repeat around to give textural contrast (48)
Round 19 :
Petal Layer 3: *sc 1, ch 5, skip 4* x12 (48)
Round 20 :
In each ch-5 space: (sl st, ch1, 2 dc, tr, 2 dc, ch1, sl st) forming deep sculpted petals—stitch into anchors only (12 sculpted petals)
Info :
Arrange petals so the third layer sits staggered between layer 1 and 2 petals for a natural look. Pin while joining to hold shape if needed.
Round 21 :
1 sc around to tidy (48)
Round 22 :
*sc 2, dec over next 2 sts* x12 (36)
Info :
Begin slight shaping at base for a gentle cupped flower by decreasing evenly. This does not change petal count but narrows the base slightly for better sit on the runner.
Round 23 :
1 sc around (36)
Round 24 :
Edge finish: *sc, ch1, sc in next st* repeat around for a picot-like edging to stabilize petal bases (36)
Round 25 :
Fasten off leaving a 25-30cm tail for joining. Weave tail through back of center and between rounds securely. Add embroidered center details with contrasting yarn: 12 straight stitches radiating from disc center.
Info :
Embroider a small starburst with yellow yarn for stamens—12 stitches around center held by knot on back. This small detail draws the eye and replicates the reference look.
— Large Layered Flower (Mustard) : (Make 3)
Round 1 :
6 sc in magic ring (6)
Round 3 :
(1 sc, 1 inc) x 6 (18)
Round 4 :
(2 sc, 1 inc) x 6 (24)
Round 5 :
(3 sc, 1 inc) x 6 (30)
Round 6 :
(4 sc, 1 inc) x 6 (36)
Round 7 :
(5 sc, 1 inc) x 6 (42)
Round 8 :
(6 sc, 1 inc) x 6 (48)
Round 9-10 :
1 sc in each st (48)
Round 11 :
*sc 1, ch 3, skip 1* around to make 12 ch-3 spaces (48)
Round 12 :
Petal base: In each ch-3: sl st, ch1, (2 dc, tr, 2 dc), ch1, sl st. Arrange to curve outward (no base stitch count change)
Info :
Use slightly looser tension on outer petal layers for a softer look. Blocking petals lightly will help maintain shapes when assembled on the runner.
Round 13 :
1 sc around to secure petals (48)
Round 14 :
Petal Layer 2: *sc 2, ch4, skip 2* x12 anchors (48)
Round 15 :
In each ch-4: sl st, ch1, (3 dc, tr, 3 dc), ch1, sl st forming deep ruffled petals (12 large petals)
Round 16 :
1 sc around; FLO on last 6 sts to create textured edge if desired (48)
Round 17 :
*sc 1, ch5, skip 4* x12 (48)
Round 18 :
Large sculpted petal: In ch-5: (sl st, ch1, 4 dc, tr, 4 dc, ch1, sl st) forming a third petal row that overlaps previous petals.
Round 19 :
1 sc around to tidy (48)
Round 20 :
Decrease base: *(4 sc, dec) x8* adjust evenly to bring base to 40 sts if you prefer flatter bottom (adjust to your preference)
Info :
For this mustard flower a slightly flatter base makes it sit better in clusters. Decide whether you want a cupped or flatter flower and decrease accordingly; counts should remain consistent after adjustment.
Round 21 :
Edge finish and fasten off leaving long tail for joining. Add contrast-embroidered center in dark grey and a few yellow stitches for stamens.
— Large Layered Flower (Burnt Orange) : (Make 3)
Round 1 :
6 sc in magic ring (6)
Round 3 :
(1 sc, 1 inc) x 6 (18)
Round 4 :
(2 sc, 1 inc) x 6 (24)
Round 5 :
(3 sc, 1 inc) x 6 (30)
Round 6 :
(4 sc, 1 inc) x 6 (36)
Round 7 :
(5 sc, 1 inc) x 6 (42)
Round 8 :
(6 sc, 1 inc) x 6 (48)
Round 9 :
1 sc around (48)
Round 10 :
*sc 1, ch3, skip 1* x12 creating petal anchors (48)
Round 11 :
Petal 1: In each ch-3: sl st, ch1, (hdc, dc, tr, dc, hdc), ch1, sl st making 12 fuller inner petals
Round 12 :
1 sc around to secure (48)
Round 13 :
*sc 2, ch4, skip 2* x12 for second petal row (48)
Round 14 :
In ch-4: sl st, ch1, (3 dc, 2 tr, 3 dc), ch1, sl st for ruffled outer petals (12 outer petals)
Round 15 :
1 sc around (48)
Round 16 :
Add a small securing ridge: *sc 3 FLO, sc 3 BLO* around for texture (48)
Round 17 :
*sc 1, ch5, skip 4* x12 anchors (48)
Round 18 :
Third petal sculpt: In each ch-5: (sl st, ch1, 5 dc, 2 tr, 5 dc, ch1, sl st) for an extra dramatic outer layer.
Round 19 :
1 sc around to tidy and shape (48)
Round 20 :
Fasten off leaving long tail for joining. Embroider center with charcoal grey and a few yellow top stitches for stamens.
Info :
For a slightly more rustic, open petal, pull outer petal stitches gently with blocking pins while damp and allow to dry in position.
— Large Layered Flower (Cream) : (Make 2)
Round 1 :
6 sc in magic ring (6)
Round 3 :
(1 sc, 1 inc) x 6 (18)
Round 4 :
(2 sc, 1 inc) x 6 (24)
Round 5 :
(3 sc, 1 inc) x 6 (30)
Round 6 :
(4 sc, 1 inc) x 6 (36)
Round 7 :
(5 sc, 1 inc) x 6 (42)
Round 8 :
(6 sc, 1 inc) x 6 (48)
Round 9 :
1 sc in each st (48)
Round 10 :
*sc 1, ch3, skip1* x12 anchors (48)
Round 11 :
Inner petal: in ch-3: (sl st, ch1, hdc, dc, hdc, ch1, sl st) x12 forming delicate inner petals
Round 12 :
1 sc around (48)
Round 13 :
*sc 2, ch4, skip2* x12 (48)
Round 14 :
Outer petal: in ch-4: (sl st, ch1, 3dc, tr, 3dc, ch1, sl st) x12
Round 15 :
1 sc around to tidy (48)
Round 16 :
Edge: *sc, picot (ch3, sl st in 3rd ch), sc* around for a lacy finish (48)
Round 17 :
Fasten off leaving tail for joining. Embroider center with light brown for realism and dark tiny specks for seed detail if desired.
Info :
Cream flowers read as highlights; keep their petals slightly flatter to sit beneath other petals visually. Use a smaller hook (3.0mm) if you want denser texture.
— Small Five-Petal Fillers : (Make many)
Round 1 :
5 sc in magic ring (5)
Round 2 :
*ch 3, sl st in next st* repeat around to make 5 ch-3 loops (5)
Round 3 :
In each ch-3 loop: (sl st, ch1, 3 dc, ch1, sl st) making 5 tiny petals (no base count change)
Round 4 :
Fasten off leaving long tail for sewing. Use bright yellow or contrasting color to add tiny French knot or embroidered dot center for detail.
Info :
These small flowers are the primary filler between large blooms and leaves. Make many in cream and mustard and a few in burgundy for dimension.
— Tiny Puff Buds : (Make many)
Round 1 :
6 sc in magic ring (6)
Round 2 :
*ch1, 3 dc in same st, sl st in next st* repeat to create little popcorns around (6 little puffs)
Round 3 :
Fasten off leaving long tail. These are used as discrete texture pickups between petals and leaves.
Info :
Use these sparingly to avoid a crowded look; they add precious little dimensional points like buds in a real bouquet.
— Sculpted Leaf A (Large Olive Leaf) : (Make many)
Round 1 :
Ch 10, sl st into 2nd ch from hook, sc across (9), turn, sc back across to create a small strap (9)
Round 2 :
Work along one long edge: sc in next 3, hdc in next 2, dc in next 2, (tr, dc) in last ch to taper; continue around tip and work symmetrical on other side: dc2, hdc2, sc3. Join to first st (18)
Round 3 :
Edge shaping: *sc 1, hdc 1, dc 2, hdc 1, sc 1* across both sides creating a crisp raised midrib (18)
Round 4 :
Midrib row: Sl st in center st from base to tip along top side to form raised vein. Fasten off leaving long tail for sewing.
Info :
Make two sizes: the base chain length determines size—use ch12 for larger leaves and ch8 for small leaves. Work the midrib using a contrasting slightly darker green for realism.
— Sculpted Leaf B (Pointed Small Leaf) :
Round 1 :
Ch 7, sc 6 across, ch1 turn, sc back (6)
Round 2 :
Along one edge: *sc, hdc, dc, hdc, sc* then mirror on return edge. Fasten off leaving tail (12)
Info :
These small pointed leaves fill tight gaps around flower edges. Work them in two shades of olive for natural variation.
— Decorative Multi-Leaf Sprig (Make many)
Round 1 :
Ch 15, work 1 sc in 2nd ch from hook and across small chain (14)
Round 2 :
Along one side make 3 small leaves by: *ch6, sl st back in base to form a leaf; ch6, sl st back to base* repeat three times total, then sc across remaining base to anchor. Fasten off with long tail.
Info :
These sprigs are excellent to fan out from behind big flowers and give the runner that garden-picked look. Work them in varying green tones and sizes.
— Small Rounded Leaf (Seed Leaf) :
Round 1 :
Ch 5, sc 4 across, ch1, sc back (4)
Round 2 :
Increase at tips: sc, hdc, dc, hdc, sc along edge and mirror back. Fasten off leaving long tail for joining.
Info :
These create little clusters near the smallest flowers and help the eye move along the runner length.
— Assembly & Joining Motifs :
Info :
Layout first: arrange large flowers in a staggered line alternating colors (burgundy, mustard, orange, cream) with about 8-12 cm between centers. Fill gaps with large leaves and filler flowers before final joining to ensure an organic composition.
Round 1 :
Start joining by placing two adjacent large flowers right sides up with edges overlapping. Using the long tail from one flower, mattress stitch through back loops at the bases where petals overlap; make 8-12 secure stitches distributed along overlap.
Round 2 :
Secure small flowers and puff buds by sewing through their centers into the base of large petals to anchor. Use tiny stitches through foundation rounds only so join is invisible from top.
Round 3 :
Attach leaves and sprigs: pin in place then use slip stitch joins along edge points: insert hook through leaf base and adjacent flower stitches, sl st to attach. For stronger joins use a few mattress-stitch passes.
Info :
Work joins with a long tail and whipstitch for strength around high-traffic areas (near center of runner) and sl st or single invisible stitches for delicate edges to keep the lace effect.
Round 4 :
Close gaps by sewing tiny rounded leaves and puff buds into negative spaces. Keep the runner edge slightly irregular—this mimics a natural bouquet rather than a rigid stripe.
Round 5 :
After most motifs are joined, recluster and add a final row of small five-petal fillers in cream along one edge to create a delicate trailing border (sew through center with long tail).
Info :
If you want motifs more permanently joined, use a light fabric stiffener sprayed from back once layout is finalized; allow to dry flat on blocking board.
— Joining Detail Techniques :
Round 1 :
Ladder stitch join for invisibility: thread a yarn needle with long tail, pick up back loop only on first motif and back loop only on second motif aligning anchors, pull snug but not tight; continue every 3-5mm.
Round 2 :
Slip-stitch join for lace edges: with hook use the joining color and sl st through edges at regular intervals (every 2-3 stitches) to create a delicate ladder tie that still allows drape.
Info :
Where motifs meet at petal tips use tiny whipstitches on the underside to avoid visible knots on the top surface. Use matching color thread to hide joins.
— Finishing Touches :
Round 1 :
Weave all tails through several rounds of motifs on the reverse side and trim close. Use fabric glue on knot backs if the runner will be heavily handled.
Round 2 :
Block pieces lightly: pin motifs to blocking board in final layout and mist with water or light starch to set petals in shape. Allow to dry fully before removing pins.
Round 3 :
Optional beading: sew a small bead or pearl into centers of tiny flowers for a subtle shimmer—secure with thread and knot on back side inside motif.
Info :
Store runner flat to preserve shape. If folding is necessary, place tissue paper between folds and avoid crushing larger petals.
This autumn floral runner pattern invites you to slow down and savor every petal and stitch. Each layered bloom and delicate leaf comes together to create a hand-assembled centerpiece you can be proud of. It’s the perfect weekend project for cozy decor or a thoughtful handmade gift. Enjoy the process and let your layout evolve as you work—happy stitching! 🍁🧶