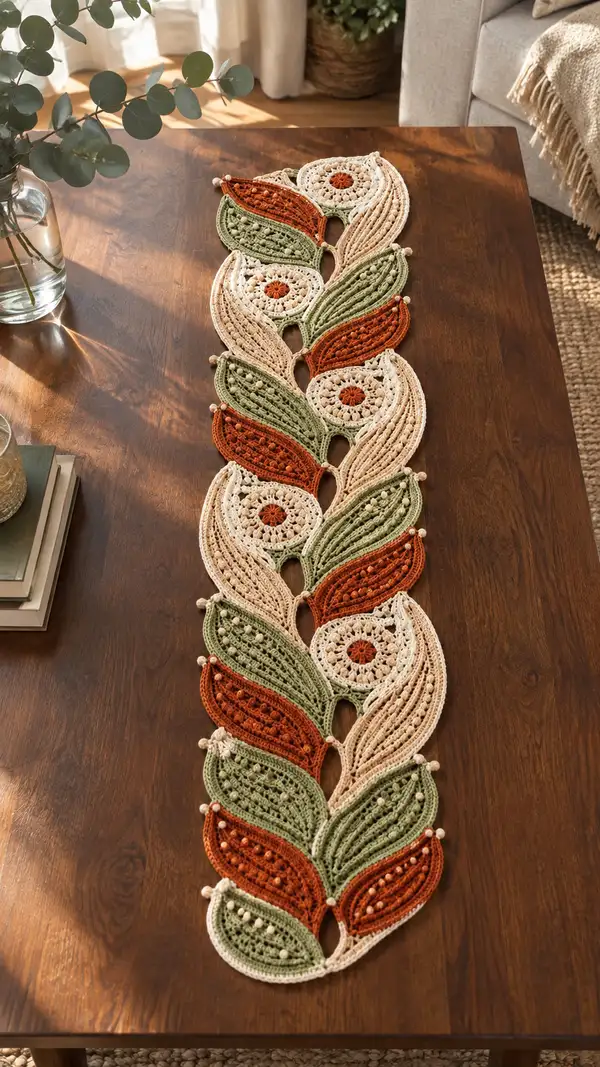
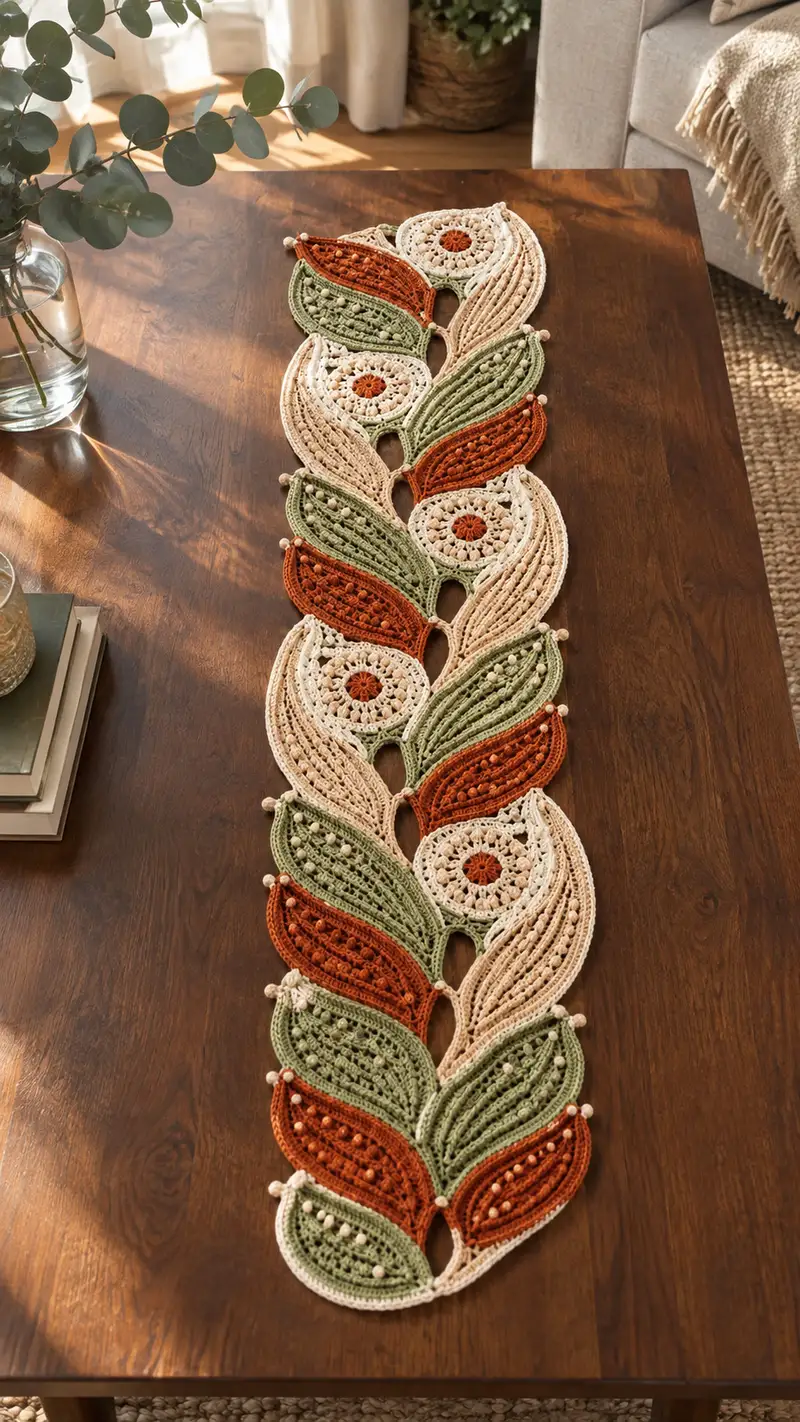
A long, elegant table runner composed of alternating leaf and circular floral motifs in warm cream, sage green and rust tones. Features raised ribbing, bobble clusters and beaded tips for texture and charm. Modular motifs are joined as you go for a seamless, lace-like centerpiece that lays flat and drapes nicely over a dining table. Perfect seasonal accent that combines practical durability with handcrafted detail.
Progress Tracker
0% Complete
— Overview :
Info :
This pattern is modular: make Circular Blossom Motifs and two Leaf Motif Types (Leaf A ribbed, Leaf B bobble). Join motifs as you go in an alternating braid (Circle then Leaf A then Leaf B then Circle). The sample runner pictured uses 6 circular motifs and 12 leaf motifs (alternating), producing a runner approx. 48-54 inches long and 10-12 inches wide. Adjust repeats to lengthen or shorten.
Info :
Work with a 4.0mm hook and worsted cotton held single. Block each motif lightly before joining for best alignment.
— Circular Blossom Motif :
Round 1 :
Start with mr. Ch3 (counts as dc), 11 dc into ring. Join with sl st to top of ch3. (12)
Round 2 :
Ch3, (1 dc, inc) x6 around (work pattern as (1 dc, 2 dc in next st) across); join. (18)
Round 3 :
Ch3, (2 dc, inc) x6 around; join. (24)
Round 4 :
Ch3, (3 dc, inc) x6 around; join. (30)
Round 5 :
Ch4 (counts as tr), *skip 1, tr in next, ch1* rep around creating open spokes; join. (30 tr spaced, 30 ch-1 spaces)
Info :
Use this round to create airy spokes—the ch-1 spaces will be used to anchor later shell rounds. Keep tension loose for openwork.
Round 6 :
Switch to contrast center border if desired. Ch1, sc in same st, *ch3, skip next tr, 5 dc shell in next ch-1 space, ch3, sc in next tr* rep around; join. (6 shells, 6 sc)
Round 7 :
Ch1, sc in each sc and in top of each shell center (work 3 sc across shell center evenly), placing sc in each ch3 space too so circumference increases to decorative round. Final count approx (48) depending on shell clusters.
Info :
Round 6-7 create the flower-like petal framing. If you want a tighter center, use sc around shells; for lacy effect, use ch-3 picot between shells.
Round 8 :
Ch3, dc in same st, *ch2, skip 2 sts, (dc2, ch2, dc2) in next sc (picot-shell), ch2, skip 2* rep around; join. (Approx 12 shell clusters)
Round 9 :
Ch1, sc in each st to tidy edge; join. (st count equal to previous round)
Info :
At the end of Round 9 block motif gently into a 6-7in circle; this ensures flat motifs and neat joins later.
Round 10 :
Switch to cream if using multi-color center. Ch3, *dc in next 3 sts, ch2, skip 2* rep around to create decorative arches; join. (approx 36 dc positions and 12 ch-2 arches)
Round 11 :
Ch1, sc in each dc and 3 sc across each arch to create stable join edges; join. (approx 48)
Round 12 :
Ch3, (2 dc in same st, dc in next 4) x8 around to build scalloped contour; join. (64)
Round 13 :
Ch1, sc in each st; join. (64)
Info :
If you plan to join Circle to Leaves by slip-stitching later, leave top loops tidy; otherwise you will join into Round 13 sc spaces during assembly.
Round 14 :
Ch2, hdc in same st, *ch3, skip 3, (3 hdc cluster) into next 2-3 stitches to create open fans* rep around; join. (count varies ~48-56 depending on fan size)
Round 15 :
Ch1, sc evenly around to tidy; finish off leaving long tail for joining. (approx 56)
Info :
Weave in the tail temporarily to hold motif shape; do not bury permanently until after blocking and joining. Make as many circular motifs as your runner requires (sample used 6).
— Leaf Motif A (Ribbed Leaf) :
Round 1 :
Ch8. Sc in 2nd ch from hook and across until last ch, 3 sc in last ch, working on opposite side of foundation ch sc across back to start; join to form a ring-shaped leaf base. (16)
Round 2 :
Ch2 (counts as hdc), hdc in each st around; join. (16)
Round 3 :
Ch1, sc in same st, *ch3, skip 1, sc in next* rep across to create 8 ch-3 loops; join. (8 loops)
Round 4 :
Into each ch-3 loop: ch3, (tr, tr, ch1, tr, tr) cluster to form the central raised rib start; join. (8 ribs)
Info :
Work the rib cluster tall on the centre to create the leaf spine. Keep height consistent across ribs by using same stitch count in each loop.
Round 5 :
Ch1, sc in each stitch and 3 sc across each cluster top to stabilize (approx 40 sts); join. (approx 40)
Round 6 :
Switch color to leaf green if changing. Ch2, hdc in next 2, *fpdc around cluster (front post double crochet) down the center to emphasize rib, hdc in next 3* rep across; join. (approx 40)
Round 7 :
Ch1, sc in first 2, *(ch2, skip 2, sc) x2, sc in each of next 6* rep around to create subtle openwork along the edges; join. (approx 40)
Round 8 :
Ch1, sc in each st around working sc into ch-2 spaces also; join. (approx 40)
Round 9 :
Ch3, dc in next 6, (dc2tog) over next 2 sts to gently shape one tip; ch2, sl st to opposite side stitch to create symmetrical shaping for leaf tip; join at base. (count changes create gentle taper)
Info :
Use BLO on rounds 6-8 on the outer edge to create a raised border that helps leaf layers sit neatly over each other during joining.
Round 10 :
Ch1, sc around entire leaf, placing 3 sc in each corner/curve to keep shape; join. (approx 42)
Round 11 :
Ch2, hdc in each st for two rounds to add body and thickness to leaf; join each round. (42)
Round 12 :
Ch1, sc in each st; finish off leaving long tail for joining. (42)
Info :
Make Leaf A motifs in both cream and green as pictured; alternate color placement along runner for balance. Block leaf flat with ribs slightly curved upward to add dimension.
— Leaf Motif B (Bobble Leaf) :
Round 1 :
Ch8. Sc in 2nd ch from hook across, 3 sc in last ch, work across back of foundation ch sc to first; join. (16)
Round 2 :
Ch2, hdc in each st around; join. (16)
Round 3 :
Ch1, sc in each st, creating 16 sc; join. (16)
Round 4 :
Ch3, dc in next st, *bobble in next ch-space (work a 5dc bobble: yarn over, insert, pull up loop, rep 5 times, yarn over and pull through all loops), ch1 between bobbles, dc in next 2* rep across to form a bobble row; join. (8 bobbles approx)
Info :
Bobble stitch: YO, insert, pull up loop; repeat 5 times in same st; YO and pull through all loops; ch1 to space. Keep loops even to maintain consistent bobble height.
Round 5 :
Ch1, sc around including ch-1 spaces, placing sc between bobbles to stabilize; join. (approx 40)
Round 6 :
Ch2, hdc around, working hdc in each sc and across bobble tops (approx 40); join. (40)
Round 7 :
Ch1, sc in each st; join. (40)
Round 8 :
Shape edges: ch1, sc 4, (sc2tog) across next 2 to shape tip, sc across center, repeat shaping on opposite side; join. (approx 36)
Round 9 :
Ch1, sc in each st for two rounds to firm edges; join. (approx 36)
Round 10 :
Ch3, dc in each st across to form pronounced ribs on outer face of leaf (work in FLO to form ridges if desired); join. (36)
Round 11 :
Ch1, sc around; finish off leaving long tail for joining. (36)
Info :
Make Leaf B motifs in rust and green alternately. Add small wooden beads to the tips after blocking by looping a short ch under the final stitch and securing bead before tying off.
— Joining Motif Connector (Make several connector arches) :
Round 1 :
Ch10. Sl st back into 2nd ch from hook and along to create a narrow chain arch for bridging motifs; finish with sl st to base point. (10-ch arch)
Round 2 :
Ch1, sc around and along chain arch (work 1 sc in each ch) to stabilize arch; join to base with sl st. (10)
Info :
These connector arches are worked when joining a circle to a leaf so spacing between motifs remains consistent. Make connectors with same yarn color as the adjacent leaf for a seamless look.
Round 3 :
Ch2, hdc in each st around arch to thicken; finish leaving long tail for slip-stitch joining to motif edge. (10)
Round 4 :
Info :
When joining, align connector arch to the ch-2 spaces or top sc of the circle motif. Use sl st through both motifs and connectors for flat, neat joins.
— Joining Sequence (As you go joining) :
Info :
Work motifs in the following repeating order across runner width: Circle -> Leaf A -> Leaf B -> Circle -> Leaf A -> Leaf B, etc. Join each new motif to the previous motif on the last round using slip stitches through the sc round of one motif and the edge sc/hdc of the adjacent motif. For the sample runner, join in a staggered braid so circular motifs nest between leaf clusters.
Round 1 :
Place first circular motif on table. Pick up second motif (Leaf A). With right sides facing, align Leaf A base to Circle Round 13 sc spacing. With cream or matching color, sl st through both rounds at evenly spaced points (approx 8-12 sl sts across the join) until motifs are attached. Fasten off and weave ends. (Join points variable)
Round 2 :
Attach next Leaf B to the opposite side of the Circle in the same manner using connector arches where specified. Maintain consistent orientation of leaf tips all pointing along runner direction. (Join points variable)
Info :
Work joins loosely enough to allow motifs to lay flat but firm enough to avoid large gaps. Use a tapestry needle to tidy any join tails inside the motif so they don't show on the surface.
Round 3 :
Continue joining in sequence making connector arches to fill gaps between leaf bases and circle edges. Each full cycle (Circle+Leaf A+Leaf B) uses approx 3 joins. Repeat cycle until desired length is reached. (Repeat)
— Edging & Beaded Tip Details :
Round 1 :
After all motifs are joined and blocked, work a uniform outer edge to the entire runner. Join yarn at one end point. Ch1, sc evenly around entire perimeter, placing 3 sc in each curve and 2 sc along straight edges; sl st to join. (Perimeter count depends on size)
Round 2 :
Ch2, hdc across for one round to bulk edge slightly and create a stable border; join. (Perimeter count same)
Round 3 :
Ch1, sc in next 3 sts, *(ch3, bead loop: slide bead onto short loop of cotton thread and ch1 to trap bead), sc in next 6* rep around placing bead loops at tip points of leaves; join. (Beads placed at approx 6-10 places on each runner side)
Info :
To add a bead: thread bead onto a small length of yarn or thread before making bead loop; when you reach the location, insert bead onto loop, ch1 to secure bead then sl st back into securing st. Alternatively sew beads on after finishing with needle and thread.
Round 4 :
Ch1, sc around placing sc into bead loop next to bead to further secure; join and finish off. Weave in all ends on back side of runner. Block the finished runner again to set final shape.
Round 5 :
Info :
If you prefer no beads, simply omit bead loops and finish with a picot edging worked in ch-3 picots every 6-8 sc for a lacy finish.
— Optional Extended Texture Rounds (Add if you want thicker ribs or motif depth) :
Round 1 :
Work an additional rib round across Leaf A center: join yarn at base of leaf ribs, ch2, work fpdc around each rib cluster to create a raised ridge; join. (per leaf)
Round 2 :
Work an additional bobble pass on Leaf B by making a staggered bobble row between earlier bobble rows for more pronounced texture; join. (per leaf)
Info :
These optional rounds increase thickness and visual depth but use more yarn. Add them uniformly on every leaf to keep balance.
— Final Finishing Rounds (Blocking & Secure Tails) :
Round 1 :
Gently wet-block runner: pin to shape on a blocking mat (use measurements to keep straight edges approx 10-12in wide). Let dry completely. This step flattens and sets joins.
Round 2 :
Weave in all tails: use tapestry needle to bury ends through several motifs and secure. Trim flush. Tie off any bead loop tails tightly and hide within nearby stitches.
Info :
Store runner flat or rolled to preserve beads and avoid crushing ribs. Spot clean stains promptly with mild detergent and re-block if needed.
Completing this runner is such a satisfying project—each motif clicks into place like a handcrafted puzzle. The tactile ribs and bobble clusters give wonderful depth while the beaded tips add a refined finish. It makes a beautiful centerpiece for seasonal or everyday decor and is surprisingly portable for gifting. 🧶🍂✨