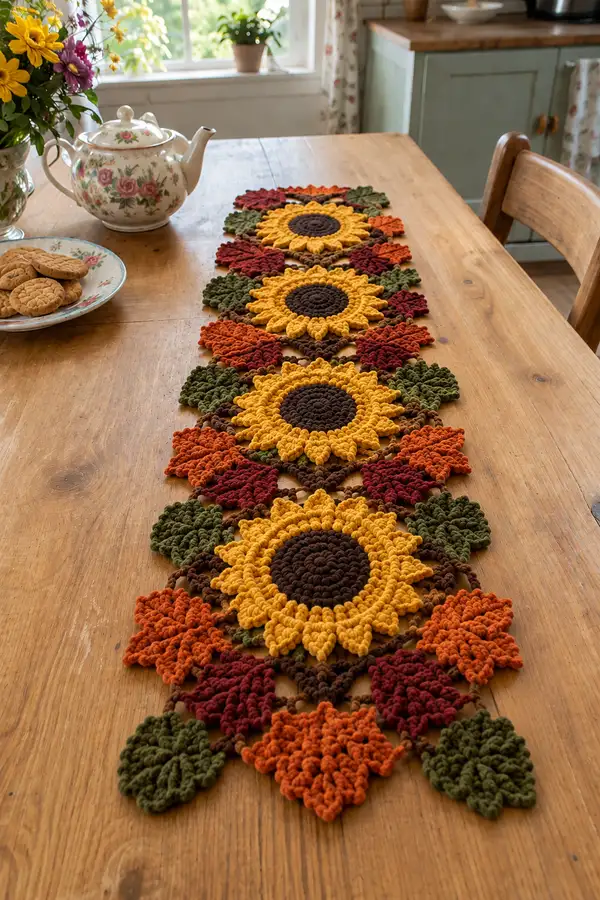
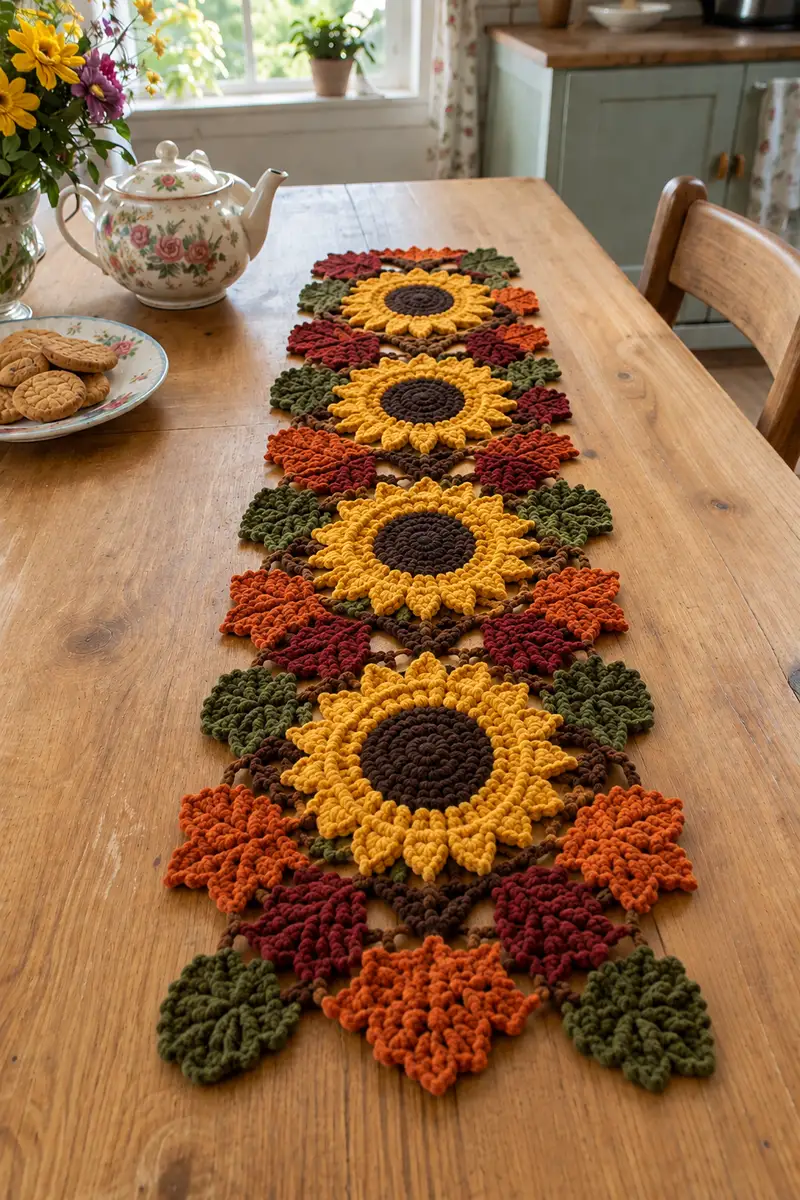
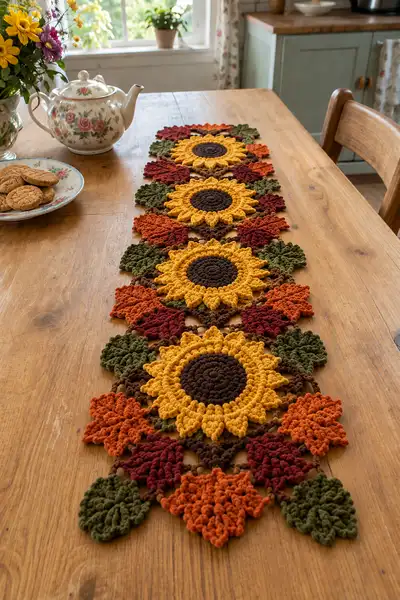
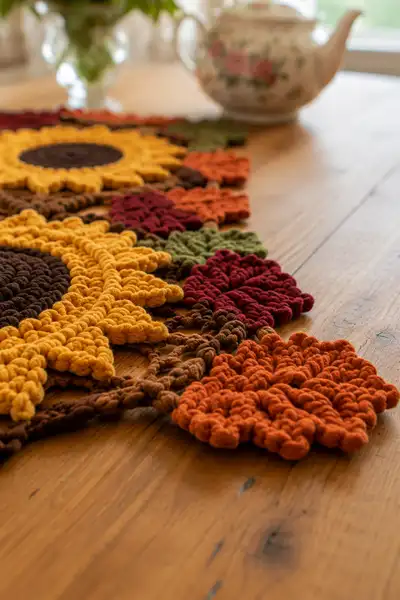
This warm, textured table runner features joined sunflower motifs with layered puff-stitch petals and chunky autumn leaves in rich harvest tones. Worked in worsted-weight yarn, the runner creates a bold, dimensional surface perfect for a farmhouse or seasonal table. The design joins motifs with a braided vine of slip-stitches and finishes with a tidy scalloped edge for a polished look. Use this pattern to make a centerpiece runner long enough for dining tables, sideboards or hall consoles.
Progress Tracker
0% Complete
— Overview :
Info :
This pattern is modular: make sunflower motifs and leaf motifs separately, then join them with the braided vine (brown). Each sunflower motif is made in the following sections: center, petal foundation, petal layers, and finishing trim. Leaf motifs are made flat in rows and worked as small diamond/maple shapes. After making all motifs, join them in a repeating sequence: sunflower - cluster of leaves - sunflower - cluster etc. The pattern includes full round-by-round instructions and extra Info sections every few rounds for tips and placement.
Info :
Gauge is not critical, but using the recommended 5.0mm hook with worsted weight yarn will yield motifs similar to photographed size (approximately 40cm long per sunflower module including leaves). Adjust hook size + yarn to change final scale. For a runner with four sunflowers (as photographed) plan for 4 sunflower motifs and 8 leaf clusters (two between each sunflower).
— Sunflower Center (Make 1 center for each sunflower motif) :
Round 1 :
6 sc in magic ring (6)
Round 3 :
(1 sc, inc) x 6 (18)
Round 4 :
(2 sc, inc) x 6 (24)
Round 5 :
(3 sc, inc) x 6 (30)
Round 6 :
(4 sc, inc) x 6 (36)
Round 7 :
(5 sc, inc) x 6 (42)
Round 8 :
(6 sc, inc) x 6 (48)
Info :
At this point you have 48 stitches around. If you'd like a larger center, continue increasing with the pattern (7 sc, inc) x 6 to reach 54, otherwise maintain this count. Keep stitch marker in first st of each round.
Round 9-12 :
1 sc in each st around (48)
Info :
These rounds build the visible brown centre. Work tightly so the spiral appearance is dense and slightly raised. Use a stitch definition technique (tight tension) to avoid showing gaps.
Round 13 :
*(BLO) 1 sc in each st around for slight ridge (48)
Round 14 :
1 sc in each st (48)
Round 15 :
Optional: sl st in each st around for a flatter, tidy edge (48). Fasten off and weave tail neatly to center back if you prefer a flatter base for petals
Info :
Leave a 25-35 cm tail of brown yarn if you're planning to join the center directly to petals without finishing; this tail will be used to stitch center to petal foundation securely before final trimming.
— Petal Foundation Round (Attach Petal Base to Center) :
Info :
Change to golden yellow. Attach with a sl st into any round-12 stitch. The center had 48 sts; we will create 16 petal anchors around the center by dividing 48 by 16 = 3. The repeat will use 3 stitches per petal anchor.
Round 16 :
*(Sc in next 2 sts, ch 3, sk 1 st) repeat from * around to make 16 ch-3 loops for petals (48 anchor sts used). Join with sl st to first sc (48 anchor points, 16 loops)
Info :
Count your loops to confirm you have 16. Adjust by moving a ch-3 loop if needed so petals are evenly spaced. This round is the anchor for all puff-petal work that follows.
— Petal Layer 1 (Puff Petals — Round-by-Round) :
Round 17 :
Work into each ch-3 loop: (ch 1, puff stitch made of 5 partial yarn overs — yarn over, pull up loop five times, yarn over, draw through all loops, ch 1, sl st to base of loop) in each ch-3 loop around — 16 puff petals. Finish with sl st to first puff.
Info :
Make puff loops moderately loose so puff stitches sit puffed rather than flat. Each puff will count visually as one petal; do not count as stitches in subsequent rounds — we will anchor into stitches behind petals.
Round 18 :
Move to the back of each puff and sl st into the nearest base sc behind the petal to secure and create a ridge (16 sl st anchors). This secures petals and prevents twisting.
Round 19 :
Between each puff, ch 2 and work 2 sc in the sc behind the puff to widen the petal base: (2 sc in sc behind, ch 2) x 16 around. Join (48)
Info :
These chains act as a small spacer so the next petal layer can be built slightly above the first. Keep petals oriented outward by holding each puff up as you secure it.
— Petal Layer 2 (Extended Petals) :
Round 20 :
Attach yarn at base of first petal. In each petal base work: *(hdc, hdc, puff, hdc, hdc) in same base loop/space. Move to next base space and repeat* — 16 petal clusters total. Join with sl st to first st.
Round 21 :
Work single crochet around petals to tidy edges: sl st up to the top of first petal, then 3 sc across top of petal, sl st down to base, sl st to next petal base. Continue around to give each petal a neat outline.
Info :
Use your fingers to shape petals outward as you work sc rounds so petals remain distinct and fanned. If petals begin to twist, steam-block lightly after finishing motif.
Round 22 :
Reverse popcorn for added texture: in each petal top, work (ch 1, *5 dc cluster in same stitch, remove hook, insert hook into front of cluster, draw hook through to close cluster*, then sl st over cluster top). This forms a defined petal tip ridge — 16 ridges.
Round 23 :
Sl st into next base, sc around the back edge of petals to create a stable foundation: 1 sc in each st and around the back loops of the petal base where possible. This evens the join between petals and center (count varies by petal geometry, approx 60-68 tidy sc).
Info :
Fasten off golden yellow after round 23 if you prefer a single-layer petal. For a fuller sunflower, reattach golden yellow at the base again in the next round and work a second row of smaller petals that sit between first layer petals.
— Optional Petal Layer 3 (Smaller Top Petals) :
Round 24 :
Attach golden yellow to a ch-2 spacer between large petals. In each spacer work: (ch 1, puff of 4 loops, ch 1, sl st to base) — 16 small puffs sitting between main petals.
Round 25 :
Work 1 sc between small puffs and 2 sc around puff bases to secure. Join and fasten off. Tidy ends by weaving through the back of the center and around the base of petals.
Info :
These smaller puffs add depth and reduce gaps between large petals. If you prefer a flatter sunflower, omit layer 3 and proceed to the outer trim round.
— Outer Trim and Petal Backing :
Round 26 :
With dark brown, work 1 sc in each visible back-loop around the entire motif to create a subtle shadow between center and petals (count will match previous total sc count, approximately 60-70). Join and fasten off.
Info :
This brown backing visually ties the sunflower to the braided vine and unifies the palette. We use brown again for join chains later so the tones coordinate.
— Sunflower Motif Finished Dimensions & Notes :
Info :
Each completed sunflower motif measures roughly 30-40 cm across depending on tension and yarn. Make 4 motifs for a long runner, or more/less to suit table length. Block motifs gently to flatten petals and square the motif before joining.
— Leaf Motif (Maple-Style Leaf — Make multiple in assorted colors) :
Info :
Leaf motifs are worked flat in rows to create a slightly raised maple/diamond shape that tucks between sunflowers. Start with a magic loop or starting chain depending on preference.
Round 1 :
Ch 6, sc in 2nd ch from hook, sc across (5 sc). Turn. (5)
Round 2 :
Ch 1, inc in first st, sc in next 3 sts, inc in last st (7)
Round 3 :
Ch 1, inc, sc 5, inc (9)
Round 4 :
Ch 1, sc across 9 (9)
Round 5 :
Ch 1, inc, (sc 2, inc) repeat across to last st, inc (12)
Info :
These early rounds create the basic diamond width. Work loosely enough so later textured stitches (puffs) can sit on top without pulling.
Round 6 :
Ch 1, sc across (12)
Round 7 :
Ch 1, (sc 2, inc) repeat to end (15)
Round 8 :
Ch 1, sc across (15)
Round 9 :
Begin shaping tip: ch 1, sc 5, dec, sc 3, dec, sc 4 (13)
Round 10 :
Ch 1, sc across 13 (13)
Round 11 :
Bring leaf to point: ch 1, sc 4, dec, sc 3, dec, sc 2 (11)
Round 12 :
Ch 1, sc across 11 (11)
Round 13 :
Row of texture: *in next st work puff (4 loops) then sl st into next st* repeat across to add raised ridges along leaf surface (approx 5-6 puffs depending on leaf width)
Round 14 :
Ch 1, sc in each st around the leaf edge to tidy and create a defined border. Fasten off and weave in ends.
Info :
Make leaves in your chosen colors and gently block to shape. Vary the size by adding or omitting increases in rounds 5-8. Make 8 leaf motifs for a 4-sunflower runner (two leave clusters between each sunflower) or adjust quantity for desired length.
— Small Filler Leaf (Make multiples for staggered clusters) :
Round 1 :
mr, 6 sc in mr, pull tight (6). Join with sl st (6)
Round 2 :
*(1 sc, inc) x 3 (9)
Round 3 :
1 sc in each st (9)
Round 4 :
Ch 1, sc in next 2, puff in next 3 sts to create textured tip, sc in remaining sts. Fasten off (9)
Info :
These small filler leaves tuck between larger leaves and sunflower petals to create a full, organic border. Make 8-12 in assorted colors to vary the look.
— Braided Vine / Joining Chain (Worked in Dark Brown) :
Info :
The motifs are joined by a decorative braided vine made of alternating chain arches and short slip-stitch rails. This keeps the runner flexible and gives a hand-crocheted lacy connector between motifs.
Round 1 :
With dark brown, ch 60 (or length equal to spacing between two sunflower motifs including leaves) — this will be your first vine segment. Turn, sl st into 2nd ch from hook and across to make a firm cord of sl st (60). Fasten off leaving long tail for joining.
Round 2 :
Attach vine to back of one sunflower motif by sewing tail through brown backing stitches at two anchor points opposite one another. Repeat for second sunflower and tighten to create a slight sag—this imitates a vine. Secure with knots and weave tails inside motif.
Round 3 :
Across the vine work decorative loops: attach yarn every 6 sl st with a sl st, ch 6, sl st back to vine. Repeat along the vine to create arches (approx 10 arches per vine segment depending on ch count).
Info :
Make vine segments as needed between each pair of motifs. For a long runner use multiple vine segments joined invisibly by sewing ends together from the back. Keep vine tension even so motifs remain evenly spaced.
— Joining Motifs (Sequence and Technique) :
Round 1 :
Lay motifs RS up in the desired sequence (sunflower, cluster of leaves, sunflower). Pin motifs together at the brown backing and vine anchor points. Use the long brown tails left when fastening off the sunflower backing to whip-stitch through vine cord and through adjacent motif backing for secure join.
Round 2 :
Sew leaf clusters to the vine at points where small chain arches cross leaf backs: insert needle through leaf back loops and through vine sl st cord, sew several passes and knot on the back. Repeat for each leaf in the cluster to anchor leaves so they sit between sunflowers.
Info :
Pin pieces carefully before stitching to avoid skewed alignment. Work on a flat surface and check that petals face the same direction and leaves overlap naturally. Leave small gaps if you want a lighter appearance or stitch closely for a compact runner.
Round 3 :
After sewing all vine segments and leaf clusters, turn runner over and weave all remaining tails into the vine underside and through back loops of motif trims to hide ends. Trim flush.
— Border Edging (Scalloped Edge to Finish Runner) :
Info :
Edge the entire runner to give a tidy, finished look. The scallop uses chains and shell stitches worked along the exposed motif edges and leaves. Use main brown for consistent frame or use a contrast color for a softer look.
Round 1 :
Attach brown to any outermost stitch on motif edge. Work 1 sc in each st around the entire runner where there are regular stitches; when you encounter a petal tip or leaf point, work the scallop pattern: (sc, ch 2, 5 dc in same st, ch 2, sc) to form a shell. Continue around making shells at each prominent point and sc along smoother edges. Join with sl st and fasten off.
Round 2 :
For a deeper scallop repeat round 1 in the shells only: centered in each 5 dc shell work (sl st to center, ch 1, 7 dc in center st, sl st). This gives a pronounced scallop. Fasten off and weave in ends.
Info :
Use steam blocking to coax scallops into nice rounded shapes. If you prefer a flat border, work a single round of sc around the entire runner and omit shells.
— Finishing Touches and Blocking :
Round 1 :
Gently wet-block each motif: pin each sunflower petals flat with slight outward curve and pin leaves to natural shape. Allow to dry fully before final joining to lock shape in place.
Round 2 :
Inspect runner for loose ends and secure any puffs with a few hidden stitches at their bases if needed. Trim any stray fibers and trim tails close to work after weaving through a few centimeters of yarn.
Info :
Optional: Press with a warm iron using a damp cloth to flatten join points slightly, but avoid direct pressure on puffs which could flatten texture. Instead, steam gently for best results.
— Tips for Scaling & Variation :
Info :
To scale runner longer or shorter, add or remove sunflower + leaf sets in the repeating sequence. To make a round table centerpiece, make 3 sunflowers joined in a tight triangle pattern and finish with rounds of leaves around the outside. Swap petal color for pale cream or orange for different seasonal looks.
Info :
To convert motifs into placemats, add additional rows of sc around each completed sunflower to reach a desired placemat diameter, then edge with scallops or a tidy single crochet round.
Your finished sunflower runner brings a warm, handcrafted statement to any table—each textured petal and curled leaf adds cozy, seasonal charm. The modular design makes it easy to customize length or color palette for different looks. I hope you enjoy every step of making and assembling these tactile motifs—there's something so satisfying about watching them join into a beautiful, autumn-ready centerpiece. 🧡🍂✨