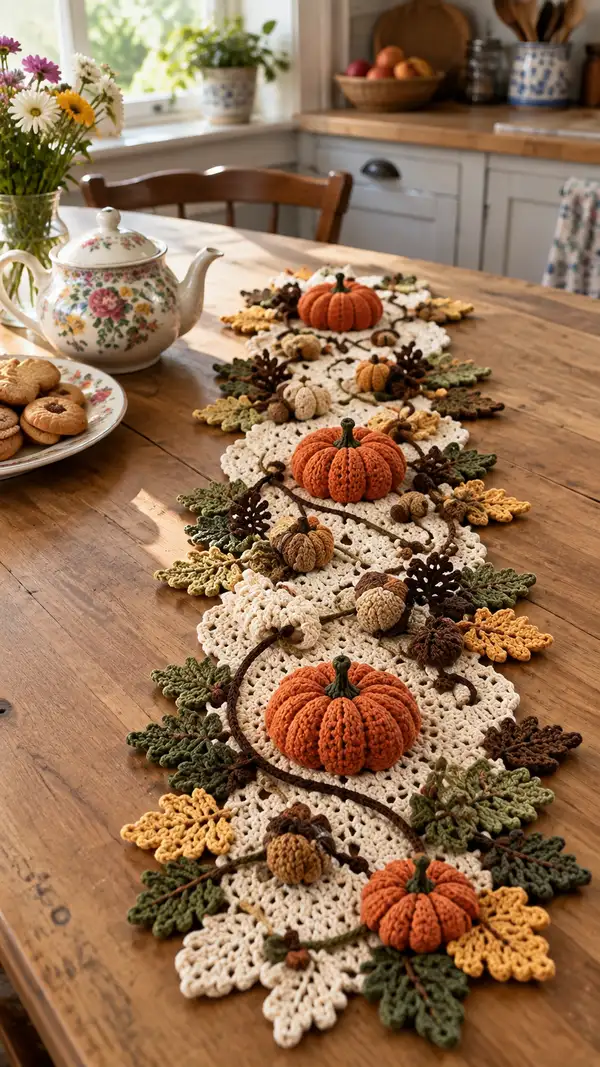
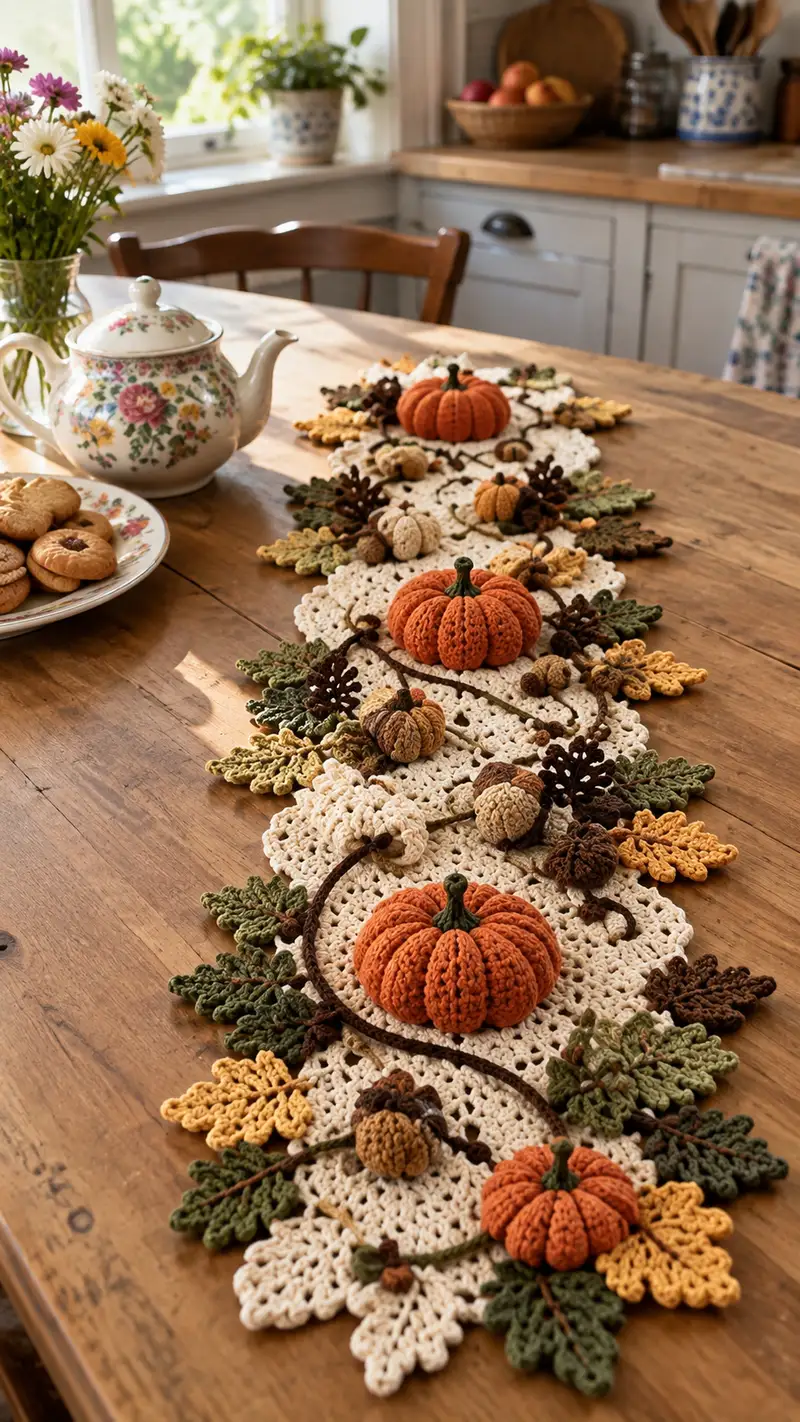
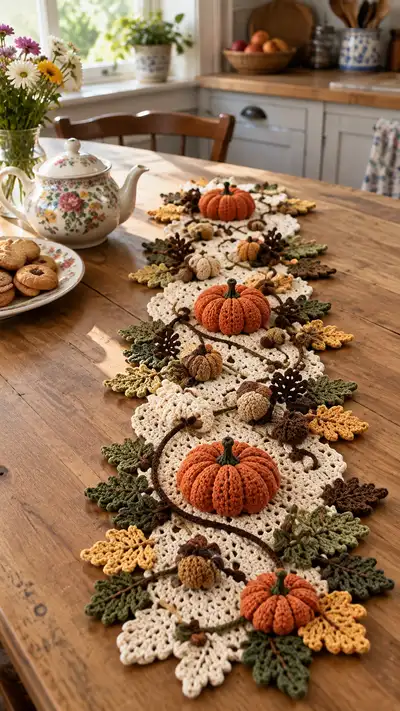
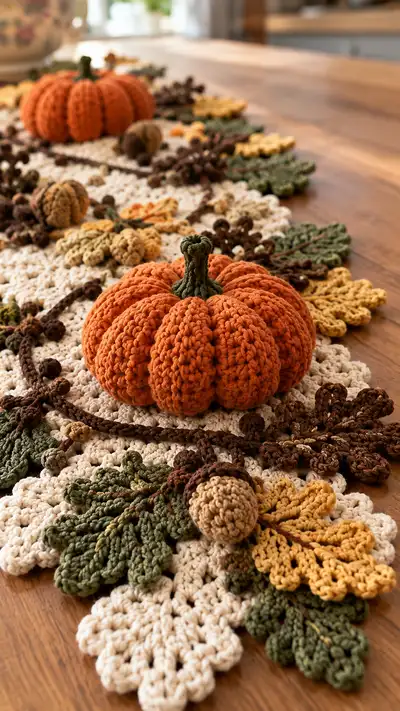
Create a warm, layered autumn table runner featuring textured pumpkins, oak and maple leaves, acorns, pinecones, and a lacy cream base. This pattern uses worsted-weight cotton to build dimensional decorations that sit securely on a scalloped runner. Great for fall centerpieces and seasonal tablescapes — the finished piece has a rustic, hand-crafted look with lots of tactile detail.
Progress Tracker
0% Complete
— Runner Base (make 5 scallop motifs and join) :
Round 1 :
With cream yarn and 4.0mm hook, ch 6, join with sl st to form a ring, ch 3 (counts as dc), 11 dc in ring (12 dc)
Round 2 :
Ch 1, sc in same stitch, *ch 3, skip next dc, sc in next dc* rep around to create 6 ch-3 loops; join with sl st to first sc
Round 3 :
Sl st into first ch-3 sp, (ch 3, 2 dc, ch 3, sl st) into same sp to make a shell; *sl st to next ch-3 sp, shell in next sp* rep around; join (6 shells)
Info :
Each shell creates a petal that will form scallops; keep tension relaxed for a flat motif.
Round 4 :
Sl st to center of shell, ch 1, sc in center, *ch 3, sc in center of next shell* rep around to create connecting loops (6 loops)
Round 5 :
Into each ch-3 loop: (sc, hdc, 3 dc, hdc, sc) to form a fuller scallop; join with sl st
Round 6 :
Ch 2 (counts as hdc), hdc in same st, *ch 2, 2 hdc across the top of next scallop* rep around to create small picot-like openwork; join (24 hdc including chs)
Round 7 :
Ch 1, sc in same st, *ch 4, sc in next space between scallops* rep around (6 ch-4 loops); join
Round 8 :
Into each ch-4 loop: (sc, 2 dc, tr, 2 dc, sc) to strengthen scallops; join
Info :
Repeat Rounds 6-8 for two more rounds if you want a larger motif. For the pictured runner, make five motifs identical and join them edge-to-edge using whip stitch or join-as-you-go at Round 9.
Round 9 :
Ch 1, sc evenly around entire motif working 3 sc in each shallow valley between large scallops to create join points (approx 36 sc)
Round 10 :
Join motifs: arrange motifs in a long strip; sew together through these sc join points to make an undulating runner. Once joined, work 1 rnd of sc around entire assembled runner to tidy joins (sc in each st, approx 180-220 sc depending on length)
Info :
Block motifs gently to the same shape before joining to make assembly easier. Pin the motifs with equal spacing and check scallop alignment.
Round 11 :
With cream yarn, ch 3, *skip 2 sc, (2 dc, ch 2, 2 dc) in next sc (creates square shell), skip 2 sc, dc in next sc* rep to edge to create a continuous lace pattern around the runner; join
Round 12 :
Ch 1, sc in same st, *ch 3, sc in space between shells* rep around; join (creates loops for decorative pieces to be sewn later)
Info :
Leave extra long tails at the join points where you plan to attach pumpkins and leaves so you can baste pieces easily during assembly.
— Large Pumpkin (Make 3 identical large pumpkins) :
Round 1 :
With burnt orange and 3.5mm hook, mr, ch 1, 6 sc in mr (6)
Round 2 :
Inc in each st around (12)
Round 3 :
(1 sc, inc) x 6 (18)
Round 4 :
(2 sc, inc) x 6 (24)
Round 5 :
(3 sc, inc) x 6 (30)
Info :
These first rounds form the pumpkin base. Work tightly - pumpkins should be dense so stuffing doesn't show through.
Round 6 :
(4 sc, inc) x 6 (36)
Round 7 :
(5 sc, inc) x 6 (42)
Round 8 :
1 sc in each st around (42)
Round 9 :
1 sc in each st around (42)
Info :
To create vertical ridges, we'll work surface loops to partition the pumpkin into lobes. For a classic pumpkin with 8 lobes, you'll place 8 evenly spaced foundation posts around the next round. Count and mark every 5th-6th stitch to create 8 markers (42/8 ≈ 5.25 stitches).
Round 10 :
Place 8 surface slip stitch posts: *insert hook under post of desired st, sl st leaving loop on surface* rep to place 8 loops evenly spaced; join
Round 11 :
Working back loops only (BLO), sc in each st around (42)
Round 12 :
Start working in rounds forming ridged segments using front post puff segments: *ch 1, (yarn over, insert in next st, draw up loop) 4 times, yarn over and pull through all loops, ch 1, sl st in same st to secure* in every stitch that falls next to a surface post to accentuate the lobe; fill between with 1 sc each (maintain 42 total)
Info :
Alternate textured stitches with plain sc to create pronounced ribs. If your puff counts change your stitch tally, adjust by adding small sc spacers between puffs to keep 42 sts.
Round 13-16 :
Repeat Round 12 for 4 rounds total to build pumpkin height (42)
Round 17 :
(5 sc, dec) x 6 (36)
Round 18 :
(4 sc, dec) x 6 (30)
Info :
Begin stuffing firmly but gradually now. Do not overfill; you want the pumpkin to be full but still slightly squishy so ribs remain defined.
Round 19 :
(3 sc, dec) x 6 (24)
Round 20 :
(2 sc, dec) x 6 (18)
Round 21 :
(1 sc, dec) x 6 (12)
Info :
Close with sl st, leave long tail. Using yarn needle, weave tail through remaining sts and pull closed. Use the tail to create vertical gathering: insert needle through the bottom center up through the top center, pull to gather and create the deep center dimple. Pass needle through each surface post loop (the 8 post loops) pulling slightly to deepen grooves. Secure and weave in ends.
Round 23 - Stem (Make 3) :
With olive green and 3.5mm hook, mr, ch 1, 6 sc in mr (6)
Round 24 :
Inc in each st around (12)
Round 25 :
1 sc in each st around (12)
Round 26 :
BLO 1 sc in each st around for a ribbed look (12)
Info :
Stuff stem lightly, fold top inwards and sew closed to make a short, sturdy stem. Sew stem to pumpkin center, anchoring through the gathered center for stability.
— Medium Pumpkin (Make 4) :
Round 1 :
With burnt orange and 3.5mm hook, mr, ch 1, 6 sc in mr (6)
Round 3 :
(1 sc, inc) x 6 (18)
Round 4 :
(2 sc, inc) x 6 (24)
Round 5 :
1 sc in each st around (24)
Round 6 :
1 sc in each st around (24)
Info :
For medium pumpkins we'll use 6 lobes. Mark 6 evenly spaced points (24/6=4 stitches per lobe) to create ribs.
Round 7 :
Create surface posts for 6 lobes: place 6 sl st posts evenly around; join
Round 8-11 :
Work puff/cluster stitches adjacent to each post alternating with sc in between to keep stitch count at 24
Round 12 :
(2 sc, dec) x 6 (18)
Round 13 :
(1 sc, dec) x 6 (12)
Info :
Stuff as you go and close using same vertical gathering method described for large pumpkin. Add a small stem (Rounds 23-26 above) or use a single ch-6 rolled and sewn to create a short stem.
— Mini Pumpkin (Make 6) :
Round 1 :
With orange and 3.5mm hook, mr, ch 1, 6 sc in mr (6)
Round 2 :
Inc in each st (12)
Round 3 :
(1 sc, inc) x 6 (18)
Round 4 :
1 sc in each st around (18)
Round 5 :
(1 sc, dec) x 6 (12)
Info :
These tiny pumpkins are stuffed very lightly and closed; create ridges by sewing through center and around small surface markers or by using embroidery with a running stitch to form 6 small lobes. Attach short green ch-4 stems rolled and sewn in place.
— Acorn (Make 8) :
Nut Round 1 :
With tan yarn and 3.5mm hook, mr, ch 1, 6 sc in mr (6)
Nut Round 2 :
Inc in each st (12)
Nut Round 3 :
(1 sc, inc) x 6 (18)
Nut Round 4 :
1 sc in each st around (18)
Nut Round 5 :
(1 sc, dec) x 6 (12)
Nut Round 6 :
6 dec (6) - do not close fully; leave opening for stuffing
Acorn Cap Round 1 :
With dark brown and 3.5mm hook, ch 6, join to form ring, ch 1, 12 sc in ring (12)
Acorn Cap Round 2 :
(1 sc, inc) x 6 (18)
Acorn Cap Round 3 :
1 sc in each st around (18)
Info :
Sew the cap to the nut by placing cap over the formed nut top and whip-stitching through both layers. Leave a small stem (ch 4 roll) if desired and add a tiny brown embroidery at the base to mimic texture.
— Oak Leaf (Make 12 in assorted colors) :
Round 1 :
With olive green and 3.5mm hook, ch 12
Round 2 :
In 2nd ch from hook: sc, hdc, 2 dc, tr, tr, 2 dc, hdc, sc; continue along other side of foundation ch: sc, hdc, 2 dc, tr, tr, 2 dc, hdc, sc - do not join; turn to shape (approx 34 sts)
Round 3 :
Work petals by making picot points: *ch 3, sl st in next, sc in next 3 sts* along edge creating 7 small lobes per side; fasten and weave ends
Info :
For a more realistic oak leaf, work a central ridge in BLO with 1 sc in each st along center then work lobes on each side in FLO to create raised veins.
Round 4 :
Optional: embroider vein down center using contrasting yarn and duplicate stitch to highlight shape. Block lightly to flatten lobes.
— Maple-Style Leaf (Make 8) :
Round 1 :
With mustard/gold and 3.5mm hook, ch 10, sl st to form small loop
Round 2 :
Ch 1, sc in same ch, *ch 4, sc in next ch* across to make 5 loops; flip and repeat on opposite side to create symmetric points (10 points)
Round 3 :
Into each ch-4 loop: (sc, hdc, 2 dc, hdc, sc) to form pointed lobes; finish and sew in place
Info :
Make smaller or larger by changing the number of foundation chains; maple leaves are decorative so block them flat for assembly.
— Pinecone Cluster (Make 6 small clusters) :
Round 1 :
With chocolate brown and 3.5mm hook, ch 6 join, 12 sc in ring (12)
Round 2 :
(1 sc, inc) x 6 (18)
Round 3 :
Work sc in BLO around (18)
Round 4 :
Make staggered scales: *ch 2, sl st in next, (sc in next 2 sts)* rep around to form layered texture; finish and stuff lightly
Info :
For a more natural pinecone, use two tones of brown: work every other round in a slightly lighter brown to create depth. Sew multiple small cones together for bulkier clusters.
— Twisted Vine (Make 2 long vines) :
Round 1 :
With chocolate brown and 4.0mm hook, ch 150 (or desired length for runner), sl st to first ch to join into a cord if making circular vine or leave as chain if you want a hanging tail
Round 2 :
Option A: Rope cord by working 1 sc in 2nd ch from hook and in each ch across, finish leaving tail. Option B: For twisted vine, work i-cord style: ch 3, sc in 3rd ch from hook, continuous sc around to form a tight rope; rep until length achieved
Info :
To give vine body, insert a pipe cleaner or floral wire inside the cord before final stuffing/sewing in place; bend into organic curves and anchor to runner base with small stitches.
— Assembly Notes & Decorative Layout :
Info :
Arrange pumpkins, acorns, leaves, and pinecones along runner in small clusters. Heaviest pieces (large pumpkins) should be placed at thirds along runner for balance. Use longer vine sections to meander between clusters.
Info :
When sewing decorations, use long tails from each piece to whip-stitch through the runner base and around petals so pieces sit flush and secure. Add discreet stitches under the base of each pumpkin to stabilize them.
Info :
For a layered, natural look: sew layered oak leaves under pumpkins, add acorn clusters at bases, and tuck small pinecone clusters between leaves. Use a few loose stitches to secure vines along the path.
Info :
To prevent movement on the table, attach small non-slip felt dots under larger pumpkins and pinecone clusters, or sew a short loop to slip an invisible weight (washable sachet) inside large pumpkins.
— Additional Decorative Embellishments :
Info :
Add embroidery details to leaf veins with contrasting floss for extra definition. Use a length of chain-stitched embroidery to mimic tendrils. Consider a few metallic thread highlights for evening shimmer.
Info :
Optional: Make miniature clusters of berries by crocheting tiny 3-sc balls in mustard or rust and sewing them to clusters of leaves for color contrast.
Info :
Stitch counts in textured rounds are approximate and may vary by yarn and tension. If puff or cluster stitches create extra bulk, add occasional sc decreases to maintain round counts given above.
Info :
Care: hand wash runner and small pieces separately. Spot-clean pinecone clusters if they get wet. Store decorations nested in tissue paper to keep shape between seasons.
This Autumn Harvest Table Runner brings a warm and tactile touch to your fall table—layered pumpkins, leaves, and acorns come alive with textured stitches and careful assembly. Each component is an opportunity to add your own color and style, and the modular format makes it easy to adapt to any table length. Enjoy the process of building this cozy centerpiece and know that each stitch adds charm to your home. 🧶🍂🎃