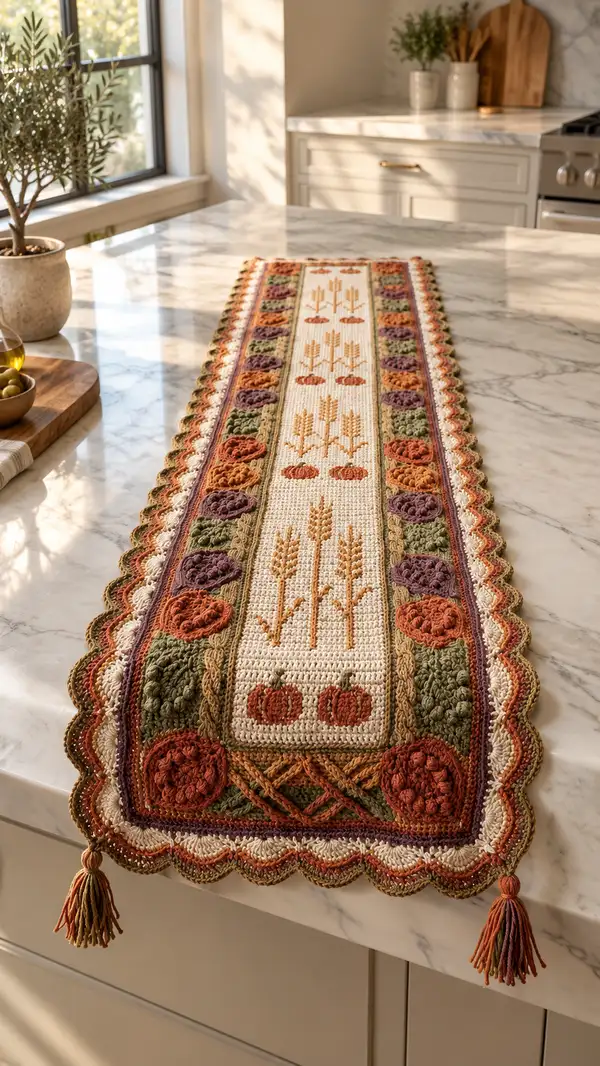
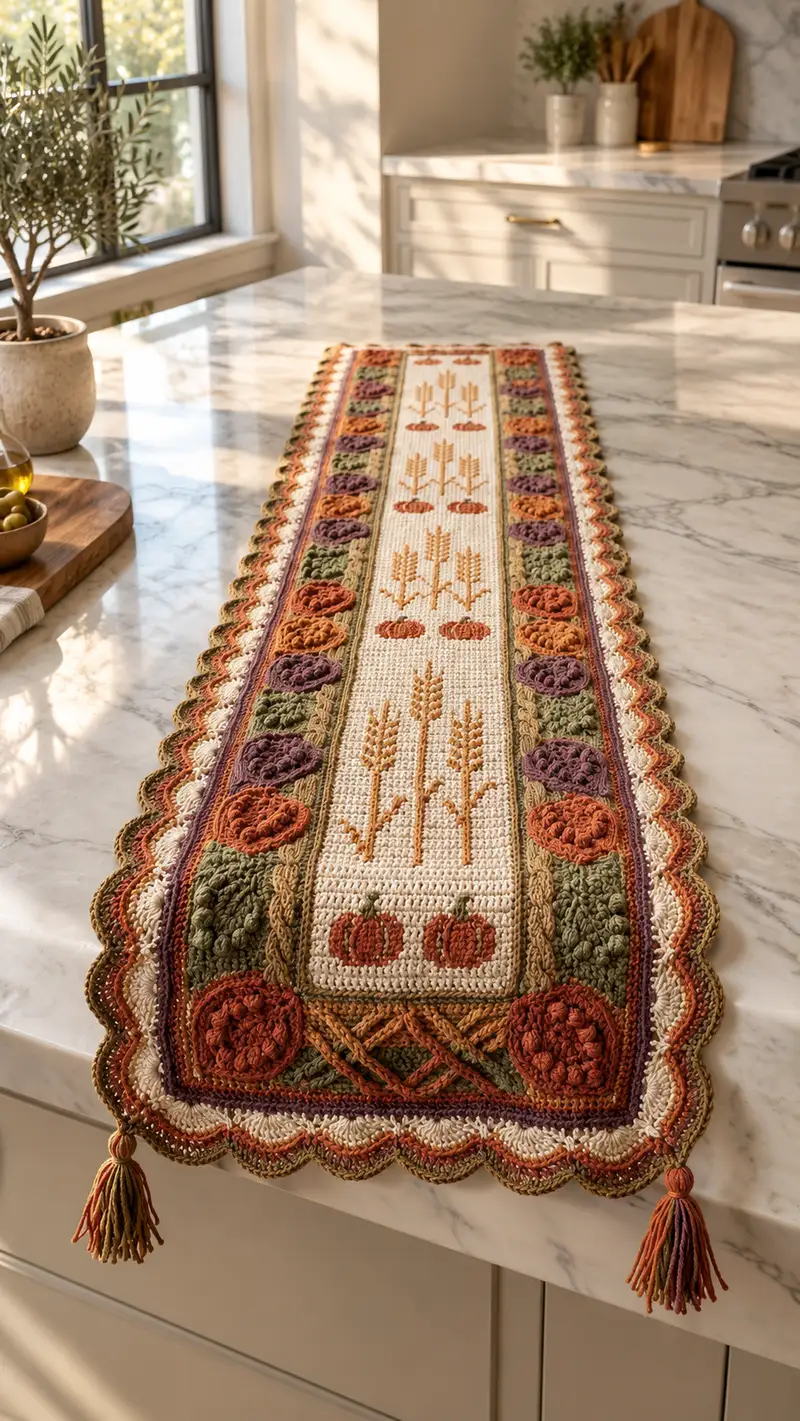
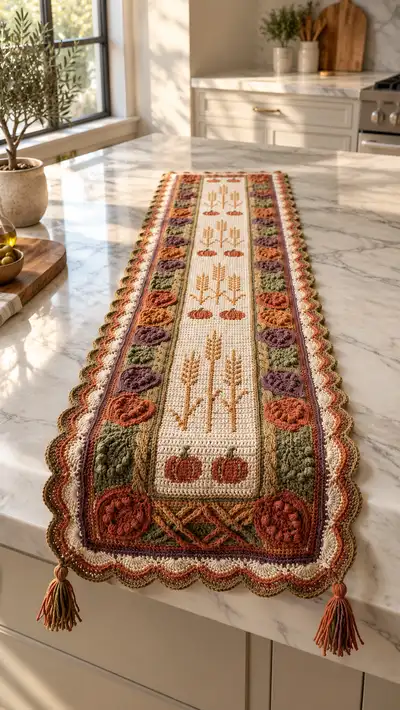
Bring cozy fall charm to your table with this richly textured Autumn Harvest Table Runner. Featuring a cream central panel with wheat stalks and pumpkins, textured bobble flowers in warm rust, olive and plum, braided corner details and a scalloped multicolor edge finished with tassels. Perfect for holiday tables, mantle displays or as a seasonal gift, this runner combines tapestry-style colorwork and surface texture for dramatic, rustic appeal.
Progress Tracker
0% Complete
— Materials & Gauge :
Info :
Gauge is not critical for width but a tight fabric works best for texture: 18 sc and 20 rows = 4" (10cm) in single crochet using 4.0mm hook in worsted cotton. Adjust hook if necessary to match feel. Finished runner in sample measures approximately 12" (30cm) wide by 48" (122cm) long including tassels.
— Center Panel :
Round 1 :
Foundation chain 73. (This yields 72 working chain spaces across the center panel width)
Round 2 :
Row 1: 1 sc in 2nd ch from hook and in each ch across (72)
Round 3 :
Row 2: ch1, turn, 1 sc in each st across (72)
Round 4-8 :
Work 1 sc in each st across for 5 rows (72)
Info :
These first rows create a neat base for the tapestry wheat and pumpkin motifs. Use an even tension; carry background color (cream) consistently along the wrong side or weave in color changes as you go.
Round 9 :
Row 8: Begin tapestry-style colorwork to place first pumpkin motif at lower end. Chart: work 20 sc in background, 8 sc in pumpkin color, 44 sc background (72).
Round 10 :
Row 9: Repeat pattern placement: 20 sc background, 8 sc pumpkin, 44 sc background (72)
Round 11-14 :
Row 10-13: Continue in background cream across (72). These rows frame the small pumpkin motif.
Info :
How to carry color: When you change to pumpkin color, twist the yarns at the color change stitch to lock floats and carry the unused color loosely across the row on the wrong side every 6-8 stitches to avoid long floats.
Round 15-20 :
Work even in sc across in background 6 rows to create spacing for wheat motif placement (72)
Round 21 :
Row 20: Mark center: 36th stitch is central column start. Begin tapestry for wheat stalk repeat. Chart: 32 sc background, 8 sc mustard (wheat stems), 32 sc background (72)
Round 22-28 :
Work rows continuing the wheat chart vertically: shift mustard stitches up to create a stylized stalk using 8 stitches width for each stalk. Keep tapestry floats tidy (72)
Info :
Wheat technique: use single crochet tapestry shading to form vertical stalks. For the wheat 'heads' use 2-3 stitches in mustard over several rows to create the grain clusters. Place three sets of vertical stalks along the center band, spaced evenly by 10-12 rows.
Round 29-34 :
Work even background sc rows between wheat motifs to reach approximately halfway down the panel (72)
Round 35 :
Row 34: Repeat pumpkin placement as in rounds 9-10 for the mid-panel pumpkins: 20 sc background, 8 sc pumpkin, 44 sc background (72)
Round 36-42 :
Row 35-41: 1 sc in each st (72) keeping tension consistent
Info :
When weaving colors, always catch floats every 3-5 stitches for a very tight tapestry piece to prevent sagging. If you prefer, you can work the motifs in surface slip stitch after finishing the background for slightly raised motifs.
Round 43-48 :
Work 6 rows even in sc (72) to finish the center band length. Fasten off and weave ends, leaving them to the wrong side for blocking.
Info :
Center panel total: 48 rows. Block the panel flat to square the edges before attaching side panels and border. Use pins on a blocking board or towel to keep straight edges and correct any slight skewing from tapestry work.
— Pumpkin Motif (Make 8 for side columns) :
Round 1 :
Use rust/copper yarn. 6 sc in magic ring (6)
Round 3 :
(1 sc, 1 inc) x 6 (18)
Round 4 :
(2 sc, 1 inc) x 6 (24)
Round 5 :
(3 sc, 1 inc) x 6 (30)
Info :
These first rounds shape a small pumpkin 'disk' that will be appliqued into the textured side columns. Keep stitches loose enough to flatten slightly when joined into the square field.
Round 6 :
1 sc in each st around (30)
Round 7 :
Change to mustard (stem highlight) for 2 rows: 1 sc in each st (30)
Round 8 :
Return to rust: 1 sc in each st (30)
Round 9 :
Working around edge, sc evenly for one final round (30). Fasten off leaving long tail for sewing.
Info :
To create the classic pumpkin ridges, embroider stretch lines from top center to bottom with contrasting darker yarn using a yarn needle, cinching slightly to give ridged segments before securing.
— Bobble Flower Motif (Make 16) :
Round 1 :
With plum yarn, mr, ch1, 8 sc into mr (8)
Round 3 :
(1 sc, 1 inc) x 8 (24)
Round 4 :
1 sc in each st (24)
Round 5 :
Switch to olive for textured base: 1 sc in each st (24)
Round 6 :
Bobble round: *(skip 1 st, bobble in next st, sc in next st)* repeat across to end (24)
Info :
Bobble stitch (US): yarn over, insert into stitch, yarn over and pull through, yarn over and pull through two loops; repeat yarn over, insert into same stitch 4 times to create 5 incomplete loops, yarn over and pull through all loops, ch1 to close bobble. Maintain consistent bobble height.
Round 7 :
1 sc in each st around to secure bobbles (24)
Round 8 :
Fasten off, leave tail for sewing. Slightly flatten so bobbles sit proud when sewn into side strip (24)
Info :
Sew bobble motifs into the olive textured boxes on the side panels spaced evenly; pin each motif to measure placement before sewing to ensure symmetry along runner length.
— Side Panel / Textured Column (Make 2) :
Round 1 :
Foundation chain 13 (for narrow column width). Row 1: 1 sc in 2nd ch from hook and across (12)
Round 2 :
ch1, turn, 1 sc in each st across (12)
Round 3 :
ch1, turn, 1 sc in each st BLO for 2 rows to create ridge (12)
Round 4 :
Change to olive: ch1, 1 sc in each st (12)
Round 5-8 :
Alternate 2 rows of olive sc with 1 row of bobble pattern across the width: Row pattern: 2 rows sc, 1 row bobble (12)
Info :
Work these repeats to assemble textured blocks for appliqued flowers and pumpkins. Each block of 3 rows yields a single textured square approximately equal to 1" high; repeat to match center panel length (approximately 48 rows to match center).
Round 9-48 :
Continue textured repeat: (2 rows sc in olive, 1 row bobble) x 16 repeats (48 rows total per side panel). Adjust repeats to match the center panel height exactly. Fasten off and block flat.
Info :
Pin the side panels to the edges of the center panel, leaving a 1-st background seam between panels. Use mattress stitch or whipstitch with cream yarn to join, matching rows carefully. Place pumpkin and bobble motifs in the olive boxes before final joining to ensure placement.
— Corner Braided Square (Make 4) :
Round 1 :
With rust yarn, mr, 6 sc in mr (6)
Round 3 :
(1 sc, 1 inc) x 6 (18)
Round 4 :
Change to olive: 1 sc in each st (18)
Round 5 :
With brown, work a 2-row cable braid surface: Row 1 brown sc around, Row 2 sc in front loops only of previous row in brown to simulate braid (18)
Round 6 :
Change to cream, sc around to square off edge; work 2 rounds even (18)
Round 7 :
Work corner shaping: ch1, (sc2tog, sc, sc) across to reduce slightly and square the corner (16)
Round 8 :
Fasten off leaving long tail for sewing. Sew corners to runner ends overlapping side panels and center panel seam. The braid sits at the visible corner diagonal.
Info :
Corner placement: orient braid diagonally across corner and pin carefully. The braided look is achieved using front loop stitches to create a raised ridge; if you prefer a true cable, use surface crochet slip-stitch cables worked with a contrasting color for extra definition.
— Joining Panels (Join-as-you-go Option) :
Info :
Join side panels to center using join-as-you-go slip stitch method: place side panel along edge aligning rows; with right sides facing, insert hook into edge st of center panel and corresponding st of side panel, pull up loop, sl st through both. Work along entire length ensuring consistent tension. Alternatively, whipstitch with matching cream yarn for an invisible seam.
Info :
Attach corner squares last so they cover the joins at the ends. Ensure motifs fit within olive boxes before finalizing sewing—adjust placement by sliding motifs left/right slightly when pinned.
— Scalloped Border (Work around entire runner) :
Round 1 :
With cream yarn, join in any corner stitch. Work 1 rnd sc evenly along runner edge over the join seam (work approximately 300 sc around; exact number depends on final measurements). Count and mark quarter points to keep scallops even.
Round 2 :
1 sc in each st around (same count as previous). Place markers at every 10th st to maintain spacing (approx. 300)
Round 3 :
Switch to rust: *skip 2 sts, 5 dc in next st (shell), skip 2 sts, sl st in next st* repeat around to form large shell spacing. Adjust repeats so shells sit nicely on sides and corners.
Info :
Shell sizing tip: if shells look too crowded, work 4 dc instead of 5 dc. Keep corner shaping by working extra dc in corner spaces (3 shells across corner) and using sl st to square the turn.
Round 4 :
With plum, work 1 rnd sc between shell peaks to define color transition (approx 300)
Round 5 :
With olive, 1 sc around to set the scallop base (approx 300)
Round 6 :
Switch to mustard: Scallop finish: *5 sc in next st, skip 3 sts, sl st* repeat around to form tight scallop ridge aligning with shell peaks (calculate repeats to equal number of shell peaks, approximately 60 scallops)
Round 7 :
Final edge row: with cream, work 1 ch, sc in same st, *ch3, skip next sc, sc in next sc* repeat to create picot-like small loops. Fasten off and weave ends. Trim evenly and block again lightly to shape scallops.
Info :
When working shells and scallops, maintain consistent stitch height to keep edge flat. Use corner increases where needed to prevent ruffle—work an extra sl st or sc in corners as required.
— Tassels (Make 4) :
Round 1 :
Cut generous bundles of all main colors (cream, rust, olive, mustard, plum) approx 6" long before folding. Fold in half and insert fold through a corner loop to create tassel. Secure with a wrap of matching yarn and knot firmly.
Round 2 :
Trim ends evenly and optionally brush ends to fluff slightly. Sew tassel base to corner securely by stitching the wrap to the fabric with needle and yarn.
Info :
Make tassels slightly heavier than you think; they help the runner hang and lie flat on the table. Add extra stitches under the wrap for security, especially if the runner will be moved often.
— Finishing & Weaving In :
Round 1 :
Weave all ends to the wrong side and trim. Block the runner flat to final dimensions. If desired, lightly steam-block cotton yarn for crisp scallops.
Round 2 :
Check all joins: if any seams feel loose, tack them from wrong side with small stitches. Reinforce tassels with a few extra whipstitches at the base.
Info :
Surface embroidery: if any wheat stalks need definition, use contrasting mustard yarn to embroider single vertical stitches or use surface slip stitch to sharpen edges. Add small French knots with yarn for extra berry-like accents if desired.
Round 3 :
Final pressing/blocking and photograph your finished runner laid flat on a long table. Enjoy!
This Autumn Harvest Table Runner brings that warm, nostalgic fall feeling right to your table. Each textured stitch, bobble and braid works together to create a layered, cozy centerpiece you'll be proud to display. The detailed instructions walk you through tapestry colorwork, bobble construction and a scalloped finish for a beautifully professional result. Gather your favorite fall yarns and make a runner to treasure — happy crocheting and enjoy the cozy season! 🍂🧶