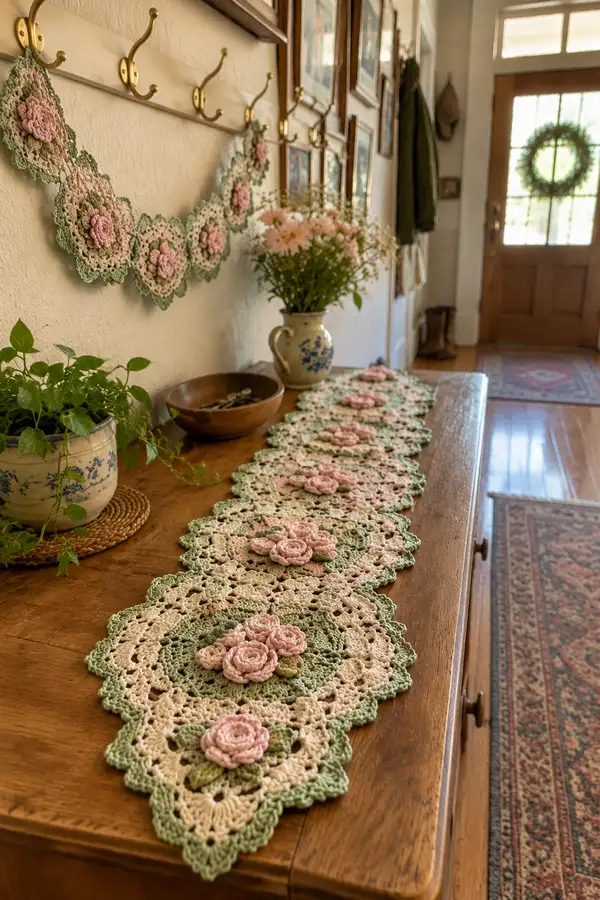
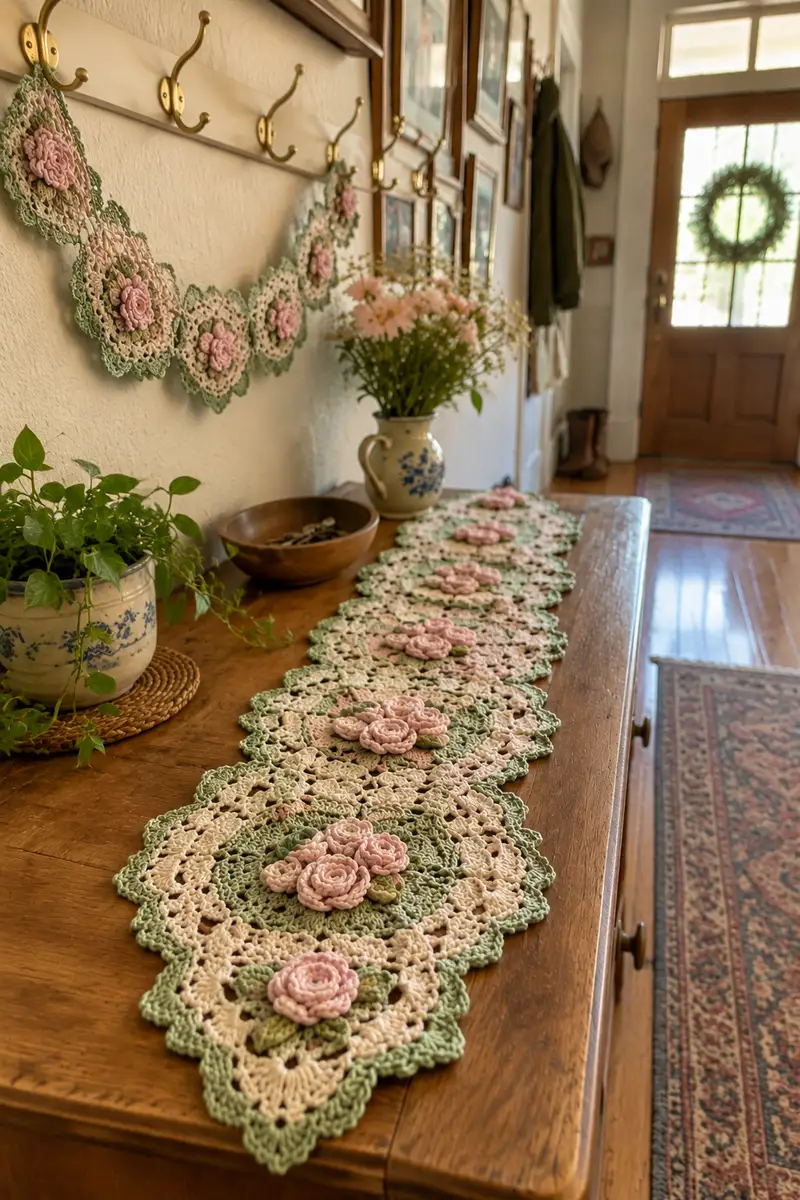
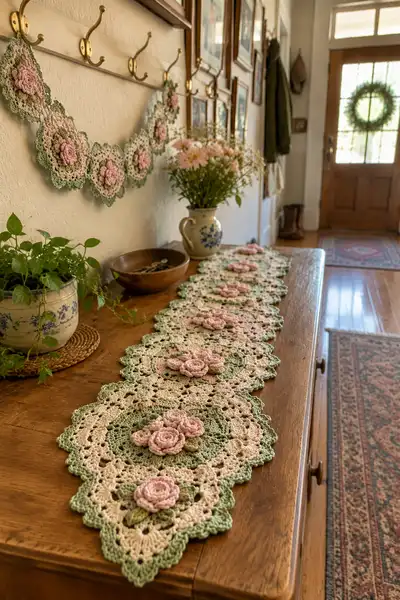
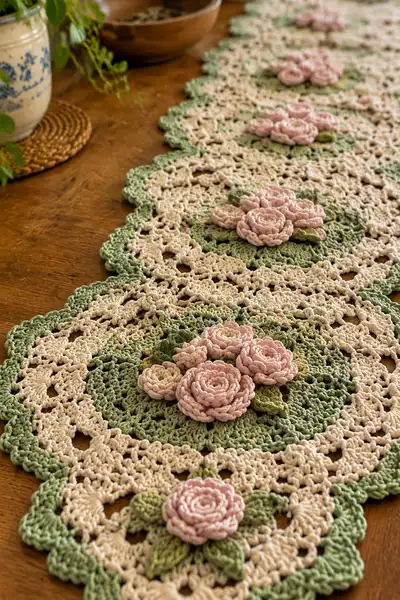
A romantic cottagecore table runner featuring linked scalloped doily motifs with layered 3D roses in blush and sage. Each oval motif combines a textured sage center, lacy cream rounds, and delicate pink rosettes for a soft vintage look. Designed to be assembled into a runner or used as individual placemats or garland. Detailed instructions guide you through roses, leaves, medallions, joining and edging for a polished finish.
Progress Tracker
0% Complete
— Center Rose (Large) :
Round 1 :
Make a magic ring. 6 sc in magic ring (6)
Round 2 :
Inc in each st around (6 inc) (12)
Round 3 :
(1 sc, inc) x 6 (18)
Round 4 :
(2 sc, inc) x 6 (24)
Round 5 :
(3 sc, inc) x 6 (30)
Round 6 :
(4 sc, inc) x 6 (36)
Info :
These first 6 rounds create a firm circular base for the layered rose petals. Work tightly to form a compact disc that will support the 3D petals. Do not fasten off. Place a stitch marker at the start of Round 7.
Round 7 :
1 sc in each st around (36)
Round 8 :
*Ch 3, sl st in next st; rep from * around creating 36 small ch-3 loops (36 loops)
Round 9 :
Work petals into ch-3 loops: *(5 dc in ch-3 loop, sl st in next st) x 36 — this forms the first petal layer (36 petals)
Info :
Keep petals all worked into the ch-3 loops only. When working 5 dc in each loop, fan the stitches slightly so the petals flare. Maintain consistent tension for an even rose.
Round 10 :
Turn rose over and into the back of each petal work *sl st into base of petal, ch 2, 3 dc in same place, ch 2, sl st in top of next petal* around to produce a second layer of small petals sitting between first petals (36 small clusters)
Round 11 :
On right side, working between petals, *ch 4, sl st between petals* around making 36 ch-4 loops (36)
Round 12 :
Into each ch-4 loop make a raised spiral petal by working a 7-stitch spiral: (sl st, ch 1, [sl st in same space, pull up long loop, yarn over, pull through 2] repeat 6 times to create a spiral chain) — secure end with sl st. Repeat in each loop producing 36 spiral petals that overlap to make a dense rosette.
Info :
This spiral technique uses long pulled loops anchored with slip-stitches to create a rope-like spiral. If unfamiliar, practice on a scrap: pull loops to 3-4 times the height of a regular sc before anchoring to create the textured spiral look.
Round 13 :
Working into spaces behind the spiral petals, sc around the base (36) to tidy edges and anchor petals securely.
Round 14 :
Optional: for extra fullness, make a third micro-layer of *ch 2, 3 hdc in tight V spaced between petal clusters* around (36 clusters)
Round 15 :
Fasten off leaving a 20cm tail for sewing to medallion. Weave the tail through the base rounds to stabilize and flatten the center. Finish end and set aside.
Info :
Block rose lightly by pinning to a small round and misting if necessary. Do not over-starch — the rose should remain soft but hold shape. Make one large rose per motif as shown.
— Small Rose Bud (Make 2 per motif) :
Round 1 :
Make a magic ring. 6 sc in ring (6)
Round 2 :
Inc each st (12)
Round 3 :
(1 sc, inc) x 6 (18)
Round 4 :
1 sc in each st (18)
Round 5 :
*Ch 3, sl st in next st* around to create 18 loops (18)
Round 6 :
Into each ch-3 loop work {4 dc, sl st in base} forming petite petals (18)
Round 7 :
Work a quick spiral around the center by chaining 12-15, then sl st back along the chain into the base to form a rolled bud. Tuck and sew the tail securely (no count)
Info :
The small bud is created as a rolled chain spiral anchored to the disc; length of chain will control how large the bud sits. Make two small buds per motif, using the same blush yarn so sizes are consistent.
Round 8 :
Fasten off and leave a 15-20cm tail for sewing. Weave tail through base rounds to secure and flatten if needed.
— Leaf (Larger) (Make 2 per motif) :
Round 1 :
Ch 8, sc in 2nd ch from hook, hdc, dc, tr, dc, hdc, sc — turning to form leaf shape; do not join (7 sts worked from chain)
Round 2 :
Working along opposite side of foundation chain: sc in first, hdc in next, dc in next two, tr in next, dc in next two, hdc in next, sc in last (15 total when counting both sides)
Round 3 :
Edge: sl st around leaf edge; in tip work (2 sc, ch 2, 2 sc) to create a tiny picot-style tip, sl st back down other side. Fasten off leaving long tail for sewing.
Info :
Work leaves with slightly tighter tension than the lace rounds so they sit up beneath flowers. Use moss-olive green and steam-block lightly to flatten curve if desired. Make two large leaves per motif and position under the rose cluster.
— Leaf (Small Accent) (Make 1-2 per motif) :
Round 1 :
Ch 6, sc in 2nd ch, hdc, dc, hdc, sc (5 sts)
Round 2 :
Sl st in each back along opposite side to shape leaf. Fasten off leaving tail for sewing.
Info :
These tiny leaves tuck near buds and help fill space. Work a couple of these per motif for a natural clustered look.
— Motif Medallion Base (Sage Center) :
Round 1 :
Using sage color, make a magic ring. 8 sc in ring (8)
Round 2 :
Inc in each st around (8 inc) (16)
Round 3 :
(1 sc, inc) x 8 (24)
Round 4 :
(2 sc, inc) x 8 (32)
Round 5 :
1 sc in each st around (32)
Info :
We will create a gently textured disc to anchor the roses. Work next rounds in BLO to create a slight ridge that the rose can sit on if you want a raised effect.
Round 7 :
1 sc in each st BLO around (32)
Round 8 :
*(ch 3, sk 1, dc in next) repeat around creating 16 ch-3 arches and 16 dc (32 stitches counted as 16 arches)
Round 9 :
Into each ch-3 arch: (sc, hdc, 3 dc, hdc, sc) — shell made into arch (16 shells)
Round 10 :
1 sc in each st around to stabilize shells (32)
Info :
Center medallion is now ready to receive roses. Position the large rose in the center and the two small buds slightly off-center; tack in place with the long tails before permanently sewing.
Round 11 :
Optional decorative row: *ch 5, sl st into next shell apex* around to create ring of loops (16 loops)
Round 12 :
Fasten off sage and switch to cream for lacy rounds. Leave a long tail for joining to next round.
— Inner Lace (Cream) :
Info :
Change to cream/beige yarn now. Carry unused sage inside or fasten off and join new color cleanly with a sl st. Work lightly tensioned stitches to achieve airy lace.
Round 1 :
Join cream into any outer st. Ch 3 (counts as dc), dc in same st, *ch 2, sk 1, (2 dc, ch 2, 2 dc) in next ch-5 loop apex, ch 2, sk 1* around forming 16 picot-shell groups. End with sl st to top of beginning ch-3. (16 shell groups)
Round 2 :
Sl st to center ch-2 space of first shell. *(ch 3, 2 dc) in ch-2 sp, ch 2, (2 dc, ch 3) in next shell center* around to create an airy lacy ring; sl st to join (32 dc clusters)
Round 3 :
Ch 1, sc in same, *ch 4, sc in next ch-2 space* around creating 32 ch-4 loops, sc to join (32 loops)
Round 4 :
Into each ch-4 loop work (sc, hdc, 3 dc, hdc, sc) creating 32 small shells. Sl st to join.
Info :
This lacy unit produces the delicate cream lace seen between the sage inner circle and the outer scallops. Keep consistent stitch height to maintain even shell size.
Round 5 :
Ch 3, *sk 1 shell, (3 dc, ch 2, 3 dc) in next shell center, ch 2* around forming larger cluster points (16 clusters)
Round 6 :
Work sc around to stabilize clusters; 1 sc in each small st and 3 sc across each cluster apex (count will return to approx 64 sc total depending on cluster handling)
Round 7 :
Ch 1, *sc in next 3 sts, ch 3, sk 2* repeat around to create airy openwork and prepare for outer scallops (approx 16 ch-3 spaces)
Round 8 :
Fasten off cream leaving long tail for sewing. Block motif flat to open the lace before adding outer scallop rounds.
— Outer Scallop Edge (Sage) :
Info :
Switch back to sage color for the scalloped border. The scallops give the motif its soft rounded outline that integrates with neighboring motifs when joined.
Round 1 :
Join sage in any ch-3 space. Ch 1, sc in same, *(ch 4, 5 dc in next ch-3 sp, ch 4, sc in next sc) repeat around to form pronounced scallops — 16 scallops
Round 2 :
Into each scallop apex work (sc, hdc, 3 dc, hdc, sc) for a picot scallop finish (16 scallops)
Round 3 :
Ch 1, sc in each st around to tidy edges and ensure consistent spacing for joining motifs (approx 128 sc total depending on exact counts)
Info :
When finishing the scalloped border, block the motif fully and pin each scallop to identical width so motifs shape uniformly. Repeat for each motif you make.
— Joining Motif Connector (Small Oval Join) :
Round 1 :
Using cream, ch 20, join with sl st to first ch to form a small oval ring. Ch 2, work 1 hdc in each ch around (20 hdc)
Round 2 :
1 hdc in each st around. Fasten off leaving long tail for sewing. These small ovals are used to join scallops edge-to-edge when linking motifs into a runner.
Info :
Make as many connectors as motifs minus one for a runner. For each adjacent scallop pair you will attach a connector between two scallop apexes for a gentle scalloped seam, or you can mattress stitch motifs directly on their outer edges for a seamless look.
— Runner Joining & Assembly :
Info :
Lay motifs in desired order on blocking board or table. Pin motifs so scallops nest neatly. There are two options: 1) Use small oval connectors sewn between scallop apexes (recommended for flexible runner). 2) Slip-stitch join through both motifs' scallop edge for a flatter join. Instructions below use the connector method.
Round 1 :
Position two motifs with scallop apexes touching. Using long tail from connector, sew connector to scallop apex on motif A through the center of the scallop with hidden whipstitch then to motif B scallop apex. Repeat securing both ends and center to ensure connector is flat. Make 1 connector per scallop pair along the seam between motifs.
Round 2 :
Continue adding motifs, connecting one at a time until runner reaches desired length. For pictured runner, 6 motifs are connected end-to-end for a long table runner; adjust motif count to suit your table or use fewer as individual doilies.
Info :
When joining, ensure connectors are taut but not pulling scallops inward; check on a flat surface periodically and adjust by loosening or tightening connector stitches as needed.
— Final Edge & Stabilizing Round :
Round 1 :
Once runner is assembled, work a final stabilizing round in cream along the entire outer edge: join cream to any outermost scallop, ch 1, sc evenly through both layers where motifs meet and along single edges where motifs are outermost. Aim for 1 sc per 3-4 mm of scallop edge to provide a clean edge (approx 10-12 sc per scallop depending on size).
Round 2 :
On longer straight sections (where two scallops merge) add reinforcement: *(sc, ch 2, sc) across seam spaces to fill small holes and maintain runner stability.
Round 3 :
Switch to sage and work a decorative picot scallop: *(sc 2, picot (ch 3, sl st in 3rd ch), sc 2, sl st) around entire outer edge to finish profile and echo motif scallops. Fasten off and weave in ends.
Info :
The final edge adds cohesion and a slightly firmer border for everyday use. If you prefer a drapier runner, omit the picot and instead do a row of simple sc in sage.
— Alternative: Make a Garland (Optional) :
Info :
Instead of connective ovals, use long chain loops between motifs to make a decorative garland. Chain 40 between motifs and attach at scallop apexes to create a hanging strand for wall display as seen in the background of the photos.
Round 1 :
When making a garland, place a small loop of chain behind each scallop at even intervals and secure with invisible whipstitch. This allows gentle draping over hooks or knobs.
Info :
Gently block garland loops into shape and allow to dry fully before hanging so the lace holds its curve.
— Finishing Touches & Blocking :
Info :
To achieve the crisp, vintage look in the photos, block each motif while slightly damp. Pin scallops uniformly and steam or mist motifs gently — use spray starch lightly on the scalloped border if you want a firmer hold. Allow to dry fully before removing pins.
Round 1 :
Weave all tails into the backs of motifs with a yarn needle. Reinforce sewn connectors with an additional pass of whipstitch if runner will be handled frequently.
Round 2 :
Final inspection: Ensure roses are securely sewn to medallion base. Tuck small leaves and buds beneath petals and tack in place with small stitches. Trim stray threads close to fabric after weaving ends securely.
Info :
Your runner is now complete. For care, gently hand wash and reshape while damp, or use a low-heat iron over a pressing cloth to refresh the finish periodically.
Completing this cottagecore rose runner is such a satisfying project — each motif feels like a tiny heirloom and the assembled runner brings a soft romantic touch to any table. The layered roses and scalloped edges are perfect for gifting or dressing up seasonal decor. Enjoy blocking and tucking in those final stitches — the slow, careful finishing is where the piece truly comes to life. 🌸🧶