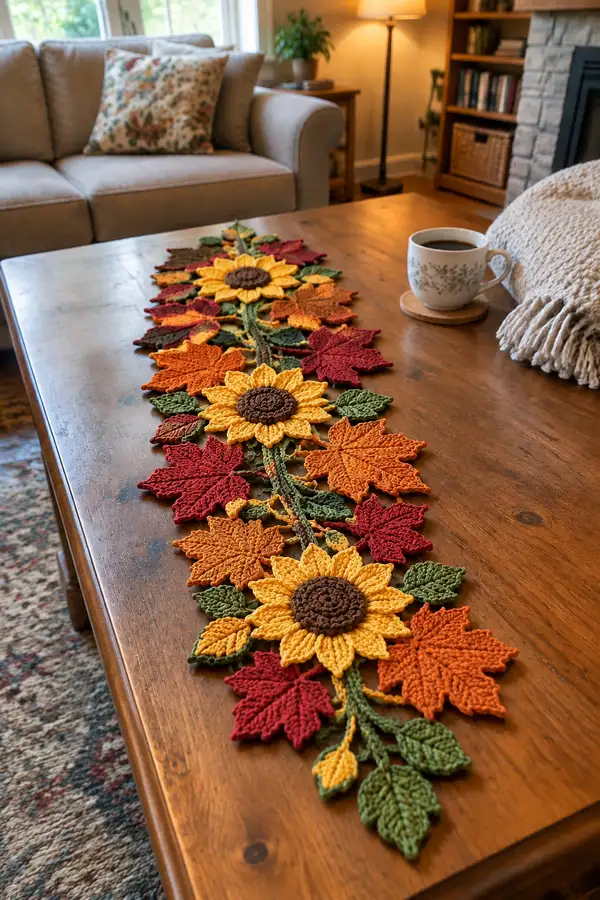
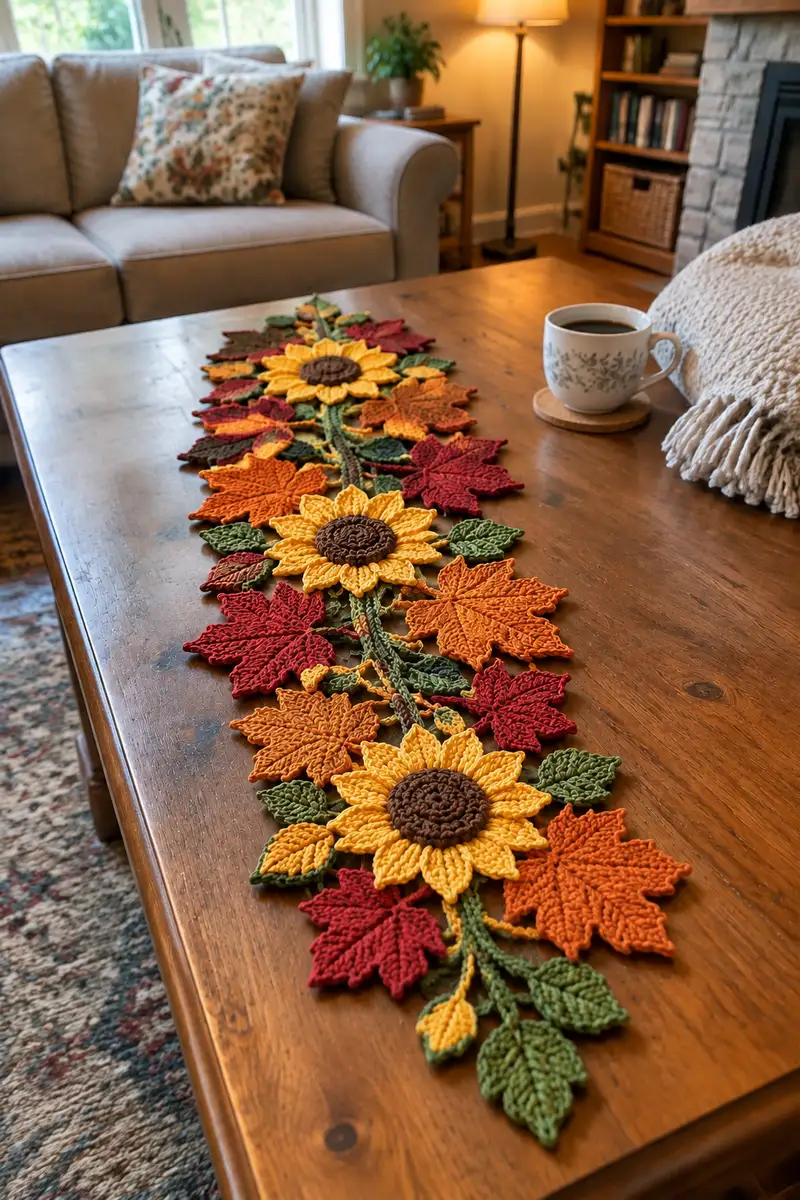
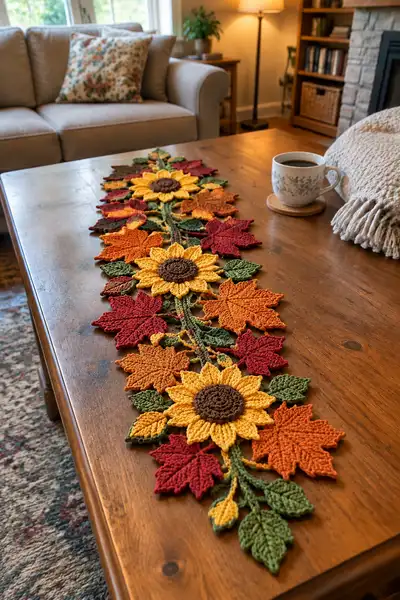
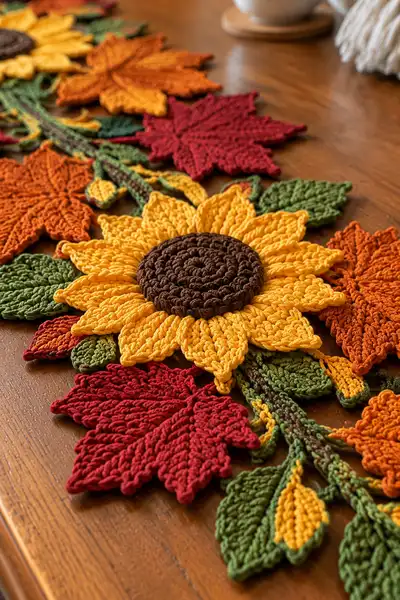
A warm, autumn-inspired table runner featuring bright sunflowers surrounded by layered maple leaves and leafy accents connected by a braided vine spine. This detailed pattern shows how to crochet detached motifs (sunflower centers, petals, maple leaves, small leaves and buds) and assemble them into a long, decorative table runner. Colors shown: golden yellow, chocolate brown, rust orange, deep red and olive green. Perfect for seasonal décor or a cozy harvest centerpiece.
Progress Tracker
0% Complete
— Notes & Gauge :
Info :
Gauge is flexible since this is decorative; aim for about 10 sc x 10 rows = 4 inches measured in single crochet in worsted cotton on 4.0mm hook. Maintain consistent tension so motifs lie flat and join easily. Work motifs flat; blocking is essential for crisp veins and petal shaping.
Info :
Colors used in photos: Golden Yellow (sunflower petals), Chocolate Brown (center), Burnt Orange and Deep Red (maple leaves), Olive Green (leaves and vine), Mustard (small bud highlights). Yarn weight: worsted #4 cotton or cotton-blend recommended for crisp texture.
— Sunflower Center (Make 3) :
Round 1 :
6 sc in magic ring (6)
Round 3 :
(1 sc, inc) x 6 (18)
Round 4 :
(2 sc, inc) x 6 (24)
Round 5 :
(3 sc, inc) x 6 (30)
Round 6 :
(4 sc, inc) x 6 (36)
Round 7 :
1 sc in each st (36)
Info :
Switch to working in BLO for a slightly domed textured edge if desired. For a flatter center leave normal. Place a marker at the start of each round.
Round 8 :
1 sc in each st BLO (36)
Round 9 :
(5 sc, inc) x 6 (42)
Round 10 :
1 sc in each st (42)
Round 11 :
(6 sc, inc) x 6 (48)
Round 12 :
1 sc in each st (48)
Info :
Fasten off leaving a long tail for sewing to petals. You may optionally work an extra round of reverse sc (standing sc) to create a small rim for attaching petals. Do not stuff — centers are flat disks.
— Sunflower Petals (Make 24 petals per sunflower; join to center) :
Info :
Petals are worked in rows attached around the center disc. Make 24 petals around centers for a full sunflower. Petal repeat below is worked into chain-3 spaces created by a single round of sc and ch-3 placement markers — see assembly step for spacing. Use Golden Yellow yarn.
Petal Row 1 :
Ch 6, sl st in 2nd ch from hook, sc in next, hdc in next, dc in next, tr in last, sl st to attach at marked petal base (counts as one petal foundation)
Info :
Create 24 foundation chains around center using this sequence: after round 12 of center, evenly space 24 ch-6 loops by sewing or crocheting a round of 'ch 3, sc in next st' across the edge to form 24 starting loops. See below for detailed placement technique.
Petal Row 2 :
Work into the chain-6: from base sc into the base st, ch1, 1 sc, 1 hdc, 2 dc, 1 hdc, 1 sc, sl st in next base (petal nearly full and slightly domed) — fasten off and weave end. (Petal counts: varied stitches for shape)
Petal Row 3 (optional layering) :
For fuller sunflower make a second row staggered behind first: attach at base behind row1 and repeat chain-6 petal but shorter: ch5 and decrease top height: sl st, sc, hdc, 2 dc, hdc, sc, sl st. Fasten off.
Info :
Petal shaping uses increased height at center (tr stitches) tapering at edges. Block petals flat by pinning on foam mat then spritzing with water or light starch to hold shape. Arrange petals layered: second row slightly offset so petals alternate.
— Small Raised Seed Ring (Optional for center texture) :
Round 1 :
With brown, join to center's round 7 edge: ch1, sc evenly around the small inner ring comprised of center rounds 3-6 to create a raised ridge (work 1 sc in each st of an inner loop) (approx 24-30 sc depending on how many inner rounds you use)
Round 2 :
FPdc around each st of Round 1 to create raised texture (24-30 FPdc). Fasten off and weave in ends.
Info :
Use this optional ring to give the sunflower a bumpy, realistic center. If you do this, attach petals to the outside of this textured ring for best adhesion.
— Large Maple Leaf (Make 10-12 assorted sizes) :
Info :
Maple leaves are worked flat in rows with shaping for lobes and points. Each large maple leaf uses burnt orange or deep red. Stitch count will vary because of shaping; check math below carefully. Block each leaf well to open veins.
Round 1 (Base Chain) :
Ch 21. (This chain determines leaf length; adjust by odd numbers for size variations)
Round 2 (Foundation Row) :
Row 1: sc in 2nd ch from hook, sc across to end (20 sc). Turn. (20)
Round 3 :
Ch1, sc in first 4 sts, (hdc in next, dc in next, hdc in next) to form first lobe, sc in next 4 sts, sl st in next 2 to create valley, (sc in next 4, hdc, dc, hdc in next) sc across remaining 2 sts. Count: shaping gives 20 sts across with added texture.
Round 4 :
Ch1, turn. Work along opposite side of foundation chain: sc 4, (hdc, dc, hdc) in corresponding lobe peaks, sc 4, sl st 2, sc 4, (hdc, dc, hdc), sc remaining to finish (20).
Info :
To create defined lobes and points, use an additional row of post stitches along the midline; this is executed as a central ridge of FPdc and BPdc on the next rounds.
Round 5 :
Ch1, turn. Starting at tip edge, sc in next 3, FPdc around corresponding st in opposite row to create a raised vein, sc next 3, (ch2, sl st in next to form small notch), sc 3, FPdc in next, sc remaining — keep counts symmetrical.
Round 6 :
Ch1, turn. Repeat Round 5 making FPdc stronger: work FPdc, FPdc, BPdc across central vein area to build a ridged vein. This will produce an elevated midrib running down center of leaf.
Round 7 :
Ch1, work a pointed edging: sc in first 2 sts, hdc in next, dc in next (point peak), dec over the next 2 sts to pull in, sc across next 4, sl st for notch, repeat mirrored on other side across the chain. End with sc to corner. Fasten off and weave end.
Info :
Large maple leaf shaping uses decreases at points to create sharp lobes. For smaller leaves reduce foundation chain to 17 or 15 ch and follow the same shaping pattern proportionally.
Round 8 (Vein Definition) :
With contrasting darker color or same color, surface slip stitch along vein: starting at stem end, surface sl st down the center forming a raised line; work small sl sts branching into lobes to create secondary veins. Fasten off.
— Medium Maple Leaf (Make 8-10) :
Round 1 (Base) :
Ch17, sc in 2nd ch from hook and across (16 sc). Turn. (16)
Round 2 :
Ch1, sc4, hdc, dc, hdc, sc4 across, turn — shape like large leaf but with 3 lobes. (16)
Round 3 :
Ch1, work FPdc down center 6 sts to start midrib, sc to ends, sl st to create notches and tips. Fasten off.
Info :
Create variations by altering peak stitch heights: for sharper lobes use tr at the peak instead of dc; for rounded lobes use only hdc. Always block to open textures.
— Small Leaf (Make 20-24) :
Round 1 :
Ch9. Sc in 2nd ch from hook, sc across to end (8 sc). Turn. (8)
Round 2 :
Ch1, 2 sc, hdc, dc, hdc, 2 sc across (8) — creates a small pointed leaf.
Round 3 :
Ch1, turn. Work FPsc down cluster center: (FPsc in st1, FPsc in st2, sl st into tip, FPsc back along other side) to form a small raised vein. Fasten off and block leaf flat.
Info :
Small leaves add visual filler and help tie the sunflower clusters and maple leaves together. Make a few in two sizes by using ch7 and ch11 foundations to vary shapes.
— Leaf Buds (Make 8-12) :
Round 1 :
With mustard or bright yellow, ch4, 3 sc in 2nd ch from hook, sl st in last ch to form a small closed bud (3 sc)
Round 2 :
Sl st into next st and work sc around to create a tiny round bud (6 sc). Fasten off.
Info :
Bud can be left flat or slightly stuffed with a couple fluff pieces for body. Sew with long tail to vine later. Make some in mustard/yellow as highlights near sunflowers.
— Braided Vine Spine (Make 1 long vine approx 36-44 inches) :
Info :
The braided vine is constructed by making three long crocheted cords and braiding them together or by working a central slip-stitch cord with side openwork chains and then crocheting over to thicken. Option A below is a 3-cord braid; Option B is a single wider cord with raised post stitches. Use olive/forest green and a little brown for the vine core.
Vine Cord A (Make 3) :
Ch 180 (adjust length to desired runner length; each ch approx 0.25 inch - 180 ch ≈ 45 inches). Work sl st in 2nd ch from hook and each ch across to make a tight slip-stitch cord (179 sl st). Fasten off leaving long tail for braiding.
Info :
Make three cords of equal length (use two in green, one in brown to create a variegated vine). If you prefer a thicker braid, make cords of 240 ch each for a longer runner or fewer but thicker cords by using hdc cords instead of sl st.
Vine Cord B (Optional alternative) :
Ch 140, join to work in round: ch1, sc in each ch working around both sides of foundation chain to create a tube until cord measures desired length (approx 2.5-3 inches less than full length), add FPdc every 6th st to give twist. Fasten off.
Info :
Block cords straight and press gently to keep them from curling. If you want a semi-rigid vine, insert a thin craft wire inside cords before final covering (wrap wire ends in tape and cover with yarn ends sewn closed).
Braiding :
Pin three cords at top, braid tightly for the entire length, finish with a small knot and weave tails under. Leave extra tails near each sunflower area for sewing into clusters and attaching leaves and buds. If you prefer not to braid, use single wide cord option and add decorative slip-stitch loops along sides for leaf placement.
Info :
Secure braid ends by wrapping a short length of yarn around end and sewing down. Keep braid tension even; too tight will shorten the vine, too loose will look sloppy. You can add small reverse sc loops along braid to tuck leaf stems when assembling.
— Stem & Leaf Stems (Make varied small stems) :
Round 1 :
To create short stems for each leaf or bud: make sl st cord: ch 12, sl st in 2nd ch from hook and across (11 sl st). Fasten off leaving long tail to sew to braid. For thicker stems ch 18 and sc around both sides for tube.
Info :
Make stems in varying lengths (8-18 ch) to create natural staggered look. Attach by sewing securely to braid at junction points then sew leaf/bud to stem end with strong stitches.
— Joining Sunflower to Center (Assembly of Flower) :
Info :
Arrange the sunflower: attach 24 petals evenly around the center disk. Use diagram or count stitches on the center round to evenly space 24 positions (e.g., if center has 48 sts, attach petals every 2 sts). Sew petals to center by weaving long petal tails through outer edge and back to create a secure join. For layered look attach a second row of slightly smaller petals behind the first, offset by 12 positions.
Joining Step 1 :
Place center flat. Mark every 2nd stitch on the outermost round with stitch marker to make 24 equal spaces. Align petal base chain of each petal to a marked space and sew through base tail around the center edge with yarn needle and long tail. Repeat for all petals.
Info :
When sewing, insert the needle through both center edge and petal base chain, pull snug but not tight to avoid puckering. After sewing 6-8 petals, block the sunflower to keep petals flat and symmetric, then finish sewing remainder.
— Decorative Raised Veins on Leaves (Surface Crochet) :
Round 1 :
With contrasting darker yarn, use tapestry needle or surface slip stitch to outline veins: insert hook or needle from back to front at leaf base then surface sl st along the central vein to the tip, create small diagonal surface sl sts to form side veins branching to lobes. Work small consistent stitches for realistic veins.
Info :
This step brings leaves to life; use a slightly darker shade of the same color for subtle contrast. Surface slip stitch is less bulky than embroidery and lies flat after blocking.
— Edge Picot Finish for Leaves (optional) :
Round 1 :
With same color, attach at edge every 3 sts: (sc, ch3, sl st in first ch) to create a small picot at each scallop for extra definition. Work around entire leaf and fasten off. Weave ends to back.
Info :
Picot edges exaggerate the serrated look of a maple leaf; adjust spacing to taste. Pin and steam lightly to set picots if necessary.
— Assembly of Runner Layout :
Info :
Lay the braided vine on blocking mat or table surface. Arrange sunflowers spaced approximately 8-10 inches apart depending on table length; tuck clusters of maple leaves and small leaves around each sunflower in an alternating pattern. The photos show three sunflowers in a 44-inch runner with maple leaves alternating sides, with buds and small leaves filling gaps.
Step 1 :
Position first sunflower near one end of braid leaving 2-3 inches of braid beyond flower to tuck under on table. Pin in place. Using yarn tail from sunflower center, sew braid to center underside at multiple points: under center and under several petal base points for stability. Repeat for each flower.
Info :
Use long tapestry needle and whip stitch through braid and under several petal bases. For extra hold, use matching slip-stitch underside to link braid and base: insert hook through braid and petal base and sl st to join then secure with hidden sewing stitches.
Step 2 :
Attach large maple leaves by sewing their stem ends to the braid at alternating angles. Add medium leaves near sunflowers to frame them, and tuck small leaves and buds into gaps by sewing through leaf base and braid. Add additional stitches through leaf veins to secure them flat and prevent flopping.
Info :
Sew leaves so that the upper surface faces up; place leaf veins so they run away from sunflower centers for natural flow. Add one or two small leaves at petal bases to visually anchor sunflowers to vine.
Step 3 :
Use surface slip-stitch along braid edges to create small loops to anchor leaf stems: with green yarn, sl st in between braid strands every 1 inch and create a ch 4 loop; slip-stitch back into same st to form a loop. Sew stem tails through the loop and tie off by weaving ends into braid to lock placement.
Info :
This technique allows repositioning: you can slide stems in loops before final stitching, providing a chance to tweak placement then secure permanently by sewing through loop and stem together.
— Edging and Final Blocking :
Round 1 :
Once all motifs are in place, work a final slip-stitch edging along entire runner perimeter: join yarn at one end, ch1 and sl st evenly along edges of leaves and petals to unify them and hide raw joins. Use the green yarn sparingly to mimic a vine outline or use color-matching yarn for contiguous look.
Round 2 :
At points where petals or leaf tips are delicate, add small reinforcement stitching: sc into tip and into braid or adjacent motif to pull tips slightly inward so they sit flat.
Info :
Once construction is complete block entire runner: pin on foam mat to desired shape and spacing, spray with water or light starch, allow to dry fully. This sets veins and keeps runner flat on table.
— Optional Decorative Accents (Beads, Tiny Flowers) :
Info :
For extra sparkle, sew small wooden or amber beads into sunflower centers spacing them evenly. Tiny crocheted roses or tiny bullion-stitch flowers in mustard can be added among buds for variety. Secure all embellishments tightly if runner will be handled frequently.
Final Finishing :
Weave all remaining ends through several motifs on underside; trim flush. Check runner flatness and secure any loose leaf tips using small stitches from underside, pulling slightly to tuck tips under petal edges so top surface looks seamless.
Info :
Store runner flat or wrapped around a tube to avoid creases. Hand wash gently if cotton yarn used, reshape while damp and block again. Avoid heavy hot items placed directly on petals to prevent squashing if starched shapes are delicate.
This autumnal table runner brings the crisp hues of fall right to your table — sunflowers, layered maple leaves, and a braided vine tie everything together into a warm seasonal display. Each motif is a joy to make and arranging them into a runner is a satisfying finishing touch. Whether you use it for Thanksgiving or everyday autumn decor, this runner is sure to be a favorite centerpiece. 🧶🍁☀️