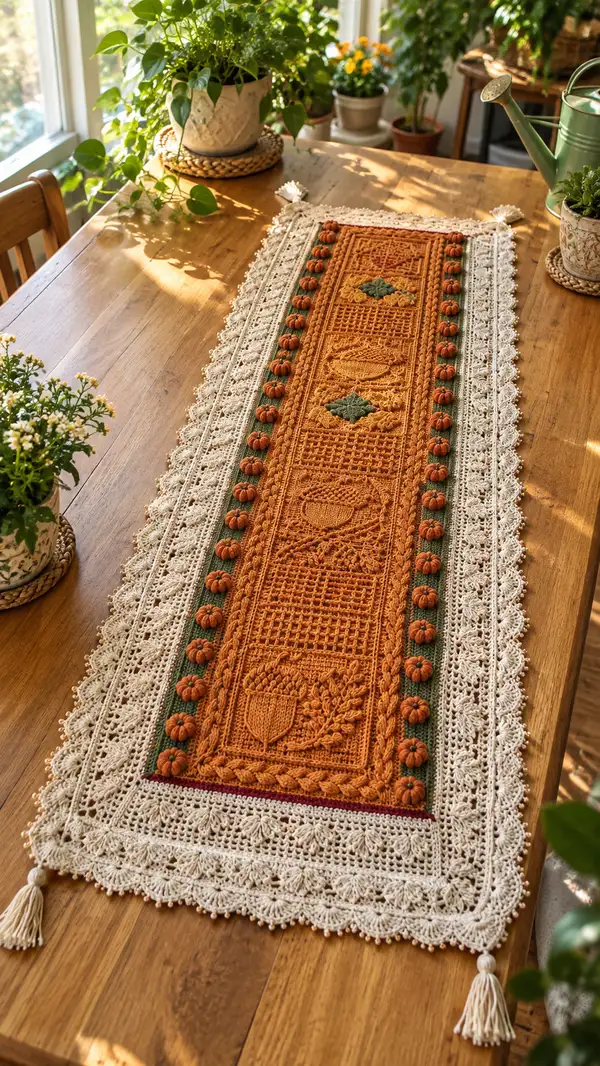
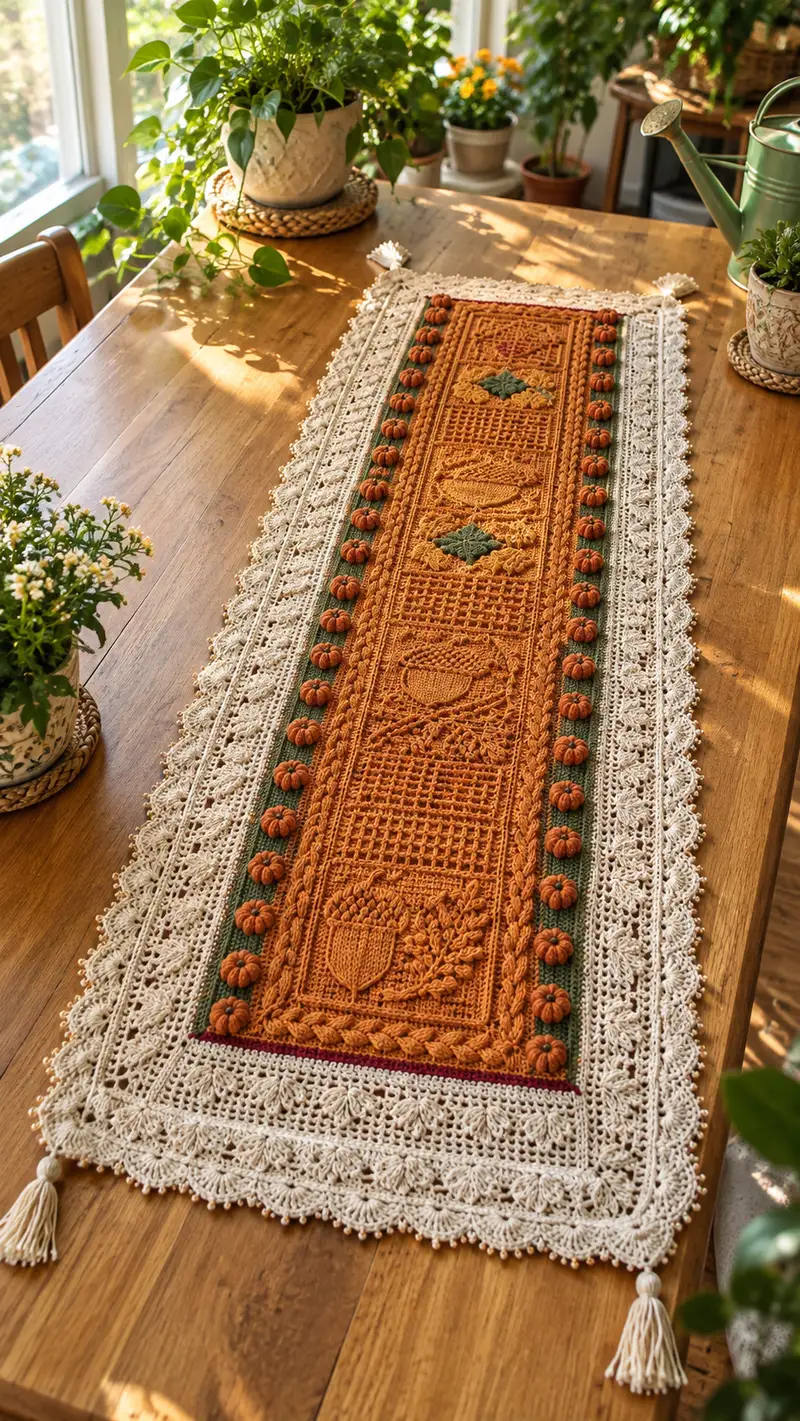
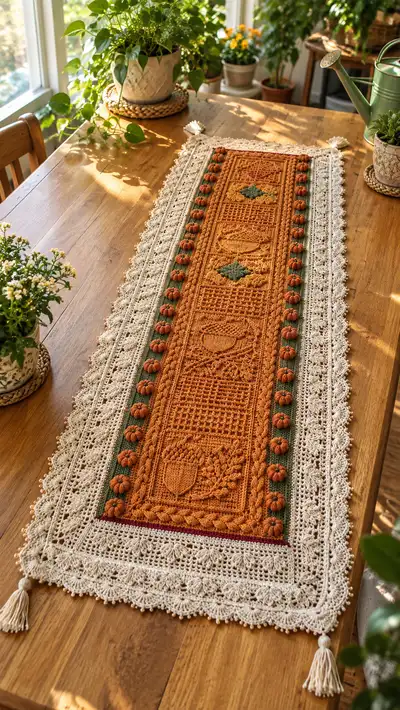
A warm, rustic table runner inspired by autumn harvest motifs — textured pumpkin bobbles, acorn and leaf panels, deep green side stripes, and an elegant ivory lace border. Worked in sections for easy assembly, this runner features raised cables, puff stitches and a decorative scalloped edging with tassels for a cozy, handcrafted centerpiece.
Progress Tracker
0% Complete
— General Notes :
Info :
This pattern is modular: work the Central Panel to desired length (instructions here create approximately a 48" long runner), then make two matching Green Side Strips with pumpkin bobbles, a narrow Burgundy Inner Stripe and a wide Ivory Lace Border. All pieces are blocked and seamed together. Throughout the pattern, counts are shown for a runner worked to approximately 14" wide. Adjust chain length by multiples of 4 + 1 if you want to scale width. Use stitch markers at the start of each round/row. Gauge is important: 18 sc x 20 rows = 4" in single crochet in worsted cotton.
— Central Panel (burnt orange) :
Round 1 :
Foundation row: ch 93. (This creates 92 base chains to work into). Starting in 2nd ch from hook, 1 sc in each ch across. Join with sl st to first sc. (92)
Round 2 :
Ch 1, 1 sc in each st around. Join. (92)
Round 3 :
Ch 1, 1 sc BLO in each st around to establish a subtle ridge for the inner frame. Join. (92)
Info :
Use BLO on round 3 to create a framed ridge that visually separates the central panel from the green rib later. Keep tension even; this ridge will stay visible after blocking.
Round 4 :
Ch 2 (counts as hdc), 1 hdc in each st around. Join. (92)
Round 5-8 :
Ch 1, 1 sc in each st around. Join every round. (92)
Info :
Rounds 5-8 form the base before pattern repeats and will sit under the first motif block. If lengthening, repeat later motif block rows to add length.
Round 9 :
Ch 1, [3 sc, fpdc around next st, 3 sc, bpdc around next st] across to end. Join. (92)
Round 10 :
Ch 1, 1 sc in each st across including post stitches (count remains 92). Join. (92)
Round 11 :
Ch 2, 1 hdc in next 4 sts, *2 dc in next st, 1 dc in next 2 sts, 2 dc in next st, 1 dc in next 4 sts*; rep from * to * across; join. (92) Note: This creates a subtle raised diamond grid background that reads as texture after blocking.
Info :
Placement of motifs: the runner is composed of four central motif panels stacked lengthwise (acorn, basket grid, leaf/vine, pumpkin panel). Each motif block uses 12 rounds of patterning. Mark the start and end of each 12-round motif block with a stitch marker as you complete rounds to keep motifs aligned.
Round 12-20 (Motif Block A - Acorn/Laurel) :
These 9 rounds create a raised outline for an acorn and leaf cluster using filet and surface post definitions. Work 1 sc in each st on rounds designated as plain. On shaping rounds, use combinations of ch spaces and dc to create negative space for the motif. The counts remain 92 every round. Specifically: Round 12: ch 1, 1 sc across (92). Round 13: ch 1, work filet pattern: *dc, ch 1, skip 1* across to create mesh where acorn cup will sit; adjust last stitch to finish with dc. Round 14: ch 1, 1 sc across to anchor mesh. Round 15: ch 2, use front post doubles to outline acorn curved edges at specified position between sts 20-40 (make fpdc around the pairs of stitches corresponding to the acorn outline). Round 16: ch 1, 1 sc across. Round 17: ch 1, repeat mesh to form acorn top; finish with treatment rows 18-20 as descriptive sc and post stitches to firm up edges. (92 each round)
Info :
For the acorn shape, I recommend sketching a 12-stitch wide by 10-row tall grid on paper mapping the 'filled' (sc/dc) and 'open' (ch1, skip) cells. Filet is counted by groups, not by stitch count change, so the 92-stitch perimeter remains constant.
Round 21-32 (Motif Block B - Basket Grid & Cable) :
Work rounds 21-32 as follows to create a textured basketweave and rope cable row at the bottom. Round 21: ch 1, 1 sc in each st. Round 22: ch 2, [fpdc around next 2 sts, bpdc around next 2 sts] rep across to create a basket texture (92). Round 23: sc round. Round 24: ch1 then work 3 rounds of braided rope cable: use sequences of [hdc fp around next st, hdc bp around next st] across to simulate twisting columns (92). Round 25-32: sc rounds alternating with 1 round of puff cluster pattern: [ch1, sc in next 3, puff in next st (yarn over, insert, pull loop 5 times, yarn over, pull through all loops), sc in next 3] across; keep counts by substituting puff as one stitch. All rounds maintain 92 stitches.
Info :
Puff stitch: yarn over, insert hook, pull up a loop (repeat 4 more times), you will have 11 loops on hook, yarn over and pull through all loops, ch 1 to secure. Count the completed puff as 1 stitch for subsequent counts. Use the same puff technique throughout to maintain even height.
Round 33-44 (Motif Block C - Leaf Diamond) :
These rounds form a diamond-shaped leaf lattice with surface slip stitch embroidery for vein detail. Round 33: sc round. Round 34: Begin filet mesh for leaf outline using dc and ch 1 mesh across the 92 sts. Round 35: sc anchor round. Round 36: Use surface sl st to trace primary veins after working the round — work sl st on top of the round 36 surface (counts unaffected). Round 37-44: Repeat shaping rounds that enlarge and then taper the diamond leaf using combination of dc mesh rounds and sc anchor rounds. Every round remains 92 stitches.
Info :
Surface slip stitch embroidery should be worked with a slightly smaller hook or with a tightened tension to hold defined veins. Use a spare strand of burnt orange for tone-on-tone, or olive green for contrast leaf veins.
Round 45-56 (Motif Block D - Pumpkin Panel with Arched Basket)
Round 45 :
sc in each st (92)
Round 46 :
Use puff clusters to create raised pumpkin segments across a central 36-stitch width: ch1, sc in first 28 sts, then [puff, sc] across 36 sts to create the pumpkin ribbing, then sc in last 28 sts. (92)
Round 47-50 :
sc anchor rounds to stabilize puff ribs (92)
Round 51-56 :
finish the pumpkin panel with surface post outlines to define the bowl/arched base in the lower portion of the panel. Work 1 sc in each st across for finishing rows. (92)
Info :
Work a total of four 12-round motif blocks along your runner to create the repeating harvest narrative. After Round 56, repeat Rounds 9-56 if you want additional length. Each 12-round motif block = approximately 1.5" of length depending on stitch height; plan length accordingly.
Round 57-64 :
After completing the last motif block, work 8 rounds of sc to form a stable edge before attaching the green stripe: Round 57-64: ch1, sc in each st around. Join each round. (92)
Info :
Fasten off burnt orange leaving a long tail for seaming to the green side strips. Block the central panel flat to smooth motifs and set stitch memory. Use gentle steam or wet-block according to yarn label.
— Green Side Strips (make 2) :
Info :
The green side strips are worked as long narrow rectangles to be seamed to the central panel on each side. Each strip will be 6 sts wide before the bobble row (6 stitches x runner length). Work strips to the same length as your central panel including the 8 sc edge rows so seams align (approx 64 rounds as above).
Round 1 :
Ch 7. (6 foundation chains + 1 turning ch). Row 1: sc in 2nd ch from hook and across (6). Turn.
Round 2-6 :
Ch1, sc in each st across (6). Turn. Repeat until strip height equals the central panel height (about 64 rows total). Keep stitch count 6.
Info :
The green strip will receive a vertical row of pumpkin bobbles centered on its outer edge. Work the strip to exact length before adding bobbles so spacing for bobbles and tassels is even.
Round 7 (Bobble positioning preparation) :
With strip still attached to your hook, mark the right-hand edge stitch at every 4th row using a removable stitch marker to indicate where each pumpkin bobble will be attached later. For a 48" runner, you will mark about 14 positions spaced evenly; adjust number to your length.
Info :
Fasten off leaving long tail for seaming. Make two identical green strips. Decide whether you want to sew bobbles on after assembling strips to panel (recommended) or add bobbles as you go (advanced, may create bulk when seaming).
— Pumpkin Bobble Appliques (make 28 or as many as fit your length; pattern shows 14 per side) :
Round 1 :
Make a magic ring. 6 sc in magic ring. (6)
Round 3 :
(1 sc, inc) x 6 (18)
Round 4 :
(2 sc, inc) x 6 (24)
Round 5 :
Ch1, 1 sc in each st around (24)
Round 6 :
Puff ring (forming pumpkin ribs): *puff stitch in next st, ch1, sl st in next st* repeat around for total of 12 puff stitches and 12 sl sts; count remains 24 (puff counts as 1). Finish round with sl st to first puff.
Info :
Make pumpkin segment ribs by placing 6 to 8 puff stitches across the top row in a semicircle and gather in the center later when seaming. Do not overstuff at this stage; the pumpkin will become 3D when the back is cinched and attached to the green strip.
Round 7 :
Ch1, sc in each st around (24). Join. (24)
Round 8 :
Shape bottom: (2 sc, dec) x 6 (18)
Round 9 :
(1 sc, dec) x 6 (12)
Info :
Finish stuffing lightly through the opening, then cinch closed leaving a tail for sewing. Use the tail to press a small gathering at the pumpkin top so puff ribs bow outwards. Sew a small stem using 6 sc in brown yarn worked as a short tube, or embroider a short stalk with brown yarn. Make 28 pumpkins (or match how many markers you placed on each green strip).
— Burgundy Inner Accent Stripe :
Info :
This narrow burgundy stripe is worked as a single-row band to sit between the burnt orange panel and the green strips. It creates a refined border line and hides seam edges.
Round 1 :
Ch 93 (to match central panel width of 92). Row 1: sc in 2nd ch from hook across. (92)
Round 2-3 :
Ch1, sc across. Join. (92) Fasten off leaving long tail for seaming. These two rows create a sturdy inner seam line.
Info :
Sew this burgundy strip on first, aligning it to the very edge of the burnt orange panel then add green strips on either side so the burgundy remains visible as a thin accent line between the central and side pieces.
— Ivory Lace Border (make 1 large rectangle border to sew onto assembled runner) :
Info :
The lace border is worked as a long rectangle that frames the entire runner. You will work a base of single crochet rows wide enough to overlap the edge of the central assembly by approximately 1/2" before switching to an open lacy scallop. To keep counts manageable, create a lace strip with length equal to the runner perimeter and seam it to the edge. Alternatively, work the lace directly onto the runner as you prefer. The instructions below show working a border panel then seaming on.
Round 1 :
Ch the runner perimeter length + 2 turning ch. For a 48" runner, chain approximately 380 + 2 (this is approximate based on sample gauge). Work 1 sc in each ch across. Turn. (count will vary based on your length)
Round 2-6 :
Ch1, sc across for 5 rows to create a sturdy base (this builds the area that overlaps the central runner and gives structure). Turn each row.
Info :
Because each crafter's perimeter will vary, the lace border is intentionally modular and worked to match the exact perimeter of your assembled runner. After attaching the base to your runner edges, the remaining scallop rows are worked working into every 2nd or 3rd st depending on how wide you left the overlap while sewing.
Round 7 (begin scallops) :
Attach cream yarn to the base edge. *Skip 1 st, 5 dc in next st (shell), skip 1 st, sl st in next st*; rep across to create scallops. Adjust the number of skipped sts between shells to fit your stitch count so scallops finish evenly. Turn at short edges by working 3 dc increases at corner shells so scallop pattern flows around corner.
Round 8 :
Ch1, working into the tops of shells: 1 sc in top of first shell, ch3, (5 dc in next shell top) rep across; end with sc. Fasten off and weave in ends. This makes the first layer of scallops.
Round 9-14 :
Add two more rounds of refined lace: use alternating fans and picot-edged scallops. Example Round 9: *ch2, (dc, tr, dc) in shell top, ch2, sl st into next shell top* rep across. Round 10: sc anchor round (optional). Round 11: *ch3, 7 dc fan, ch3, sl st* rep across. Round 12: picot round: sc, ch 3, sl st into 3rd ch to make picots, repeat across. Round 13-14: final sc anchor rounds to tidy edge and prepare for tassel placement. Exact stitch counts will depend on your base chain perimeter; adapt repeats to make full scallops across evenly.
Info :
Blocking the lace heavily after finishing will open the fans and create the delicate scalloped edge you see in the photograph. Use pins to shape the scallops and allow to dry fully.
— Tassels (make 4) :
Round 1 :
Wind cream yarn around a 3.5" piece of cardboard 30-40 times for a medium-thick tassel. Tie top tightly with a short yarn tail and fold, then bind the top head with yarn to create a neat head. Trim bottoms even. Make 4 tassels and attach one at each corner of the runner after assembly. (No stitch count)
Info :
Optionally add a small wooden bead overlapped by the tassel head for weight and decoration. Ensure each tassel is securely stitched and knot the yarn tail through multiple times, then weave ends into the runner backing for a tidy finish.
— Assembly and Finishing :
Info :
Before assembly, block all pieces flat to exact dimensions. Pin the Burgundy inner stripe along both long edges of the burnt orange central panel, centering it so 1 row of burgundy sits visible. Use a whip stitch or mattress stitch with matching yarn to join. Next, align the Green side strips so the marked bobble positions match the central panel motif rows; baste lightly with pins.
Round 1 :
Sew the green strips to the burgundy stripe using whip stitch through the back loops only to keep the front edge neat. Use the long tails reserved earlier to stitch discreetly and securely. Check that the seam lies flat on the wrong side. The seam will be covered by the Ivory Lace border.
Round 2 :
Sew pumpkins to green strip by aligning each pumpkin to the markers you added earlier. Use the long tail left on pumpkins to sew through the green strip, catching a few internal loops to anchor. Close the internal pumpkin opening and secure yarn inside the green strip for a tidy attachment.
Info :
Spacing for pumpkins should be even — for a 48" runner you will likely place 14 per side (about 3.5" spacing center-to-center). Adjust according to your final length. If you prefer fewer larger pumpkins, increase the spacing and make bigger pumpkin appliques by using extra puff rows and larger starting rings.
Round 3 :
Pin the assembled central+side+bump strip sandwich to the cream lace border base so the seam allowances are hidden under the lace scallops. Hand-stitch the cream base to the seam allowance with small mattress stitches, then continue to stitch the scallop edge into place catching only the base of scallops into the side seam to preserve the delicate front.
Round 4 :
Attach tassels to each corner by sewing through the bound top of the tassel down into the corner seam. Reinforce by stitching across the runner corner interior several times. Hide tails inside runner layers and trim excess.
Info :
After assembly, give the entire runner a final light blocking to flatten seamed areas and open lace. Steam-block lightly or wet-block and pin. Let dry fully before trimming threads and final inspection. Weave in any remaining ends and secure any loose bobbles with extra small stitches from the inside to avoid visible knots on the front.
— Variations & Custom Notes :
Info :
If you want a reversible runner, work the central panel in reversible stitch patterns and sew the lace border on with a slip-stitched folded edge. To make a longer runner, repeat motif blocks or add additional central panel repeats before finishing the final 8 sc edge rounds. For a more subtle look, omit pumpkin bobbles and embroider pumpkin outlines directly into the green strip with surface slip stitch.
Final Info :
All stitch counts above are calculated to maintain the fixed perimeter of 92 stitches for the centered panel. Where lace border instructions depend on your perimeter length, prefer to maintain shell repeat symmetry (adjust one or two shells at the corners rather than re-spacing all shells). Use blocking liberally to refine texture and drape.
Completing this Autumn Harvest Table Runner is deeply satisfying — the raised pumpkins and textured motif panels feel like a labor of love, and the delicate ivory scallop adds a beautiful finishing touch. The finished runner will instantly warm your table and become a seasonal heirloom. 🧶🍂 I hope every stitch reminds you of cozy gatherings and autumn light. Happy crafting and enjoy your new centerpiece! ✨