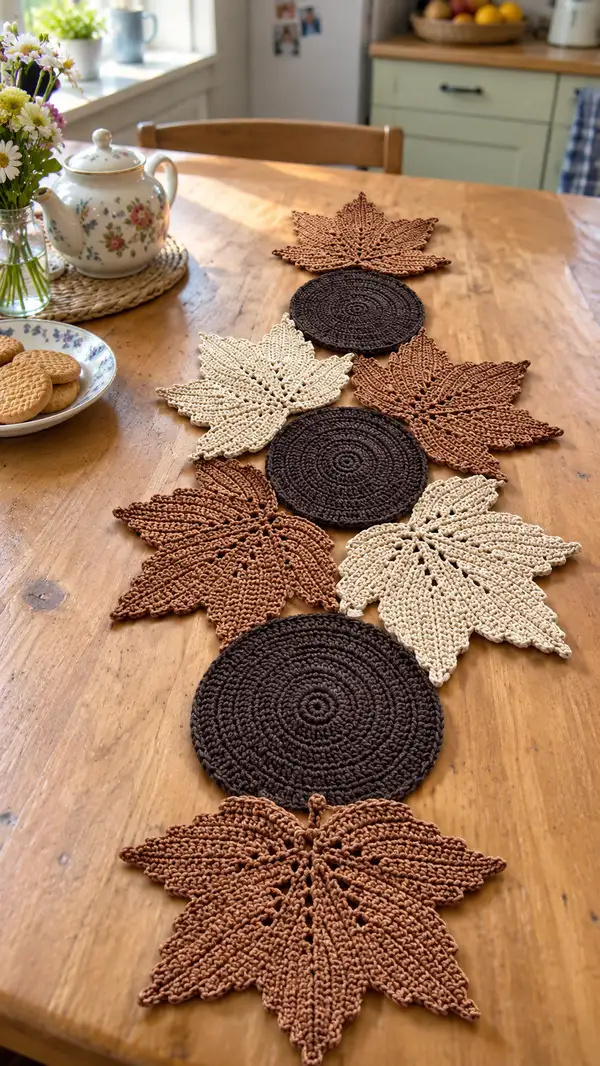
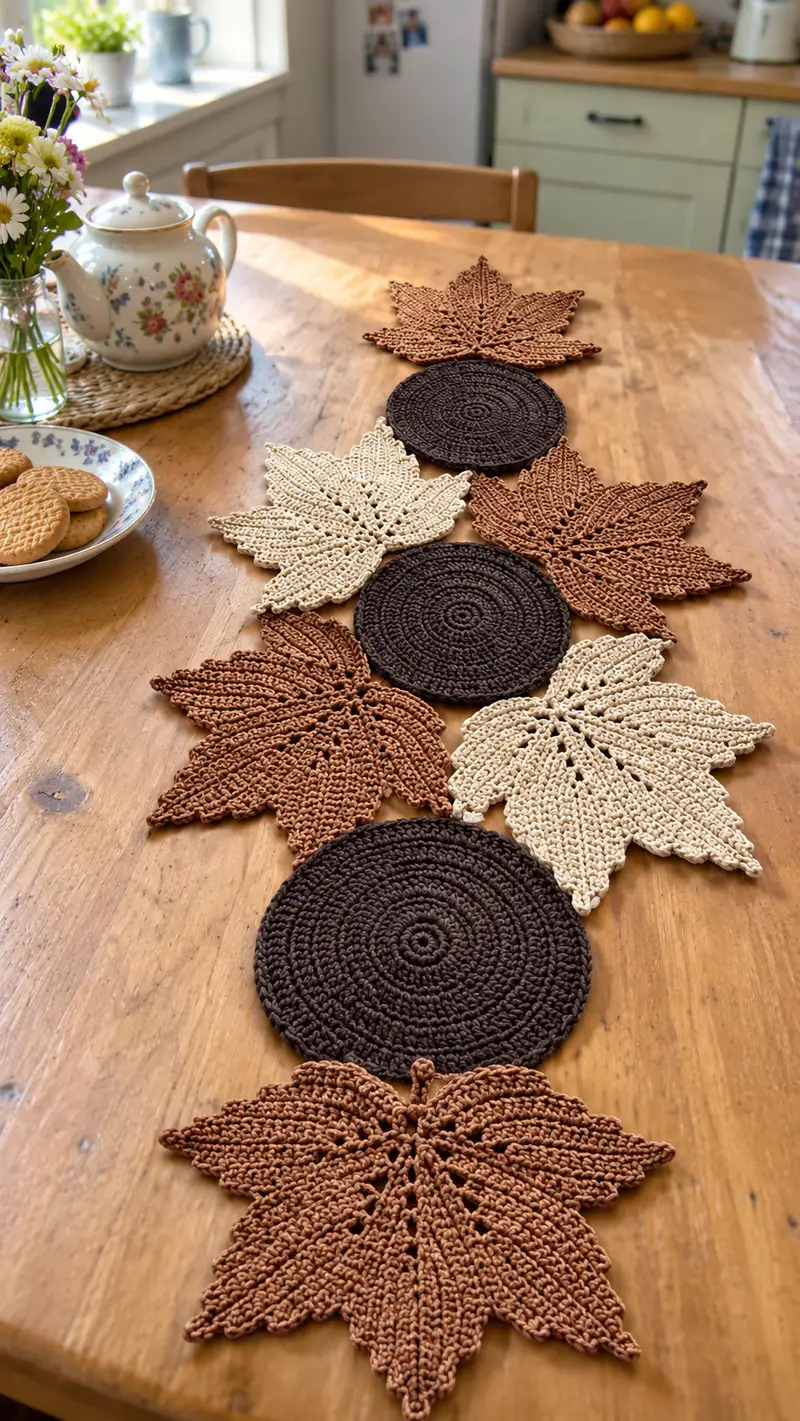
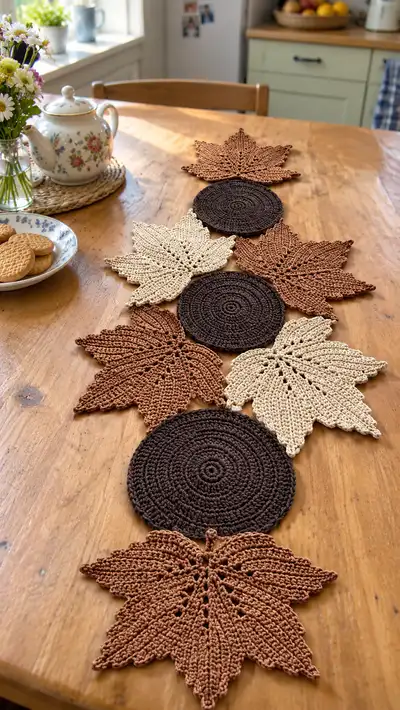
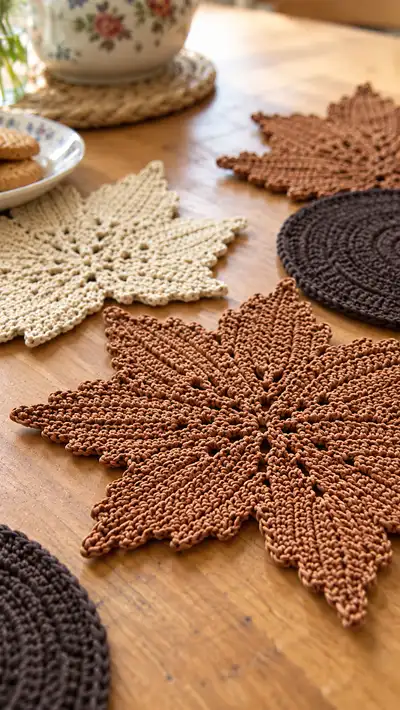
Create a warm, textured autumn table runner made from alternating maple-style leaf motifs and round placemats. This pattern includes step-by-step instructions for the large pointed leaf motif, the simple spiral round mat, joining motifs and a decorative picot edge. The finished set shown uses warm rust, cream, and espresso brown cotton for a cozy seasonal centerpiece.
Progress Tracker
0% Complete
— Notes & Gauge :
Info :
These motifs are worked flat. Gauge is not critical but will affect finished size. Using 3.5mm hook with worsted cotton expect each large leaf to measure approximately 24–26cm tip-to-tip and each round mat approximately 14–16cm diameter. Keep tension consistent to ensure motifs join neatly.
Info :
Throughout the leaf pattern you will work in repeating sectors (8 sectors total). Instructions will often use a repeating sequence 'x8' to indicate the same stitches in each petal sector. Count math is shown at the end of each round. Use stitch markers to mark the start of each sector for easier counting.
— Large Maple-Style Leaf Motif :
Round 1 :
Make a magic ring, ch1, 8 sc in ring, pull tight (8)
Round 2 :
Inc in each st around (16)
Round 3 :
(1 sc, inc) x8 (24)
Round 4 :
(2 sc, inc) x8 (32)
Round 5 :
(3 sc, inc) x8 (40)
Round 6 :
(4 sc, inc) x8 (48)
Round 7 :
(5 sc, inc) x8 (56)
Round 8 :
(6 sc, inc) x8 (64)
Info :
At the end of Round 8 you have 64 sts which are conceptually divided into 8 sectors of 8 stitches each. Place a removable stitch marker at the first stitch of each sector (every 8 sts). These markers mark the valley between leaf lobes and will help you shape the petals evenly.
Round 9 :
1 sc in each st around (64)
Round 10 :
1 sc in each st around (64)
Round 11 :
1 sc in each st around (64)
Info :
Rounds 9-11 build a stable disk before petal shaping. Keep stitches evenly spaced and correct any tension issues now. If your work wants to ruffle, block gently later; if it cups, try a slightly larger hook next time for these rounds.
Round 12 :
(Work petal base) [sc in next 3 sts, ch3, skip 1 st, sc into next st] x8 (64 sts and 8 ch3 loops)
Info :
Round 12 creates small chain loops that will anchor each petal. You will work into those ch3 loops in later rounds to raise the petal tips. Keep the ch3 loops loose so later rounds are easy to work into.
Round 13 :
(1 sc in each sc, 5 sc into each ch3 loop) x8 (64 + (5x8)=104 total stitches if you count loop stitches; for working consistency, treat each ch3 loop as a 5-stitch insertion. Final working stitch count: 104)
Round 14 :
*(Work petal shaping) In next group: sc in next 4, hdc in next 2, dc in next 2, tr in next 2, dc in next 2, hdc in next 1, sc in next 3* Repeat across 8 petals (104)
Info :
Round 14 begins to raise the petal profile. Work the taller stitches (dc, tr) into the center area of each petal to form the point. Keep the number of stitches consistent across petals to preserve symmetry.
Round 15 :
*(sc 3, hdc 2, dc 3, tr 3, dc 3, hdc 2, sc 3) in each petal sector* (104)
Round 16 :
*sc 3, hdc 1, dc 4, tr 4, dc 4, hdc 1, sc 3* x8 (104)
Round 17 :
*sc 2, (hdc, dc, tr, dc, hdc) all into central three sts of each petal, sc 2* x8 (104)
Info :
Rounds 15-17 build the height of the petal. If you prefer a flatter leaf, reduce the number of tr rows by substituting dc in place of some tr rows. Keep notes if you modify to maintain consistency across all leaves.
Round 18 :
*Work into the outer edge of petal: sc 4 along outermost edge, picot, sc 4 along inner edge into base* x8 (104)
Round 19 :
*BLO sc in next 2, FLO hdc 3, FLO dc 3, hdc 2, sc 2* x8 (104)
Round 20 :
*sc 2, (hdc, dc) x2, tr 5, (dc, hdc) x2, sc 2* x8 (104)
Info :
Using BLO and FLO strategically creates subtle ribs along each lobe—this texture mirrors natural leaf veins. Where specified, work into BLO/FLO of the previous round only for a ridged effect.
Round 21 :
*sc 1, hdc 2, dc 3, tr 7, dc 3, hdc 2, sc 1* x8 (104)
Round 22 :
*sc 1, (hdc, dc) x3, tr 8, (dc, hdc) x3, sc 1* x8 (104)
Round 23 :
*sc 1, hdc 3, dc 5, tr 9, dc 5, hdc 3, sc 1* x8 (104)
Round 24 :
*sc 2, hdc 2, dc 6, tr 11, dc 6, hdc 2, sc 2* x8 (104)
Info :
Rounds 21-24 push the petal points outward. Row counts are kept consistent per petal for symmetry. If your petal points appear blunt, add an extra tr in the center group for a sharper tip (but do the same for each petal).
Round 25 :
*sc in next 3 sts, dec over next 2, hdc 2, dc 4, tr 9, dc 4, hdc 2, dec over next 2, sc in next 3* x8 (96)
Info :
Round 25 reduces the center ridge slightly to create a tapered petal base. The total per-round count becomes 96 after doing decs across all 8 petals (8 decs total).
Round 26 :
*sc 3, hdc 2, dc 5, tr 8, dc 5, hdc 2, sc 3* x8 (96)
Round 27 :
*sc 3, hdc 1, dc 4, tr 6, dc 4, hdc 1, sc 3* x8 (96)
Round 28 :
*sc 3, hdc 1, dc 3, tr 4, dc 3, hdc 1, sc 3* x8 (96)
Info :
Rounds 26-28 begin shaping the petal outer contour toward the tip and start forming scalloped edges. This is where the leaf takes on the visible lobe shape in the photos.
Round 29 :
*sc 3, hdc 1, dc 2, tr 3, dc 2, hdc 1, sc 3* x8 (96)
Round 30 :
*sc 3, hdc 1, (dc, picot, dc) across center of petal, hdc 1, sc 3* x8 (96)
Round 31 :
*sc around outer edge to shape tip: sc 2, picot, sc 2 across tip area, then sc along inner side back to base* x8 (96)
Info :
Picots used on petal tips create those crisp pointed edges visible in the photograph. If you prefer a softer tip, replace picots with ch2, sl st into first ch.
Round 32 :
*1 sc in each working st across petal sector to tidy edges, use FLO on outermost edge to lift ridge where you prefer more texture* x8 (96)
Round 33 :
*1 sc across, placing 3 sc into each picot to firm them up, sc across inner valley between petals* x8 (96)
Round 34 :
*Reverse the previous ridging: work BLO sc across the inner valley to emphasize separation between petals, sc across petal edge to finish shape* x8 (96)
Info :
Rounds 32-34 are finishing rounds that tidy and strengthen the leaf edge. This results in a crisp decorative motif that lays flat when blocked. Stop here to check size and symmetry; trim or add one extra tidy round if petals need slight elongation.
Round 35 :
*(ch8, sl st into next valley stitch) repeat for each valley to create small hanging loop separators between petals, then 1 sc across rest of sector* x8 (96)
Round 36 :
*sc evenly around outer edge placing [sc, picot, sc] across each petal tip and single sc across valleys* x8 (96)
Round 37 :
*1 sc in each st around for a smooth edge and extra firmness* (96)
Round 38 :
*BLO slip stitch around the very outermost edge for a turned-under look, finishing any loose picots with small tucks as needed* (96)
Round 39 :
Fasten off, weave ends. Block: pin each petal point outward so leaf is flat and dry thoroughly.
Info :
If you want a stiffer leaf that doubles as a trivet, spray lightly with diluted craft glue or starch before drying. For a table runner set, leave them soft so they sit nicely under dishes.
— Small Accent Leaf (Alternate Size) :
Round 1 :
mr, ch1, 6 sc in ring, pull tight (6)
Round 2 :
Inc in each st (12)
Round 3 :
(1 sc, inc) x6 (18)
Round 4 :
(2 sc, inc) x6 (24)
Round 5 :
1 sc in each st around (24)
Round 6 :
(sc 3, ch3, skip 1) x6 (24 + 6 ch3 loops)
Round 7 :
Work into ch3 loops: (sc, hdc, dc, hdc, sc) across each loop to form 6 small lobes. Maintain even tension (24 + (5x6) = 54 working stitches)
Round 8 :
1 sc around entire motif to tidy edges, add picots at tips if desired. Fasten off and block flat.
Info :
Small accent leaves are great to alternate with round mats for a more delicate look. Use contrasting color for accent interest.
— Round Spiral Mat (Dense Single Crochet) :
Round 1 :
mr, ch1, 8 sc in ring, pull tight (8)
Round 2 :
Inc in each st around (16)
Round 3 :
(1 sc, inc) x8 (24)
Round 4 :
(2 sc, inc) x8 (32)
Round 5 :
(3 sc, inc) x8 (40)
Round 6 :
(4 sc, inc) x8 (48)
Round 7 :
(5 sc, inc) x8 (56)
Round 8 :
(6 sc, inc) x8 (64)
Info :
Round 9-12 :
1 sc in each st around (64)
Round 13 :
(6 sc, inc) x8 (72)
Round 14 :
1 sc in each st around (72)
Round 15 :
(7 sc, inc) x8 (80)
Round 16 :
1 sc in each st around (80)
Round 17 :
(8 sc, inc) x8 (88)
Round 18 :
1 sc in each st around (88)
Round 19 :
(9 sc, inc) x8 (96)
Round 20 :
1 sc in each st around (96)
Info :
These single crochet rounds create a dense, sturdy mat perfect for plates and mugs. If your mat begins to ripple, block it flat with slight steam while pinned. To keep a firm edge, use a slightly smaller hook for the last 2-3 rounds.
Round 21 :
BLO 1 sc in each st around (96) to create a subtle ridge at the edge
Round 22 :
1 sc in each st around (96)
Round 23 :
*(sc 4, picot) repeat around to create a decorative edge* (96)
Round 24 :
Fasten off, weave ends. Block flat. Final diameter approximately 14-16cm depending on yarn and tension.
Info :
If you prefer a slightly smaller mat for coasters, stop after Round 16. For a larger placemat, continue increases (add (10 sc, inc) x8 then even rounds until desired diameter).
— Decorative Joining & Border (Runner Assembly) :
Round 1 :
To create the decorative connector loop between motifs: With matching yarn, ch6, sc in 2nd ch from hook and across, sl st into first join point. Repeat to form loops between each motif when assembling runner.
Info :
These small connectors are worked on-the-fly as you join motifs or can be crocheted separately and sewn on later. Pin motifs in their final positions before making connectors to ensure even spacing.
Round 2 :
Edge around joined motifs: join yarn at any valley, ch1, sc evenly along available stitches across both motifs where they meet, placing extra sc at corners/points to avoid puckering. Work a full round of sc across the full perimeter to produce one continuous border.
Round 3 :
*(Edge shaping) Work [sc 2, picot, sc 2] into each petal tip and [sc 4] across each valley area to balance shapes* Repeat around entire assembled runner for continuity.
Round 4 :
Weave a narrow corded join: using a contrasting color, sl st through adjacent motifs in a whip stitch pattern to create a visible chain link between leaves and rounds. Fasten off and weave ends.
Info :
When joining leaves to round mats alternate top-to-bottom positioning as in the photo (leaf, round, leaf, round). Use plenty of pins and baste with a long tail to test layout before committing to the final seam.
Round 5 :
Optional: Add a double-row border around entire runner - 1 sc in each st for one round, then 1 sc in BLO to create a subtle frame. Fasten off and block again as a finished piece.
Info :
Always leave long tails for sewing and weave through 6-8 stitches to secure. Block joined runner flat with gentle steam and pin each motif to keep points crisp and runner straight.
— Finishing & Blocking :
Info :
Wet-block each motif: dampen with spray or soak briefly, pin flat on blocking mat, stretch petal tips gently to achieve desired points. When totally dry, unpin and assemble into runner using the joining method described. Press lightly with steam if needed but avoid direct heat on cotton blends without testing.
Info :
For everyday use, you can back the round mats with thin non-slip felt circles or attach cork discs with craft glue. For table safety, place a heat-resistant trivet under hot serving dishes.
Info :
Care: Hand wash or gentle machine wash in a mesh bag on a delicate cycle, reshape while damp and lay flat to dry. Iron lightly on low if needed after blocking.
This stylish autumn runner brings instant seasonal charm to any table! The textured leaf motifs and sturdy spiral mats combine rustic elegance with practical durability. Assemble a full runner or make individual placemats — each piece blocks beautifully and makes a thoughtful handmade gift. 🧶🍂 Enjoy the slow, satisfying process of shaping petals and watching the runner take form. Display it proudly and share your finished photos for a little seasonal joy! 🎨✨